Overview
Hardening is the process of securing a system by reducing its surface of vulnerability. We will show you how to reduce available ways of attack this includes enabling FIPS mode, changing the default password, encrypting configuration passwords, limiting SSL Protocols and Ciphersuites, replacing Certificates, setting a bootloader password, disable root access with SSH root, securing the MySQL/MariaDB Databases, setting Firewall rules and resetting RCDevs Virtual Appliance root password... Please consider carefully which of these settings are relevant for your use. We also recommend you keep your WebADM and OS up to date with the latest versions.
Boot Loader GRUB2 Password
To protect GRUB2 with a password, run the following command grub2-setpassword and type in your new bootloader password.
-bash-5.1# grub2-setpassword
Enter password:
Confirm password:
-bash-5.1#
Now, update your GRUB2 configuration with the grub2-mkconfig -o /boot/grub2/grub.cfgcommand.
-bash-5.1# grub2-mkconfig -o /boot/grub2/grub.cfg
Generating grub configuration file ...
Adding boot menu entry for UEFI Firmware Settings ...
done
-bash-5.1#
Reboot your RCDevs Virtual Appliance CentOS 7 and enter the GRUB2 boot menu. The bootloader will ask for your password if one tries to modify the kernel arguments.

Encrypting Configuration Passwords
This feature requires an Enterprise License and the encryption mechanism is bound to secret data in your encoded license file. Please, start with encrypting the WebADM Encryption Key. That is the most important as it protects also your seeds.
Replace the cleartext passwords and keys with encrypted values in /opt/webadm/conf/webadm.conf and /opt/webadm/conf/servers.xml. Please follow this documentation RCDevs Utilities and Command Line Tools for WebADM.
Below a few examples: PKI Server RCDevs Directory Server Session Server WebADM Encryption Key
FIPS Mode
To enable FIPS mode for RCDevs Virtual Appliance Rocky Linux 9 do the following steps:
Run the following command fips-mode-setup --enable to update your GRUB configuration file and reboot.
-bash-5.1# # fips-mode-setup --enable
*****************************************************************
* PRESS CONTROL-C WITHIN 15 SECONDS TO ABORT...                 *
*                                                               *
* ENABLING FIPS MODE AFTER THE INSTALLATION IS NOT RECOMMENDED. *
* THIS OPERATION CANNOT BE UNDONE.                              *
* REINSTALL WITH fips=1 INSTEAD.                                *
*****************************************************************
15... 14... 13... 12... 11... 10... 9... 8... 7... 6... 5... 4... 3... 2... 1...
Kernel initramdisks are being regenerated. This might take some time.
Setting system policy to FIPS
Note: System-wide crypto policies are applied on application start-up.
It is recommended to restart the system for the change of policies
to fully take place.
FIPS mode will be enabled.
Please reboot the system for the setting to take effect.
-bash-5.1# reboot
After rebooting, check with fips-mode-setup --check if FIPS mode is enabled on the system.
-bash-5.1# fips-mode-setup --check
FIPS mode is enabled.
Your SSH client may complain about the server offering a key with a different fingerprint than before. If your SSH client is PuTTY, you can delete the entry for the previous key of the server with regedit at HKEY_CURRENT_USER\Software\(You)\PuTTY\SshHostKeys.
For more information about FIPS, check out the official documentation at NIST GOV FIPS.
Firewall Rules
Please have a look at the RCDevs Communication Ports. It describes the ports and protocols used by RCDevs products between different components.
Firewalld - Rocky Linux 9
Firewalld is a firewall management tool, acting as a front-end for the Linux kernel's netfilter framework via the iptables command, acting as an alternative to the iptables service.
Verify if the firewalld service is running with the command firewall-cmd --state or systemctl status firewalld.
-bash-5.1# firewall-cmd --state
running
-bash-5.1# systemctl status firewalld
● firewalld.service - firewalld - dynamic firewall daemon
     Loaded: loaded (/usr/lib/systemd/system/firewalld.service; disabled; preset: enabled)
     Active: active (running) since Mon 2024-12-02 17:11:33 CET; 24s ago
       Docs: man:firewalld(1)
   Main PID: 4042 (firewalld)
      Tasks: 2 (limit: 4645)
     Memory: 28.9M
        CPU: 819ms
     CGroup: /system.slice/firewalld.service
             └─4042 /usr/bin/python3 -s /usr/sbin/firewalld --nofork --nopid

Dec 02 17:11:33 webadm1.support.rcdevs.com systemd[1]: Starting firewalld - dynamic firewall daemon...
Dec 02 17:11:33 webadm1.support.rcdevs.com systemd[1]: Started firewalld - dynamic firewall daemon.
If the firewalld service is inactive then start it with systemctl start firewalld.
-bash-5.1# systemctl status firewalld
○ firewalld.service - firewalld - dynamic firewall daemon
     Loaded: loaded (/usr/lib/systemd/system/firewalld.service; disabled; preset: enabled)
     Active: inactive (dead)
       Docs: man:firewalld(1)

Dec 02 17:21:23 webadm1.support.rcdevs.com systemd[1]: Stopped firewalld - dynamic firewall daemon.
-bash-5.1# systemctl start firewalld
-bash-5.1#
If the firewalld service has been disabled then enable it with systemctl enable firewalld and reboot.
-bash-5.1# systemctl status firewalld
○ firewalld.service - firewalld - dynamic firewall daemon
     Loaded: loaded (/usr/lib/systemd/system/firewalld.service; disabled; preset: enabled)
     Active: inactive (dead)
       Docs: man:firewalld(1)
-bash-5.1# systemctl enable firewalld
Created symlink /etc/systemd/system/dbus-org.fedoraproject.FirewallD1.service → /usr/lib/systemd/system/firewalld.service.
Created symlink /etc/systemd/system/multi-user.target.wants/firewalld.service → /usr/lib/systemd/system/firewalld.service.
-bash-5.1# reboot
To check the firewall rules, run the following command firewall-cmd --list-all.
-bash-5.1# firewall-cmd --list-all
public (active)
  target: default
  icmp-block-inversion: no
  interfaces: ens32
  sources:
  services: cockpit dhcpv6-client http https ldap ldaps radius ssh
  ports: 8080/tcp 8443/tcp 10389/tcp 10636/tcp 4000/tcp 5000/tcp
  protocols:
  forward: yes
  masquerade: no
  forward-ports:
  source-ports:
  icmp-blocks:
  rich rules:
-bash-5.1#
For example to remove http then use this command firewall-cmd --zone=public --remove-service=http --permanent and firewall-cmd --reload.
-bash-5.1# firewall-cmd --zone=public --remove-service=http --permanent
success
-bash-5.1# firewall-cmd --reload
success
-bash-5.1# firewall-cmd --list-all
public (active)
  target: default
  icmp-block-inversion: no
  interfaces: ens32
  sources:
  services: dhcpv6-client ldaps radius ssh https ldap
  ports: 4000/tcp 10389/tcp 8080/tcp 8443/tcp 10636/tcp 5000/tcp
  protocols:
  masquerade: no
  forward-ports:
  source-ports:
  icmp-blocks:
  rich rules:

-bash-5.1#
To add http to the firewall rules run the following command firewall-cmd --zone=public --add-service=http --permanent.
-bash-5.1# firewall-cmd --zone=public --add-service=http --permanent
success
-bash-5.1# firewall-cmd --reload
success
-bash-5.1# firewall-cmd --list-all
public (active)
  target: default
  icmp-block-inversion: no
  interfaces: ens32
  sources:
  services: dhcpv6-client ldaps radius ssh https ldap http
  ports: 4000/tcp 10389/tcp 8080/tcp 8443/tcp 10636/tcp 5000/tcp
  protocols:
  masquerade: no
  forward-ports:
  source-ports:
  icmp-blocks:
  rich rules:
-bash-5.1#
To add a port like 8834/tcp to the firewall rules run the following command firewall-cmd --zone=public --add-port=8834/tcp --permanent.
-bash-5.1# firewall-cmd --zone=public --add-port=8834/tcp --permanent
success
-bash-5.1# firewall-cmd --reload
success
-bash-5.1# firewall-cmd --list-all
public (active)
  target: default
  icmp-block-inversion: no
  interfaces: ens32
  sources:
  services: dhcpv6-client ldaps radius ssh https ldap http
  ports: 4000/tcp 10389/tcp 8080/tcp 8443/tcp 10636/tcp 5000/tcp 8834/tcp
  protocols:
  masquerade: no
  forward-ports:
  source-ports:
  icmp-blocks:
  rich rules:
-bash-5.1#
For more information about the firewalld, check out the official documentation at Firewalld Docs.
Iptables - Rocky Linux 9
Please disable firewalld service before installing iptables then install iptables services on CentOS 7 and enable the iptables service:
-bash-5.1# systemctl disable firewalld
Removed "/etc/systemd/system/multi-user.target.wants/firewalld.service".
Removed "/etc/systemd/system/dbus-org.fedoraproject.FirewallD1.service".
-bash-5.1# dnf install iptables-services
[...]
Is this ok [y/N]: y
[...]
Installed:
  iptables-services-1.8.10-4.1.el9.noarch
-bash-5.1# systemctl enable iptables
Created symlink /etc/systemd/system/multi-user.target.wants/iptables.service → /usr/lib/systemd/system/iptables.service.
-bash-5.1# systemctl stop firewalld
Verify if the iptables service is running with the command systemctl status iptables.
-bash-5.1# systemctl status iptables
● iptables.service - IPv4 firewall with iptables
     Loaded: loaded (/usr/lib/systemd/system/iptables.service; enabled; preset: disabled)
     Active: active (exited) since Mon 2024-12-02 17:55:07 CET; 3s ago
    Process: 9802 ExecStart=/usr/libexec/iptables/iptables.init start (code=exited, status=0/SUCCESS)
   Main PID: 9802 (code=exited, status=0/SUCCESS)
        CPU: 21ms

Dec 02 17:55:07 webadm1.support.rcdevs.com systemd[1]: Starting IPv4 firewall with iptables...
Dec 02 17:55:07 webadm1.support.rcdevs.com iptables.init[9802]: iptables: Applying firewall rules: [  OK  ]
Dec 02 17:55:07 webadm1.support.rcdevs.com systemd[1]: Finished IPv4 firewall with iptables.
-bash-5.1#
If the iptables service is inactive then start it with systemctl start iptables.
-bash-5.1# systemctl start iptables
-bash-5.1# systemctl status iptables
● iptables.service - IPv4 firewall with iptables
     Loaded: loaded (/usr/lib/systemd/system/iptables.service; enabled; preset: disabled)
     Active: active (exited) since Mon 2024-12-02 17:55:07 CET; 3s ago
    Process: 9802 ExecStart=/usr/libexec/iptables/iptables.init start (code=exited, status=0/SUCCESS)
   Main PID: 9802 (code=exited, status=0/SUCCESS)
        CPU: 21ms

Dec 02 17:55:07 webadm1.support.rcdevs.com systemd[1]: Starting IPv4 firewall with iptables...
Dec 02 17:55:07 webadm1.support.rcdevs.com iptables.init[9802]: iptables: Applying firewall rules: [  OK  ]
Dec 02 17:55:07 webadm1.support.rcdevs.com systemd[1]: Finished IPv4 firewall with iptables.
-bash-5.1#
Verify your firewall rules with the following command iptables -nvL.
-bash-5.1# iptables -nvL
Chain INPUT (policy ACCEPT 0 packets, 0 bytes)
 pkts bytes target     prot opt in     out     source               destination

Chain FORWARD (policy ACCEPT 0 packets, 0 bytes)
 pkts bytes target     prot opt in     out     source               destination

Chain OUTPUT (policy ACCEPT 0 packets, 0 bytes)
 pkts bytes target     prot opt in     out     source               destination
In this case, the firewall is wide open. To close the INPUT/FORWARD/OUTPUT chain, use the following commands:
-bash-5.1# iptables -I INPUT -p tcp --dport 22 -j ACCEPT
-bash-5.1# iptables -P INPUT DROP
-bash-5.1# iptables -P FORWARD DROP
-bash-5.1# iptables -A OUTPUT -p tcp --sport 22 -m state --state ESTABLISHED -j ACCEPT
-bash-5.1# iptables -P OUTPUT DROP
-bash-5.1# iptables -nvL
Chain INPUT (policy DROP 0 packets, 0 bytes)
 pkts bytes target     prot opt in     out     source               destination
   30  2388 ACCEPT     6    --  *      *       0.0.0.0/0            0.0.0.0/0            tcp dpt:22

Chain FORWARD (policy DROP 0 packets, 0 bytes)
 pkts bytes target     prot opt in     out     source               destination

Chain OUTPUT (policy DROP 14 packets, 896 bytes)
 pkts bytes target     prot opt in     out     source               destination
   11  1544 ACCEPT     6    --  *      *       0.0.0.0/0            0.0.0.0/0            tcp spt:22 state ESTABLISHED
Now, the firewall is completely closed, except for incoming SSH. For example, to allow WebADM traffic, outgoing PUSH connections and disabled IPv6:
-bash-5.1# vi flock
#!/bin/bash

MODPROBE="/sbin/modprobe"
IPTABLES="/sbin/iptables"
IP6TABLES="/sbin/ip6tables"
SYSCTL="/sbin/sysctl"

$MODPROBE nf_conntrack
$SYSCTL -w net.ipv4.tcp_syncookies=1
$SYSCTL -w net.ipv4.icmp_echo_ignore_broadcasts=1
$SYSCTL -w net.ipv4.conf.all.rp_filter=1
$SYSCTL -w net.ipv4.conf.all.accept_source_route=0

$SYSCTL -w net.ipv6.conf.all.disable_ipv6=1
$SYSCTL -w net.ipv6.conf.default.disable_ipv6=1

$IPTABLES -P INPUT DROP
$IPTABLES -P OUTPUT DROP
$IPTABLES -P FORWARD DROP
$IPTABLES -F
$IPTABLES -X

$IP6TABLES -P INPUT DROP
$IP6TABLES -P OUTPUT DROP
$IP6TABLES -P FORWARD DROP
$IP6TABLES -F
$IP6TABLES -X

$IPTABLES -A INPUT -i lo -j ACCEPT
$IPTABLES -A OUTPUT -o lo -j ACCEPT

$IPTABLES -A INPUT -p tcp --dport 22 --syn -m state --state NEW -j ACCEPT
$IPTABLES -A INPUT -p tcp --dport 443 --syn -m state --state NEW -j ACCEPT

$IPTABLES -A OUTPUT -p udp --dport 53 -m state --state NEW -j ACCEPT

$IPTABLES -A OUTPUT -p tcp --dport 7000 --syn -m state --state NEW -j ACCEPT

$IPTABLES -A INPUT -m state --state ESTABLISHED -j ACCEPT
$IPTABLES -A OUTPUT -m state --state ESTABLISHED -j ACCEPT

-bash-5.1# chmod 700 flock
-bash-5.1# ./flock
net.ipv4.tcp_syncookies = 1
net.ipv4.icmp_echo_ignore_broadcasts = 1
net.ipv4.conf.all.rp_filter = 1
net.ipv4.conf.all.accept_source_route = 0
net.ipv6.conf.all.disable_ipv6 = 1
net.ipv6.conf.default.disable_ipv6 = 1
-bash-5.1# iptables -nvL
Chain INPUT (policy DROP 97 packets, 22252 bytes)
 pkts bytes target     prot opt in     out     source               destination
  759  179K ACCEPT     all  --  lo     *       0.0.0.0/0            0.0.0.0/0
    1    64 ACCEPT     tcp  --  *      *       0.0.0.0/0            0.0.0.0/0            tcp dpt:22 flags:0x17/0x02 state NEW
    6   384 ACCEPT     tcp  --  *      *       0.0.0.0/0            0.0.0.0/0            tcp dpt:443 flags:0x17/0x02 state NEW
  268 28813 ACCEPT     all  --  *      *       0.0.0.0/0            0.0.0.0/0            state ESTABLISHED

Chain FORWARD (policy DROP 0 packets, 0 bytes)
 pkts bytes target     prot opt in     out     source               destination

Chain OUTPUT (policy DROP 18 packets, 1220 bytes)
 pkts bytes target     prot opt in     out     source               destination
  759  179K ACCEPT     all  --  *      lo      0.0.0.0/0            0.0.0.0/0
   30  1905 ACCEPT     udp  --  *      *       0.0.0.0/0            0.0.0.0/0            udp dpt:53 state NEW
    2   120 ACCEPT     tcp  --  *      *       0.0.0.0/0            0.0.0.0/0            tcp dpt:7000 flags:0x17/0x02 state NEW
  205 89004 ACCEPT     all  --  *      *       0.0.0.0/0            0.0.0.0/0            state ESTABLISHED
Saving your firewall rules can be done as follows:
-bash-5.1# service iptables save
iptables: Saving firewall rules to /etc/sysconfig/iptables:[  OK  ]
For more information about the iptables, check out the official documentation at Netfilter Docs.
Iptables - Ubuntu 24.04
Applying firewall rules on startup can be done as follows:
-bash-5.1# apt install iptables-persistent  # answer yes to all questions
-bash-5.1# cat >> /etc/sysctl.d/99-sysctl.conf <<EOF
net.ipv4.tcp_syncookies=1
net.ipv4.icmp_echo_ignore_broadcasts=1
net.ipv4.conf.all.rp_filter=1
net.ipv4.conf.all.accept_source_route=0

net.ipv6.conf.all.disable_ipv6=1
net.ipv6.conf.default.disable_ipv6=1
EOF
-bash-5.1# iptables -A INPUT -i lo -j ACCEPT
-bash-5.1# iptables -A OUTPUT -o lo -j ACCEPT
-bash-5.1# iptables -A INPUT -p tcp --dport 22 --syn -m state --state NEW -j ACCEPT
-bash-5.1# iptables -A INPUT -p tcp --dport 443 --syn -m state --state NEW -j ACCEPT
-bash-5.1# iptables -A OUTPUT -p udp --dport 53 -m state --state NEW -j ACCEPT
-bash-5.1# iptables -A OUTPUT -p tcp --dport 7000 --syn -m state --state NEW -j ACCEPT
-bash-5.1# iptables -A INPUT -m state --state ESTABLISHED -j ACCEPT
-bash-5.1# iptables -A OUTPUT -m state --state ESTABLISHED -j ACCEPT
-bash-5.1# iptables-save > /etc/iptables/rules.v4
-bash-5.1# reboot
Your SSH session may be interrupted during the process: you can reconnect and continue. For more information about the iptables, check out the official documentation at Netfilter Docs.
UFW - Ubuntu 24.04
The default firewall configuration tool for Ubuntu is UFW (Uncomplicated Firewall). Verify if the UFW service is running with the command ufw status if it's inactive then enable it with ufw enable. You may have to install UFW first with apt.
-bash-5.1# apt install ufw
[...]
Do you want to continue? [Y/n]
Get:1 https://lu.archive.ubuntu.com/ubuntu noble/main amd64 ufw all 0.36.2-6 [169 kB]
[...]
-bash-5.1# ufw status
Status: inactive

-bash-5.1# ufw enable
Command may disrupt existing ssh connections. Proceed with operation (y|n)? y
Firewall is active and enabled on system startup
To add ssh to the firewall rules run the following command ufw allow ssh and check the status with ufw status numbered.
-bash-5.1# ufw allow ssh
Rule added
Rule added (v6)
-bash-5.1# ufw status numbered
Status: active

     To                         Action      From
     --                         ------      ----
[ 1] 22/tcp                     ALLOW IN    Anywhere
[ 2] 22/tcp (v6)                ALLOW IN    Anywhere (v6)
For example to remove a UFW rule do as follows:
-bash-5.1# ufw delete 2
Deleting:
 allow 22/tcp
Proceed with operation (y|n)? y
Rule deleted (v6)
-bash-5.1# ufw status numbered
Status: active

     To                         Action      From
     --                         ------      ----
[ 1] 22/tcp                     ALLOW IN    Anywhere
To add a port like 4000/tcp to the firewall rules run the following command ufw allow 4000/tcp.
-bash-5.1# ufw status numbered
Status: active

     To                         Action      From
     --                         ------      ----
[ 1] 22/tcp                     ALLOW IN    Anywhere

-bash-5.1# ufw allow 4000/tcp
Rule added
Rule added (v6)
-bash-5.1# ufw status numbered
Status: active

     To                         Action      From
     --                         ------      ----
[ 1] 22/tcp                     ALLOW IN    Anywhere
[ 2] 4000/tcp                   ALLOW IN    Anywhere
[ 3] 4000/tcp (v6)              ALLOW IN    Anywhere (v6)

-bash-5.1# ufw delete 3
Deleting:
 allow 4000/tcp
Proceed with operation (y|n)? y
Rule deleted (v6)
-bash-5.1# ufw status numbered
Status: active

     To                         Action      From
     --                         ------      ----
[ 1] 22/tcp                     ALLOW IN    Anywhere
[ 2] 4000/tcp                   ALLOW IN    Anywhere
For more information about the UFW, check out the official documentation at Ubuntu Wiki Uncomplicated Firewal.
HA Cluster Firewall Rules
Here is an example of iptables firewall rules for a high availability cluster with 4 nodes. The WebADM Master (PKI Role) needs only incoming TCP 5000 port and the WebADM Slaves (PKI Clients) need only outgoing TCP 5000 port. Adjust the firewall rules to your needs.
For troubleshooting, you might want to log the accepted and dropped packets with -j LOG --log-prefix "IPTables-Accepted-443-I: " --log-level 5. The option -m limit --limit 2/min will limit logging to 2 per minute. You can also set it to second, hour or day. The logs can be seen with journalctl -k on both Ubuntu 24.04 and RHEL 9.
To limit, for example, the outgoing DNS request to one IP address then specify it with -d 8.8.8.8 for Google DNS. To limit an incoming SSH to one defined IP with -s 192.168.3.233 for example. IP source range from 192.168.3.80-192.168.3.83 can be defined with -m iprange --src-range 192.168.3.80-192.168.3.83 and destination range with -m iprange --dst-range 192.168.3.80-192.168.3.83.
Furthermore, hardening your TCP/IP Stack against SYN Floods with net.ipv4.tcp_syncookies=1. Ignores broadcast pings and reducing the damage from SMURF attacks with net.ipv4.icmp_echo_ignore_broadcasts=1. Prevent some spoofing attacks with net.ipv4.conf.all.rp_filter=1. Do not accept IP source route packets because we are not a router with net.ipv4.conf.all.accept_source_route=0. This is just an intro, there are a lot of more settings.
-bash-5.1# vi flock
#!/bin/bash

MODPROBE="/sbin/modprobe"
IPTABLES="/sbin/iptables"
IP6TABLES="/sbin/ip6tables"
SYSCTL="/sbin/sysctl"

$MODPROBE nf_conntrack
$SYSCTL -w net.ipv4.tcp_syncookies=1
$SYSCTL -w net.ipv4.icmp_echo_ignore_broadcasts=1
$SYSCTL -w net.ipv4.conf.all.rp_filter=1
$SYSCTL -w net.ipv4.conf.all.accept_source_route=0

$SYSCTL -w net.ipv6.conf.all.disable_ipv6=1
$SYSCTL -w net.ipv6.conf.default.disable_ipv6=1

$IPTABLES -P INPUT DROP
$IPTABLES -P OUTPUT DROP
$IPTABLES -P FORWARD DROP
$IPTABLES -F
$IPTABLES -X

$IP6TABLES -P INPUT DROP
$IP6TABLES -P OUTPUT DROP
$IP6TABLES -P FORWARD DROP
$IP6TABLES -F
$IP6TABLES -X

$IPTABLES -A INPUT -i lo -j ACCEPT
$IPTABLES -A OUTPUT -o lo -j ACCEPT

# Log Accepted Packets
# SSH
$IPTABLES -A INPUT -p tcp --dport 22 -s 192.168.3.233 --syn -m state --state NEW -j LOG --log-prefix "IPTables-Accepted-22-I: " --log-level 5
# WebADM httpd
#$IPTABLES -A INPUT -p tcp --dport 80 --syn -m state --state NEW -j LOG --log-prefix "IPTables-Accepted-80-I: " --log-level 5
#$IPTABLES -A INPUT -p tcp --dport 8080 --syn -m state --state NEW -j LOG --log-prefix "IPTables-Accepted-8080-I: " --log-level 5
$IPTABLES -A INPUT -p tcp --dport 443 --syn -m state --state NEW -j LOG --log-prefix "IPTables-Accepted-443-I: " --log-level 5
$IPTABLES -A INPUT -p tcp --dport 8443 --syn -m state --state NEW -j LOG --log-prefix "IPTables-Accepted-8443-I: " --log-level 5

# WebADM Session
$IPTABLES -A INPUT -p tcp --dport 4000 -m iprange --src-range 192.168.3.80-192.168.3.83 --syn -m state --state NEW -j LOG --log-prefix "IPTables-Accepted-4000-I: " --log-level 5
# WebADM PKI
$IPTABLES -A INPUT -p tcp --dport 5000 -m iprange --src-range 192.168.3.80-192.168.3.83 --syn -m state --state NEW -j LOG --log-prefix "IPTables-Accepted-5000-I: " --log-level 5
# LDAP
$IPTABLES -A INPUT -p tcp --dport 389 -m iprange --src-range 192.168.3.80-192.168.3.83 --syn -m state --state NEW  -j LOG --log-prefix "IPTables-Accepted-389-I: " --log-level 5
#$IPTABLES -A INPUT -p tcp --dport 636 -m iprange --src-range 192.168.3.80-192.168.3.83 --syn -m state --state NEW  -j LOG --log-prefix "IPTables-Accepted-636-I: " --log-level 5
# MYSQL
$IPTABLES -A INPUT -p tcp --dport 3306 -m iprange --src-range 192.168.3.80-192.168.3.83 --syn -m state --state NEW -j LOG --log-prefix "IPTables-Accepted-3306-I: " --log-level 5

# DNS UDP
$IPTABLES -A OUTPUT -p udp --dport 53 -d 192.168.3.1 -m state --state NEW -j LOG --log-prefix "IPTables-Accepted-53-O: " --log-level 5
# NTP UDP
$IPTABLES -A OUTPUT -p udp --dport 123 -m state --state NEW -j LOG --log-prefix "IPTables-Accepted-123-O: " --log-level 5

# SSH
$IPTABLES -A OUTPUT -p tcp --dport 22 -m iprange --dst-range 192.168.3.80-192.168.3.83 --syn -m state --state NEW -j LOG --log-prefix "IPTables-Accepted-22-O: " --log-level 5
# Mail SMTP Server
$IPTABLES -A OUTPUT -p tcp --dport 25 -d 78.141.172.203 --syn -m state --state NEW -j LOG --log-prefix "IPTables-Accepted-25-O: " --log-level 5
# WebADM httpd
$IPTABLES -A OUTPUT -p tcp --dport 80 --syn -m state --state NEW -j LOG --log-prefix "IPTables-Accepted-80-O: " --log-level 5
#$IPTABLES -A OUTPUT -p tcp --dport 8080 --syn -m state --state NEW -j LOG --log-prefix "IPTables-Accepted-8080-O: " --log-level 5
$IPTABLES -A OUTPUT -p tcp --dport 443 --syn -m state --state NEW -j LOG --log-prefix "IPTables-Accepted-443-O: " --log-level 5
#$IPTABLES -A OUTPUT -p tcp --dport 8443 --syn -m state --state NEW -j LOG --log-prefix "IPTables-Accepted-8443-O: " --log-level 5
# WebADM Session
$IPTABLES -A OUTPUT -p tcp --dport 4000 -m iprange --dst-range 192.168.3.80-192.168.3.83 --syn -m state --state NEW -j LOG --log-prefix "IPTables-Accepted-4000-O: " --log-level 5
# WebADM PKI
#$IPTABLES -A OUTPUT -p tcp --dport 5000 -m iprange --dst-range 192.168.3.80-192.168.3.83 --syn -m state --state NEW -j LOG --log-prefix "IPTables-Accepted-5000-O: " --log-level 5
# LDAP
$IPTABLES -A OUTPUT -p tcp --dport 389 -m iprange --dst-range 192.168.3.80-192.168.3.83 --syn -m state --state NEW -j LOG --log-prefix "IPTables-Accepted-389-O: " --log-level 5
#$IPTABLES -A OUTPUT -p tcp --dport 636 -m iprange --dst-range 192.168.3.80-192.168.3.83 --syn -m state --state NEW -j LOG --log-prefix "IPTables-Accepted-636-O: " --log-level 5
# MYSQL
$IPTABLES -A OUTPUT -p tcp --dport 3306 -m iprange --dst-range 192.168.3.80-192.168.3.83 --syn -m state --state NEW -j LOG --log-prefix "IPTables-Accepted-3306-O: " --log-level 5
# PUSH Server
$IPTABLES -A OUTPUT -p tcp --dport 7000 -d 91.134.128.157 --syn -m state --state NEW -j LOG --log-prefix "IPTables-Accepted-7000-O: " --log-level 5
# License Server
$IPTABLES -A OUTPUT -p tcp --dport 7001 -d 91.134.128.157 --syn -m state --state NEW -j LOG --log-prefix "IPTables-Accepted-7001-O: " --log-level 5


# SSH
$IPTABLES -A INPUT -p tcp --dport 22 -s 192.168.3.233 --syn -m state --state NEW -j ACCEPT
# WebADM httpd
#$IPTABLES -A INPUT -p tcp --dport 80 --syn -m state --state NEW -j ACCEPT
#$IPTABLES -A INPUT -p tcp --dport 8080 --syn -m state --state NEW -j ACCEPT
$IPTABLES -A INPUT -p tcp --dport 443 --syn -m state --state NEW -j ACCEPT
$IPTABLES -A INPUT -p tcp --dport 8443 --syn -m state --state NEW -j ACCEPT

# WebADM Session
$IPTABLES -A INPUT -p tcp --dport 4000 -m iprange --src-range 192.168.3.80-192.168.3.83 --syn -m state --state NEW -j ACCEPT
# WebADM PKI
$IPTABLES -A INPUT -p tcp --dport 5000 -m iprange --src-range 192.168.3.80-192.168.3.83 --syn -m state --state NEW -j ACCEPT
# LDAP
$IPTABLES -A INPUT -p tcp --dport 389 -m iprange --src-range 192.168.3.80-192.168.3.83 --syn -m state --state NEW -j ACCEPT
#$IPTABLES -A INPUT -p tcp --dport 636 -m iprange --src-range 192.168.3.80-192.168.3.83 --syn -m state --state NEW -j ACCEPT
# MYSQL
$IPTABLES -A INPUT -p tcp --dport 3306 -m iprange --src-range 192.168.3.80-192.168.3.83 --syn -m state --state NEW -j ACCEPT


# DNS UDP
$IPTABLES -A OUTPUT -p udp --dport 53 -d 192.168.3.1 -m state --state NEW -j ACCEPT
# NTP UDP
$IPTABLES -A OUTPUT -p udp --dport 123 -m state --state NEW -j ACCEPT

# SSH
$IPTABLES -A OUTPUT -p tcp --dport 22 -m iprange --dst-range 192.168.3.80-192.168.3.83 --syn -m state --state NEW -j ACCEPT
# Mail SMTP Server
$IPTABLES -A OUTPUT -p tcp --dport 25 -d 78.141.172.203 --syn -m state --state NEW -j ACCEPT
# WebADM httpd
$IPTABLES -A OUTPUT -p tcp --dport 80 --syn -m state --state NEW -j ACCEPT
#$IPTABLES -A OUTPUT -p tcp --dport 8080 --syn -m state --state NEW -j ACCEPT
$IPTABLES -A OUTPUT -p tcp --dport 443 --syn -m state --state NEW -j ACCEPT
#$IPTABLES -A OUTPUT -p tcp --dport 8443 --syn -m state --state NEW -j ACCEPT
# WebADM Session
$IPTABLES -A OUTPUT -p tcp --dport 4000 -m iprange --dst-range 192.168.3.80-192.168.3.83 --syn -m state --state NEW -j ACCEPT
# WebADM PKI
#$IPTABLES -A OUTPUT -p tcp --dport 5000 -m iprange --dst-range 192.168.3.80-192.168.3.83 --syn -m state --state NEW -j ACCEPT
# LDAP
$IPTABLES -A OUTPUT -p tcp --dport 389 -m iprange --dst-range 192.168.3.80-192.168.3.83 --syn -m state --state NEW -j ACCEPT
#$IPTABLES -A OUTPUT -p tcp --dport 636 -m iprange --dst-range 192.168.3.80-192.168.3.83 --syn -m state --state NEW -j ACCEPT
# MYSQL
$IPTABLES -A OUTPUT -p tcp --dport 3306 -m iprange --dst-range 192.168.3.80-192.168.3.83 --syn -m state --state NEW -j ACCEPT
# PUSH Server
$IPTABLES -A OUTPUT -p tcp --dport 7000 -d 91.134.128.157 --syn -m state --state NEW -j ACCEPT
# License Server
$IPTABLES -A OUTPUT -p tcp --dport 7001 -d 91.134.128.157 --syn -m state --state NEW -j ACCEPT

$IPTABLES -A INPUT -m state --state ESTABLISHED -j ACCEPT
$IPTABLES -A OUTPUT -m state --state ESTABLISHED -j ACCEPT


# Log Dropped Packets
$IPTABLES -N LOGGING
$IPTABLES -A INPUT -j LOGGING
$IPTABLES -A OUTPUT -j LOGGING
#$IPTABLES -A LOGGING -m limit --limit 2/min -j LOG --log-prefix "IPTables-Dropped: " --log-level 4
$IPTABLES -A LOGGING -j LOG --log-prefix "IPTables-Dropped: " --log-level 4
$IPTABLES -A LOGGING -j DROP

-bash-5.1# chmod 700 flock
-bash-5.1# ./flock
net.ipv4.tcp_syncookies = 1
net.ipv4.icmp_echo_ignore_broadcasts = 1
net.ipv4.conf.all.rp_filter = 1
net.ipv4.conf.all.accept_source_route = 0
net.ipv6.conf.all.disable_ipv6 = 1
net.ipv6.conf.default.disable_ipv6 = 1
-bash-5.1# iptables -nvL
Chain INPUT (policy DROP 0 packets, 0 bytes)
 pkts bytes target     prot opt in     out     source               destination
 3262  647K ACCEPT     all  --  lo     *       0.0.0.0/0            0.0.0.0/0
    1    64 LOG        tcp  --  *      *       192.168.3.233        0.0.0.0/0            tcp dpt:22 flags:0x17/0x02 state NEW LOG flags 0 level 5 prefix "IPTables-Accepted-22-I: "
    6   384 LOG        tcp  --  *      *       0.0.0.0/0            0.0.0.0/0            tcp dpt:443 flags:0x17/0x02 state NEW LOG flags 0 level 5 prefix "IPTables-Accepted-443-I: "
    0     0 LOG        tcp  --  *      *       0.0.0.0/0            0.0.0.0/0            tcp dpt:8443 flags:0x17/0x02 state NEW LOG flags 0 level 5 prefix "IPTables-Accepted-8443-I: "
   58  3480 LOG        tcp  --  *      *       0.0.0.0/0            0.0.0.0/0            tcp dpt:4000 flags:0x17/0x02 source IP range 192.168.3.80-192.168.3.83 state NEW LOG flags 0 level 5 prefix "IPTables-Accepted-4000-I: "
   13   780 LOG        tcp  --  *      *       0.0.0.0/0            0.0.0.0/0            tcp dpt:5000 flags:0x17/0x02 source IP range 192.168.3.80-192.168.3.83 state NEW LOG flags 0 level 5 prefix "IPTables-Accepted-5000-I: "
   31  1860 LOG        tcp  --  *      *       0.0.0.0/0            0.0.0.0/0            tcp dpt:389 flags:0x17/0x02 source IP range 192.168.3.80-192.168.3.83 state NEW LOG flags 0 level 5 prefix "IPTables-Accepted-389-I: "
   29  1740 LOG        tcp  --  *      *       0.0.0.0/0            0.0.0.0/0            tcp dpt:3306 flags:0x17/0x02 source IP range 192.168.3.80-192.168.3.83 state NEW LOG flags 0 level 5 prefix "IPTables-Accepted-3306-I: "
    1    64 ACCEPT     tcp  --  *      *       192.168.3.233        0.0.0.0/0            tcp dpt:22 flags:0x17/0x02 state NEW
    6   384 ACCEPT     tcp  --  *      *       0.0.0.0/0            0.0.0.0/0            tcp dpt:443 flags:0x17/0x02 state NEW
    0     0 ACCEPT     tcp  --  *      *       0.0.0.0/0            0.0.0.0/0            tcp dpt:8443 flags:0x17/0x02 state NEW
   58  3480 ACCEPT     tcp  --  *      *       0.0.0.0/0            0.0.0.0/0            tcp dpt:4000 flags:0x17/0x02 source IP range 192.168.3.80-192.168.3.83 state NEW
   13   780 ACCEPT     tcp  --  *      *       0.0.0.0/0            0.0.0.0/0            tcp dpt:5000 flags:0x17/0x02 source IP range 192.168.3.80-192.168.3.83 state NEW
   31  1860 ACCEPT     tcp  --  *      *       0.0.0.0/0            0.0.0.0/0            tcp dpt:389 flags:0x17/0x02 source IP range 192.168.3.80-192.168.3.83 state NEW
   29  1740 ACCEPT     tcp  --  *      *       0.0.0.0/0            0.0.0.0/0            tcp dpt:3306 flags:0x17/0x02 source IP range 192.168.3.80-192.168.3.83 state NEW
 3284 3065K ACCEPT     all  --  *      *       0.0.0.0/0            0.0.0.0/0            state ESTABLISHED
  215 52500 LOGGING    all  --  *      *       0.0.0.0/0            0.0.0.0/0

Chain FORWARD (policy DROP 0 packets, 0 bytes)
 pkts bytes target     prot opt in     out     source               destination

Chain OUTPUT (policy DROP 0 packets, 0 bytes)
 pkts bytes target     prot opt in     out     source               destination
 3262  647K ACCEPT     all  --  *      lo      0.0.0.0/0            0.0.0.0/0
   22  1644 LOG        udp  --  *      *       0.0.0.0/0            192.168.3.1          udp dpt:53 state NEW LOG flags 0 level 5 prefix "IPTables-Accepted-53-O: "
    5   380 LOG        udp  --  *      *       0.0.0.0/0            0.0.0.0/0            udp dpt:123 state NEW LOG flags 0 level 5 prefix "IPTables-Accepted-123-O: "
    0     0 LOG        tcp  --  *      *       0.0.0.0/0            0.0.0.0/0            tcp dpt:22 flags:0x17/0x02 destination IP range 192.168.3.80-192.168.3.83 state NEW LOG flags 0 level 5 prefix "IPTables-Accepted-22-O: "
    0     0 LOG        tcp  --  *      *       0.0.0.0/0            78.141.172.203       tcp dpt:25 flags:0x17/0x02 state NEW LOG flags 0 level 5 prefix "IPTables-Accepted-25-O: "
    2   120 LOG        tcp  --  *      *       0.0.0.0/0            0.0.0.0/0            tcp dpt:80 flags:0x17/0x02 state NEW LOG flags 0 level 5 prefix "IPTables-Accepted-80-O: "
   15   900 LOG        tcp  --  *      *       0.0.0.0/0            0.0.0.0/0            tcp dpt:443 flags:0x17/0x02 state NEW LOG flags 0 level 5 prefix "IPTables-Accepted-443-O: "
  158  9480 LOG        tcp  --  *      *       0.0.0.0/0            0.0.0.0/0            tcp dpt:4000 flags:0x17/0x02 destination IP range 192.168.3.80-192.168.3.83 state NEW LOG flags 0 level 5 prefix "IPTables-Accepted-4000-O: "
  247 14820 LOG        tcp  --  *      *       0.0.0.0/0            0.0.0.0/0            tcp dpt:389 flags:0x17/0x02 destination IP range 192.168.3.80-192.168.3.83 state NEW LOG flags 0 level 5 prefix "IPTables-Accepted-389-O: "
  164  9840 LOG        tcp  --  *      *       0.0.0.0/0            0.0.0.0/0            tcp dpt:3306 flags:0x17/0x02 destination IP range 192.168.3.80-192.168.3.83 state NEW LOG flags 0 level 5 prefix "IPTables-Accepted-3306-O: "
    0     0 LOG        tcp  --  *      *       0.0.0.0/0            91.134.128.157       tcp dpt:7000 flags:0x17/0x02 state NEW LOG flags 0 level 5 prefix "IPTables-Accepted-7000-O: "
    0     0 LOG        tcp  --  *      *       0.0.0.0/0            91.134.128.157       tcp dpt:7001 flags:0x17/0x02 state NEW LOG flags 0 level 5 prefix "IPTables-Accepted-7001-O: "
   22  1644 ACCEPT     udp  --  *      *       0.0.0.0/0            192.168.3.1          udp dpt:53 state NEW
    5   380 ACCEPT     udp  --  *      *       0.0.0.0/0            0.0.0.0/0            udp dpt:123 state NEW
    0     0 ACCEPT     tcp  --  *      *       0.0.0.0/0            0.0.0.0/0            tcp dpt:22 flags:0x17/0x02 destination IP range 192.168.3.80-192.168.3.83 state NEW
    0     0 ACCEPT     tcp  --  *      *       0.0.0.0/0            78.141.172.203       tcp dpt:25 flags:0x17/0x02 state NEW
    2   120 ACCEPT     tcp  --  *      *       0.0.0.0/0            0.0.0.0/0            tcp dpt:80 flags:0x17/0x02 state NEW
   15   900 ACCEPT     tcp  --  *      *       0.0.0.0/0            0.0.0.0/0            tcp dpt:443 flags:0x17/0x02 state NEW
  158  9480 ACCEPT     tcp  --  *      *       0.0.0.0/0            0.0.0.0/0            tcp dpt:4000 flags:0x17/0x02 destination IP range 192.168.3.80-192.168.3.83 state NEW
  247 14820 ACCEPT     tcp  --  *      *       0.0.0.0/0            0.0.0.0/0            tcp dpt:389 flags:0x17/0x02 destination IP range 192.168.3.80-192.168.3.83 state NEW
  164  9840 ACCEPT     tcp  --  *      *       0.0.0.0/0            0.0.0.0/0            tcp dpt:3306 flags:0x17/0x02 destination IP range 192.168.3.80-192.168.3.83 state NEW
    0     0 ACCEPT     tcp  --  *      *       0.0.0.0/0            91.134.128.157       tcp dpt:7000 flags:0x17/0x02 state NEW
    0     0 ACCEPT     tcp  --  *      *       0.0.0.0/0            91.134.128.157       tcp dpt:7001 flags:0x17/0x02 state NEW
 3114  868K ACCEPT     all  --  *      *       0.0.0.0/0            0.0.0.0/0            state ESTABLISHED
    0     0 LOGGING    all  --  *      *       0.0.0.0/0            0.0.0.0/0

Chain LOGGING (2 references)
 pkts bytes target     prot opt in     out     source               destination
  215 52500 LOG        all  --  *      *       0.0.0.0/0            0.0.0.0/0            LOG flags 0 level 4 prefix "IPTables-Dropped: "
  215 52500 DROP       all  --  *      *       0.0.0.0/0            0.0.0.0/0

-bash-5.1#
Below, the Firewall Rules without logging the accepted and dropped packets.
-bash-5.1# vi flock
#!/bin/bash

MODPROBE="/sbin/modprobe"
IPTABLES="/sbin/iptables"
IP6TABLES="/sbin/ip6tables"
SYSCTL="/sbin/sysctl"

$MODPROBE nf_conntrack
$SYSCTL -w net.ipv4.tcp_syncookies=1
$SYSCTL -w net.ipv4.icmp_echo_ignore_broadcasts=1
$SYSCTL -w net.ipv4.conf.all.rp_filter=1
$SYSCTL -w net.ipv4.conf.all.accept_source_route=0

$SYSCTL -w net.ipv6.conf.all.disable_ipv6=1
$SYSCTL -w net.ipv6.conf.default.disable_ipv6=1

$IPTABLES -P INPUT DROP
$IPTABLES -P OUTPUT DROP
$IPTABLES -P FORWARD DROP
$IPTABLES -F
$IPTABLES -X

$IP6TABLES -P INPUT DROP
$IP6TABLES -P OUTPUT DROP
$IP6TABLES -P FORWARD DROP
$IP6TABLES -F
$IP6TABLES -X

$IPTABLES -A INPUT -i lo -j ACCEPT
$IPTABLES -A OUTPUT -o lo -j ACCEPT

# SSH
$IPTABLES -A INPUT -p tcp --dport 22 -s 192.168.3.233 --syn -m state --state NEW -j ACCEPT
# WebADM httpd
#$IPTABLES -A INPUT -p tcp --dport 80 --syn -m state --state NEW -j ACCEPT
#$IPTABLES -A INPUT -p tcp --dport 8080 --syn -m state --state NEW -j ACCEPT
$IPTABLES -A INPUT -p tcp --dport 443 --syn -m state --state NEW -j ACCEPT
$IPTABLES -A INPUT -p tcp --dport 8443 --syn -m state --state NEW -j ACCEPT

# WebADM Session
$IPTABLES -A INPUT -p tcp --dport 4000 -m iprange --src-range 192.168.3.80-192.168.3.83 --syn -m state --state NEW -j ACCEPT
# WebADM PKI
$IPTABLES -A INPUT -p tcp --dport 5000 -m iprange --src-range 192.168.3.80-192.168.3.83 --syn -m state --state NEW -j ACCEPT
# LDAP
$IPTABLES -A INPUT -p tcp --dport 389 -m iprange --src-range 192.168.3.80-192.168.3.83 --syn -m state --state NEW -j ACCEPT
#$IPTABLES -A INPUT -p tcp --dport 636 -m iprange --src-range 192.168.3.80-192.168.3.83 --syn -m state --state NEW -j ACCEPT
# MYSQL
$IPTABLES -A INPUT -p tcp --dport 3306 -m iprange --src-range 192.168.3.80-192.168.3.83 --syn -m state --state NEW -j ACCEPT


# DNS UDP
$IPTABLES -A OUTPUT -p udp --dport 53 -d 192.168.3.1 -m state --state NEW -j ACCEPT
# NTP UDP
$IPTABLES -A OUTPUT -p udp --dport 123 -m state --state NEW -j ACCEPT

# SSH
$IPTABLES -A OUTPUT -p tcp --dport 22 -m iprange --dst-range 192.168.3.80-192.168.3.83 --syn -m state --state NEW -j ACCEPT
# Mail SMTP Server
$IPTABLES -A OUTPUT -p tcp --dport 25 -d 78.141.172.203 --syn -m state --state NEW -j ACCEPT
# WebADM httpd
$IPTABLES -A OUTPUT -p tcp --dport 80 --syn -m state --state NEW -j ACCEPT
#$IPTABLES -A OUTPUT -p tcp --dport 8080 --syn -m state --state NEW -j ACCEPT
$IPTABLES -A OUTPUT -p tcp --dport 443 --syn -m state --state NEW -j ACCEPT
#$IPTABLES -A OUTPUT -p tcp --dport 8443 --syn -m state --state NEW -j ACCEPT
# WebADM Session
$IPTABLES -A OUTPUT -p tcp --dport 4000 -m iprange --dst-range 192.168.3.80-192.168.3.83 --syn -m state --state NEW -j ACCEPT
# WebADM PKI
#$IPTABLES -A OUTPUT -p tcp --dport 5000 -m iprange --dst-range 192.168.3.80-192.168.3.83 --syn -m state --state NEW -j ACCEPT
# LDAP
$IPTABLES -A OUTPUT -p tcp --dport 389 -m iprange --dst-range 192.168.3.80-192.168.3.83 --syn -m state --state NEW -j ACCEPT
#$IPTABLES -A OUTPUT -p tcp --dport 636 -m iprange --dst-range 192.168.3.80-192.168.3.83 --syn -m state --state NEW -j ACCEPT
# MYSQL
$IPTABLES -A OUTPUT -p tcp --dport 3306 -m iprange --dst-range 192.168.3.80-192.168.3.83 --syn -m state --state NEW -j ACCEPT
# PUSH Server
$IPTABLES -A OUTPUT -p tcp --dport 7000 -d 91.134.128.157 --syn -m state --state NEW -j ACCEPT
# License Server
$IPTABLES -A OUTPUT -p tcp --dport 7001 -d 91.134.128.157 --syn -m state --state NEW -j ACCEPT

$IPTABLES -A INPUT -m state --state ESTABLISHED -j ACCEPT
$IPTABLES -A OUTPUT -m state --state ESTABLISHED -j ACCEPT
For more information about the iptables, check out the official documentation at Netfilter Docs.
Linux Security Modules
Linux Security Modules (LSM) is a framework that allows the Linux kernel to support a variety of computer security models.
AppArmor - Ubuntu 24.04
AppArmor is a Mandatory Access Control (MAC) system which is a kernel (LSM) enhancement to confine programs to a limited set of resources.
Let's install the apparmor-utils package:
Welcome to Ubuntu 24.04.1 LTS (GNU/Linux 6.8.0-49-generic x86_64)
admin@webadm1:~$ sudo su
[sudo] password for admin:
root@webadm1:/home/admin# apt install apparmor-utils
Reading package lists... Done
Building dependency tree... Done
Reading state information... Done
The following additional packages will be installed:
  python3-apparmor python3-libapparmor
Suggested packages:
  vim-addon-manager
The following NEW packages will be installed:
  apparmor-utils python3-apparmor python3-libapparmor
0 upgraded, 3 newly installed, 0 to remove and 28 not upgraded.
Need to get 161 kB of archives.
After this operation, 1040 kB of additional disk space will be used.
Do you want to continue? [Y/n] y
Get:1 https://lu.archive.ubuntu.com/ubuntu noble-updates/main amd64 python3-libapparmor amd64 4.0.1really4.0.1-0ubuntu0.24.04.3 [30.1 kB]
Get:2 https://lu.archive.ubuntu.com/ubuntu noble-updates/main amd64 python3-apparmor all 4.0.1really4.0.1-0ubuntu0.24.04.3 [84.5 kB]
Get:3 https://lu.archive.ubuntu.com/ubuntu noble-updates/main amd64 apparmor-utils all 4.0.1really4.0.1-0ubuntu0.24.04.3 [46.4 kB]
Fetched 161 kB in 0s (668 kB/s)
Selecting previously unselected package python3-libapparmor.
(Reading database ... 171286 files and directories currently installed.)
Preparing to unpack .../python3-libapparmor_4.0.1really4.0.1-0ubuntu0.24.04.3_amd64.deb ...
Unpacking python3-libapparmor (4.0.1really4.0.1-0ubuntu0.24.04.3) ...
Selecting previously unselected package python3-apparmor.
Preparing to unpack .../python3-apparmor_4.0.1really4.0.1-0ubuntu0.24.04.3_all.deb ...
Unpacking python3-apparmor (4.0.1really4.0.1-0ubuntu0.24.04.3) ...
Selecting previously unselected package apparmor-utils.
Preparing to unpack .../apparmor-utils_4.0.1really4.0.1-0ubuntu0.24.04.3_all.deb ...
Unpacking apparmor-utils (4.0.1really4.0.1-0ubuntu0.24.04.3) ...
Setting up python3-libapparmor (4.0.1really4.0.1-0ubuntu0.24.04.3) ...
Setting up python3-apparmor (4.0.1really4.0.1-0ubuntu0.24.04.3) ...
Setting up apparmor-utils (4.0.1really4.0.1-0ubuntu0.24.04.3) ...
Processing triggers for man-db (2.12.0-4build2) ...
Scanning processes...
Scanning linux images...

Running kernel seems to be up-to-date.

No services need to be restarted.

No containers need to be restarted.

No user sessions are running outdated binaries.

No VM guests are running outdated hypervisor (qemu) binaries on this host.
root@webadm1:/home/admin#
The command apparmor_status will show the status of all loaded AppArmor Profiles.
root@webadm1:/home/admin# apparmor_status
apparmor_status
apparmor module is loaded.
119 profiles are loaded.
24 profiles are in enforce mode.
   /usr/bin/man
   /usr/lib/snapd/snap-confine
   /usr/lib/snapd/snap-confine//mount-namespace-capture-helper
   lsb_release
   man_filter
   man_groff
   nvidia_modprobe
   nvidia_modprobe//kmod
   plasmashell
   plasmashell//QtWebEngineProcess
   rsyslogd
   tcpdump
   ubuntu_pro_apt_news
   ubuntu_pro_esm_cache
   ubuntu_pro_esm_cache//apt_methods
   ubuntu_pro_esm_cache//apt_methods_gpgv
   ubuntu_pro_esm_cache//cloud_id
   ubuntu_pro_esm_cache//dpkg
   ubuntu_pro_esm_cache//ps
   ubuntu_pro_esm_cache//ubuntu_distro_info
   ubuntu_pro_esm_cache_systemctl
   ubuntu_pro_esm_cache_systemd_detect_virt
   unix-chkpwd
   unprivileged_userns
4 profiles are in complain mode.
   transmission-cli
   transmission-daemon
   transmission-gtk
   transmission-qt
0 profiles are in prompt mode.
0 profiles are in kill mode.
91 profiles are in unconfined mode.
   1password
   Discord
   MongoDB Compass
   QtWebEngineProcess
   balena-etcher
   brave
   buildah
   busybox
   cam
   ch-checkns
   ch-run
   chrome
   crun
   devhelp
   element-desktop
   epiphany
   evolution
   firefox
   flatpak
   foliate
   geary
   github-desktop
   goldendict
   ipa_verify
   kchmviewer
   keybase
   lc-compliance
   libcamerify
   linux-sandbox
   loupe
   lxc-attach
   lxc-create
   lxc-destroy
   lxc-execute
   lxc-stop
   lxc-unshare
   lxc-usernsexec
   mmdebstrap
   msedge
   nautilus
   notepadqq
   obsidian
   opam
   opera
   pageedit
   podman
   polypane
   privacybrowser
   qcam
   qmapshack
   qutebrowser
   rootlesskit
   rpm
   rssguard
   runc
   sbuild
   sbuild-abort
   sbuild-adduser
   sbuild-apt
   sbuild-checkpackages
   sbuild-clean
   sbuild-createchroot
   sbuild-destroychroot
   sbuild-distupgrade
   sbuild-hold
   sbuild-shell
   sbuild-unhold
   sbuild-update
   sbuild-upgrade
   scide
   signal-desktop
   slack
   slirp4netns
   steam
   stress-ng
   surfshark
   systemd-coredump
   thunderbird
   toybox
   trinity
   tup
   tuxedo-control-center
   userbindmount
   uwsgi-core
   vdens
   virtiofsd
   vivaldi-bin
   vpnns
   vscode
   wike
   wpcom
1 processes have profiles defined.
1 processes are in enforce mode.
   /usr/sbin/rsyslogd (2976) rsyslogd
0 processes are in complain mode.
0 processes are in prompt mode.
0 processes are in kill mode.
0 processes are unconfined but have a profile defined.
0 processes are in mixed mode.
root@webadm1:/home/admin#
The command aa-unconfined will show a list of processes with tcp or udp ports that do not have AppArmor profiles loaded.
root@webadm1:/home/admin# aa-unconfined
aa-unconfined
1 /usr/lib/systemd/systemd (/sbin/init) not confined
599 /usr/lib/systemd/systemd-networkd not confined
844 /usr/lib/systemd/systemd-resolved not confined
1258 /opt/webadm/libexec/webadm-rsignd not confined
1260 /opt/webadm/libexec/webadm-sessiond not confined
1273 /usr/sbin/sshd (sshd: /usr/sbin/sshd -D [listener] 0 of 10-100 startups) not confined
1310 /opt/webadm/libexec/webadm-httpd not confined
1367 /opt/webadm/libexec/webadm-httpd not confined
1368 /opt/webadm/libexec/webadm-httpd not confined
1369 /opt/webadm/libexec/webadm-httpd not confined
root@webadm1:/home/admin#
Let's create a new profile with the command aa-genprof for the RCDevs Directory Server (slapd).
root@webadm1:/home/admin# aa-genprof /opt/slapd/libexec/rcdevs-slapd
Writing updated profile for /opt/slapd/libexec/rcdevs-slapd.
Setting /opt/slapd/libexec/rcdevs-slapd to complain mode.

Before you begin, you may wish to check if a
profile already exists for the application you
wish to confine. See the following wiki page for
more information:
http://wiki.apparmor.net/index.php/Profiles

Profiling: /opt/slapd/libexec/rcdevs-slapd

Please start the application to be profiled in
another window and exercise its functionality now.

Once completed, select the "Scan" option below in
order to scan the system logs for AppArmor events.

For each AppArmor event, you will be given the
opportunity to choose whether the access should be
allowed or denied.

[(S)can system log for AppArmor events] / (F)inish
Now, switch to another terminal and the RCDevs Directory Server (slapd) service needs to be restarted.
root@webadm1:/home/admin# /opt/slapd/bin/slapd restart
Stopping RCDevs LDAP Directory... Ok
Checking system architecture... Ok
Checking server configuration... Ok
Starting RCDevs LDAP Directory... Ok
root@webadm1:/home/admin#
Afterward, switch back to the first terminal. Press S to (S)can system log for AppArmor events, save the changes and finish.
[(S)can system log for AppArmor events] / (F)inish
Reading log entries from /var/log/syslog.
Updating AppArmor profiles in /etc/apparmor.d.
Complain-mode changes:

Profile:    /opt/slapd/libexec/rcdevs-slapd
Capability: dac_override
Severity:   9

 [1 - #include <abstractions/lxc/container-base>]
  2 - #include <abstractions/lxc/start-container>
  3 - capability dac_override,
(A)llow / [(D)eny] / (I)gnore / Audi(t) / Abo(r)t / (F)inish
Adding #include <abstractions/lxc/container-base> to profile.
Deleted 2 previous matching profile entries.

= Changed Local Profiles =

The following local profiles were changed. Would you like to save them?

 [1 - /opt/slapd/libexec/rcdevs-slapd]
(S)ave Changes / Save Selec(t)ed Profile / [(V)iew Changes] / View Changes b/w (C)lean profiles / Abo(r)t
Writing updated profile for /opt/slapd/libexec/rcdevs-slapd.

Profiling: /opt/slapd/libexec/rcdevs-slapd

Please start the application to be profiled in
another window and exercise its functionality now.

Once completed, select the "Scan" option below in
order to scan the system logs for AppArmor events.

For each AppArmor event, you will be given the
opportunity to choose whether the access should be
allowed or denied.

[(S)can system log for AppArmor events] / (F)inish
Setting /opt/slapd/libexec/rcdevs-slapd to enforce mode.

Reloaded AppArmor profiles in enforce mode.

Please consider contributing your new profile!
See the following wiki page for more information:
http://wiki.apparmor.net/index.php/Profiles

Finished generating profile for /opt/slapd/libexec/rcdevs-slapd.
root@webadm1:/home/admin#
AppArmor profiles can be in one of two modes: enforcement and complain. Profiles loaded in enforcement mode will result in enforcement of the policy defined in the profile as well as reporting policy violation attempts (either via syslog or auditd). Profiles in complain mode will not enforce policy but instead report policy violation attempts.
Let's put this profile in complain mode for testing purpose.
root@webadm1:/home/admin# aa-complain /opt/slapd/libexec/rcdevs-slapd
Setting /opt/slapd/libexec/rcdevs-slapd to complain mode.
root@webadm1:/home/admin# aa-unconfined
aa-unconfined
1 /usr/lib/systemd/systemd (/sbin/init) not confined
599 /usr/lib/systemd/systemd-networkd not confined
844 /usr/lib/systemd/systemd-resolved not confined
1258 /opt/webadm/libexec/webadm-rsignd not confined
1260 /opt/webadm/libexec/webadm-sessiond not confined
1273 /usr/sbin/sshd (sshd: /usr/sbin/sshd -D [listener] 0 of 10-100 startups) not confined
1310 /opt/webadm/libexec/webadm-httpd not confined
1367 /opt/webadm/libexec/webadm-httpd not confined
1368 /opt/webadm/libexec/webadm-httpd not confined
1369 /opt/webadm/libexec/webadm-httpd not confined
27887 /opt/slapd/libexec/rcdevs-slapd confined by '/opt/slapd/libexec/rcdevs-slapd (complain)'
root@webadm1:/home/admin#
Let's do the same for /opt/webadm/libexec/webadm-sessiond, /opt/webadm/libexec/webadm-rsignd and /opt/webadm/libexec/webadm-httpd.
root@webadm1:/home/admin# aa-genprof /opt/webadm/libexec/webadm-sessiond
Writing updated profile for /opt/webadm/libexec/webadm-sessiond.
Setting /opt/webadm/libexec/webadm-sessiond to complain mode.

Before you begin, you may wish to check if a
profile already exists for the application you
wish to confine. See the following wiki page for
more information:
http://wiki.apparmor.net/index.php/Profiles

Profiling: /opt/webadm/libexec/webadm-sessiond

Please start the application to be profiled in
another window and exercise its functionality now.

Once completed, select the "Scan" option below in
order to scan the system logs for AppArmor events.

For each AppArmor event, you will be given the
opportunity to choose whether the access should be
allowed or denied.

[(S)can system log for AppArmor events] / (F)inish
Now, switch to another terminal and the WebADM service needs to be restarted.
root@webadm1:/home/admin# /opt/webadm/bin/webadm restart
Stopping WebADM HTTP server... Ok
Stopping WebADM Watchd server..... Ok
Checking libudev dependency... Ok
Checking system architecture... Ok
Checking server configurations... Ok

Found Trial Enterprise license (RCDEVSSUPPORT)
Licensed by RCDevs SA to LOIC
Licensed product(s): OpenOTP

Starting WebADM Session server... Ok
Starting WebADM PKI server... Ok
Starting WebADM Watchd server... Ok
Starting WebADM HTTP server... Ok

Checking server connections. Please wait...
Connected LDAP server: LDAP Server (192.168.3.80)
Connected SQL server: SQL Server (192.168.3.80)
Connected PKI server: PKI Server (192.168.3.80)
Connected Session server: Session Server (192.168.3.80)

Checking LDAP proxy user access... Ok
Checking SQL database access... Ok
Checking PKI service access... Ok

Cluster mode enabled with 4 nodes (I'm master)
root@webadm1:/home/admin#
Afterward, switch back to the first terminal. Press S to (S)can system log for AppArmor events, save the changes and finish.
[(S)can system log for AppArmor events] / (F)inish
Reading log entries from /var/log/syslog.
Updating AppArmor profiles in /etc/apparmor.d.
Complain-mode changes:

Profile:    /opt/webadm/libexec/webadm-sessiond
Capability: setgid
Severity:   9

 [1 - #include <abstractions/dovecot-common>]
  2 - #include <abstractions/lxc/container-base>
  3 - #include <abstractions/lxc/start-container>
  4 - #include <abstractions/postfix-common>
  5 - capability setgid,
(A)llow / [(D)eny] / (I)gnore / Audi(t) / Abo(r)t / (F)inish
Adding #include <abstractions/dovecot-common> to profile.

Profile:    /opt/webadm/libexec/webadm-sessiond
Capability: setuid
Severity:   9

 [1 - #include <abstractions/lxc/container-base>]
  2 - #include <abstractions/lxc/start-container>
  3 - #include <abstractions/postfix-common>
  4 - capability setuid,
(A)llow / [(D)eny] / (I)gnore / Audi(t) / Abo(r)t / (F)inish
Adding #include <abstractions/lxc/container-base> to profile.
Deleted 2 previous matching profile entries.

= Changed Local Profiles =

The following local profiles were changed. Would you like to save them?

 [1 - /opt/webadm/libexec/webadm-sessiond]
(S)ave Changes / Save Selec(t)ed Profile / [(V)iew Changes] / View Changes b/w (C)lean profiles / Abo(r)t
Writing updated profile for /opt/webadm/libexec/webadm-sessiond.

Profiling: /opt/webadm/libexec/webadm-sessiond

Please start the application to be profiled in
another window and exercise its functionality now.

Once completed, select the "Scan" option below in
order to scan the system logs for AppArmor events.

For each AppArmor event, you will be given the
opportunity to choose whether the access should be
allowed or denied.

[(S)can system log for AppArmor events] / (F)inish
Setting /opt/webadm/libexec/webadm-sessiond to enforce mode.

Reloaded AppArmor profiles in enforce mode.

Please consider contributing your new profile!
See the following wiki page for more information:
http://wiki.apparmor.net/index.php/Profiles

Finished generating profile for /opt/webadm/libexec/webadm-sessiond.
root@webadm1:/home/admin#
root@webadm1:/home/admin# aa-genprof /opt/webadm/libexec/webadm-rsignd
Writing updated profile for /opt/webadm/libexec/webadm-rsignd.
Setting /opt/webadm/libexec/webadm-rsignd to complain mode.

Before you begin, you may wish to check if a
profile already exists for the application you
wish to confine. See the following wiki page for
more information:
http://wiki.apparmor.net/index.php/Profiles

Profiling: /opt/webadm/libexec/webadm-rsignd

Please start the application to be profiled in
another window and exercise its functionality now.

Once completed, select the "Scan" option below in
order to scan the system logs for AppArmor events.

For each AppArmor event, you will be given the
opportunity to choose whether the access should be
allowed or denied.

[(S)can system log for AppArmor events] / (F)inish
Reading log entries from /var/log/syslog.
Updating AppArmor profiles in /etc/apparmor.d.
Complain-mode changes:

Profile:    /opt/webadm/libexec/webadm-rsignd
Capability: dac_override
Severity:   9

 [1 - #include <abstractions/lxc/container-base>]
  2 - #include <abstractions/lxc/start-container>
  3 - capability dac_override,
(A)llow / [(D)eny] / (I)gnore / Audi(t) / Abo(r)t / (F)inish
Adding #include <abstractions/lxc/container-base> to profile.
Deleted 2 previous matching profile entries.

= Changed Local Profiles =

The following local profiles were changed. Would you like to save them?

 [1 - /opt/webadm/libexec/webadm-rsignd]
(S)ave Changes / Save Selec(t)ed Profile / [(V)iew Changes] / View Changes b/w (C)lean profiles / Abo(r)t
Writing updated profile for /opt/webadm/libexec/webadm-rsignd.

Profiling: /opt/webadm/libexec/webadm-rsignd

Please start the application to be profiled in
another window and exercise its functionality now.

Once completed, select the "Scan" option below in
order to scan the system logs for AppArmor events.

For each AppArmor event, you will be given the
opportunity to choose whether the access should be
allowed or denied.

[(S)can system log for AppArmor events] / (F)inish
Setting /opt/webadm/libexec/webadm-rsignd to enforce mode.

Reloaded AppArmor profiles in enforce mode.

Please consider contributing your new profile!
See the following wiki page for more information:
http://wiki.apparmor.net/index.php/Profiles

Finished generating profile for /opt/webadm/libexec/webadm-rsignd.
root@webadm1:/home/admin#
root@webadm1:/home/admin# aa-genprof /opt/webadm/libexec/webadm-httpd
Writing updated profile for /opt/webadm/libexec/webadm-httpd.
Setting /opt/webadm/libexec/webadm-httpd to complain mode.

Before you begin, you may wish to check if a
profile already exists for the application you
wish to confine. See the following wiki page for
more information:
http://wiki.apparmor.net/index.php/Profiles

Profiling: /opt/webadm/libexec/webadm-httpd

Please start the application to be profiled in
another window and exercise its functionality now.

Once completed, select the "Scan" option below in
order to scan the system logs for AppArmor events.

For each AppArmor event, you will be given the
opportunity to choose whether the access should be
allowed or denied.

[(S)can system log for AppArmor events] / (F)inish
Reading log entries from /var/log/syslog.
Updating AppArmor profiles in /etc/apparmor.d.
Complain-mode changes:

Profile:    /opt/webadm/libexec/webadm-httpd
Capability: net_bind_service
Severity:   8

 [1 - #include <abstractions/lxc/container-base>]
  2 - #include <abstractions/lxc/start-container>
  3 - #include <abstractions/nis>
  4 - capability net_bind_service,
(A)llow / [(D)eny] / (I)gnore / Audi(t) / Abo(r)t / (F)inish
Adding #include <abstractions/lxc/container-base> to profile.
Deleted 3 previous matching profile entries.

= Changed Local Profiles =

The following local profiles were changed. Would you like to save them?

 [1 - /opt/webadm/libexec/webadm-httpd]
(S)ave Changes / Save Selec(t)ed Profile / [(V)iew Changes] / View Changes b/w (C)lean profiles / Abo(r)t
Writing updated profile for /opt/webadm/libexec/webadm-httpd.

Profiling: /opt/webadm/libexec/webadm-httpd

Please start the application to be profiled in
another window and exercise its functionality now.

Once completed, select the "Scan" option below in
order to scan the system logs for AppArmor events.

For each AppArmor event, you will be given the
opportunity to choose whether the access should be
allowed or denied.

[(S)can system log for AppArmor events] / (F)inish
Setting /opt/webadm/libexec/webadm-httpd to enforce mode.

Reloaded AppArmor profiles in enforce mode.

Please consider contributing your new profile!
See the following wiki page for more information:
http://wiki.apparmor.net/index.php/Profiles

Finished generating profile for /opt/webadm/libexec/webadm-httpd.
root@webadm1:/home/admin#
Time to do some authentication tests. If there are no warnings in /var/log/kern.log then the profiles can be set to enforce mode.
root@webadm1:/home/admin# aa-enforce /opt/slapd/libexec/rcdevs-slapd
Setting /opt/slapd/libexec/rcdevs-slapd to enforce mode.
root@webadm1:/home/admin# aa-enforce /opt/webadm/libexec/webadm-sessiond
Setting /opt/webadm/libexec/webadm-sessiond to enforce mode.
root@webadm1:/home/admin# aa-enforce /opt/webadm/libexec/webadm-rsignd
Setting /opt/webadm/libexec/webadm-rsignd to enforce mode.
root@webadm1:/home/admin# aa-enforce /opt/webadm/libexec/webadm-httpd
Setting /opt/webadm/libexec/webadm-httpd to enforce mode.
root@webadm1:/home/admin# aa-unconfined
1128 /lib/systemd/systemd-resolved not confined
1349 /usr/sbin/mysqld not confined
1381 /usr/sbin/sshd not confined
5615 /opt/slapd/libexec/rcdevs-slapd confined by '/opt/slapd/libexec/rcdevs-slapd (enforce)'
10534 /opt/webadm/libexec/webadm-sessiond confined by '/opt/webadm/libexec/webadm-sessiond (enforce)'
10541 /opt/webadm/libexec/webadm-rsignd confined by '/opt/webadm/libexec/webadm-rsignd (enforce)'
10572 /opt/webadm/libexec/webadm-httpd confined by '/opt/webadm/libexec/webadm-httpd (enforce)'
10575 /opt/webadm/libexec/webadm-httpd confined by '/opt/webadm/libexec/webadm-httpd (enforce)'
10576 /opt/webadm/libexec/webadm-httpd confined by '/opt/webadm/libexec/webadm-httpd (enforce)'
10577 /opt/webadm/libexec/webadm-httpd confined by '/opt/webadm/libexec/webadm-httpd (enforce)'
root@webadm1:/home/admin# apparmor_status
apparmor module is loaded.
23 profiles are loaded.
23 profiles are in enforce mode.
   /opt/slapd/libexec/rcdevs-slapd
   /opt/webadm/libexec/webadm-httpd
   /opt/webadm/libexec/webadm-rsignd
   /opt/webadm/libexec/webadm-sessiond
   /sbin/dhclient
   /snap/core/6350/usr/lib/snapd/snap-confine
   /snap/core/6350/usr/lib/snapd/snap-confine//mount-namespace-capture-helper
   /usr/bin/lxc-start
   /usr/bin/man
   /usr/lib/NetworkManager/nm-dhcp-client.action
   /usr/lib/NetworkManager/nm-dhcp-helper
   /usr/lib/connman/scripts/dhclient-script
   /usr/lib/snapd/snap-confine
   /usr/lib/snapd/snap-confine//mount-namespace-capture-helper
   /usr/sbin/tcpdump
   lxc-container-default
   lxc-container-default-cgns
   lxc-container-default-with-mounting
   lxc-container-default-with-nesting
   man_filter
   man_groff
   snap-update-ns.core
   snap.core.hook.configure
0 profiles are in complain mode.
8 processes have profiles defined.
8 processes are in enforce mode.
   /opt/slapd/libexec/rcdevs-slapd (5615)
   /opt/webadm/libexec/webadm-httpd (10572)
   /opt/webadm/libexec/webadm-httpd (10575)
   /opt/webadm/libexec/webadm-httpd (10576)
   /opt/webadm/libexec/webadm-httpd (10577)
   /opt/webadm/libexec/webadm-rsignd (10541)
   /opt/webadm/libexec/webadm-rsignd (10859)
   /opt/webadm/libexec/webadm-sessiond (10534)
0 processes are in complain mode.
0 processes are unconfined but have a profile defined.
root@webadm1:/home/admin#
SELinux - Rocky Linux 9
SELinux is a Linux kernel security module that provides a mechanism for supporting access control security policies, including mandatory access controls (MAC).
Check the SELinux status with the command sestatus.
-bash-5.1# sestatus
SELinux status:                 enabled
SELinuxfs mount:                /sys/fs/selinux
SELinux root directory:         /etc/selinux
Loaded policy name:             targeted
Current mode:                   enforcing
Mode from config file:          enforcing
Policy MLS status:              enabled
Policy deny_unknown status:     allowed
Memory protection checking:     actual (secure)
Max kernel policy version:      33
-bash-5.1#
To disable SELinux edit the configuration file /etc/selinux/config. Set the parameter SELINUX=disabled and reboot.
-bash-5.1# vi /etc/sysconfig/selinux

# This file controls the state of SELinux on the system.
# SELINUX= can take one of these three values:
#     enforcing - SELinux security policy is enforced.
#     permissive - SELinux prints warnings instead of enforcing.
#     disabled - No SELinux policy is loaded.
# See also:
# https://docs.fedoraproject.org/en-US/quick-docs/getting-started-with-selinux/#getting-started-with-selinux-selinux-states-and-modes
#
# NOTE: In earlier Fedora kernel builds, SELINUX=disabled would also
# fully disable SELinux during boot. If you need a system with SELinux
# fully disabled instead of SELinux running with no policy loaded, you
# need to pass selinux=0 to the kernel command line. You can use grubby
# to persistently set the bootloader to boot with selinux=0:
#
#    grubby --update-kernel ALL --args selinux=0
#
# To revert back to SELinux enabled:
#
#    grubby --update-kernel ALL --remove-args selinux
#
SELINUX=disabled
# SELINUXTYPE= can take one of these three values:
#     targeted - Targeted processes are protected,
#     minimum - Modification of targeted policy. Only selected processes are protected.
#     mls - Multi Level Security protection.
SELINUXTYPE=targeted
-bash-5.1# rebootVerify if there are no errors reported in the logs.
-bash-5.1# cat /var/log/messages | grep "SELinux"
Dec  5 13:13:06 webadm1 kernel: SELinux:  Initializing.
Dec  5 13:13:16 webadm1 kernel: SELinux:  policy capability network_peer_controls=1
Dec  5 13:13:16 webadm1 kernel: SELinux:  policy capability open_perms=1
Dec  5 13:13:16 webadm1 kernel: SELinux:  policy capability extended_socket_class=1
Dec  5 13:13:16 webadm1 kernel: SELinux:  policy capability always_check_network=0
Dec  5 13:13:16 webadm1 kernel: SELinux:  policy capability cgroup_seclabel=1
Dec  5 13:13:16 webadm1 kernel: SELinux:  policy capability nnp_nosuid_transition=1
Dec  5 13:13:16 webadm1 kernel: SELinux:  policy capability genfs_seclabel_symlinks=1
Dec  5 13:13:16 webadm1 systemd: Successfully loaded SELinux policy in 182.423ms.
The command semodule -l will show all the SELinux policy modules that are currently loaded into the memory.
-bash-5.1# semodule -l | grep webadm
webadm
Use the command semanage boolean -l to see the different options for the policy modules.
-bash-5.1# semanage boolean -l | grep webadm
webadm_manage_user_files       (off  ,  off)  Allow webadm to manage user files
webadm_read_user_files         (off  ,  off)  Allow webadm to read user files
To switch it on/off use the command setsebool. Use -P to set it permanently.
-bash-5.1# setsebool webadm_manage_user_files on
-bash-5.1# semanage boolean -l | grep webadm
webadm_manage_user_files       (on   ,  off)  Allow webadm to manage user files
webadm_read_user_files         (off  ,  off)  Allow webadm to read user files
-bash-5.1# setsebool webadm_manage_user_files off
-bash-5.1# semanage boolean -l | grep webadm
webadm_manage_user_files       (off  ,  off)  Allow webadm to manage user files
webadm_read_user_files         (off  ,  off)  Allow webadm to read user files
Use audit2allow to build a new local SELinux policy module from the audit logs. There must be a denied operation in cat /var/log/audit/audit.log | grep denied.
-bash-5.1# cat /var/log/audit/audit.log | grep denied
type=AVC msg=audit(1550658061.827:164): avc:  denied  { write } for  pid=11906 comm="logrotate" name="slapd.log" dev="dm-0" ino=868254 scontext=system_u:system_r:logrotate_t:s0-s0:c0.c1023 tcontext=unconfined_u:object_r:usr_t:s0 tclass=file permissive=0
type=AVC msg=audit(1550658061.836:165): avc:  denied  { write } for  pid=11906 comm="logrotate" name="bgjobs.log" dev="dm-0" ino=51131685 scontext=system_u:system_r:logrotate_t:s0-s0:c0.c1023 tcontext=unconfined_u:object_r:usr_t:s0 tclass=file permissive=0
type=AVC msg=audit(1550658061.836:166): avc:  denied  { write } for  pid=11906 comm="logrotate" name="rsignd.log" dev="dm-0" ino=51131689 scontext=system_u:system_r:logrotate_t:s0-s0:c0.c1023 tcontext=unconfined_u:object_r:usr_t:s0 tclass=file permissive=0
type=AVC msg=audit(1550658061.836:167): avc:  denied  { write } for  pid=11906 comm="logrotate" name="sessiond.log" dev="dm-0" ino=51113258 scontext=system_u:system_r:logrotate_t:s0-s0:c0.c1023 tcontext=unconfined_u:object_r:usr_t:s0 tclass=file permissive=0
type=AVC msg=audit(1550658061.836:168): avc:  denied  { write } for  pid=11906 comm="logrotate" name="watchd.log" dev="dm-0" ino=51131691 scontext=system_u:system_r:logrotate_t:s0-s0:c0.c1023 tcontext=unconfined_u:object_r:usr_t:s0 tclass=file permissive=0
type=AVC msg=audit(1550658061.836:169): avc:  denied  { write } for  pid=11906 comm="logrotate" name="webadm.log" dev="dm-0" ino=51131695 scontext=system_u:system_r:logrotate_t:s0-s0:c0.c1023 tcontext=unconfined_u:object_r:usr_t:s0 tclass=file permissive=0
Use the command audit2allow -a to reveal the Type Enforcement rule that allows the denied access.
-bash-5.1# audit2allow -a


#============= logrotate_t ==============

#!!!! This avc is allowed in the current policy
allow logrotate_t usr_t:file write;

-bash-5.1#
Afterward, build a new policy package with the command audit2allow -a -M mynewpolicyXYZ. Finally, to install the module run the command semodule -i mynewpolicyXYZ.
-bash-5.1# semodule -l | grep webadm
webadm
-bash-5.1# semodule -d webadm
-bash-5.1# audit2allow -a -M test_webadm
******************** IMPORTANT ***********************
To make this policy package active, execute:

semodule -i test_webadm.pp

-bash-5.1# semodule -i test_webadm.pp
-bash-5.1# semodule -l | grep webadm
test_webadm
-bash-5.1#
PKI Server
Change Default Password
WebADM includes its own PKI system for issuing user certificates. The default password/secret on the RCDevs Virtual Appliance for the PKI server is secret.
-bash-5.1# vi /opt/webadm/conf/rsignd.conf
#
# WebADM PKI Server Configuration
#
...
#
# Client sections
#
# Declare here the Rsign clients with IP addresses or hostnames.
# In cluster mode, the client WebADM server(s) must be defined here!

client {
 hostname localhost
 secret secret
}
-bash-5.1# vi /opt/webadm/conf/servers.xml<?xml version="1.0" encoding="UTF-8" ?>
<Servers>
<!--
******************************************
*** WebADM Remote Server Connections ***
******************************************
...
A PKI server (or CA) is required for signing user certificates.
The RSign PKI server is included in WebADM. So you can keep the
default settings here.
-->
<PkiServer name="PKI Server"
host="192.168.3.80"
port="5000"
secret="secret"
ca_file="" />
Please, change it by editing the following configuration files /opt/webadm/conf/rsignd.conf and /opt/webadm/conf/servers.xml. Afterward, restart WebADM with the /opt/webadm/bin/webadm restart command.
-bash-5.1# vi /opt/webadm/conf/rsignd.conf
#
# WebADM PKI Server Configuration
#
...
#
# Client sections
#
# Declare here the Rsign clients with IP addresses or hostnames.
# In cluster mode, the client WebADM server(s) must be defined here!

client {
 hostname localhost
 secret fn93.@sX9!q+kG-W
}
-bash-5.1# vi /opt/webadm/conf/servers.xml
<?xml version="1.0" encoding="UTF-8" ?>

<Servers>

<!--
******************************************
***  WebADM Remote Server Connections  ***
******************************************
...

A PKI server (or CA) is required for signing user certificates.
The RSign PKI server is included in WebADM. So you can keep the
default settings here.
-->

<PkiServer name="PKI Server"
	host="192.168.3.80"
	port="5000"
	secret="fn93.@sX9!q+kG-W"
	ca_file="" />
-bash-5.1# /opt/webadm/bin/webadm restart
Encrypt the configuration passwords.
Warning This feature requires an Enterprise License and the encryption mechanism is bound to secret data in your encoded license file.
Please follow this doc RCDevs Utilities and Command Line Tools for WebADM.
For example:
-bash-5.1# /opt/webadm/bin/pwcrypt -p
This script allows to encrypt some sensitive WebADM configuration settings
like user passwords and encryption keys. You can also replace the cleartext
passwords and keys with encrypted values in webadm.conf and servers.xml.

Secret: ****************
Encrypted: {wcrypt}Ucw4WJir9VGFzeKoTdYkOWAkO/kXIHSlkl655RyGHJc=
-bash-5.1# vi /opt/webadm/conf/rsignd.conf
#
# WebADM PKI Server Configuration
#
...
#
# Client sections
#
# Declare here the Rsign clients with IP addresses or hostnames.
# In cluster mode, the client WebADM server(s) must be defined here!

client {
 hostname localhost
 secret "{wcrypt}Ucw4WJir9VGFzeKoTdYkOWAkO/kXIHSlkl655RyGHJc="
}
-bash-5.1# vi /opt/webadm/conf/servers.xml
<?xml version="1.0" encoding="UTF-8" ?>

<Servers>

<!--
******************************************
***  WebADM Remote Server Connections  ***
******************************************
...

A PKI server (or CA) is required for signing user certificates.
The RSign PKI server is included in WebADM. So you can keep the
default settings here.
-->

<PkiServer name="PKI Server"
	host="192.168.3.80"
	port="5000"
	secret="{wcrypt}Ucw4WJir9VGFzeKoTdYkOWAkO/kXIHSlkl655RyGHJc="
	ca_file="" />
-bash-5.1# /opt/webadm/bin/webadm restart
Change Port
If you need to change the PKI port, then edit the following configuration file /opt/webadm/conf/rsignd.conf and add for example port 5555.
-bash-5.1# vi /opt/webadm/conf/rsignd.conf
...
# Set to yes if the CA or RSignd private keys requires a decryption password.
# PEM passwords will be prompted at WebADM startup.
ca_password no
rsignd_password no

port 5555
...
Of course, you need to change the port for the PKI server also in the following configuration file /opt/webadm/conf/servers.xml.
-bash-5.1# vi /opt/webadm/conf/servers.xml
<!--
A PKI server (or CA) is required for signing user certificates.
The RSign PKI server is included in WebADM. So you can keep the
default settings here.
-->

<PkiServer name="PKI Server"
        host="localhost"
        port="5555"
        secret="secret"
        ca_file="" />
Now, restart WebADM with the command /opt/webadm/bin/webadm restart.
-bash-5.1# /opt/webadm/bin/webadm restart
...
Checking server connections...
Connected LDAP server: LDAP Server (127.0.0.1)
Connected SQL server: SQL Server (::1)
Connected PKI server: PKI Server (127.0.0.1)
Connected Push server: Push Server (91.134.128.157)
Connected Session server: Session Server (::1)
Connected License server: License Server (91.134.128.157)
...
Finally, verify if the port has really changed with following command ss -tupln | grep rsignd or check it in the WebADM GUI>Databases>PKI Server Log File.
-bash-5.1# ss -tupln | grep rsignd
tcp   LISTEN 0      0            0.0.0.0:5000       0.0.0.0:*    users:(("webadm-rsignd",pid=1632,fd=4))
Of course, for a cluster setup, the same steps need to be done on the other nodes too. Don't forget to change the firewall rules.
RADIUS Client
If you are using RADIUS, please remove the default client definition which allows every client by default. You should also use strong passwords as RADIUS secrets.
-bash-5.1# vi /opt/radiusd/conf/clients.conf
#  Define RADIUS clients (usually a NAS, Access Point, etc.).
#
#  '127.0.0.1' is another name for 'localhost'.  It is enabled by default,
#  to allow testing of the server after an initial installation.  If you
#  are not going to be permitting RADIUS queries from localhost, we suggest
#  that you delete, or comment out, this entry.
#
#  Each client has a "short name" that is used to distinguish it from
#  other clients.
#
#  In version 1.x, the string after the word "client" was the IP
#  address of the client.  In 2.0, the IP address is configured via
#  the "ipaddr" or "ipv6addr" fields.  For compatibility, the 1.x
#  format is still accepted.

#client localhost {
	#  Only *one* of ipaddr, ipv4addr, ipv6addr may be specified for
	#  a client.
	#
	#  ipaddr will accept IPv4 or IPv6 addresses with optional CIDR
	#  notation '/<mask>' to specify ranges.
	#
	#  ipaddr will accept domain names e.g. example.org resolving
	#  them via DNS.
	#
	#  If both A and AAAA records are found, A records will be
	#  used in preference to AAAA.
	#ipaddr = 127.0.0.1

	#  Same as ipaddr but allows v4 addresses only. Requires A
	#  record for domain names.
	#ipv4addr = *	# any.  127.0.0.1 == localhost

	#  Same as ipaddr but allows v6 addresses only. Requires AAAA
	#  record for domain names.
	#ipv6addr = ::	# any.  ::1 == localhost

	#  The shared secret use to "encrypt" and "sign" packets between
	#  the NAS and FreeRADIUS.  You MUST change this secret from the
	#  default, otherwise it's not a secret any more!
	#
	#  The secret can be any string, up to 8k characters in length.
	#
	#  Control codes can be entered vi octal encoding,
	#	e.g. "\101\102" == "AB"
	#  Quotation marks can be entered by escaping them,
	#	e.g. "foo\"bar"
	#
	#  A note on security:  The security of the RADIUS protocol
	#  depends COMPLETELY on this secret!  We recommend using a
	#  shared secret that is composed of:
	#
	#	upper case letters
	#	lower case letters
	#	numbers
	#
	#  And is at LEAST 8 characters long, preferably 16 characters in
	#  length.  The secret MUST be random, and should not be words,
	#  phrase, or anything else that is recognisable.
	#
	#  The default secret below is only for testing, and should
	#  not be used in any real environment.
	#
	#secret = testing123

	#  Old-style clients do not send a Message-Authenticator
	#  in an Access-Request.  RFC 5080 suggests that all clients
	#  SHOULD include it in an Access-Request.  The configuration
	#  item below allows the server to require it.  If a client
	#  is required to include a Message-Authenticator and it does
	#  not, then the packet will be silently discarded.
	#
	#  allowed values: yes, no
	#require_message_authenticator = no

	#
	#  The short name is used as an alias for the fully qualified
	#  domain name, or the IP address.
	#
	#  It is accepted for compatibility with 1.x, but it is no
	#  longer necessary in >= 2.0
	#
	#shortname = localhost
#}

# IPv6 Client
#client localhost_ipv6 {
#	ipv6addr	= ::1
#	secret		= testing123
#}

# DNS client
#client example.org {
#	ipaddr		= radius.example.org
#	secret		= testing123
#}

# Default client (Radius Bridge allows any client to connect)
client any {
        ipaddr = *
        secret = testing123
}
Therefore, you need to set the IP address of your RADIUS client and the shared RADIUS secret. On the VPN side, you will configure a RADIUS server with its IP address (i.e. the RB server IP address), and you will set the same secret.
# Default client (Radius Bridge allows any client to connect)
client any {
        ipaddr = 192.168.0.10
        secret = testing123
}
RCDevs Directory Server
Encrypt slapd Password
Please encrypt the WebADM Encryption Key. Please follow this doc RCDevs Utilities and Command Line Tools for WebADM.
Warning This feature requires an Enterprise License and the encryption mechanism is bound to secret data in your encoded license file.
For example:
-bash-5.1# /opt/webadm/bin/pwcrypt -p
This script allows to encrypt some sensitive WebADM configuration settings
like user passwords and encryption keys. You can also replace the cleartext
passwords and keys with encrypted values in webadm.conf and servers.xml.

Secret: ****************
Encrypted: {wcrypt}Hn6CMCjGEecs6G3u6+yfJzV7v0ibYBumFibrYfRQmdI=

-bash-5.1# vi /opt/webadm/conf/webadm.conf
...
# The proxy user is used by WebADM for accessing LDAP objects over which the
# admin user does not have read permissions or out of an admin session.
# The proxy user should have read permissions on the whole LDAP tree,
# and write permissions on the users/groups used by the WebApps and WebSrvs.
# The use of a proxy user is required for WebApps and WebSrvs.
# With ActiveDirectory, you can use any Domain Administrator DN as a proxy user,
# which should look like cn=Administrator,cn=Users,dc=mydomain,dc=com.
proxy_user "cn=webadm,dc=WebADM"
proxy_password "{wcrypt}Hn6CMCjGEecs6G3u6+yfJzV7v0ibYBumFibrYfRQmdI="
...
-bash-5.1# /opt/webadm/bin/webadm restart
Reset slapd Password
If you have forgotten your admin password for the RCDevs Directory Server (slapd) then you are able to reset it. Therefore, you need access to your WebADM Server via SSH. For example:
-bash# ssh root@192.168.3.167
root@192.168.3.167's password:
Last login: Fri May 10 14:30:46 2019 from 192.168.3.233
-bash-5.1#
Now, edit the configuration file of the slapd /opt/slapd/conf/slapd.conf and enable the line rootpw "password" by removing the #. Afterward, restart the slapd service with the command /opt/slapd/bin/slapd restart.
-bash-5.1# vi /opt/slapd/conf/slapd.conf
# RCDevs Directory Server configuration
...
# You uncomment the following line to force a rootdn password.
# When uncommented, both your LDAP password the rootpw are usable
# for the rootdn. You can also use the rootpw as a recovery option
# in case the rootdn password get lost.
rootpw         "password"
...
-bash-5.1# /opt/slapd/bin/slapd restart
Stopping RCDevs LDAP Directory... Ok
Checking system architecture... Ok
Checking server configuration... Ok
Starting RCDevs LDAP Directory... Ok
-bash-5.1#
Log into the WebADM GUI with admin and password. Afterward, change your slapd password.
On the RCDevs Virtual Appliance, the default password for the RCDevs Directory Server (slapd) is password. To change the default password log into the WebADM GUI. Select the Super Administrator, which would be admin if you're using slapd, but in this example, since we're using Active Directory, it's Administrator. Then click on Change password.
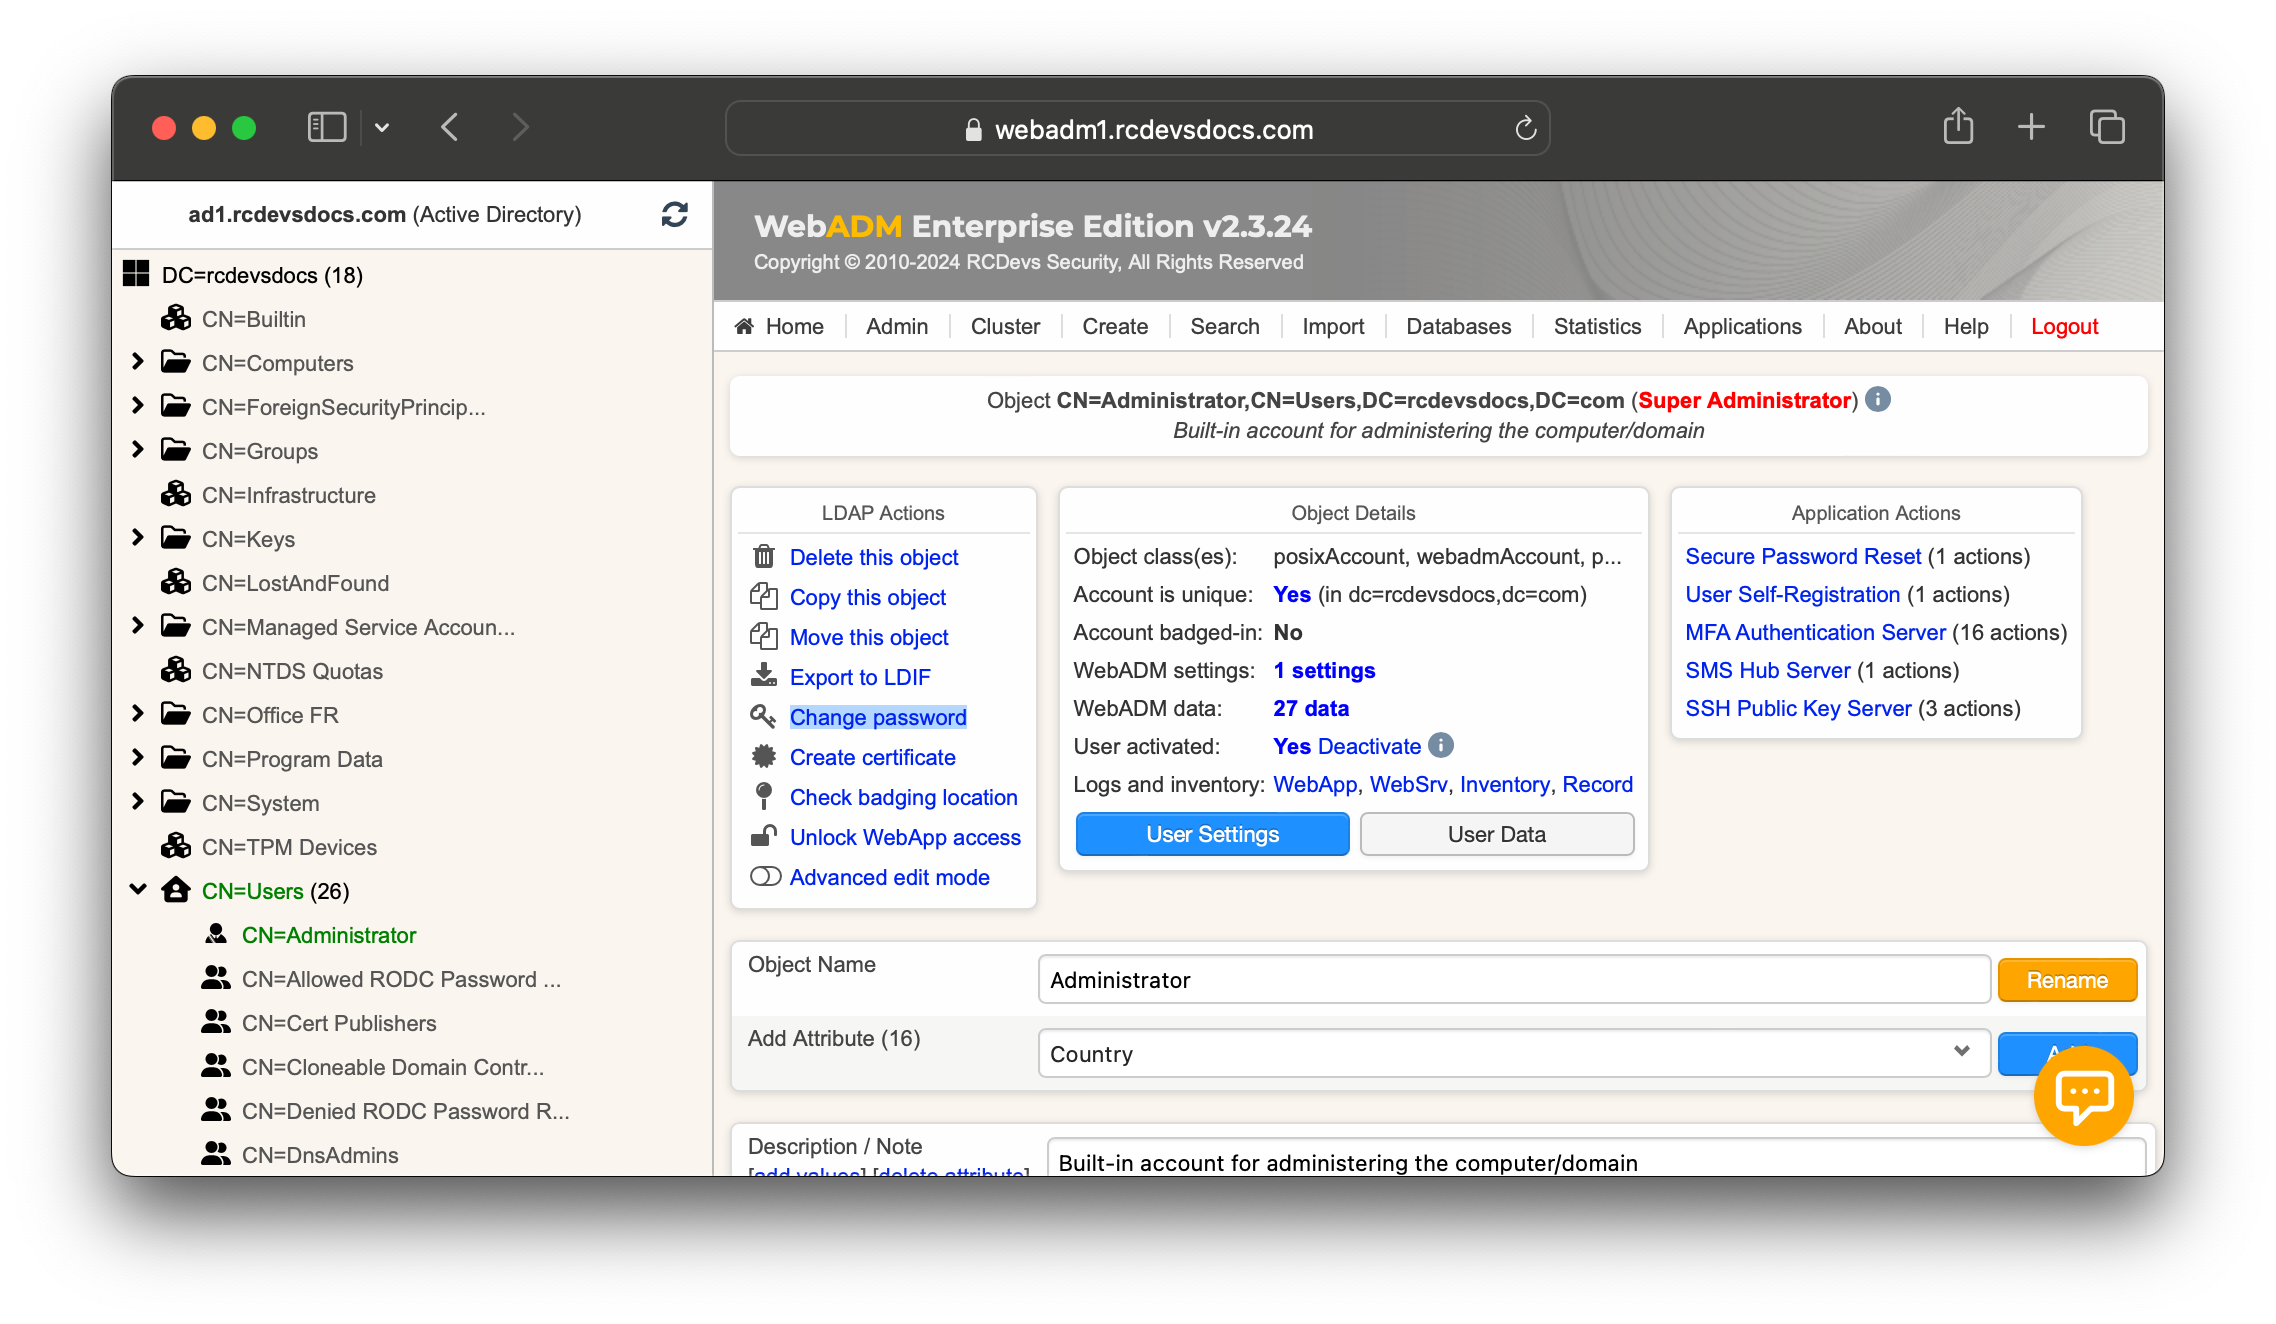
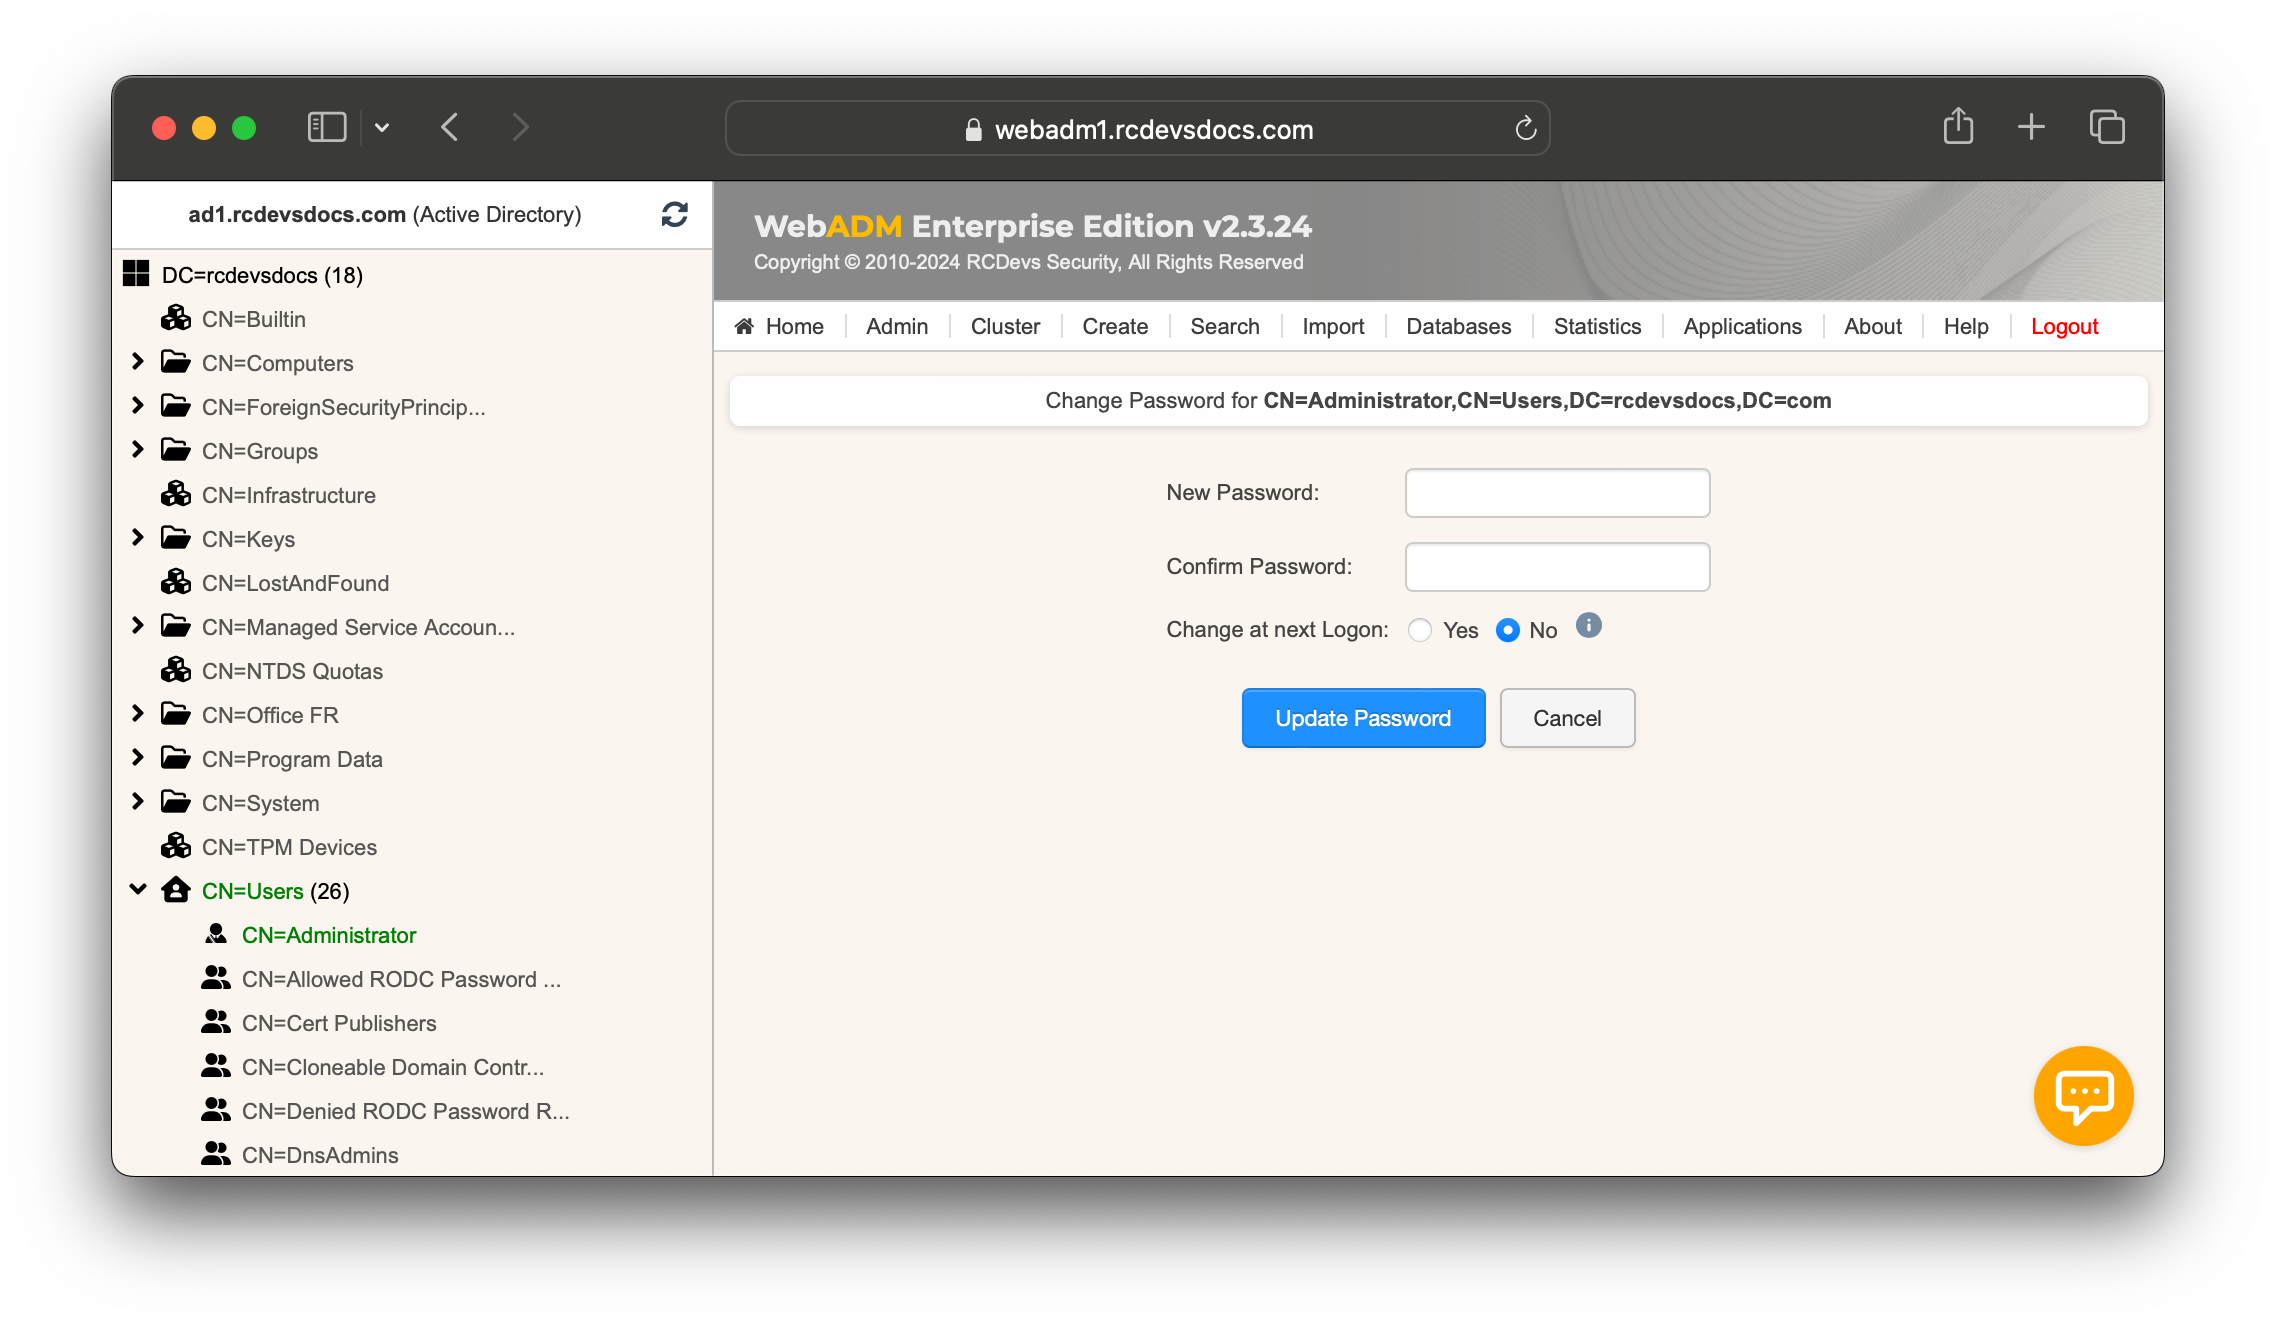
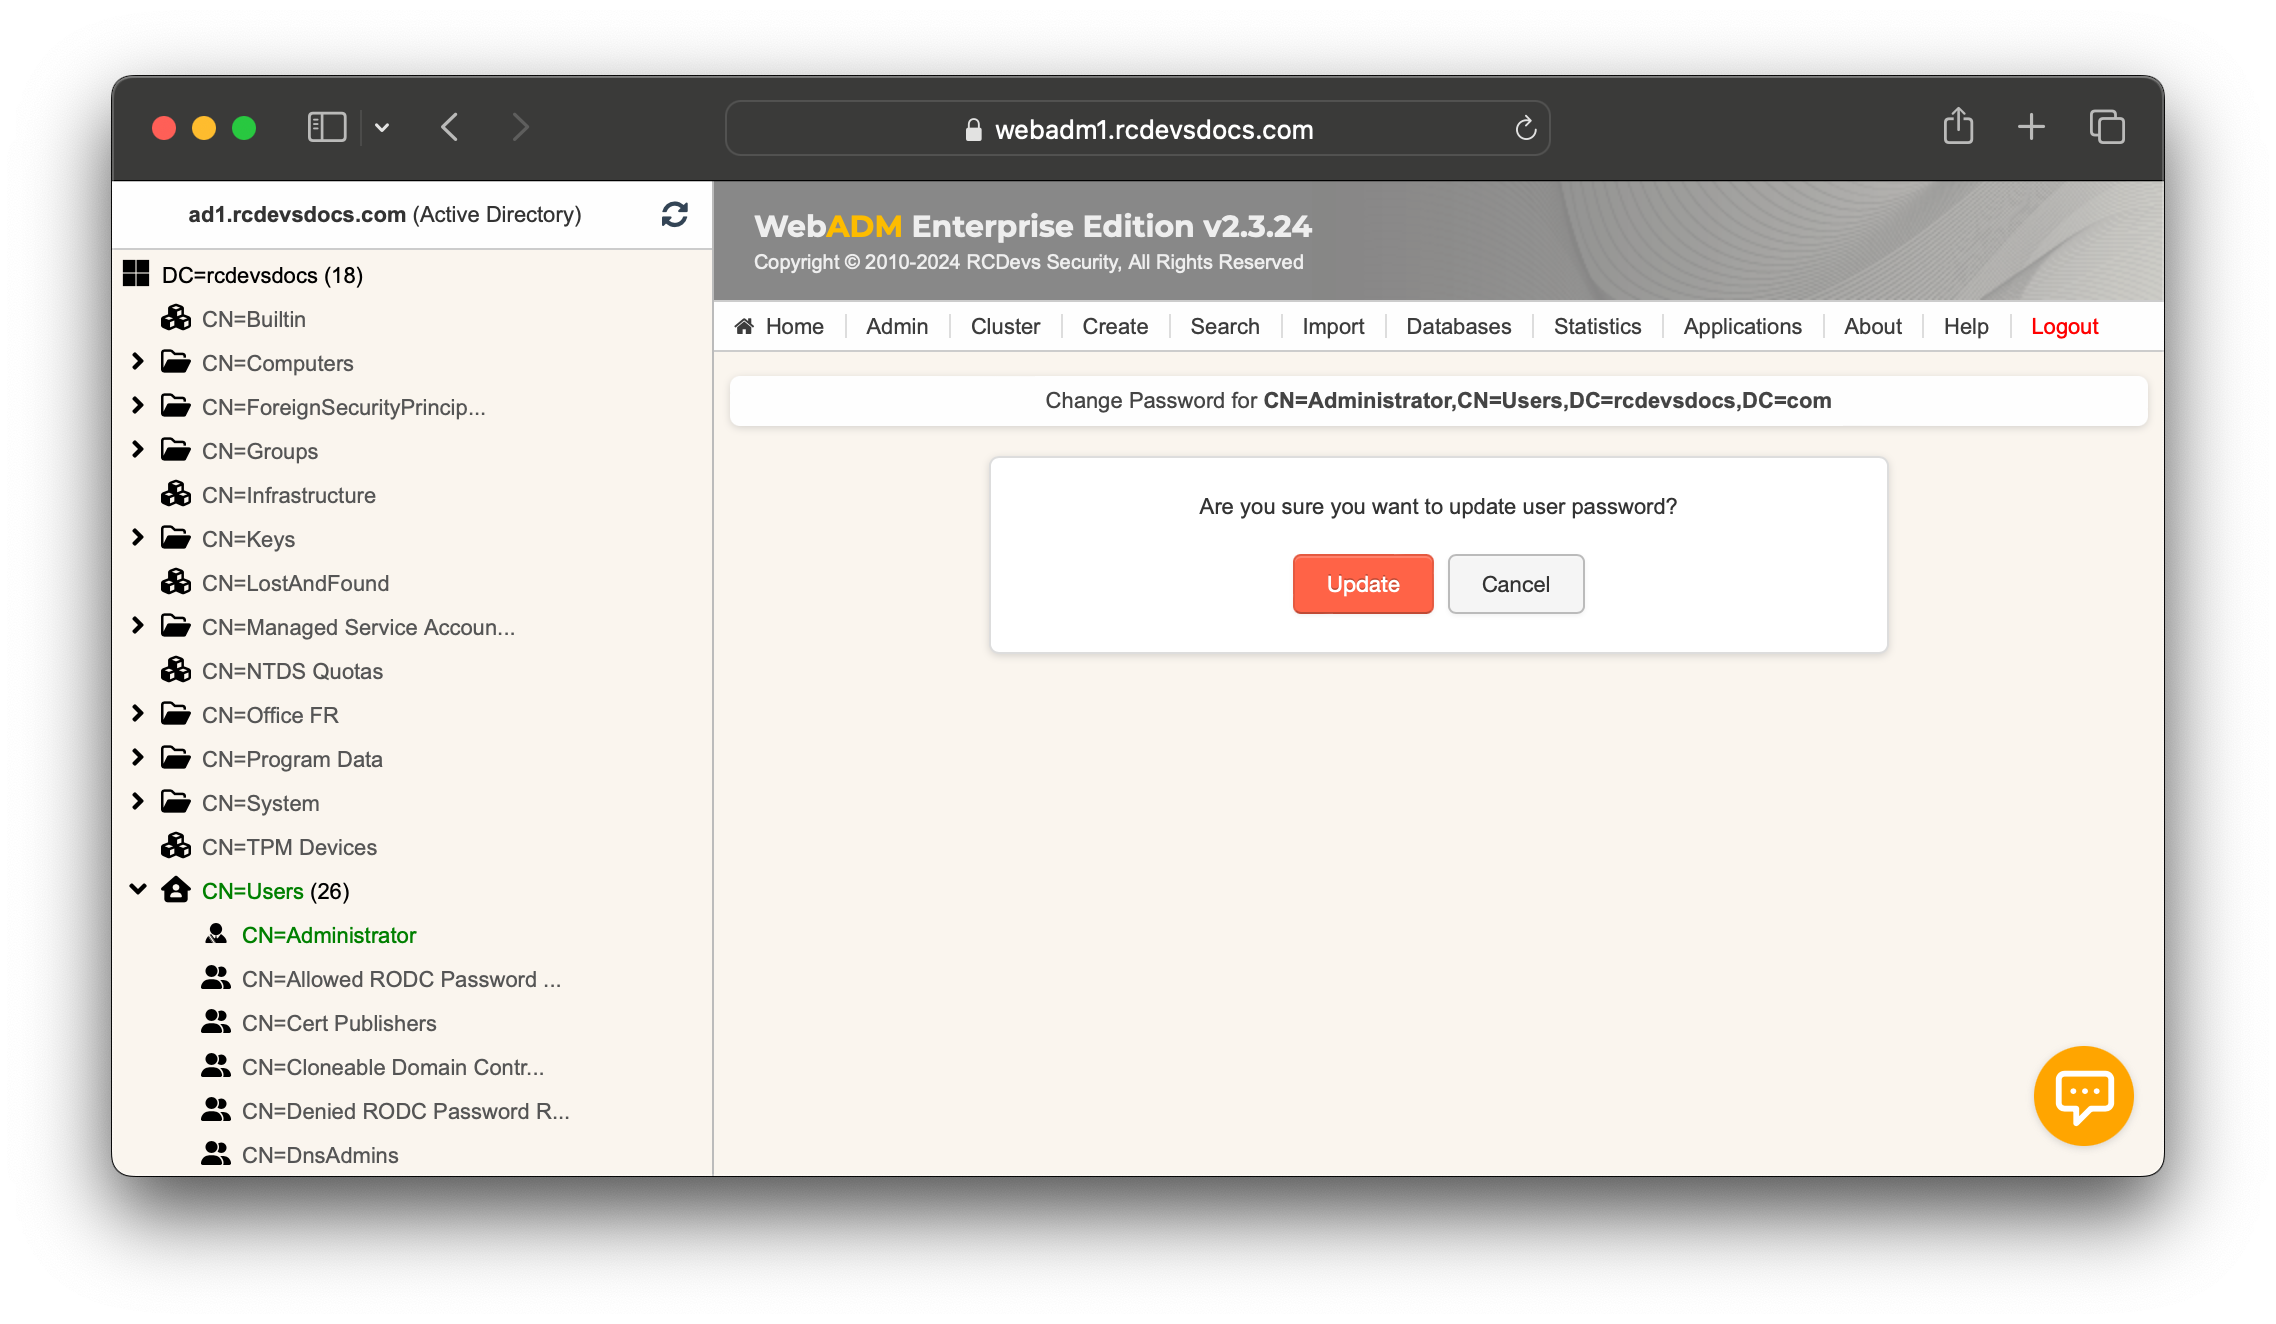
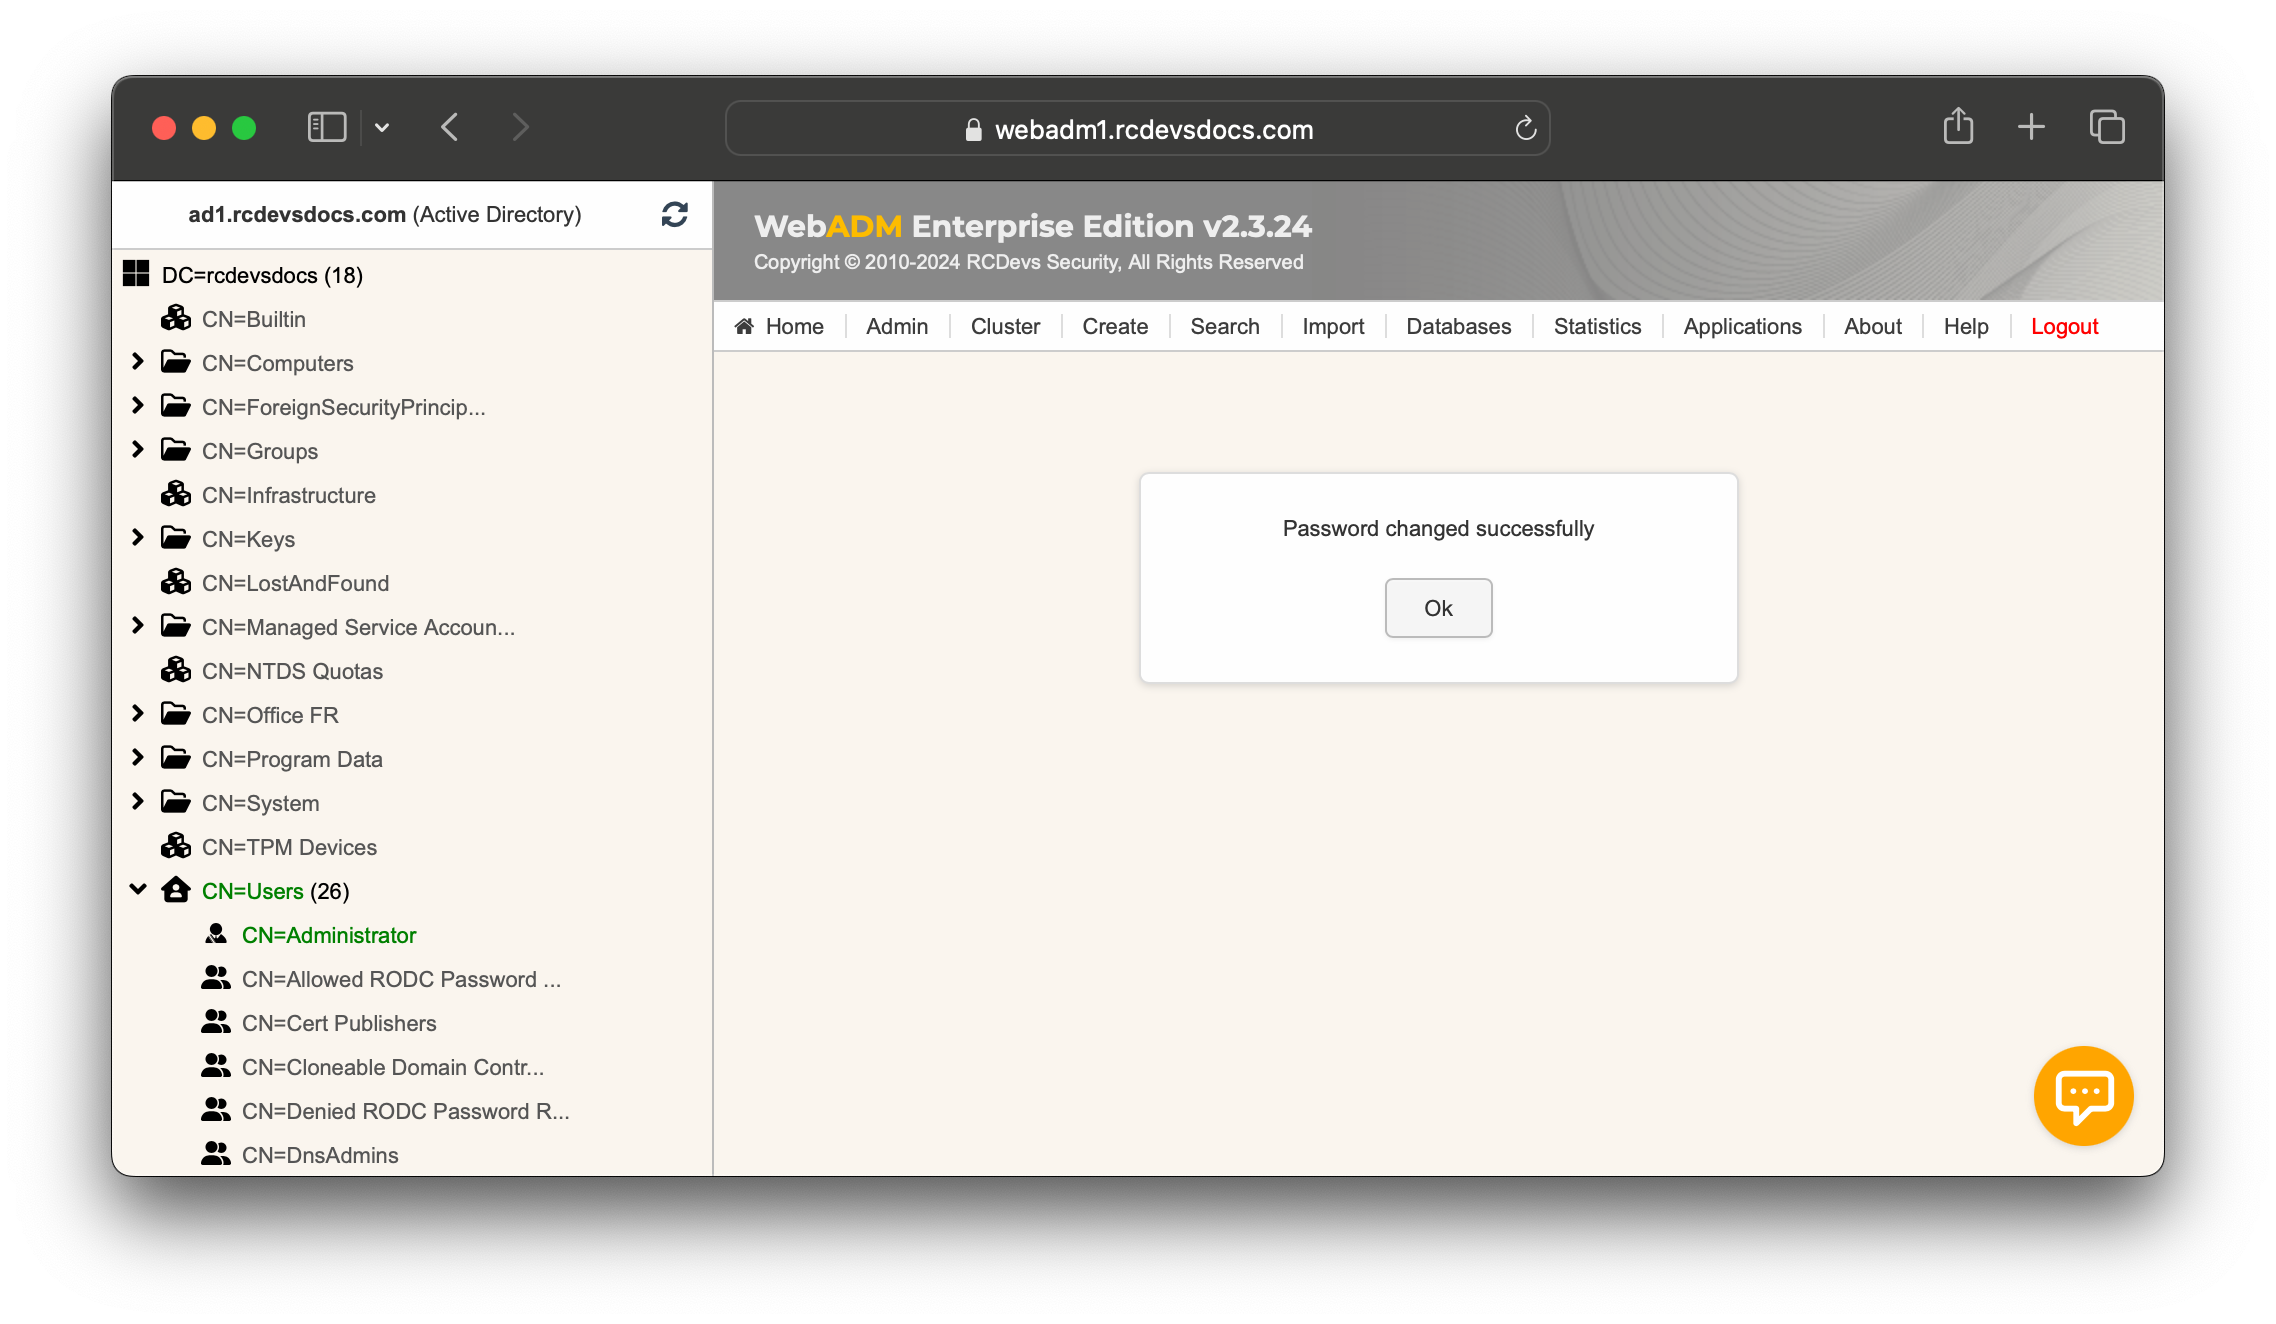
Log out and log in with the new LDAP Administrator password.
Finally, comment the line rootpw "password" by adding the # in the configuration file of the slapd /opt/slapd/conf/slapd.conf and restart the slapd service with the command /opt/slapd/bin/slapd restart.
-bash-5.1# vi /opt/slapd/conf/slapd.conf
# RCDevs Directory Server configuration
...
# You uncomment the following line to force a rootdn password.
# When uncommented, both your LDAP password the rootpw are usable
# for the rootdn. You can also use the rootpw as a recovery option
# in case the rootdn password get lost.
#rootpw         "password"
...
-bash-5.1# /opt/slapd/bin/slapd restart
Stopping RCDevs LDAP Directory... Ok
Checking system architecture... Ok
Checking server configuration... Ok
Starting RCDevs LDAP Directory... Ok
-bash-5.1#
Change Ciphersuite
In default configuration different SSL/TLS version and ciphers are supported to maintain compatibility with older clients. You can enable/disable them further by using configuration settings in /opt/slapd/conf/slapd.conf.
In the following example, only SSL Protocol TLSv1.2 and cipher AES256-GCM-SHA384 are enabled:
-bash-5.1# vi /opt/slapd/conf/slapd.conf
...
# The next three lines allow use of TLS for encrypting connections
TLSCertificateFile    /opt/slapd/conf/slapd.crt
TLSCertificateKeyFile /opt/slapd/conf/slapd.key
#TLSCipherSuite        HIGH:!SSLv2:!SSLv3:!ADH:!aNULL:!eNULL:!NULL
TLSCipherSuite        AES256-GCM-SHA384
TLSVerifyClient       never
TLSProtocolMin        3.3
...
Save the configuration and restart the RCDevs Directory Server (slapd) for the changes to take effect with the /opt/slapd/bin/slapd restart command.
After your changes, you can use NMAP tool to check which SSL/TLS versions and Ciphers are allowed.
nmap --script +ssl-enum-ciphers slapd_ip
-bash-5.1# nmap --script +ssl-enum-ciphers -p 636 localhost
Starting Nmap 7.92 ( https://nmap.org ) at 2024-12-06 11:18 CET
Nmap scan report for localhost (127.0.0.1)
Host is up (0.000059s latency).
Other addresses for localhost (not scanned): ::1

PORT    STATE SERVICE
636/tcp open  ldapssl
| ssl-enum-ciphers:
|   TLSv1.2:
|     ciphers:
|       TLS_RSA_WITH_AES_256_GCM_SHA384 (rsa 4096) - A
|     compressors:
|       NULL
|     cipher preference: indeterminate
|     cipher preference error: Too few ciphers supported
|     warnings:
|       Forward Secrecy not supported by any cipher
|   TLSv1.3:
|     ciphers:
|       TLS_AKE_WITH_AES_256_GCM_SHA384 (ecdh_x25519) - A
|       TLS_AKE_WITH_CHACHA20_POLY1305_SHA256 (ecdh_x25519) - A
|       TLS_AKE_WITH_AES_128_GCM_SHA256 (ecdh_x25519) - A
|     cipher preference: server
|_  least strength: A

Nmap done: 1 IP address (1 host up) scanned in 0.40 seconds
Now, change the port to 636 and encryption to SSL for the RCDevs Directory Server (slapd) in /opt/webadm/conf/servers.xml like below:
-bash-5.1# vi /opt/webadm/conf/servers.xml
...
<LdapServer name="LDAP Server"
        host="localhost"
        port="636"
        encryption="SSL"
        ca_file="" />
...
Afterward, restart WebADM with the /opt/webadm/bin/webadm restart command.
Reset Root Password RCDevs-VM
If you have changed and forgotten the root password of your RCDevs Virtual Appliance then follow these steps:
Boot your RCDevs Virtual Appliance machine. Press any key to enter the GRUB boot menu. From the GRUB menu, press the `ae key to modify the kernel arguments before booting.
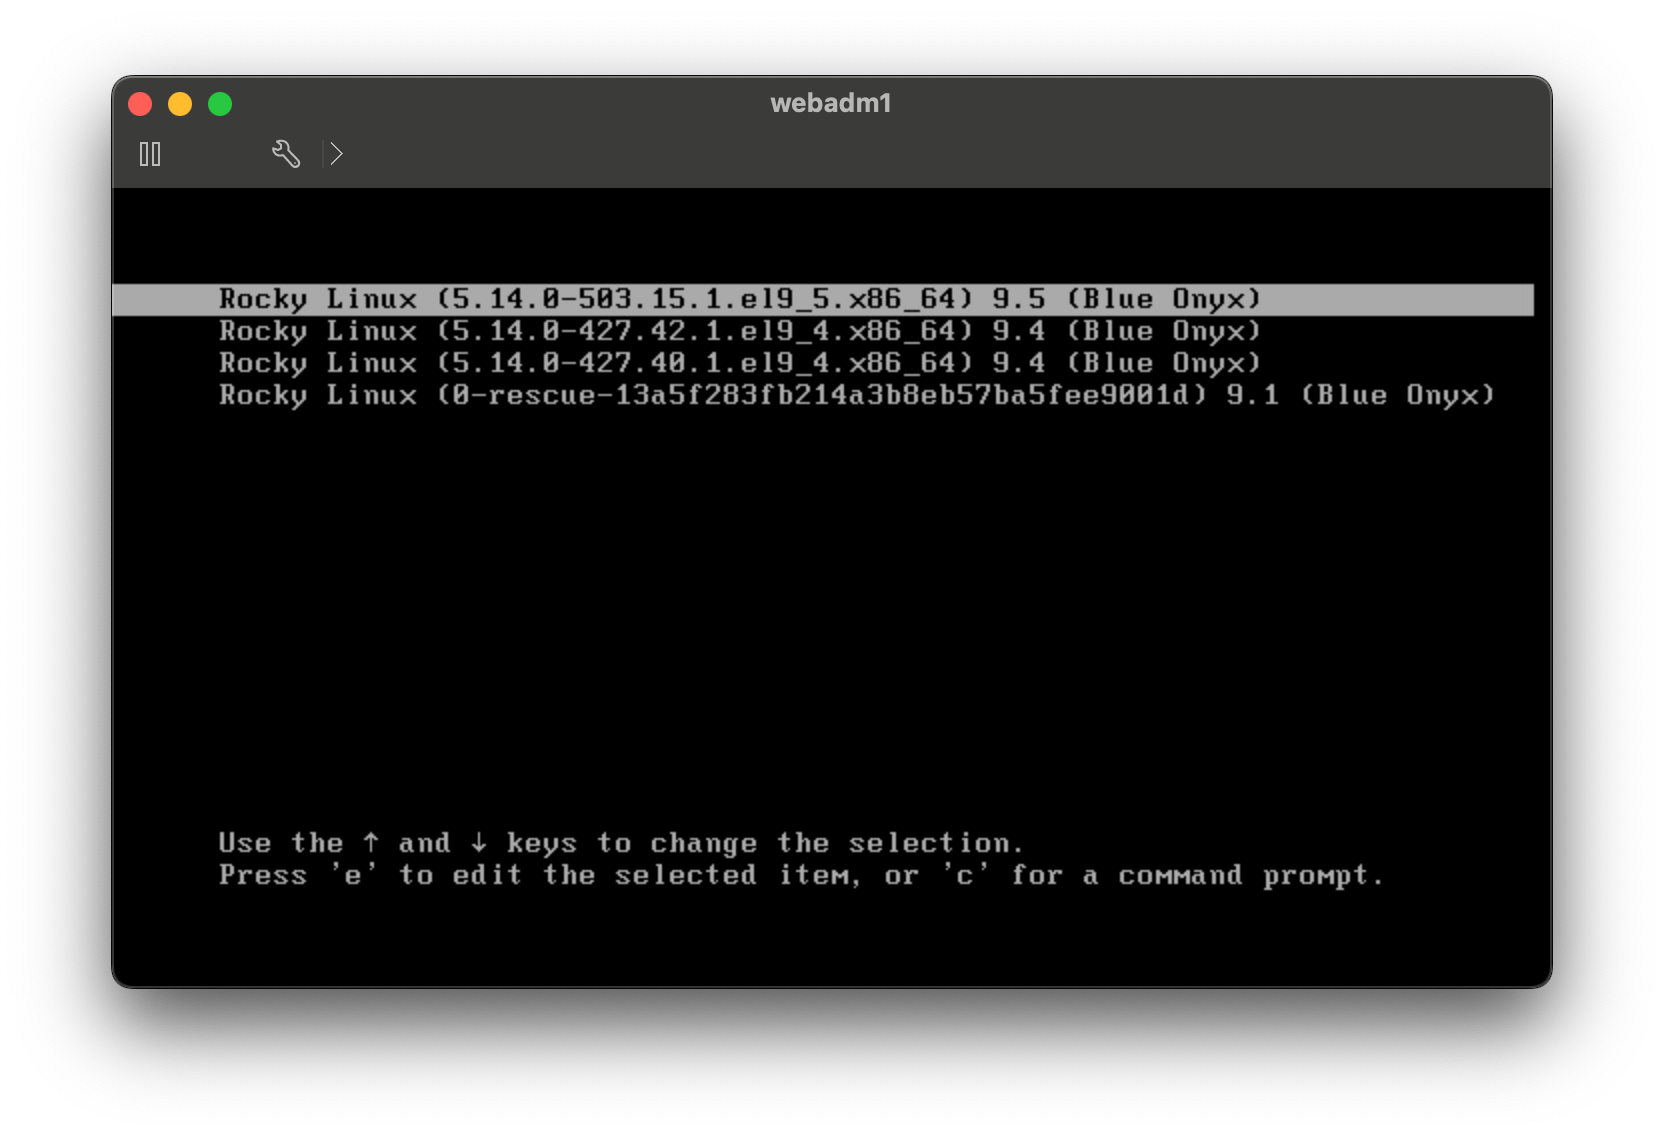
Add the following parameters rw init=/bin/bash at the end of the line starting with linux . Press ENTER to boot the system with the new argument.
After reboot, type the following command into the terminal to change the root password: passwd. Add the file /.autorelabel since we changed /etc/shadow without SELinux' knowledge. Afterward, reboot the RCDevs Virtual Appliance.
Now, after waiting for SELinux relabeling during the boot process, you can log in as root with your new password.
Secure MySQL/MariaDB Databases
After having installed MySQL/MariaDB, please run the script called mysql_secure_installation. It will ask you to change the root password, remove the ability for anyone to log into MySQL by default, disable logging in remotely with the administrator account and remove some test databases that are insecure. To enable SSL/TLS for MariaDB Replication, have a look at WebADM High Availability Guide.
-bash-5.1# mysql_secure_installation

NOTE: RUNNING ALL PARTS OF THIS SCRIPT IS RECOMMENDED FOR ALL MariaDB
      SERVERS IN PRODUCTION USE!  PLEASE READ EACH STEP CAREFULLY!

In order to log into MariaDB to secure it, we'll need the current
password for the root user.  If you've just installed MariaDB, and
you haven't set the root password yet, the password will be blank,
so you should just press enter here.

Enter current password for root (enter for none):
OK, successfully used password, moving on...

Setting the root password ensures that nobody can log into the MariaDB
root user without the proper authorisation.

You already have a root password set, so you can safely answer 'n'.

Change the root password? [Y/n]
New password:
Re-enter new password:
Password updated successfully!
Reloading privilege tables..
 ... Success!


By default, a MariaDB installation has an anonymous user, allowing anyone
to log into MariaDB without having to have a user account created for
them.  This is intended only for testing, and to make the installation
go a bit smoother.  You should remove them before moving into a
production environment.

Remove anonymous users? [Y/n]
 ... Success!

Normally, root should only be allowed to connect from 'localhost'.  This
ensures that someone cannot guess at the root password from the network.

Disallow root login remotely? [Y/n]
 ... Success!

By default, MariaDB comes with a database named 'test' that anyone can
access.  This is also intended only for testing, and should be removed
before moving into a production environment.

Remove test database and access to it? [Y/n]
 - Dropping test database...
 ... Success!
 - Removing privileges on test database...
 ... Success!

Reloading the privilege tables will ensure that all changes made so far
will take effect immediately.

Reload privilege tables now? [Y/n]
 ... Success!

Cleaning up...

All done!  If you've completed all of the above steps, your MariaDB
installation should now be secure.

Thanks for using MariaDB!
-bash-5.1#
To change to the webadm user's password, do as follows, where newpass must be replaced with your new password. Of course, you must set the new password in the WebADM server configuration file /opt/webadm/conf/servers.xml and restart WebADM.
-bash-5.1# mysql -u root -p
Enter password:
Welcome to the MariaDB monitor.  Commands end with ; or \g.
Your MariaDB connection id is 1087
Server version: 10.5.22-MariaDB MariaDB Server

Copyright (c) 2000, 2018, Oracle, MariaDB Corporation Ab and others.

Type 'help;' or '\h' for help. Type '\c' to clear the current input statement.

MariaDB [(none)]> SET PASSWORD FOR 'webadm'@'localhost' = PASSWORD('newpass');
Query OK, 0 rows affected (0.00 sec)

MariaDB [(none)]> exit
Bye
-bash-5.1#
-bash-5.1# vi /opt/webadm/conf/servers.xml

******************************************
***  WebADM Remote Server Connections  ***
******************************************
...

<SqlServer name="SQL Server"
        type="MySQL"
        host="localhost"
        user="webadm"
        password="newpass"
        database="webadm"
        encryption="NONE" />

-bash-5.1#
-bash-5.1# /opt/webadm/bin/webadm restart
Stopping WebADM HTTP server... Ok
Stopping WebADM Watchd server.... Ok
Stopping WebADM PKI server... Ok
Stopping WebADM Session server... Ok
Checking libudev dependency... Ok
Checking system architecture... Ok
Checking server configurations... Ok

No Enterprise license found (using bundled Freeware license)
Please contact sales@rcdevs.com for commercial information

Starting WebADM Session server... Ok
Starting WebADM PKI server... Ok
Starting WebADM Watchd server... Ok
Starting WebADM HTTP server... Ok

Checking server connections. Please wait...
Connected LDAP server: LDAP Server 1 (192.168.3.173)
Connected SQL server: SQL Server (127.0.0.1)
Connected PKI server: PKI Server (127.0.0.1)
Connected Session server: Session Server (::1)

Checking LDAP proxy user access... Ok
Checking SQL database access... Ok
Checking PKI service access... Ok
-bash-5.1#
Secure Email
Encrypt OTP email with the user certificate public key (S-MIME). Please, follow this documentation Mail OTP - 3.5 Encrypt Mail OTP.
Session Server
There is no default password/secret for the session server. Please, add a strong password by editing the following configuration file /opt/webadm/conf/servers.xml.
-bash-5.1# vi /opt/webadm/conf/servers.xml
<!--
A session server is required for web services using sessions
such as OpenOTP. You can specify one or more SQL servers here.
The session server is included in WebADM. So you can keep the
default settings here.
-->

<SessionServer name="Session Server"
	host="192.168.3.80"
	port="4000"
	secret="" />
Afterward, restart WebADM with the /opt/webadm/bin/webadm restart command.
-bash-5.1# vi /opt/webadm/conf/servers.xml
<!--
A session server is required for web services using sessions
such as OpenOTP. You can specify one or more SQL servers here.
The session server is included in WebADM. So you can keep the
default settings here.
-->

<SessionServer name="Session Server"
	host="192.168.3.80"
	port="4000"
	secret="g8Ns3+aoU!7B-fxR" />
-bash-5.1# /opt/webadm/bin/webadm restart
If you are using a High Availability Cluster then you must add the new password/secret to every node.
Encrypt the configuration passwords, this feature requires an Enterprise License and the encryption mechanism is bound to secret data in your encoded license file. Please follow this doc RCDevs Utilities and Command Line Tools for WebADM.
SSH Access
To disable root SSH access, edit the following file /etc/ssh/sshd_config. Then add/edit the following line: PermitRootLogin no. To force SSH to allow only users to log in with public key authentication. Then add/edit the following line: PasswordAuthentication no. Limit the ciphers and Message Authentication Codes (MACs) to those algorithms which are FIPS-approved. Counter (CTR) mode is also preferred over cipher-block chaining (CBC) mode. Therefore, add/edit the following line: Ciphers aes128-ctr,aes192-ctr,aes256-ctr,aes128-cbc,3des-cbc,aes192-cbc,aes256-cbc and Macs hmac-sha1,hmac-sha2-256,hmac-sha2-512.
-bash-5.1# vi /etc/ssh/sshd_config
#       $OpenBSD: sshd_config,v 1.104 2021/07/02 05:11:21 dtucker Exp $

# This is the sshd server system-wide configuration file.  See
# sshd_config(5) for more information.
...
# Ciphers and keying
#RekeyLimit default none
Ciphers aes128-ctr,aes192-ctr,aes256-ctr,aes128-cbc,3des-cbc,aes192-cbc,aes256-cbc
Macs hmac-sha1,hmac-sha2-256,hmac-sha2-512
...
Afterward, don't forget to restart the SSHD service with the following command systemctl restart sshd or simply reboot your OS.
Trusted SSL/TLS Certificates
You can use your own SSL certificates instead of the pre-generated ones. Please follow this doc RCDevs Trusted Certificate.
SSL/TLS Ciphersuite
WebADM
In default configuration different SSL/TLS version and ciphers are supported to maintain compatibility with older clients. You can enable/disable them further by using configuration settings in /opt/webadm/conf/webadm.env (if this file doesn't exist in your environment, please create it). Typically, you can rewrite variables defined in /opt/webadm/bin/webadm in a webadm.env file.
In the following example, only SSL Protocol TLSv1.2 and ciphers ECDHE-RSA-AES256-GCM-SHA384, AES256-GCM-SHA384 are enabled:
-bash-5.1# vi /opt/webadm/conf/webadm.env
SSL_PROTOCOL="ALL -TLSv1.1 -TLSv1 -SSLv2 -SSLv3"
SSL_CIPHERSUITE="ECDHE-RSA-AES256-GCM-SHA384:AES256-GCM-SHA384"
Warning If user certificate authentication is enabled, this is better to disable TLSv1.3 and keep only TLSv1.2, as most browser are not compatible with TLS 1.3 post-handshake authentication. In that case, use the following SSL_PROTOCOL value:
SSL_PROTOCOL="ALL -TLSv1.1 -TLSv1 -SSLv2 -SSLv3 -TLSv1.3"
Save the configuration and restart WebADM for the changes to take effect. You can find further details on the configuration options from Apache documentation. Apache Docs
If you need more information about recommended SSL/TLS ciphers then have a look at Mozilla Wiki.
After your changes, you can use NMAP tool to check which SSL/TLS versions and Ciphers are allowed.
nmap --script +ssl-enum-ciphers webadm_ip
[root@webadm1 ~]# nmap --script +ssl-enum-ciphers -p 443 localhost
Starting Nmap 7.92 ( https://nmap.org ) at 2024-12-06 14:21 CET
Nmap scan report for localhost (127.0.0.1)
Host is up (0.000065s latency).
Other addresses for localhost (not scanned): ::1

PORT    STATE SERVICE
443/tcp open  https
| ssl-enum-ciphers:
|   TLSv1.2:
|     ciphers:
|       TLS_ECDHE_RSA_WITH_AES_256_GCM_SHA384 (ecdh_x25519) - A
|       TLS_RSA_WITH_AES_256_GCM_SHA384 (rsa 4096) - A
|     compressors:
|       NULL
|     cipher preference: server
|     warnings:
|       Key exchange (ecdh_x25519) of lower strength than certificate key
|   TLSv1.3:
|     ciphers:
|       TLS_AKE_WITH_AES_256_GCM_SHA384 (ecdh_x25519) - A
|       TLS_AKE_WITH_CHACHA20_POLY1305_SHA256 (ecdh_x25519) - A
|       TLS_AKE_WITH_AES_128_GCM_SHA256 (ecdh_x25519) - A
|     cipher preference: server
|_  least strength: A

Nmap done: 1 IP address (1 host up) scanned in 0.49 seconds
WAProxy
In the following example, only SSL Protocol TLSv1.2 and ciphers ECDHE-RSA-AES256-GCM-SHA384, AES256-GCM-SHA384 are enabled:
-bash-5.1# vi /opt/waproxy/conf/waproxy.conf
#
# WAProxy Server Configuration
#
...
# List the enable protocol levels with which clients will be able
# to connect. Disable SSLv2 and SSLv3 access by default.
ssl_protocol ALL -TLSv1.1 -TLSv1 -SSLv2 -SSLv3
ssl_ciphersuite ECDHE-RSA-AES256-GCM-SHA384:AES256-GCM-SHA384
...
Save the configuration and restart WAProxy for the changes to take effect.
-bash-5.1# /opt/waproxy/bin/waproxy restart
Stopping WebADM Publishing Proxy HTTP server... Ok
Checking system architecture... Ok
Checking server configurations... Ok
Starting WebADM Publishing Proxy... Ok
After your changes, you can use NMAP tool to check which SSL/TLS versions and Ciphers are allowed.
-bash-5.1# nmap --script +ssl-enum-ciphers -p 443 192.168.3.84
Starting Nmap 7.92 ( https://nmap.org ) at 2024-12-06 14:38 CET
Nmap scan report for 192.168.3.84
Host is up (0.00046s latency).

PORT    STATE SERVICE
443/tcp open  https
| ssl-enum-ciphers:
|   TLSv1.2:
|     ciphers:
|       TLS_ECDHE_RSA_WITH_AES_256_GCM_SHA384 (ecdh_x25519) - A
|       TLS_RSA_WITH_AES_256_GCM_SHA384 (rsa 4096) - A
|     compressors:
|       NULL
|     cipher preference: server
|     warnings:
|       Key exchange (ecdh_x25519) of lower strength than certificate key
|_  least strength: A

Nmap done: 1 IP address (1 host up) scanned in 0.60 seconds
WebADM Access
Using certificates is the most secure login method. To use certificate login, you must log into WebADM and create a login certificate for your administrators.
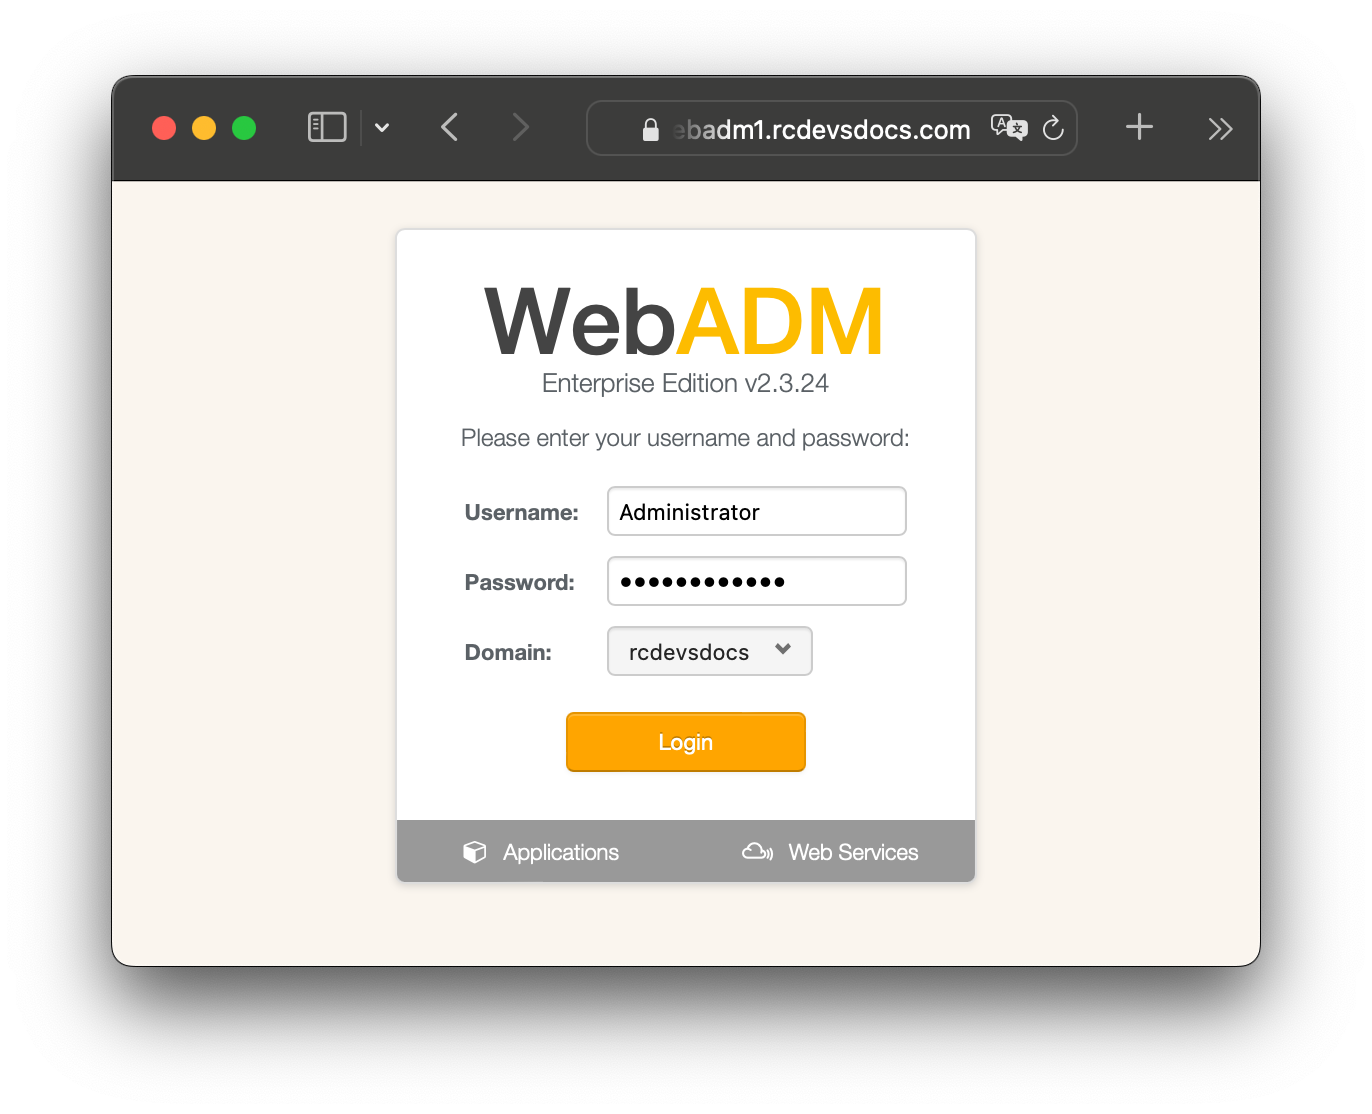


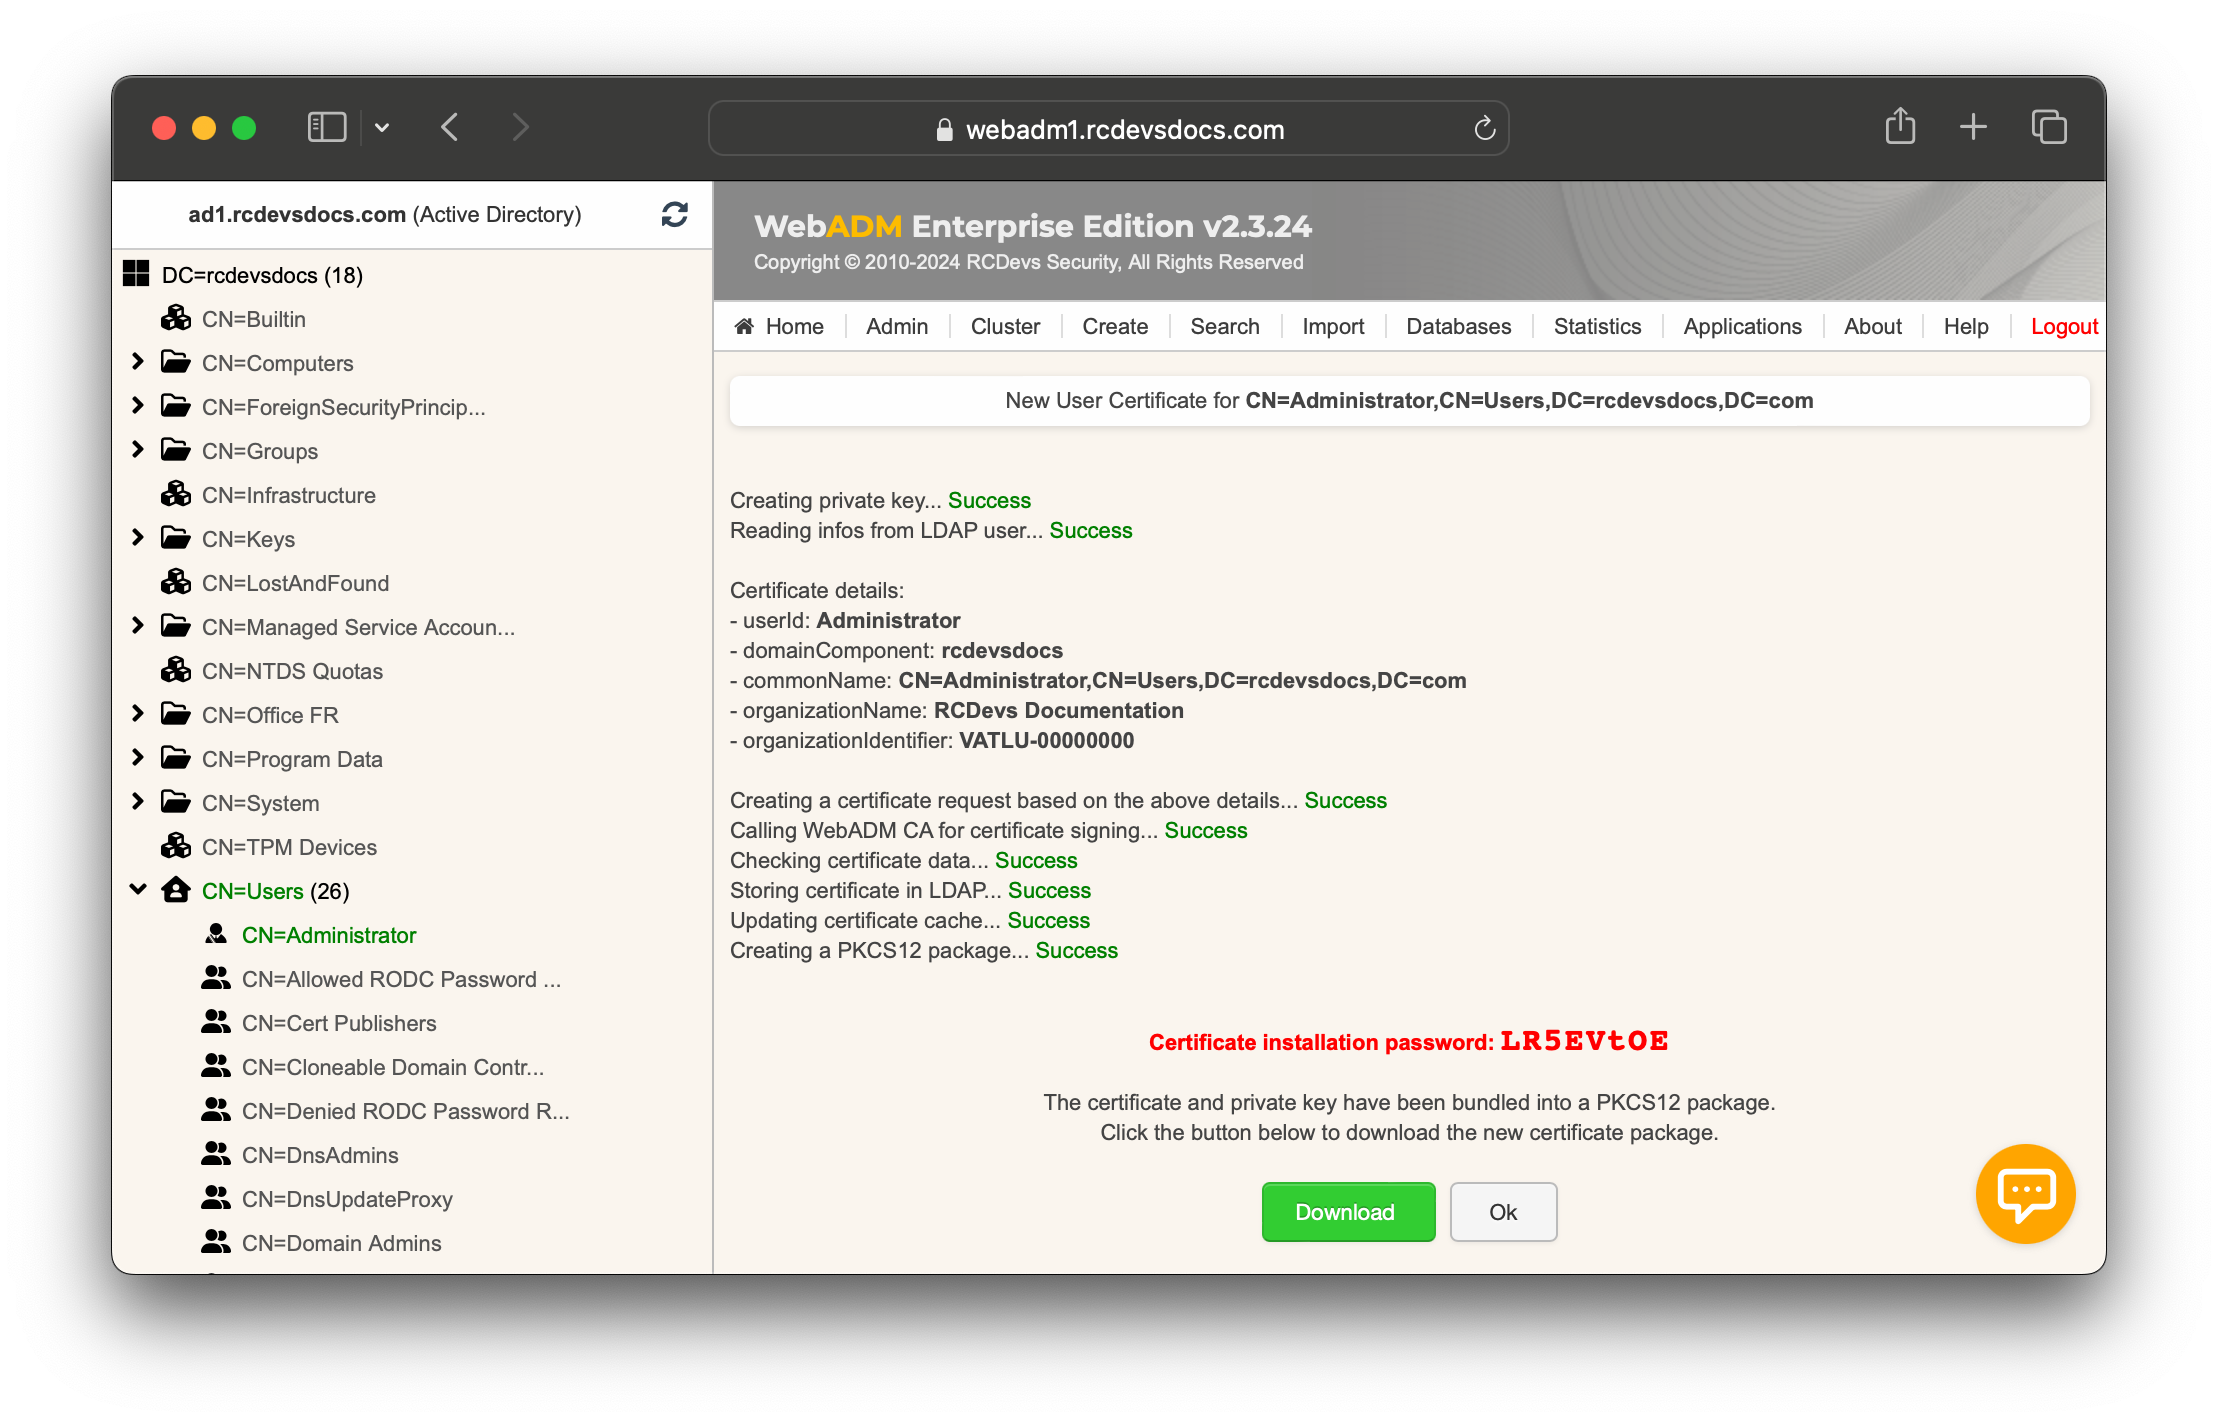
Download your Certificate and import it into your Browser. Afterward, edit the WebADM configuration file /opt/webadm/conf/webadm.conf and change admin_auth UID to admin_auth PKI and #manager_auth UID to manager_auth PKI.
-bash-5.1# vi /opt/webadm/conf/webadm.conf
#
# WebADM Server Configuration
#

# Administrator Portal's authentication method.
# - PKI: Requires client certificate and login password.
# - UID: Requires domain name, login name and password.
# - DN: Requires login DN and password.
# - OTP: Like UID with an OTP challenge.
# - U2F: Like UID with a FIDO-U2F challenge.
# - MFA: Like UID with both OTP and FIDO-U2F challenge.
# Using certificates is the most secure login method. To use certificate login,
# you must log in WebADM and create a login certificate for your administrators.
# The UID mode requires a WebADM domain to exist and have its User Search Base
# set to the subtree where are located the administrator users. When using UID
# and if there is no domain existing in WebADM, the login mode is automatically
# forced to DN. You will also need to log in with the full user DN and set up
# a WebADM domain to be able to use the UID login mode.admin_auth UID
admin_auth PKI
#admin_clients "192.168.0.10","192.168.0.11"

# Show the registered domain list when admin_auth is set to UID, OTP or U2F.
# And set a default admin login domain when auth_mode is set to these methods.
list_domains Yes
#default_domain "Default"

# Manager API's authentication method. Only UID, PKI and DN are supported here.
# If you set the admin_auth with multi-factor (PKI, OTP or U2F), then you must
# either use manager_auth PKI or UID with a list of allowed client IPs.
manager_auth PKI
manager_clients "192.168.0.10","192.168.0.11","10.3.3.2"

# User level changes the level of feature and configuration for all applications.
# WebADM proposes three levels: Beginner, Intermediate and Expert. The default
# level (Expert) is recommended as it provides access to all the RCDevs features.
#user_level Expert

# If your LDAP directory is setup with a base DN (ex. dc=mydomain,dc=com on AD),
# you can optionally set the base_treebase suffix and omit the suffix in other
# LDAP configurartions like proxy_user, super_admins and containers.
ldap_treebase "dc=rcdevsdocs,dc=com"

# The proxy user is used by WebADM for accessing LDAP objects over which the
# admin user does not have read permissions or out of an admin session.
# The proxy user should have read permissions on the whole LDAP tree,
# and write permissions on the users/groups used by the WebApps and WebSrvs.
# The use of a proxy user is required for WebApps and WebSrvs.
# With ActiveDirectory, you can use any Domain Administrator DN as a proxy user,
# which should look like cn=Administrator,cn=Users,dc=mydomain,dc=com.
proxy_user "cn=administrator,cn=users"
proxy_password "Password123!"

# Super administrators have extended WebADM privileges such as setup permissions,
# additional operations and unlimited access to any LDAP encrypted data. Access
# restriction configured in the WebADM OptionSets do not apply to super admins.
# You can set a list of individual LDAP users or LDAP groups here.
# With ActiveDirectory, your administrator account should be is something like
# cn=Administrator,cn=Users,dc=mydomain,dc=com. And you can replace the sample
# super_admins group on the second line with an existing security group.
super_admins "cn=administrator,cn=users", \
	     "cn=Domain Admins,cn=Users"

# LDAP objectclasses
container_oclasses      "container", "organizationalUnit", "organization", "domain", "locality", "country", \
                        "openldaprootdse", "treeroot"
# user_oclasses is used to build the LDAP search filter with 'Domain' auth_mode.
# If your super admin user user does not have one of the following objectclasses,
# add one of its objectclasses to the list.
user_oclasses           "user", "person", "inetOrgPerson", "account", "posixAccount"
group_oclasses          "group", "groupOfNames", "groupOfUniqueNames", "dynamicGroup", "posixGroup"
# With ActiveDirectory 2003 only, you need to add the 'user' objectclass to the
# webadm_account_oclasses and the 'group' objectclass to the webadm_group_oclasses.
webadm_account_oclasses "webadmAccount"
webadm_group_oclasses   "webadmGroup"
webadm_config_oclasses  "webadmConfig"

# LDAP attributes
certificate_attrs       "userCertificate"
password_attrs          "userPassword", "unicodePwd", "sambaNTPassword"
uid_attrs               "uid", "samAccountName", "userPrincipalName"
member_attrs            "member", "uniqueMember"
memberof_attrs          "memberOf", "groupMembership"
memberuid_attrs         "memberUid"
language_attrs          "preferredLanguage"
mobile_attrs            "mobile"
mail_attrs              "mail"
webadm_data_attrs       "webadmData"
webadm_settings_attrs   "webadmSettings"
webadm_type_attrs       "webadmType"
webadm_voice_attrs      "webadmVoice"

# Set the LDAP container required by WebADM to store its configuration objects.
config_container "cn=WebADM"

# You can alternatively configure each configuration container independently.
#domains_container "cn=Domains,cn=WebADM"
#clients_container "cn=Clients,cn=WebADM"
#devices_container "cn=Devices,cn=WebADM"
#webapps_container "cn=WebApps,cn=WebADM"
#websrvs_container "cn=WebSrvs,cn=WebADM"
#adminroles_container "cn=AdminRoles,cn=WebADM"
#optionsets_container "cn=OptionSets,cn=WebADM"
#mountpoints_container "cn=MountPoints,cn=WebADM"


...
Now, restart WebADM with /opt/webadm/bin/webadm restart.
-bash-5.1# /opt/webadm/bin/webadm restart
Stopping WebADM HTTP server... Ok
Stopping WebADM Watchd server......... Ok
Stopping WebADM Session server... Ok
Checking libudev dependency... Ok
Checking system architecture... Ok
Checking server configurations... Ok

No Enterprise license found (using bundled Freeware license)
Please contact sales@rcdevs.com for commercial information

Starting WebADM Session server... Ok
Starting WebADM PKI server... Ok
Starting WebADM Watchd server... Ok
Starting WebADM HTTP server... Ok

Checking server connections. Please wait...
Connected LDAP server: LDAP Server (127.0.0.1)
Connected SQL server: SQL Server (127.0.0.1)
Connected PKI server: PKI Server (127.0.0.1)
Connected Push server: Push Server (91.134.128.157)
Connected Session server: Session Server (::1)

Checking LDAP proxy user access... Ok
Checking SQL database access... Ok
Checking PKI service access... Ok
Checking Push service access... Ok
-bash-5.1#
Finally, log into your WebADM.
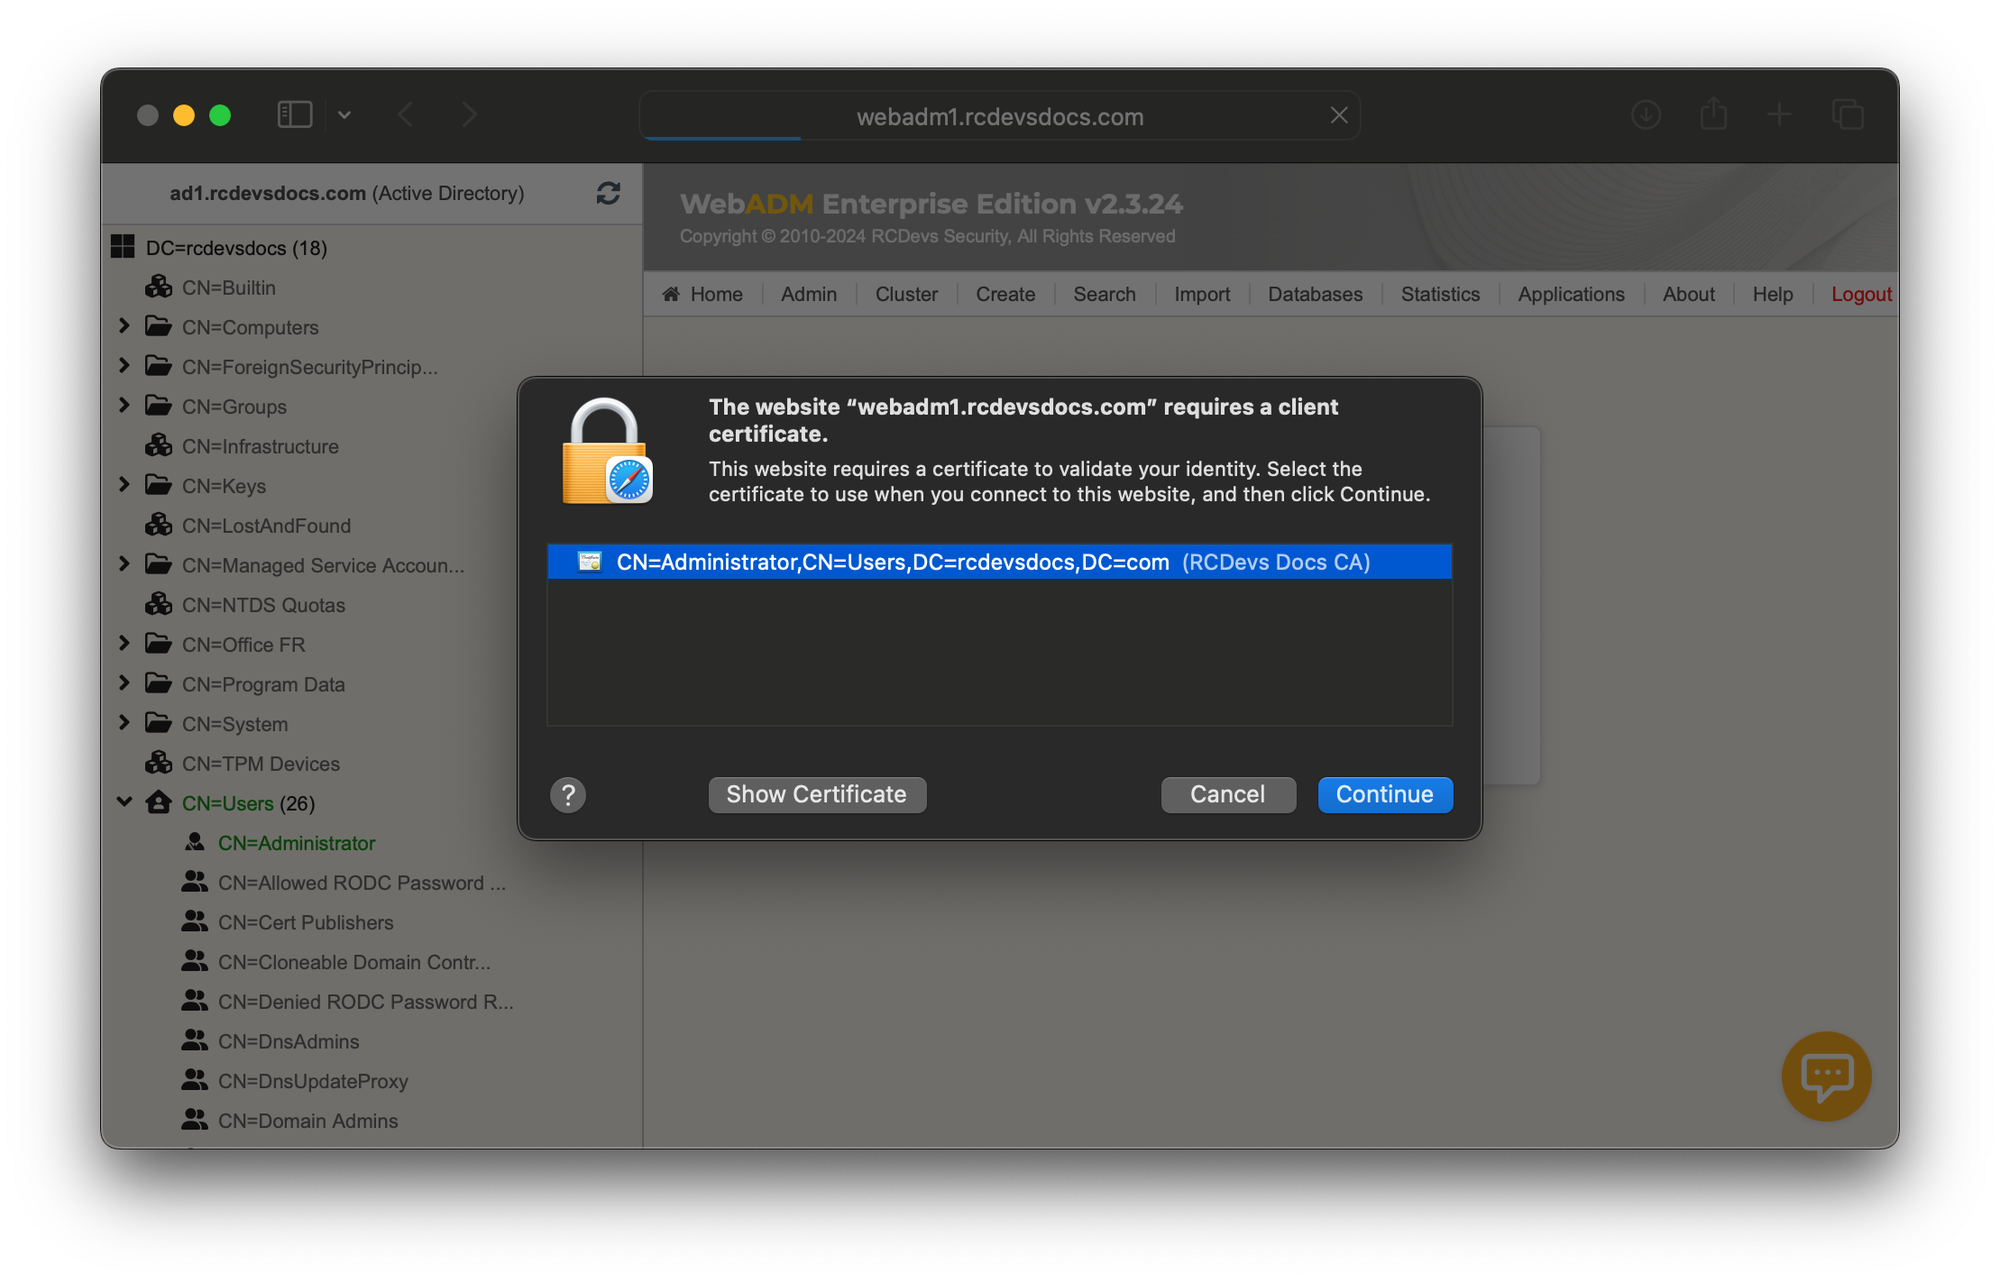
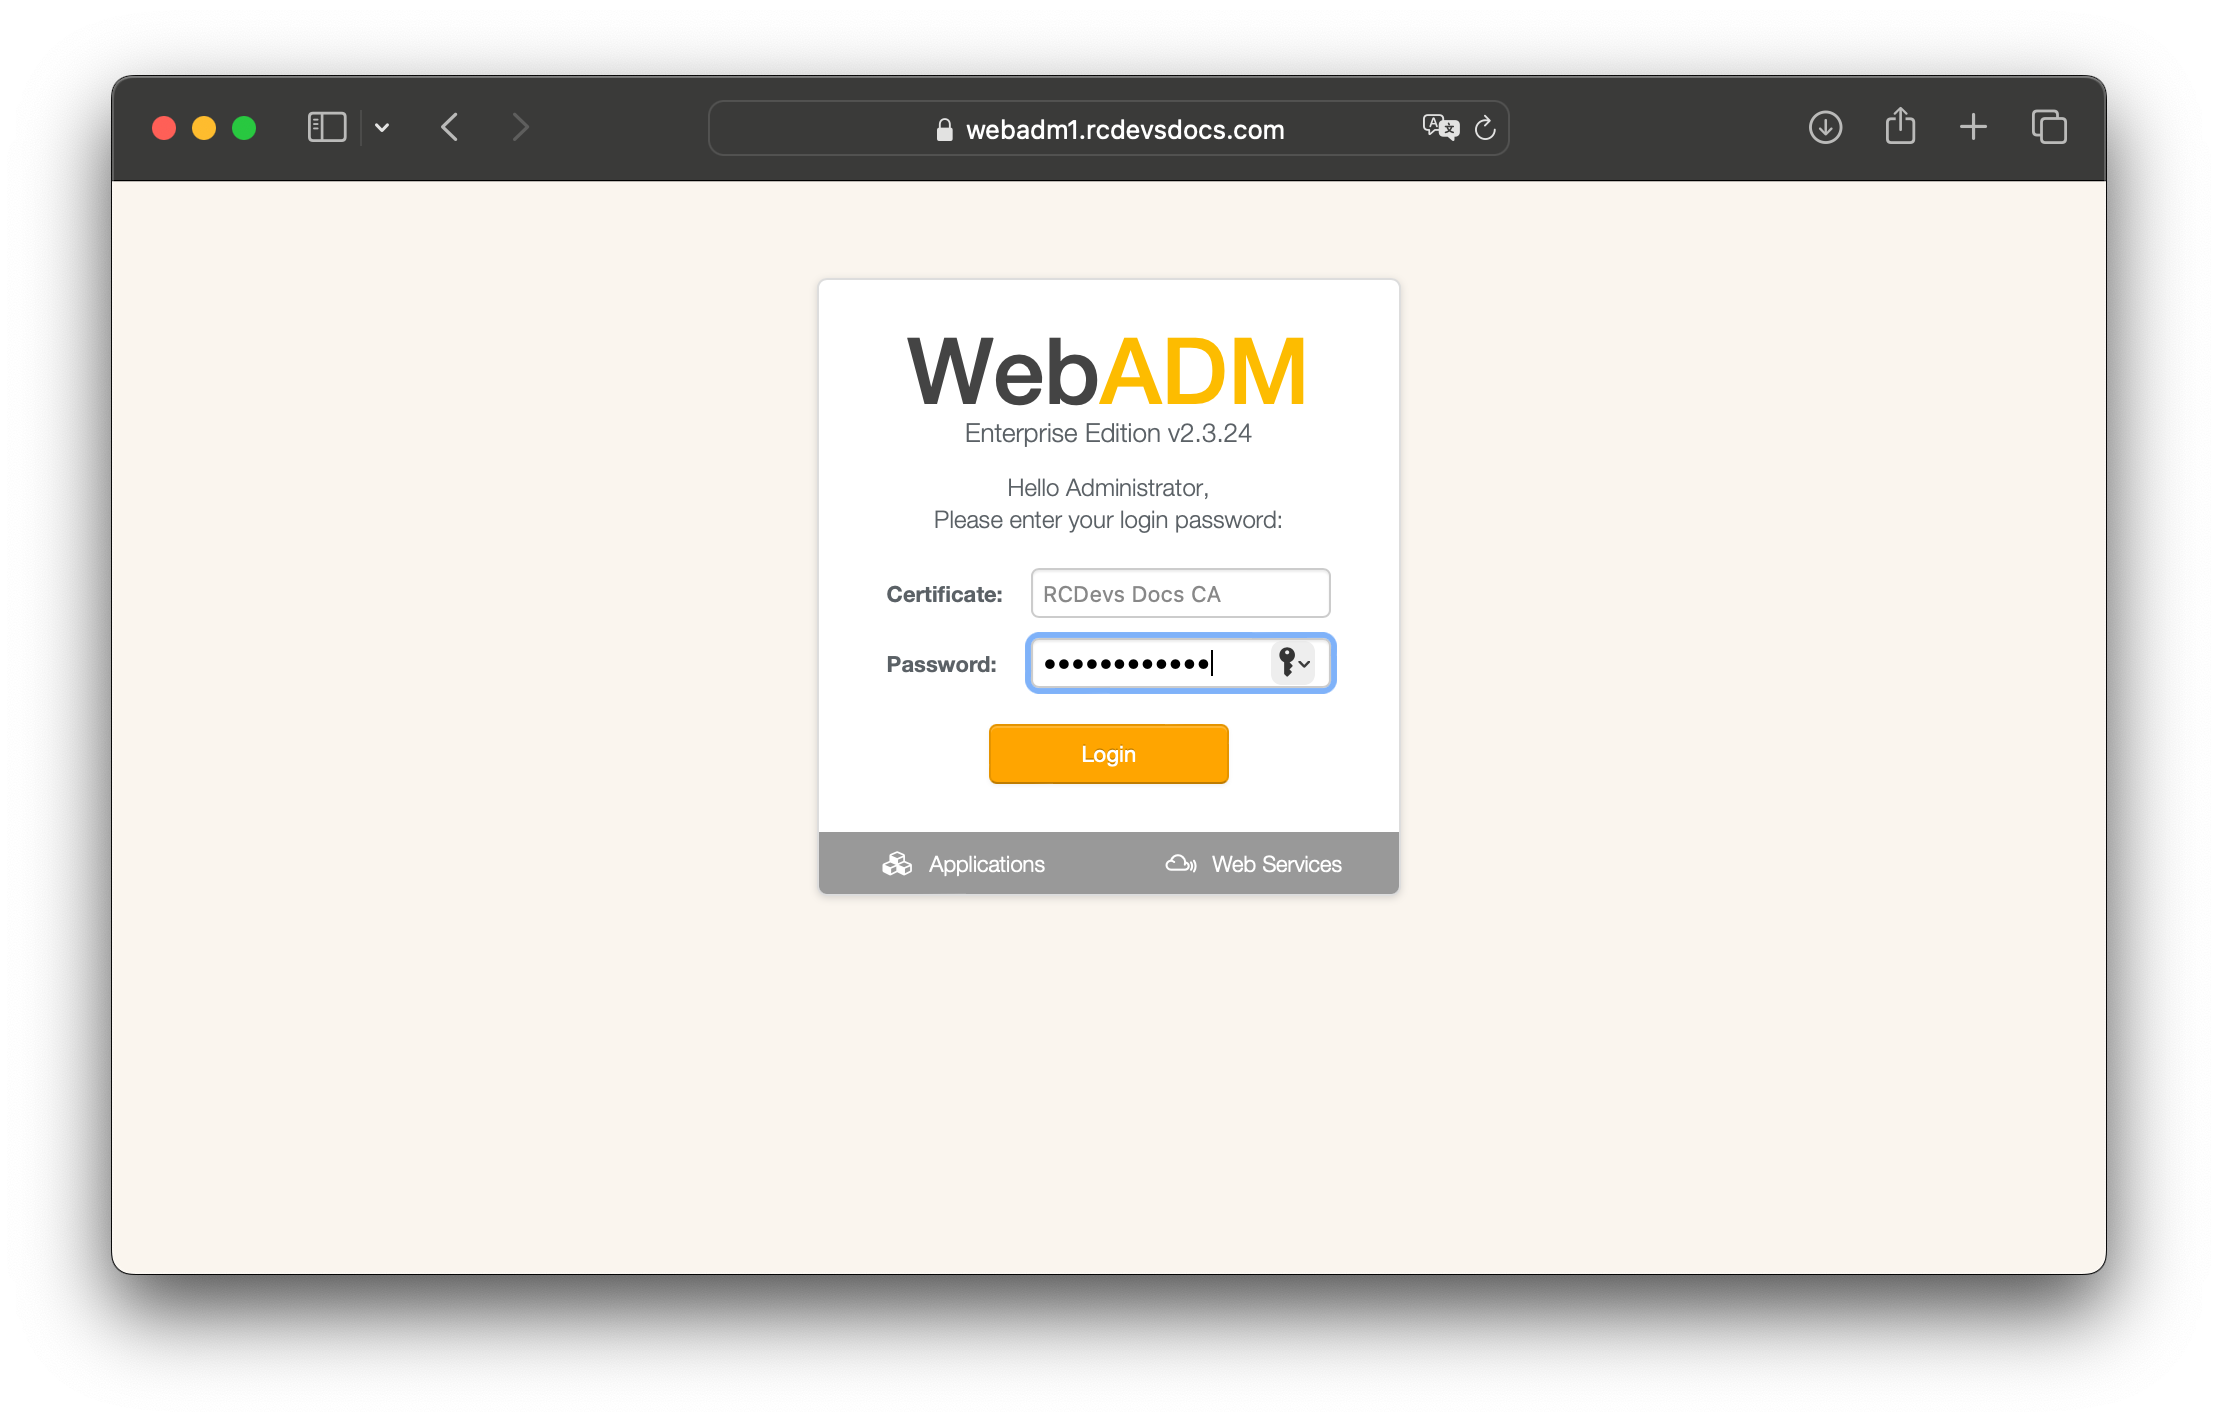
WebADM Encryption Key
Please encrypt the WebADM Encryption Key. Please follow this doc RCDevs Utilities and Command Line Tools for WebADM.
Warning This feature requires an Enterprise License and the encryption mechanism is bound to secret data in your encoded license file. Also, if you change the encryption key, any encrypted data will become invalid!
For example:
-bash-5.1# /opt/webadm/bin/pwcrypt -p
This script allows to encrypt some sensitive WebADM configuration settings
like user passwords and encryption keys. You can also replace the cleartext
passwords and keys with encrypted values in webadm.conf and servers.xml.

Secret: ****************
Encrypted:{wcrypt}rsRvssk59Zb/jEU71hh8bEEVbi3cnEsYg3YQgcCvMqfLXhguEQVSTDrdYIKRbmfJ

-bash-5.1# vi /opt/webadm/conf/webadm.conf
...
# WebADM encrypts LDAP user data, sensitive configurations and user sessions with
# AES-256. The encryption key(s) must be 256bit base64-encoded random binary data.
# Use the command 'openssl rand -base64 32' to generate a new encryption key.
# Warning: If you change the encryption key, any encrypted data will become invalid!
# You can set several encryption keys for key rollout. All the defined keys are used
# for decrypting data. And the first defined key is used to (re-)encrypt data.
# Two encryption modes are supported:
# Standard: AES-256-CBC (default)
# Advanced: AES-256-CBC with per-object encryption (stronger)
encrypt_data Yes
encrypt_mode Standard
encrypt_hsm  No
encrypt_key  "{wcrypt}rsRvssk59Zb/jEU71hh8bEEVbi3cnEsYg3YQgcCvMqfLXhguEQVSTDrdYIKRbmfJ"
...

-bash-5.1# /opt/webadm/bin/webadm restart
You can set several encryption keys for key rollout. All the defined keys are used for decrypting data. And the first defined key is used to (re-)encrypt data.
Use the command openssl rand -base64 32 to generate a new encryption key.
-bash-5.1# openssl rand -base64 32
1Lb6MB72/GOdIkbTEs1d6+nunsdv/LyXjoDDIYwy790=
-bash-5.1#
Add this new key at first place and keep your old key (it's needed for the re-encryption) as follows:
-bash-5.1# vi /opt/webadm/conf/webadm.conf
...
# WebADM encrypts LDAP user data, sensitive configurations and user sessions with
# AES-256. The encryption key(s) must be 256bit base64-encoded random binary data.
# Use the command 'openssl rand -base64 32' to generate a new encryption key.
# Warning: If you change the encryption key, any encrypted data will become invalid!
# You can set several encryption keys for key rollout. All the defined keys are used
# for decrypting data. And the first defined key is used to (re-)encrypt data.
# Two encryption modes are supported:
# Standard: AES-256-CBC (default)
# Advanced: AES-256-CBC with per-object encryption (stronger)
encrypt_data Yes
encrypt_mode Standard
encrypt_hsm  No
encrypt_key  "1Lb6MB72/GOdIkbTEs1d6+nunsdv/LyXjoDDIYwy790=","FzADk5PNYz+dl4JX+hYFiyVHQLBWnq2CXNJEy+Hpv9c="
...
Now you can re-encrypt the user data:
-bash-5.1# /opt/webadm/bin/encrypt -r default
This script will help you manage the WebADM user data encryption for the
LDAP users in the provided WebADM Domain(s). Using the script you can:
1) Review user data encryption.
2) Decrypt user data (-d option - not available with HSM encryption).
3) Encrypt user data (-e option).
4) Recrypt user data (-r option).
WebADM always uses the first configured encrypt_key to encrypt user data.
If you want to change the default encrypt_key then set the new key first.

Are you sure you want to update user data (y/n)? y
Entering Domain Default (o=root).
Re-encrypting user data for cn=test_user,o=Root... Ok

Updated 1 LDAP users in 0 seconds (0 errors).
-bash-5.1#