
Overview
This document explains how to enable OpenOTP authentication on pfSense through Radius Bridge. For this recipe, you will need to have WebADM, OpenOTP and Radius Bridge installed and configured.
Register your pfSense in RadiusBridge
On your OpenOTP RadiusBridge server, edit the /opt/radiusd/conf/clients.conf and add a RADIUS client (with IP address and RADIUS secret) for your pfSense VPN server:
client <pfSense Server IP> {
	secret = testing123
	shortname = pfSense
   }
Configuring New Radius Server on pfSense
Here, we will configure a new RADIUS Server through the pfSense GUI.
Go on the System tab and click on User Manager.
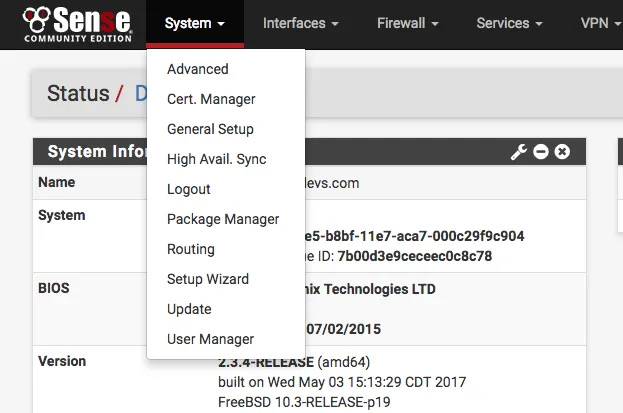
In the Authentication Server tab, click on Add:

Configure your WebADM server as a RADIUS server. Shared secret is previously defined in /opt/radiusd/conf/clients.conf.
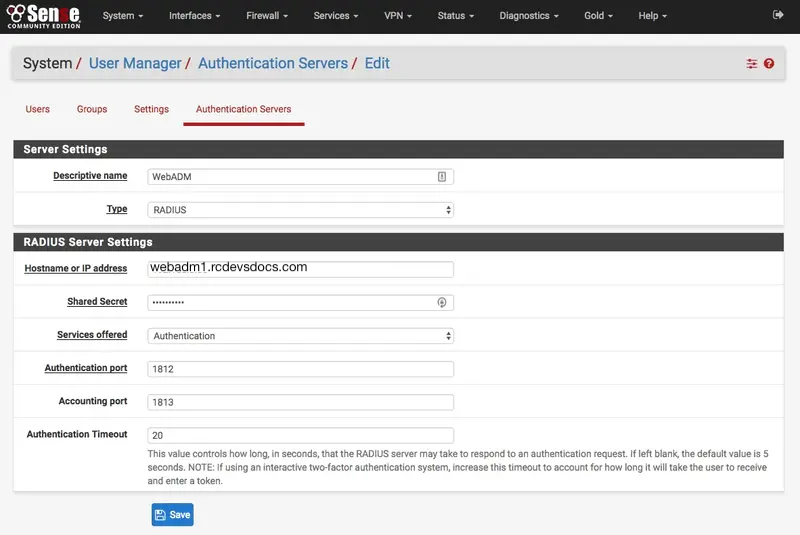
Click on Save when the configuration is done.
Configuring OpenOTP Authentication for OpenVPN Server on pfSense
In this how-to, we will not explain how to configure the OpenVPN server. Please refer to OpenVPN or pfSense documentation for this part.
Now on your OpenVPN configuration, click on Servers tab and edit your OpenVPN server.
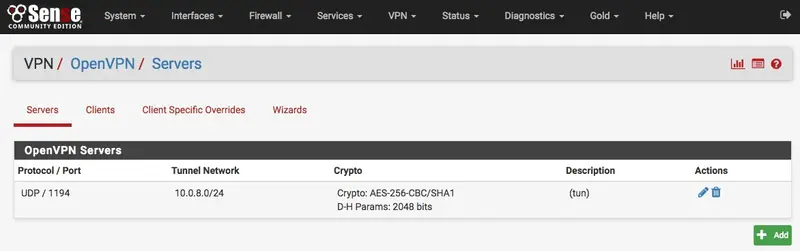
For the Server mode setting, select Remote Access (User Auth) and for the backend authentication option, choose your RADIUS Server previously created, in my case 'WebADM'.
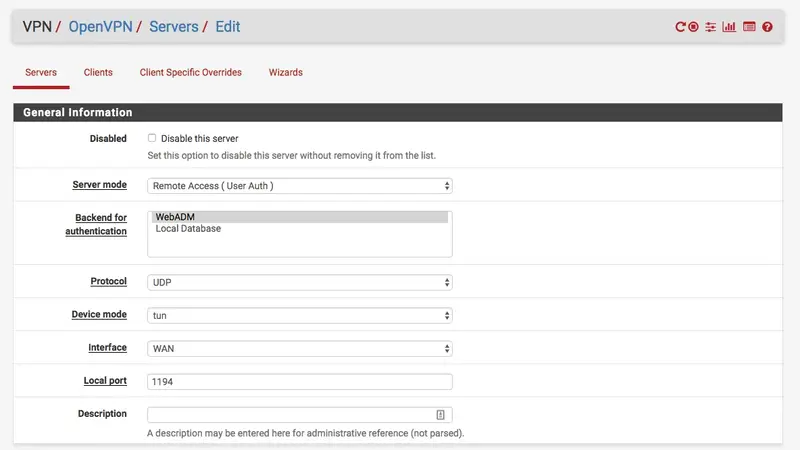
It's done for the authentication part.
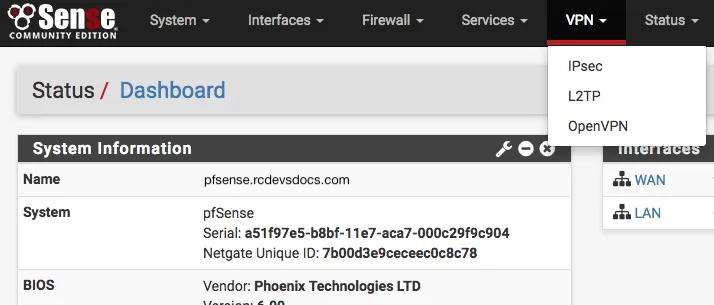
Configuring OpenOTP Authentication for IPsec
Same procedure as above, you have to select WebADM in the Extended Authentication (Xauth) if you use L2TP and IPsec:

Configuring WebADM/OpenOTP Client Policy
OpenVPN doesn't manage the RADIUS challenge authentication. So, we will create a client policy to be able to log in on the OpenVPN server with OpenOTP and the concatenated mode (LDAP password+OTP in the same password field.)
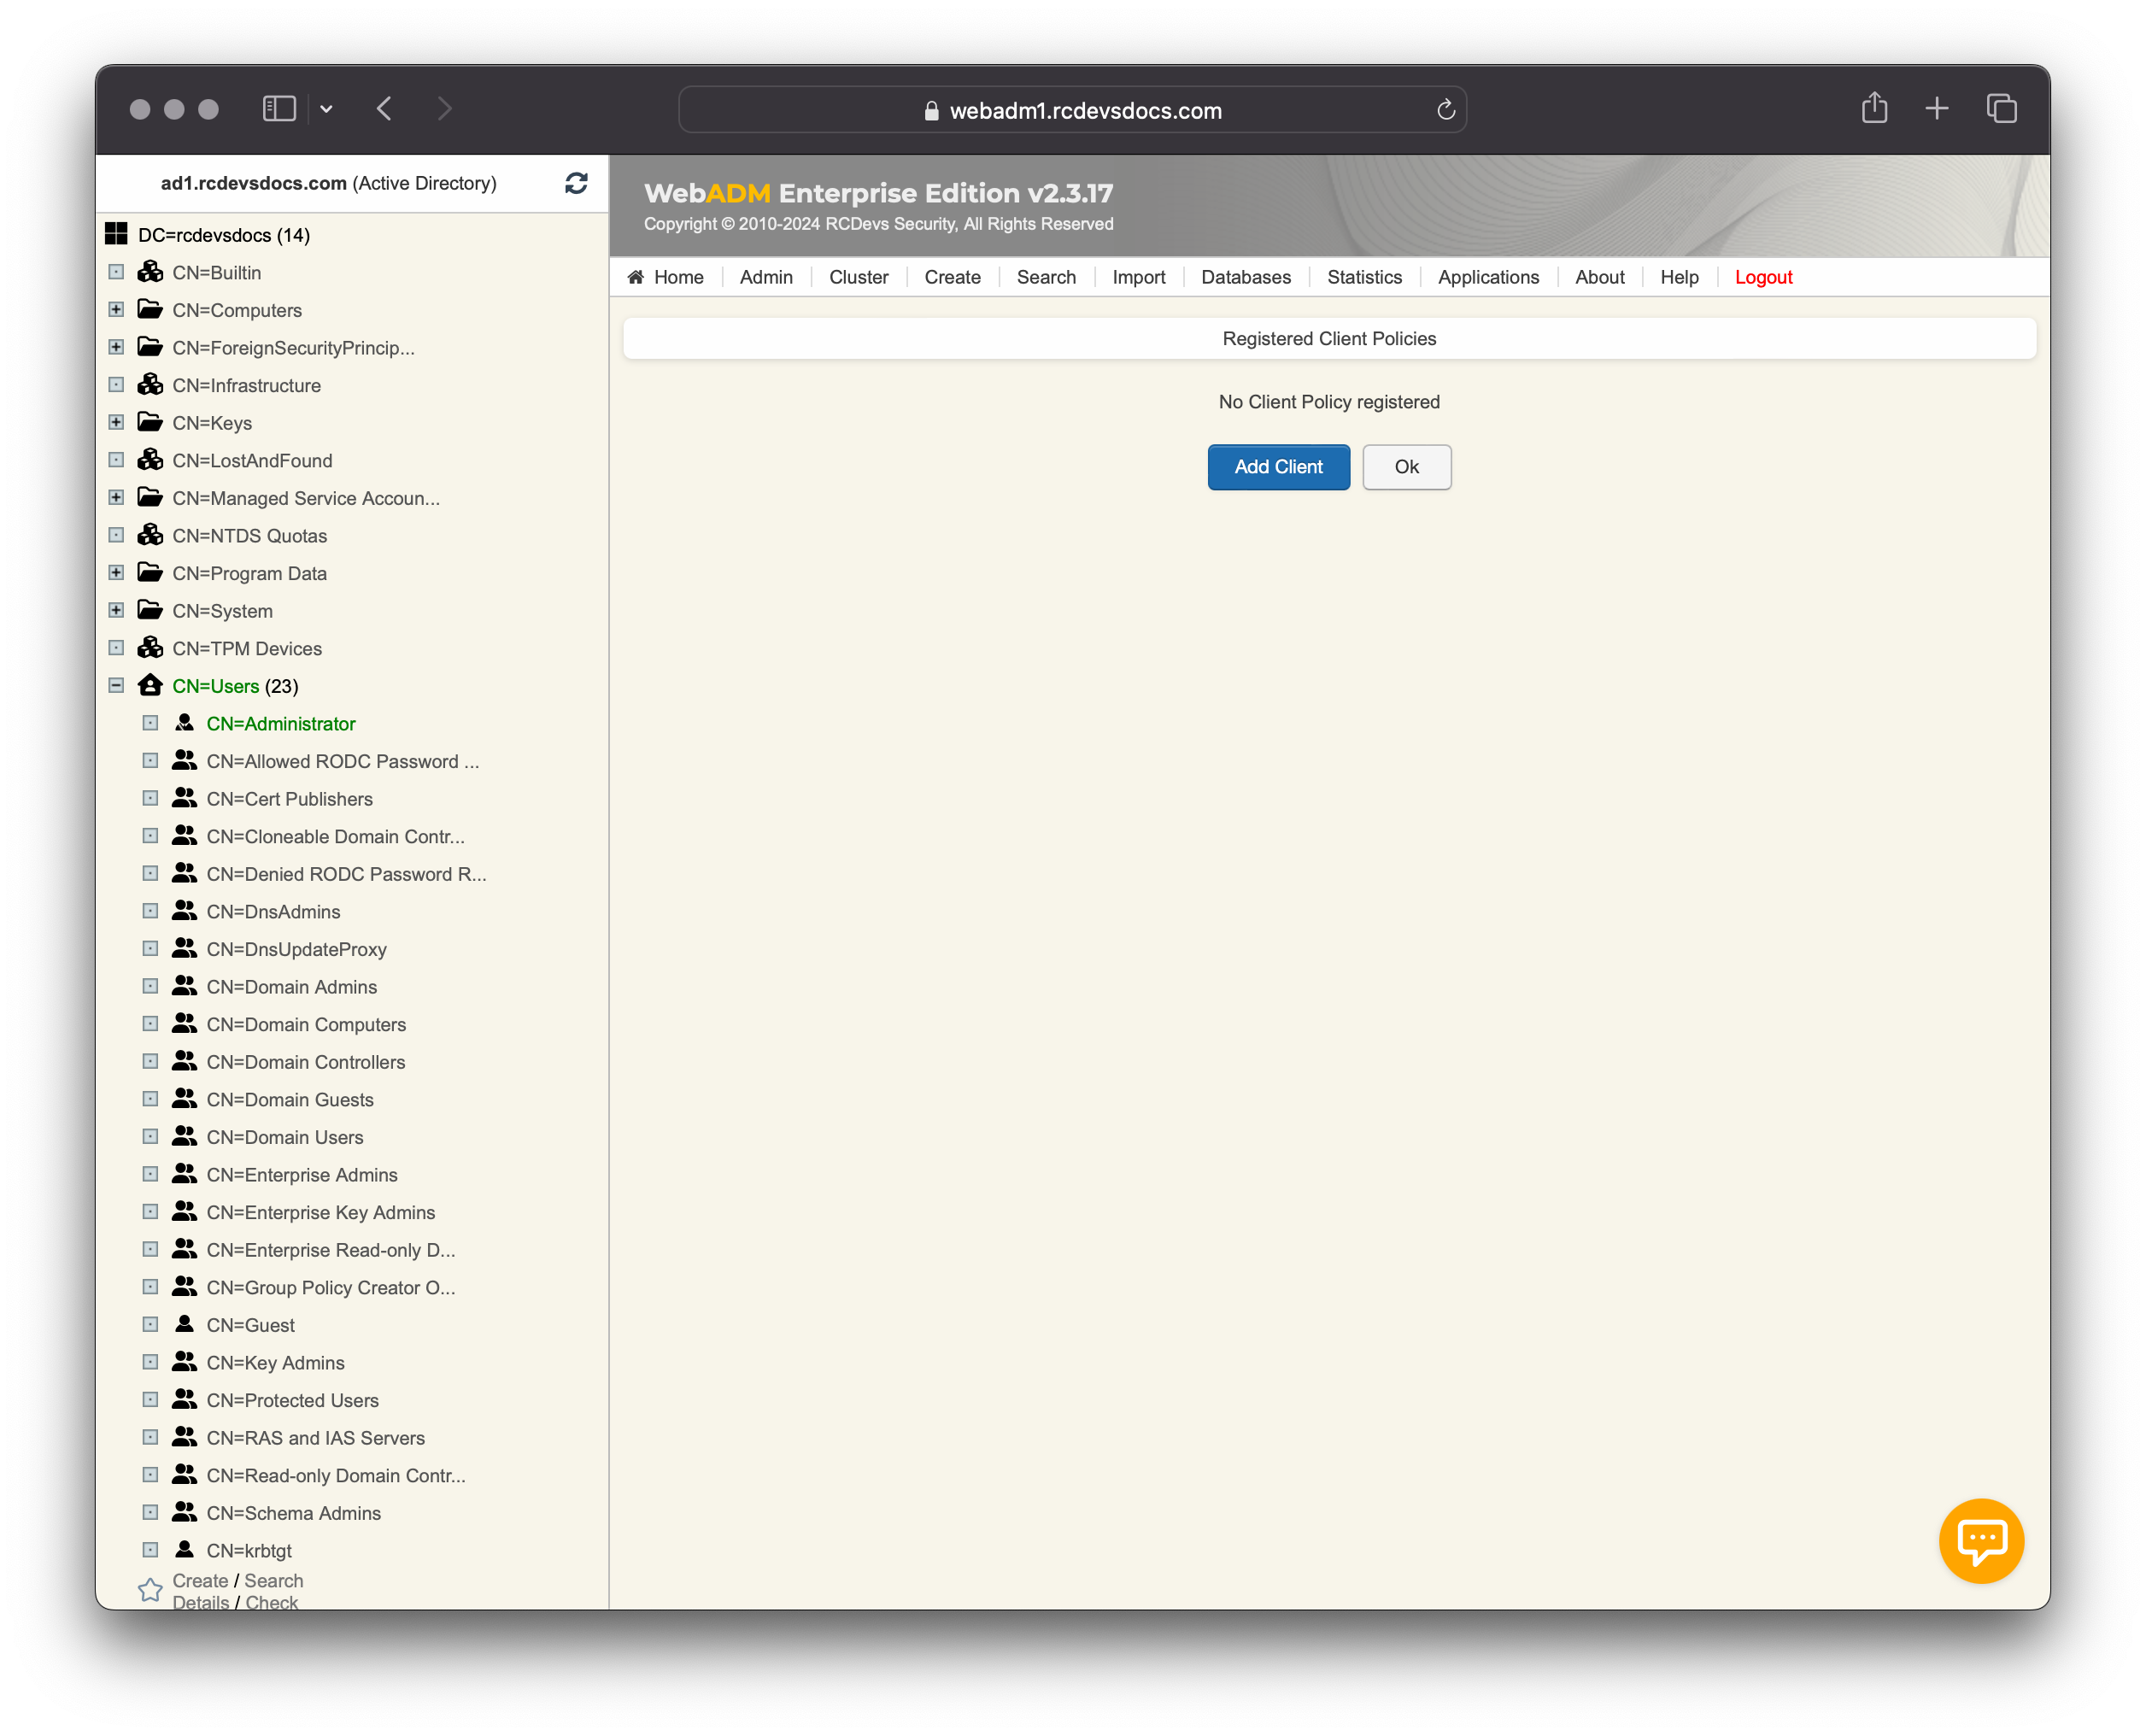
Login on the WebADM GUI, click on Admin tab and click on Client Policies button.

Click now on Add Client.
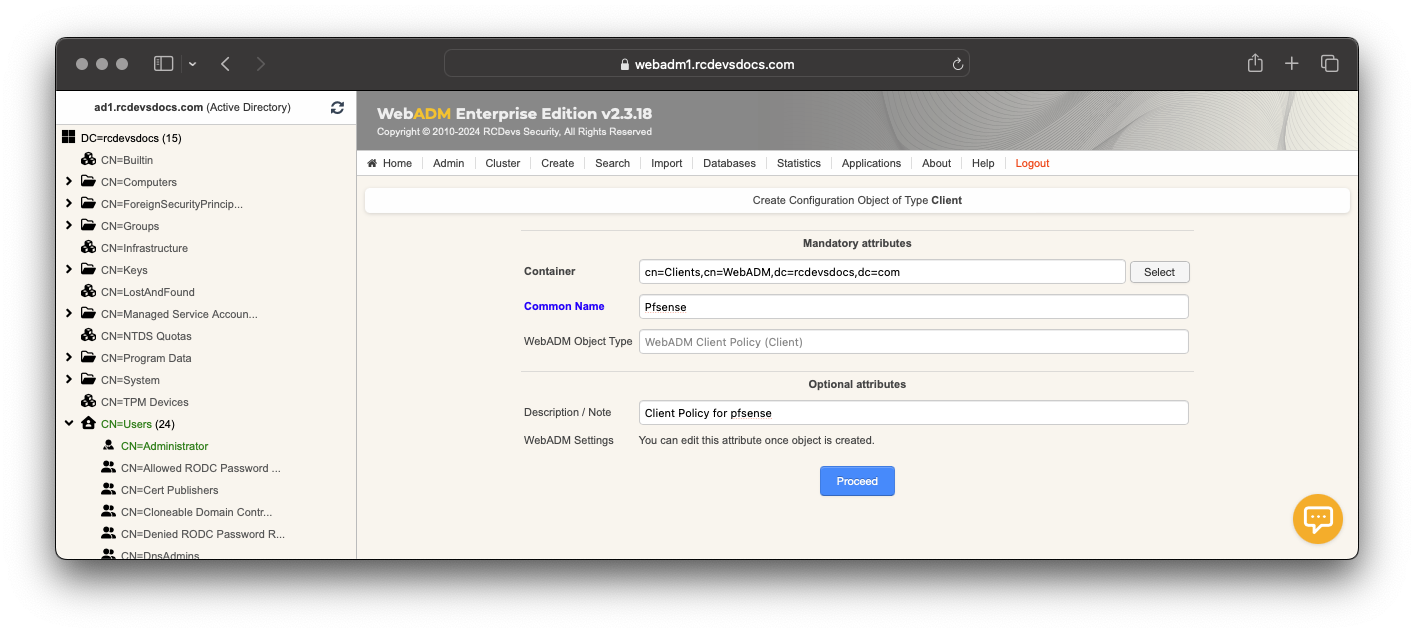
Name your client policy as you prefer, click on Proceed button and on Create Object button.
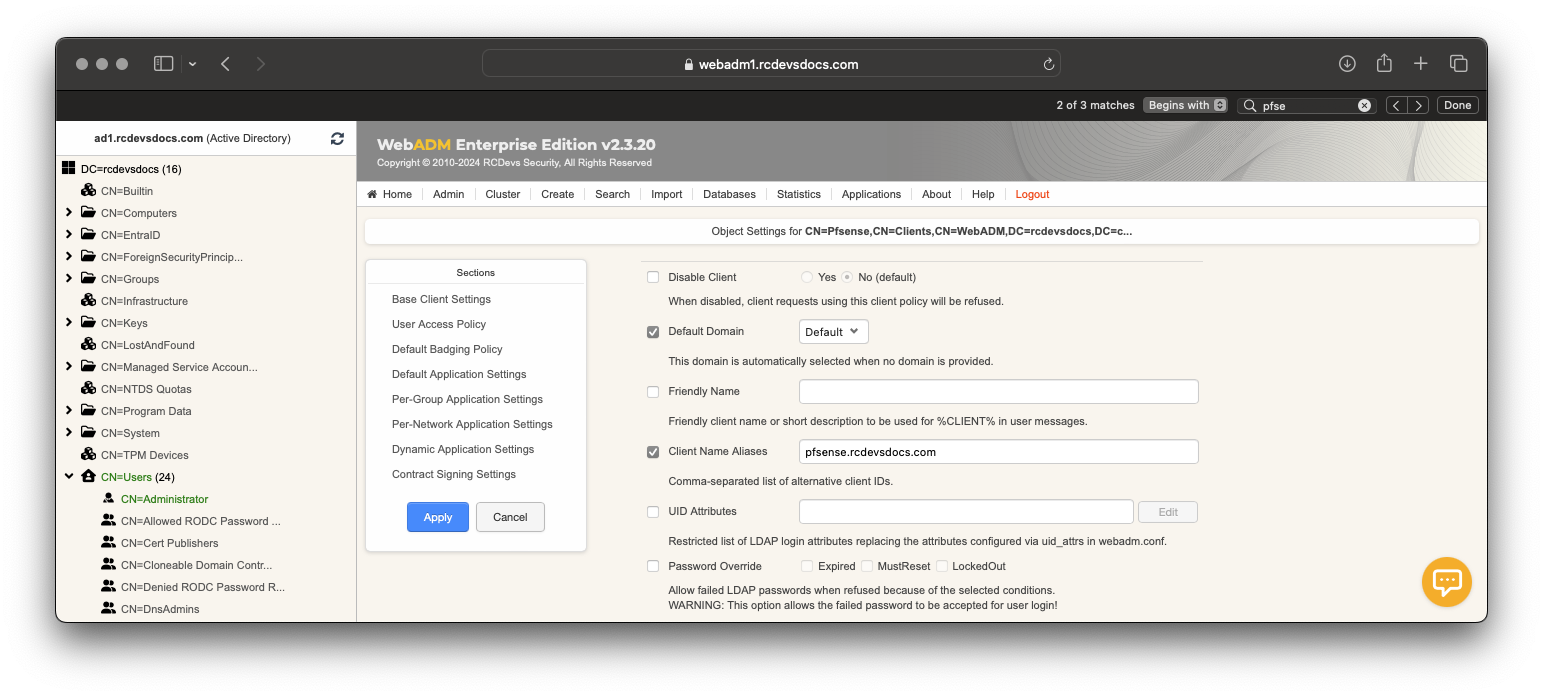
Now you are on the client policy configuration page. Edit the setting Client Name Aliases with the name of your pfsense server. In this case: pfsense.rcdevsdocs.com
This setting is very important, it will do the matching between the pfsense server and the client policy.
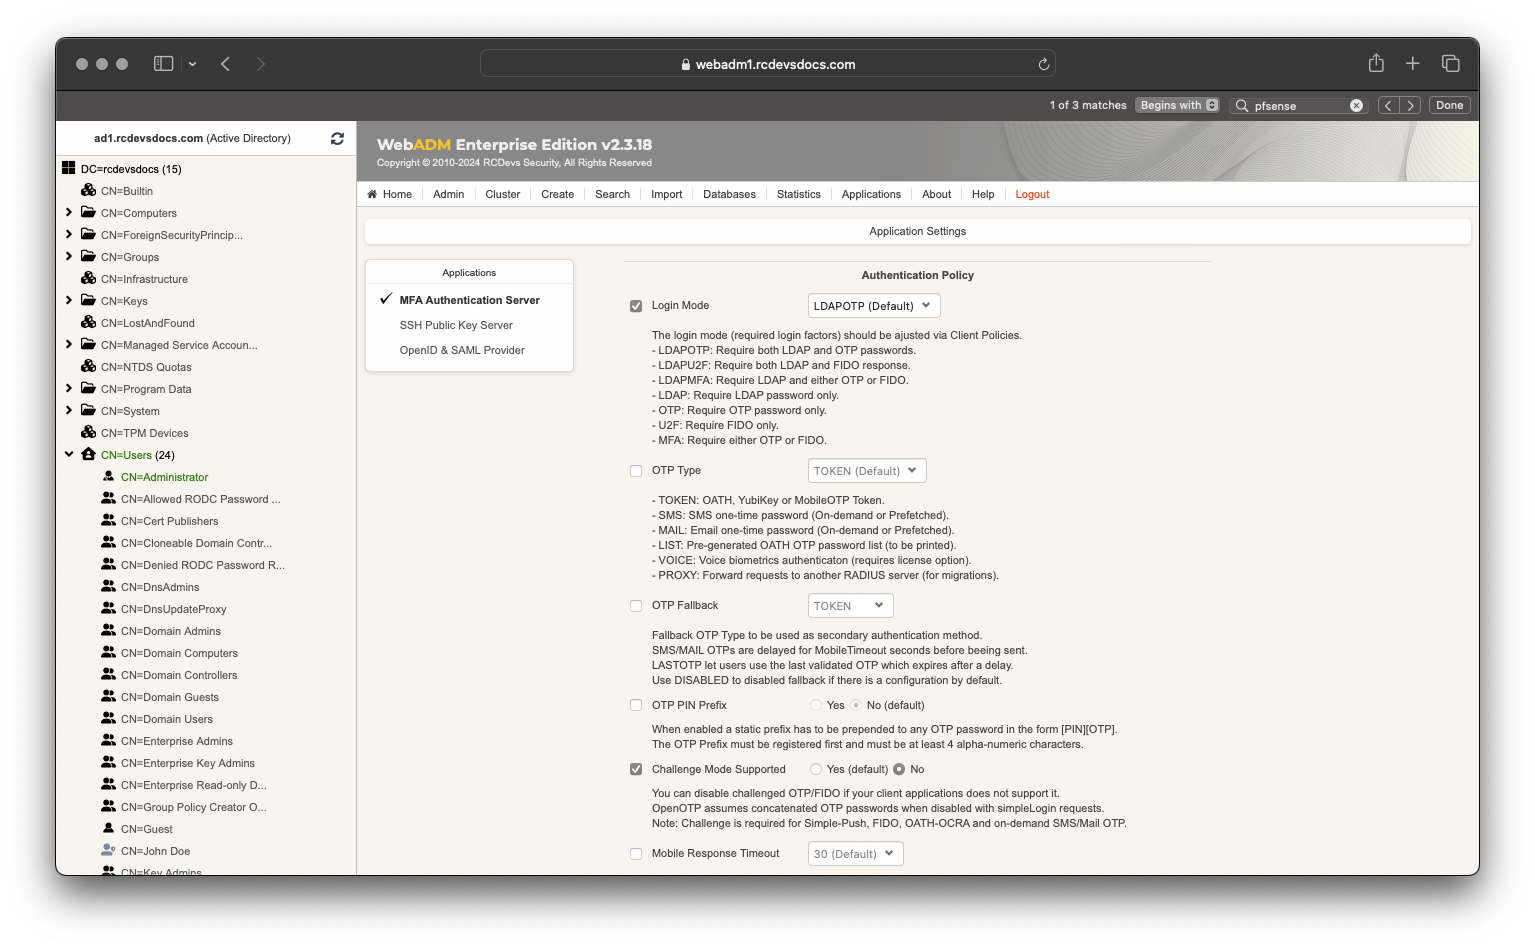
After that, you can scroll down and check the box Forced Application Policies and click on Edit button.
In the Applications box on the top left, select MFA Authentication Server and now you are able to configure the desired OpenOTP settings for pfSense. Here, one setting interest us which is the Challenge Mode Supported. You have to set the setting to No because OpenVPN doesn't manage the RADIUS Challenge.
Of course, my default configuration of OpenOTP is set for LDAPOTP login mode.
Click Apply twice, to save the policy configuration.
Now you can test the authentication.
Authentication Test
Before testing, you should have an activated User in WebADM/OpenOTP and a Token enrolled on your user account.
You can test an authentication through your VPN client or through the Authentication Diagnostic tool available on the pfSense GUI.
I will test through the diagnostic tool, so I select my WebADM server as Authentication server.
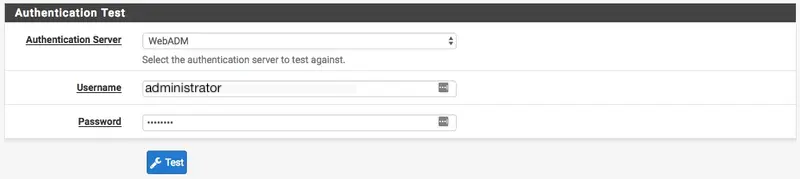
In the password field, I put my LDAP password and my OTP.
e.g : password123456
Where 'password' is my LDAP password and '123456' is my OTP.
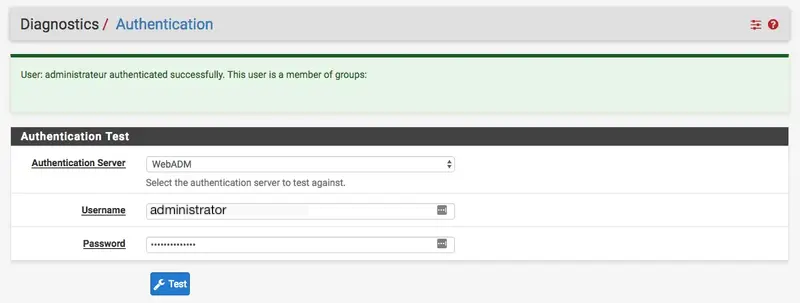
And I'm successfully logged.
WebADM Logs
We can show in the WebADM logs that the Client policy previously created is called, the challenge mode is disabled and the authentication is a success with an OTP.
[2017-10-25 14:52:20] [127.0.0.1] [OpenOTP:8VE13372] New openotpSimpleLogin SOAP request
[2017-10-25 14:52:20] [127.0.0.1] [OpenOTP:8VE13372] > Username: administrator
[2017-10-25 14:52:20] [127.0.0.1] [OpenOTP:8VE13372] > Password: xxxxxxxxxxxxxx
[2017-10-25 14:52:20] [127.0.0.1] [OpenOTP:8VE13372] > Client ID: pfSense
[2017-10-25 14:52:20] [127.0.0.1] [OpenOTP:8VE13372] > Options: RADIUS,-U2F
[2017-10-25 14:52:20] [127.0.0.1] [OpenOTP:8VE13372] Enforcing client policy: pfSense (matched client ID)
[2017-10-25 14:52:20] [127.0.0.1] [OpenOTP:8VE13372] Registered openotpSimpleLogin request
[2017-10-25 14:52:20] [127.0.0.1] [OpenOTP:8VE13372] Resolved LDAP user: CN=Administrator,CN=Users,DC=rcdevsdocs,DC=com
[2017-10-25 14:52:20] [127.0.0.1] [OpenOTP:8VE13372] Started transaction lock for user
[2017-10-25 14:52:20] [127.0.0.1] [OpenOTP:8VE13372] Found user language: EN
[2017-10-25 14:52:20] [127.0.0.1] [OpenOTP:8VE13372] Found 1 user mobiles: +33xxxxxxxxx
[2017-10-25 14:52:20] [127.0.0.1] [OpenOTP:8VE13372] Found 1 user emails: administrator@rcdevsdocs.com
[2017-10-25 14:52:20] [127.0.0.1] [OpenOTP:8VE13372] Found 3 user certificates
[2017-10-25 14:52:20] [127.0.0.1] [OpenOTP:8VE13372] Found 37 user settings: LoginMode=LDAPOTP,OTPType=TOKEN,OTPLength=6,ChallengeMode=No,ChallengeTimeout=90,PushLogin=Yes,EnableLogin=Yes,AppKeyLength=10,HOTPLookAheadWindow=25,TOTPTimeStep=30,TOTPTimeOffsetWindow=120,MOTPTimeOffsetWindow=120,OCRASuite=OCRA-1:HOTP-SHA1-6:QN06-T1M,SMSType=Normal,SMSMode=Ondemand,MailMode=Ondemand,LastOTPTime=300,ListChallengeMode=ShowID
[2017-10-25 14:52:20] [127.0.0.1] [OpenOTP:8VE13372] Found 9 user data: LoginCount,RejectCount,LastOTP,TokenType,TokenKey,TokenState,Device1Name,Device1Data,Device1State
[2017-10-25 14:52:20] [127.0.0.1] [OpenOTP:8VE13372] Last OTP present (valid until 2017-10-25 14:54:30)
[2017-10-25 14:52:20] [127.0.0.1] [OpenOTP:8VE13372] Challenge mode disabled (assuming concatenated passwords)
[2017-10-25 14:52:20] [127.0.0.1] [OpenOTP:8VE13372] Found 1 registered OTP token (TOTP)
[2017-10-25 14:52:20] [127.0.0.1] [OpenOTP:8VE13372] Requested login factors: LDAP & OTP
[2017-10-25 14:52:20] [127.0.0.1] [OpenOTP:8VE13372] LDAP password Ok
[2017-10-25 14:52:20] [127.0.0.1] [OpenOTP:8VE13372] TOTP password Ok (token #1)
[2017-10-25 14:52:20] [127.0.0.1] [OpenOTP:8VE13372] Updated user data
[2017-10-25 14:52:20] [127.0.0.1] [OpenOTP:8VE13372] Sent success response