Overview
WebADM is always configured with a primary LDAP infrastructure, such as Active Directory, OpenLDAP, Novell, or others. The LDAP Mount Points concept allows you to configure multiple LDAP infrastructures within the same WebADM framework. This enables WebADM to simultaneously work with numerous LDAP infrastructures for managing identities and groups, providing a unified authentication service across diverse directory services. Consequently, WebADM can extend its authentication services, such as those provided by OpenOTP or SpanKey, as well as all its web applications, to users in different AD/LDAP domains.
Remote LDAP connections are configured with a mechanism called LDAP Mount Points in WebADM, which as indicated is a method of creating virtual folders (containers) in the local WebADM directory to which the remote AD/LDAP contents are dynamically mounted to.
In this documentation, we will demonstrate how it works and how to configure it.
The steps are:
-
Create a new OU or container on your primary LDAP server configured with WebADM. The remote LDAP infrastructure will be virtually mounted into that OU/container, making the LDAP objects browsable through it.
-
Provide information about your additional LDAP infrastructure and mount it in the previously created OU/container.
-
Create a new WebADM domain object. This object is required to define the User Search Base for your additional LDAP server.
In this documentation, WebADM is natively connected to Active Directory, and the Mount point will be an OpenLDAP.
Create a container
We will start by creating a new Organizational Unit (OU) or container. This new OU/container will host the virtually mounted remote LDAP. To create the container, the authenticated user on the WebADM Administrator Portal must have the appropriate permissions on the primary LDAP infrastructure (in this case, Active Directory). Here, we demonstrate the OU/container creation through the WebADM Administrator Portal, but it can also be done using any other LDAP management tool or console.
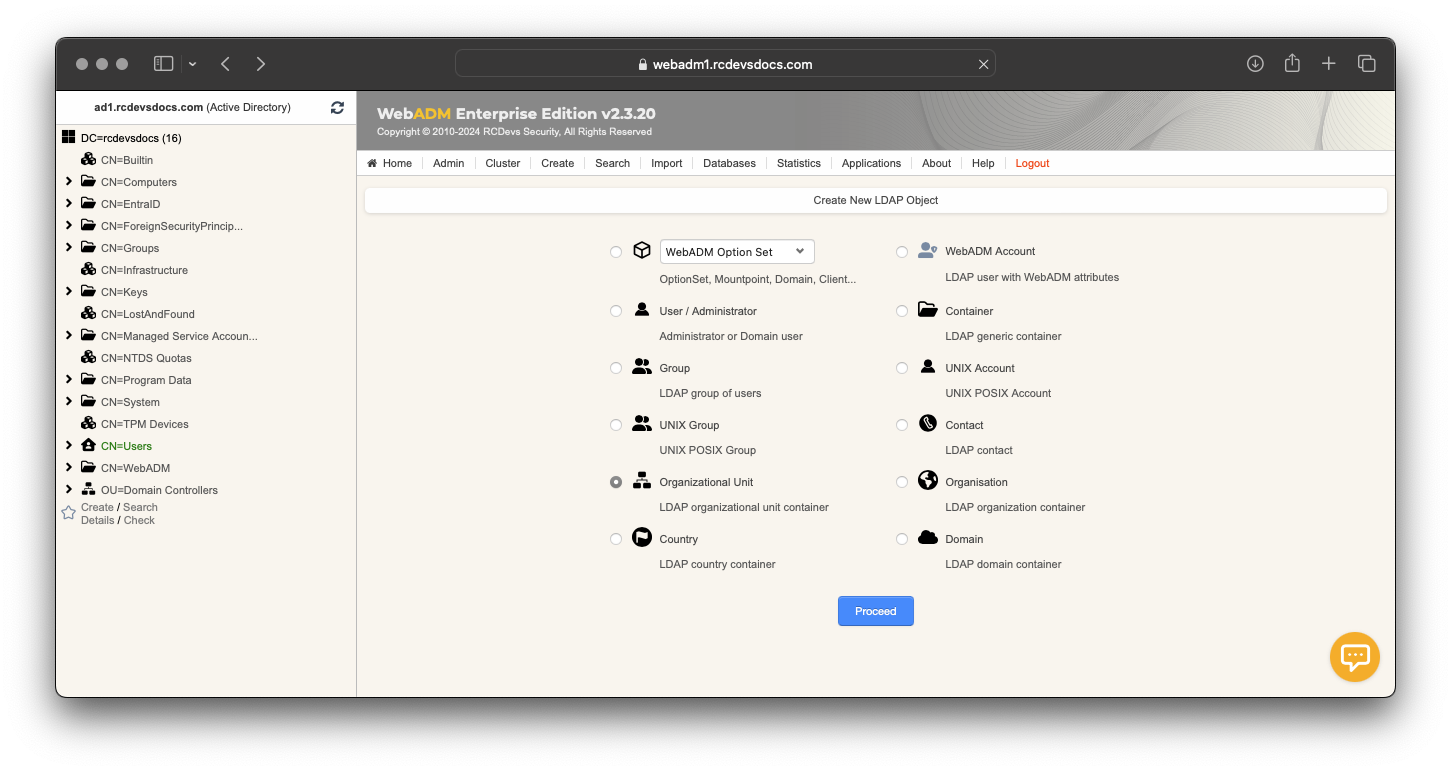
Login on WebADM Administrator Portal, click on the Create tab and choose Container or Organizational Unit then click Proceed.
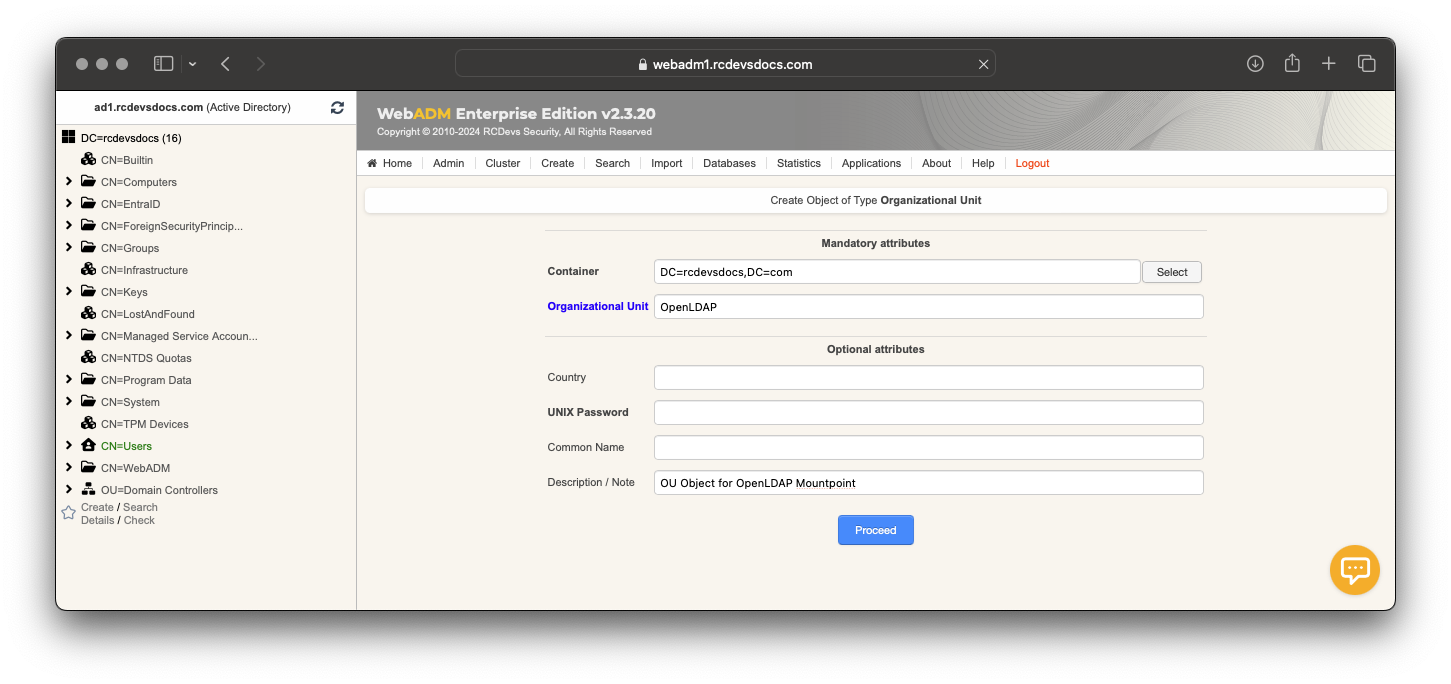
Provide the name of your OU; in this example, it is named OpenLDAP. Optionally, you can provide a description and then click Proceed button.
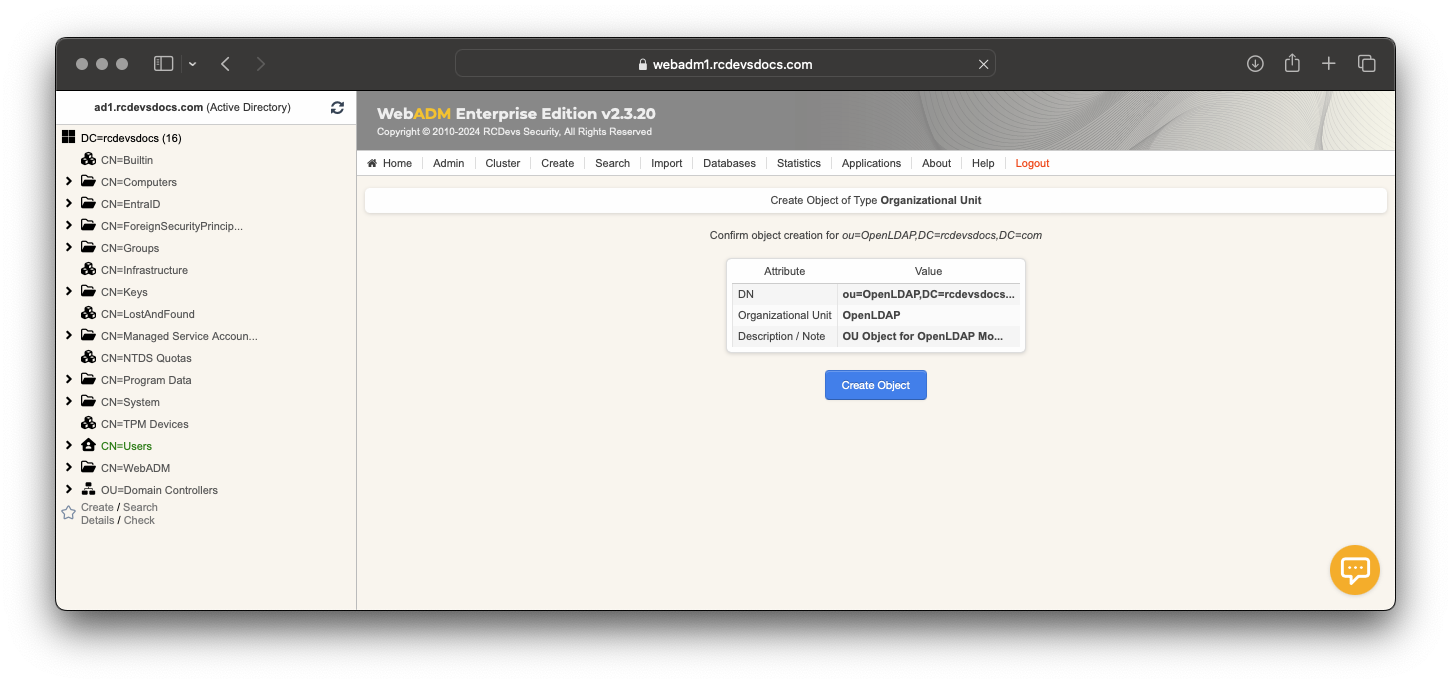
Click on Create Object, and if you have the required permissions, the OU will be created. In this example, I created it at the root of the LDAP tree, but you can set up a hierarchical structure if you need to configure multiple LDAP mount points.
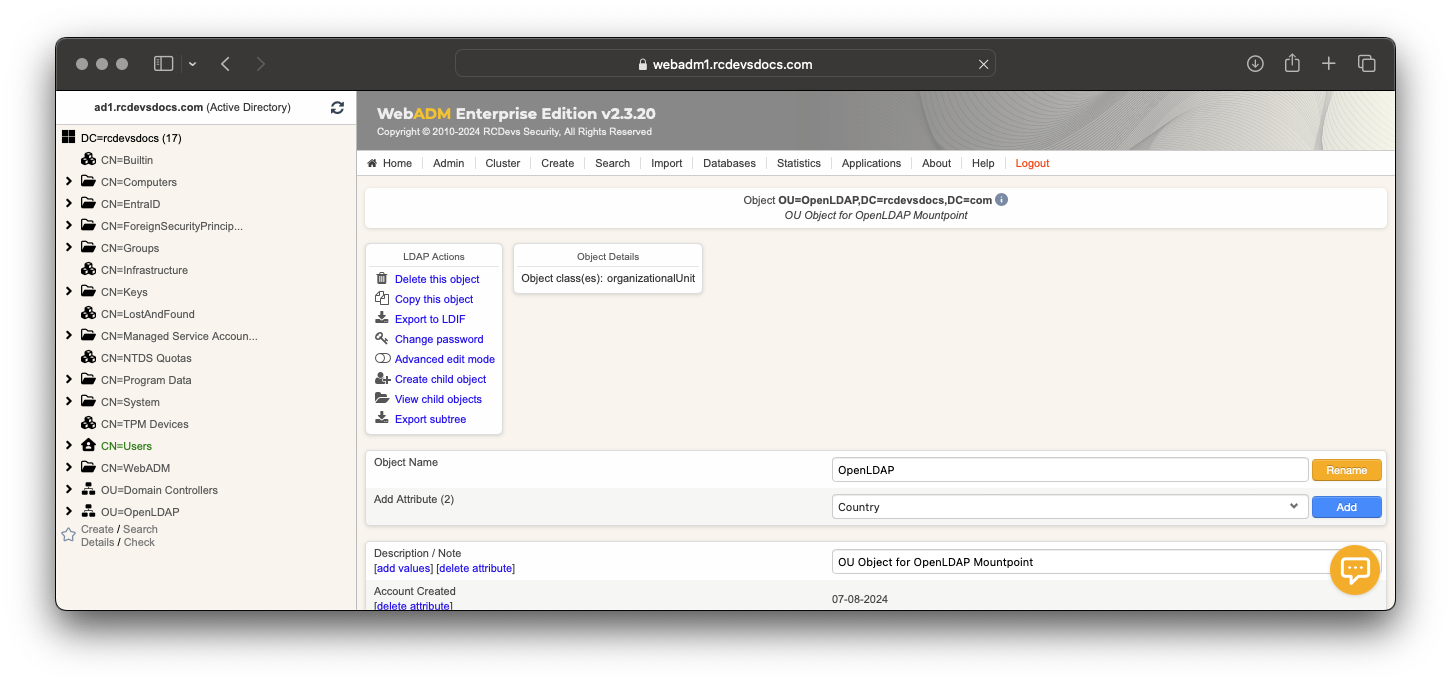
My OU has been successfully created and is ready for the next configuration step.
Mount Point Object creation
We can now create the Mount Point configuration object. Click on the Admin tab and click on the LDAP Mount Points menu.
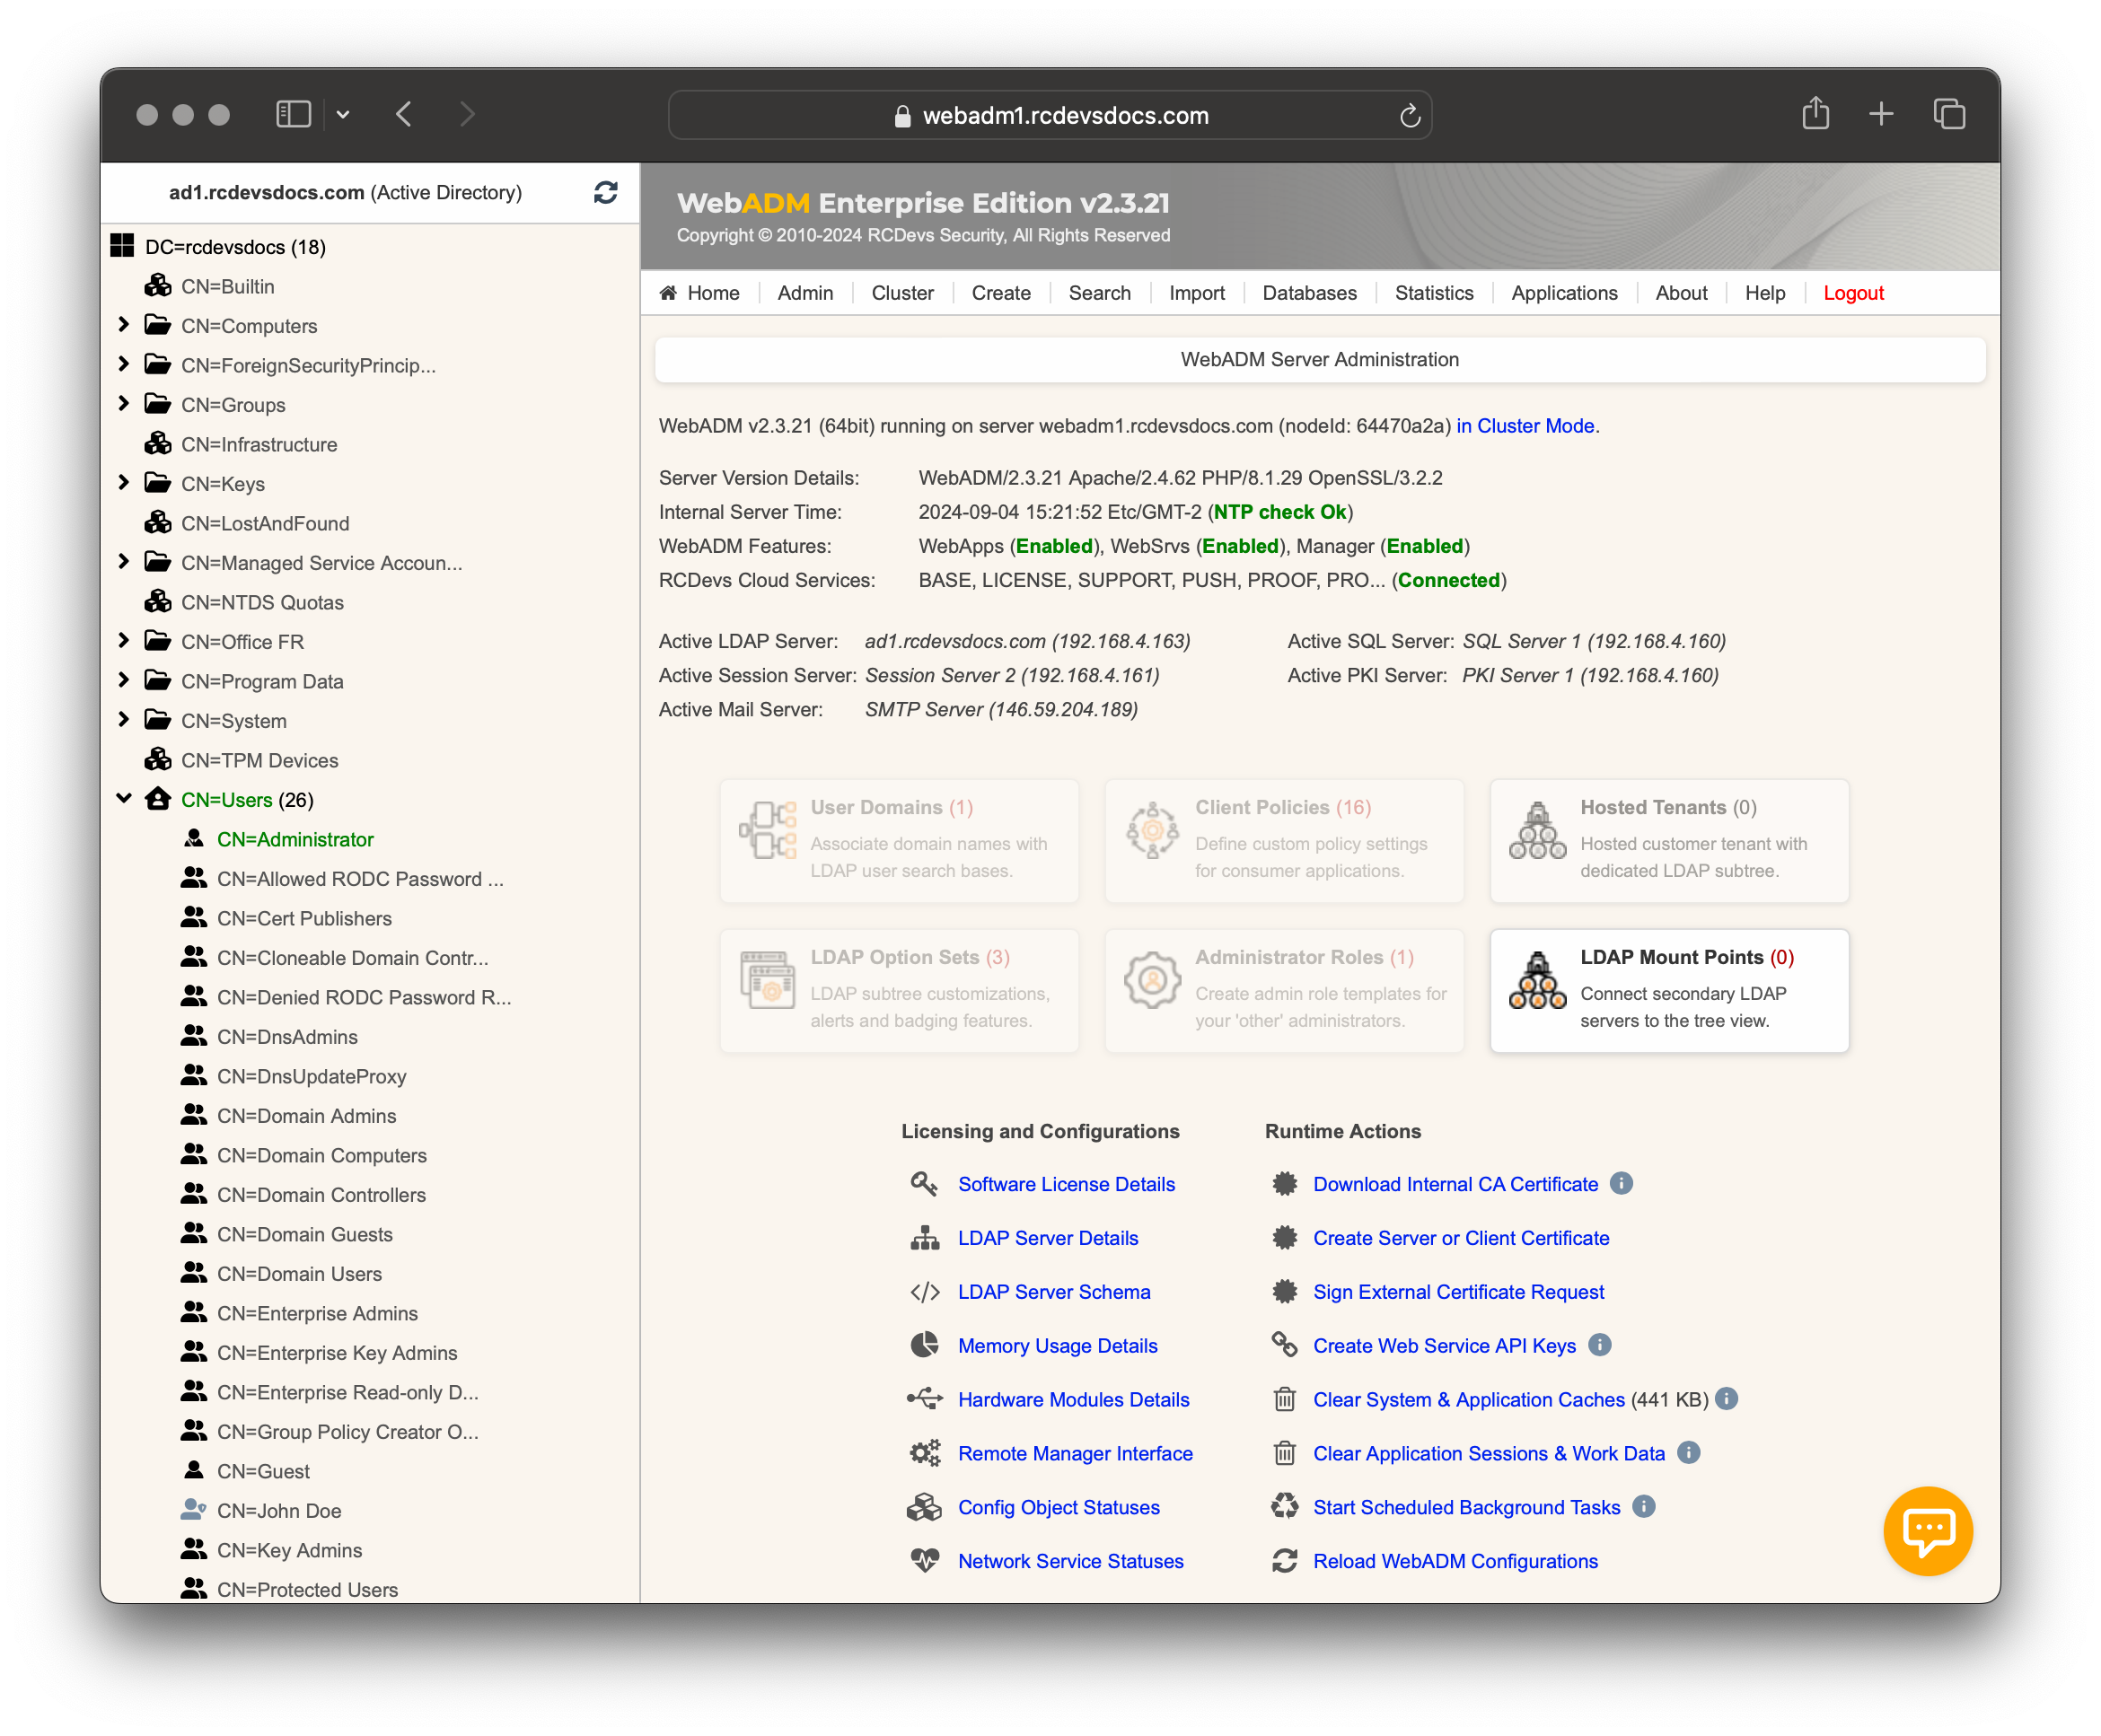
Click on Add Mount Point button and provide the required information to create the configuration object.
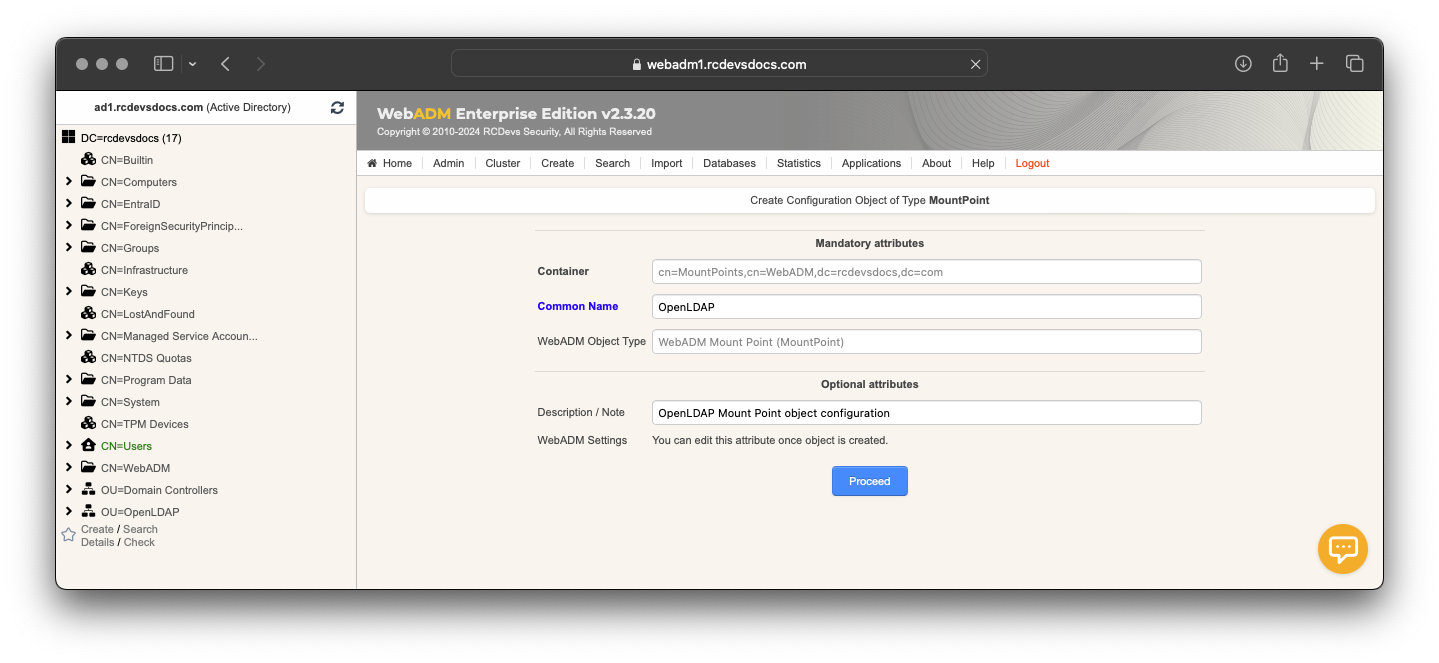
Click Proceed, then click the Create Object button to create the configuration object.
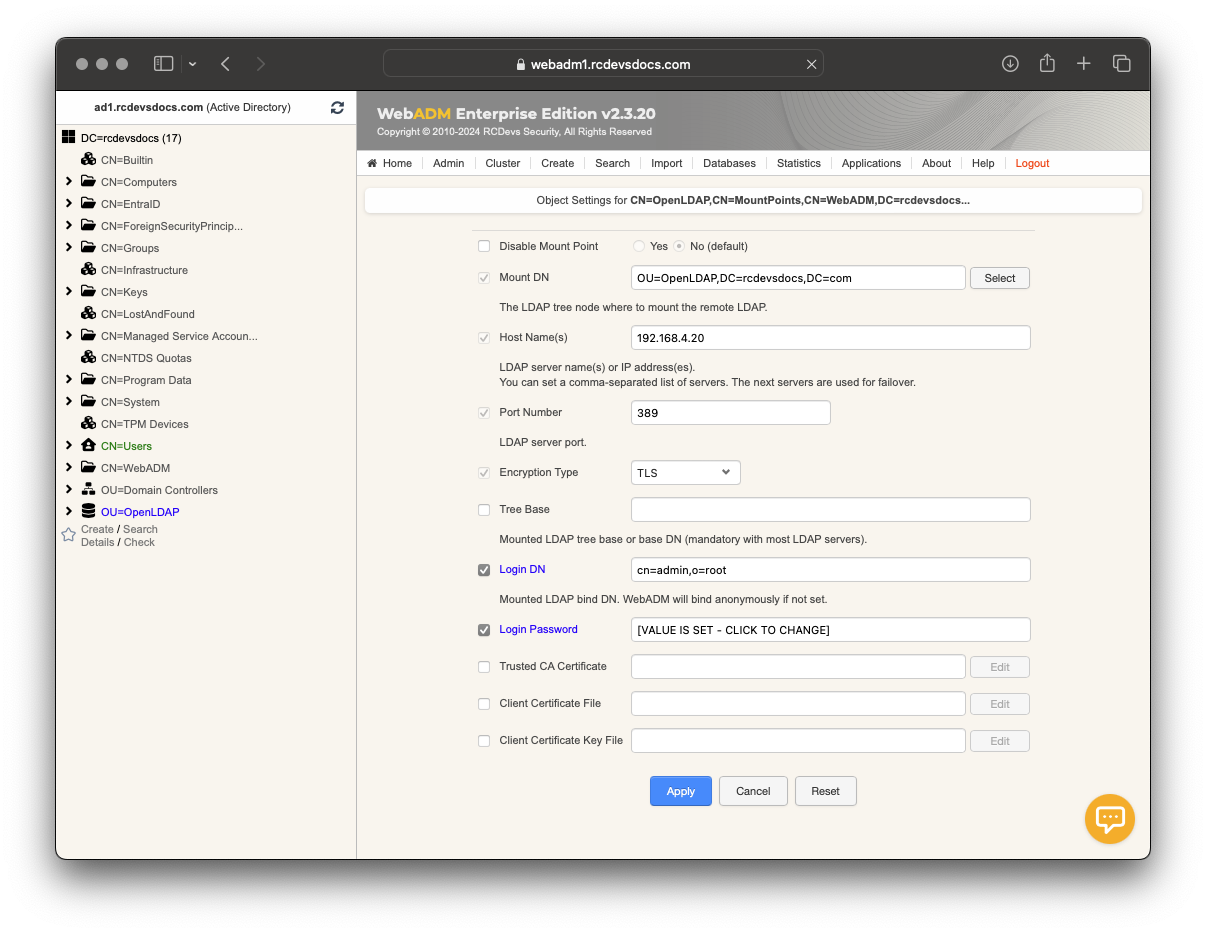
Once the configuration object is created, you are entering in the Mount Point configuration page.

Configure the required information as shown below, then click Save to save your configuration.
Mount DN: This setting is the location where the remote LDAP will be mounted on your WebADM server. We previously created a blank OU for this. So select your OU or the container previously created.Host Name(s): You have to configure here, the name or IP address of the remote LDAP server(s).Port Number: Set by default to 389 port but can be changed to 636 for LDAP SSL.Encryption type: None, SSL or TLS encryption are available.Tree Base: Enter the tree base of the remote LDAP (e.g: for the domain rcdevs.com, the tree base is dc=rcdevs,dc=com).Login DN: The login DN will be used to write WebADM metadata on users account on the remote LDAP.Login password: Password of the login DN user.Trusted CA Certificate: The certificate of the Certificate Authority (CA) that issued the server's certificate. This file must be located on the file system in PEM format.Client Certificate file: The file containing the client’s certificate, used for authentication. This file must be located on the file system in PEM format.Client Certificate key file: The private key file corresponding to the client certificate. This file must be located on the file system in PEM format.
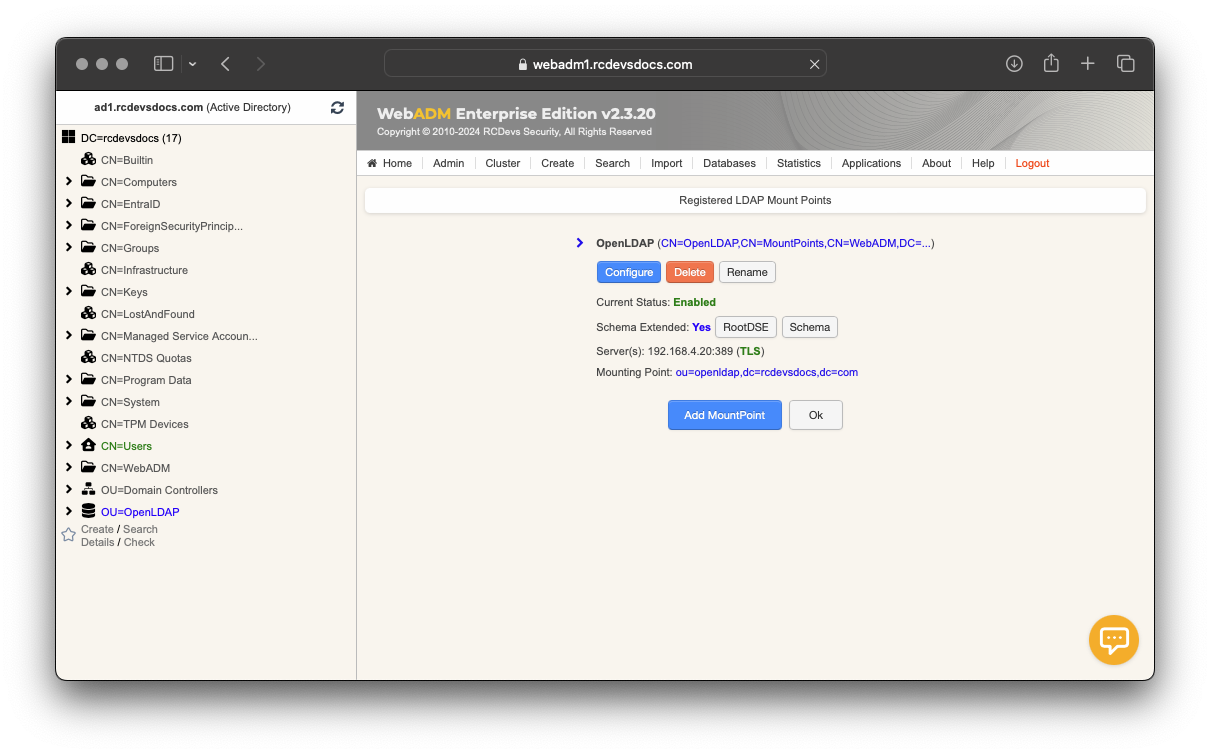
After saving the configuration, you will return to the mount point's main page, where you should see your mount point object and its status.
In the LDAP tree view on the left, you can expand your container/OU to browse the objects and structure of your LDAP infrastructure.
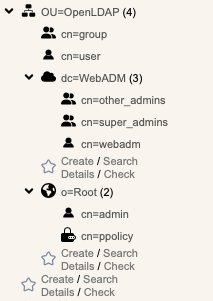
All LDAP operations performed in the mount point use the permissions of the account configured in the Mount Point object. Configure LDAP ACLs accordingly to manage and create objects.
Create the WebADM Domain Associated with This Mount Point
To use identities from that mount point with web services or web applications, a WebADM Domain object must be created for the mount point; otherwise, it will not be usable.
From WebADM Admin Portal, click on Admin tab then click on User Domains.

You should already have at least one domain refering to the main LDAP infrastucture configured with WebADM.
Click on Add Domain button, name your domain object and click Proceed.
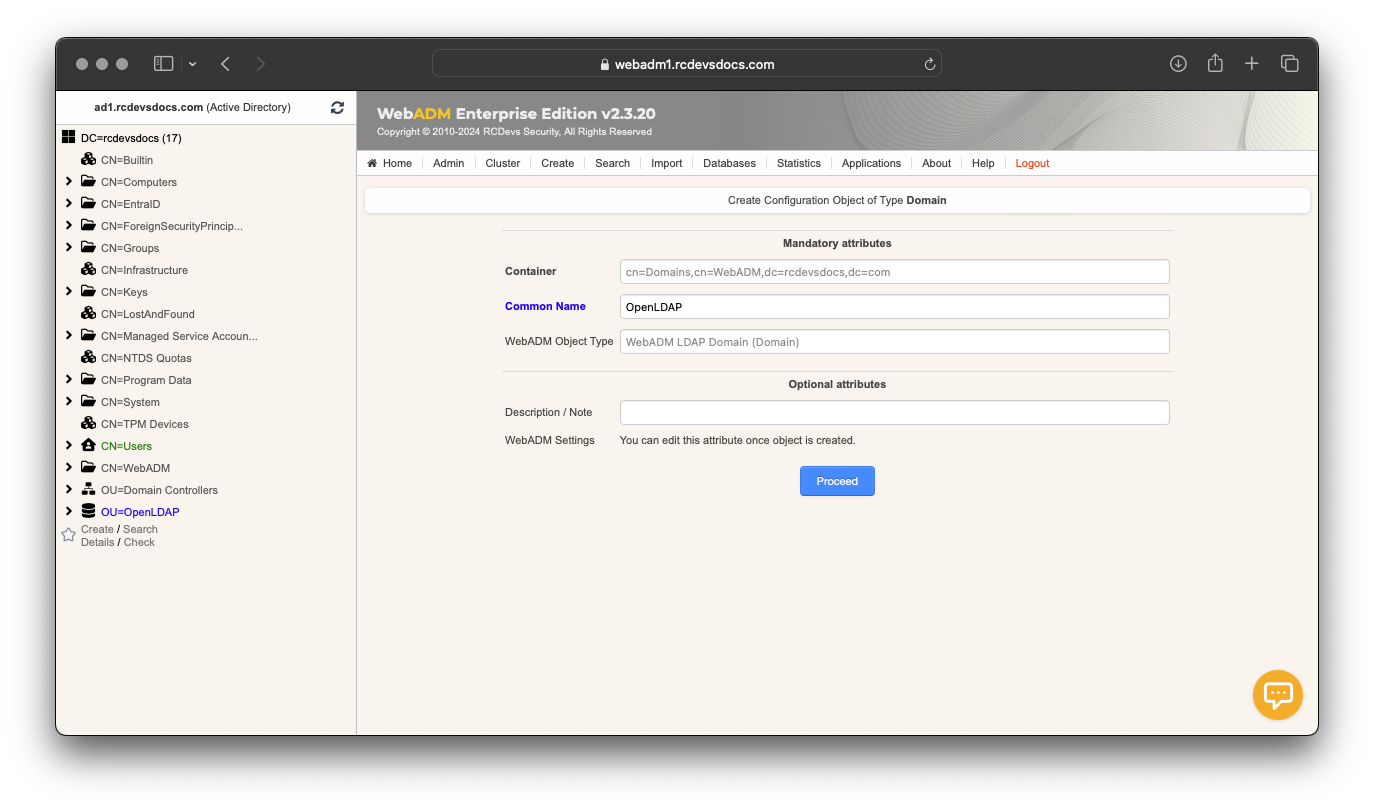
On the next page, click Create Object to create your domain configuration object. You will be redirected to the domain configuration editor, where you must configure at least the User Search Base setting.
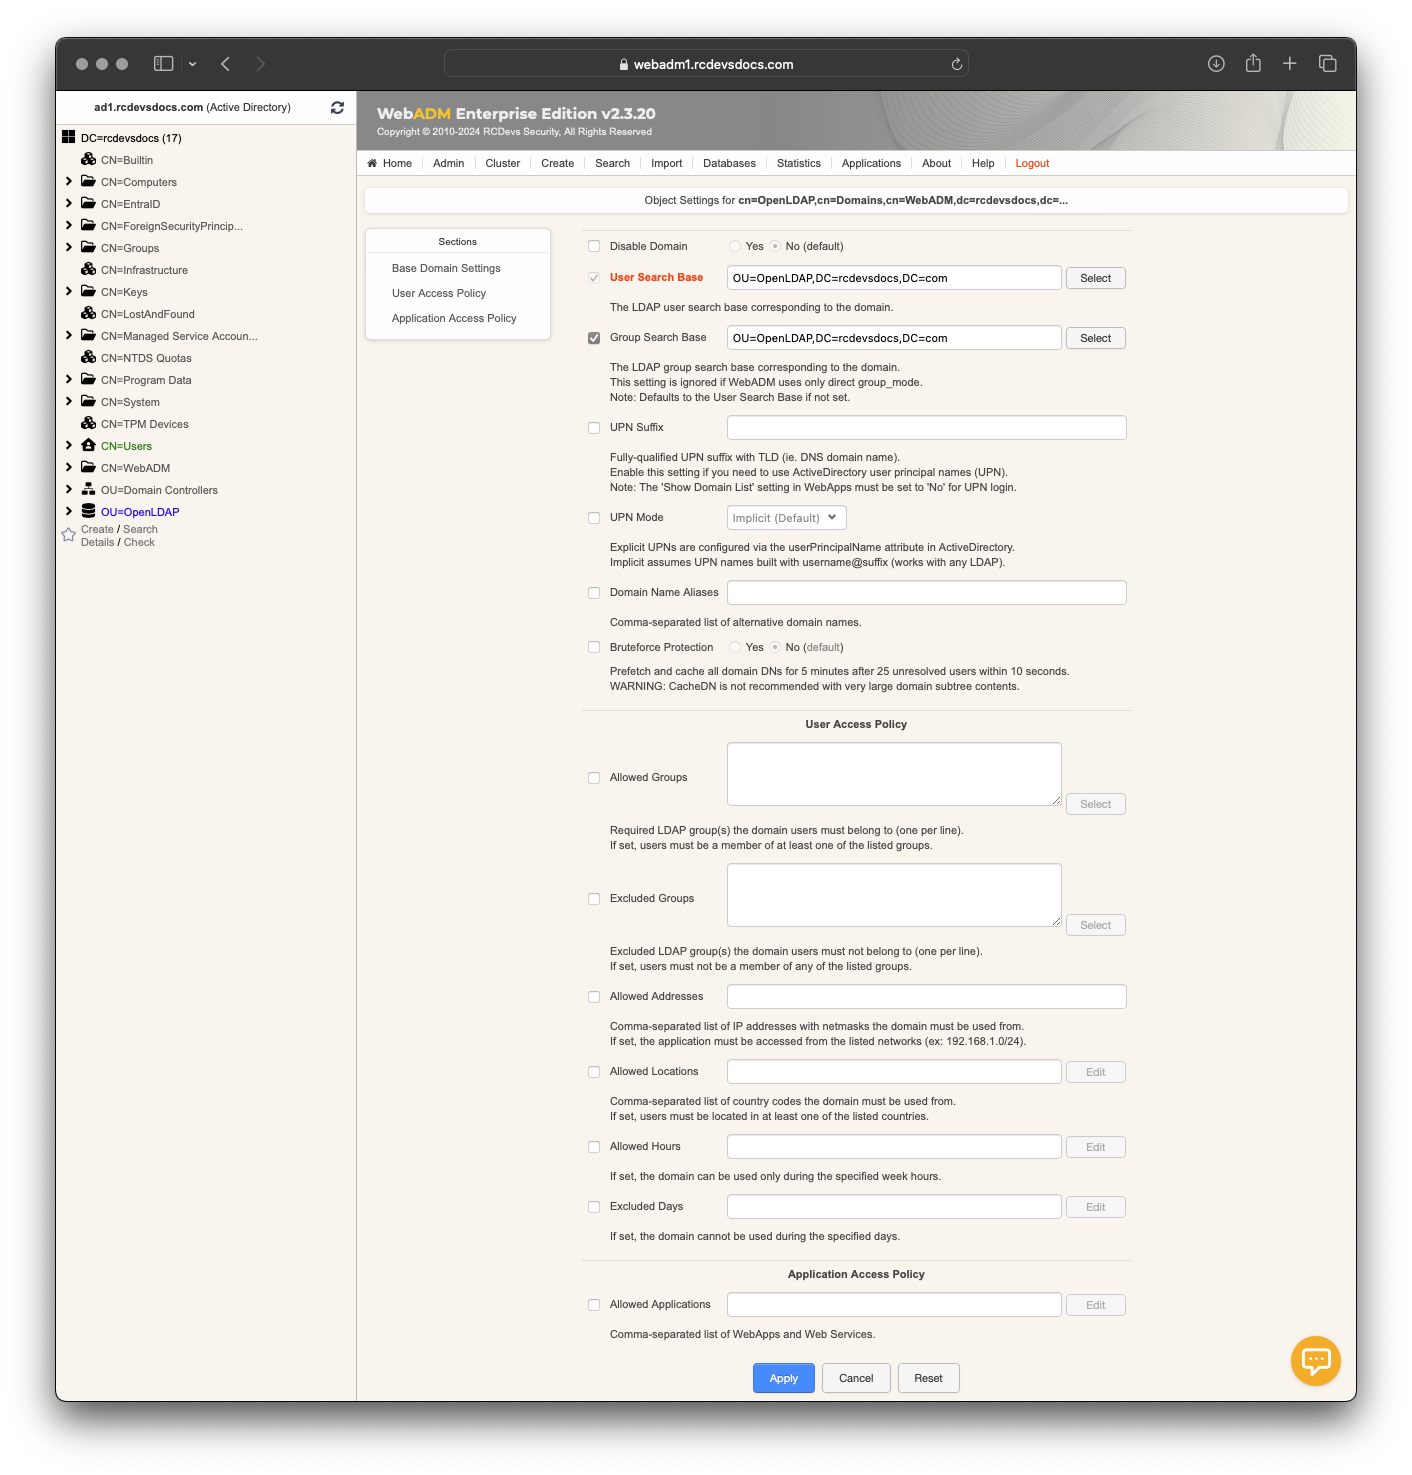
Configure the desired settings and click Apply. Your mount point is now ready for use with web services and web applications.
