Overview
The purpose of this web application is to provide an easy-to-use interface for the most common "tier 1" support task, typically performed by a Help-Desk function in a company IT organization.
This Web application is designed for internal (corporate) use and includes several self-management features like:
- Activate users for OpenOTP use
- View and manage account information such as email, mobile phone numbers, etc...
- Reset LDAP password
- Send password reset or token registration links
- Enroll, re-synchronize and test a Software / Hardware Token or Yubikey
- Manage user certificates
- Manage SSH keys (SpanKey)
Administration Help Desk web application must be installed on your WebADM server(s) and can be accessed through WAProxy or another reverse proxy configured with WebADM.
Please see the Helpdesk Installation and Configuration for further details.
The HelpDesk application is accessible via the following address:
https://webadm_server_address/webapps/helpdesk/login_uid.php
and through the WAProxy it is:
https://waproxy_or_reverse_proxy_address/helpdesk/login_uid.php
Dashboard
Log in to the Help Desk application portal using an administrator account defined in the Help Desk configuration. After logging in, you will be directed to the home page, which looks like this:

User Search
When searching for a user, the LDAP search is based on the attributes configured in the User Search Attributes and User Search Scope settings. You must type at least 3 characters for the search to be automatically triggered and auto-fill the response if only one account matches your search. If multiple accounts match, a dropdown list containing the matching accounts will be displayed.
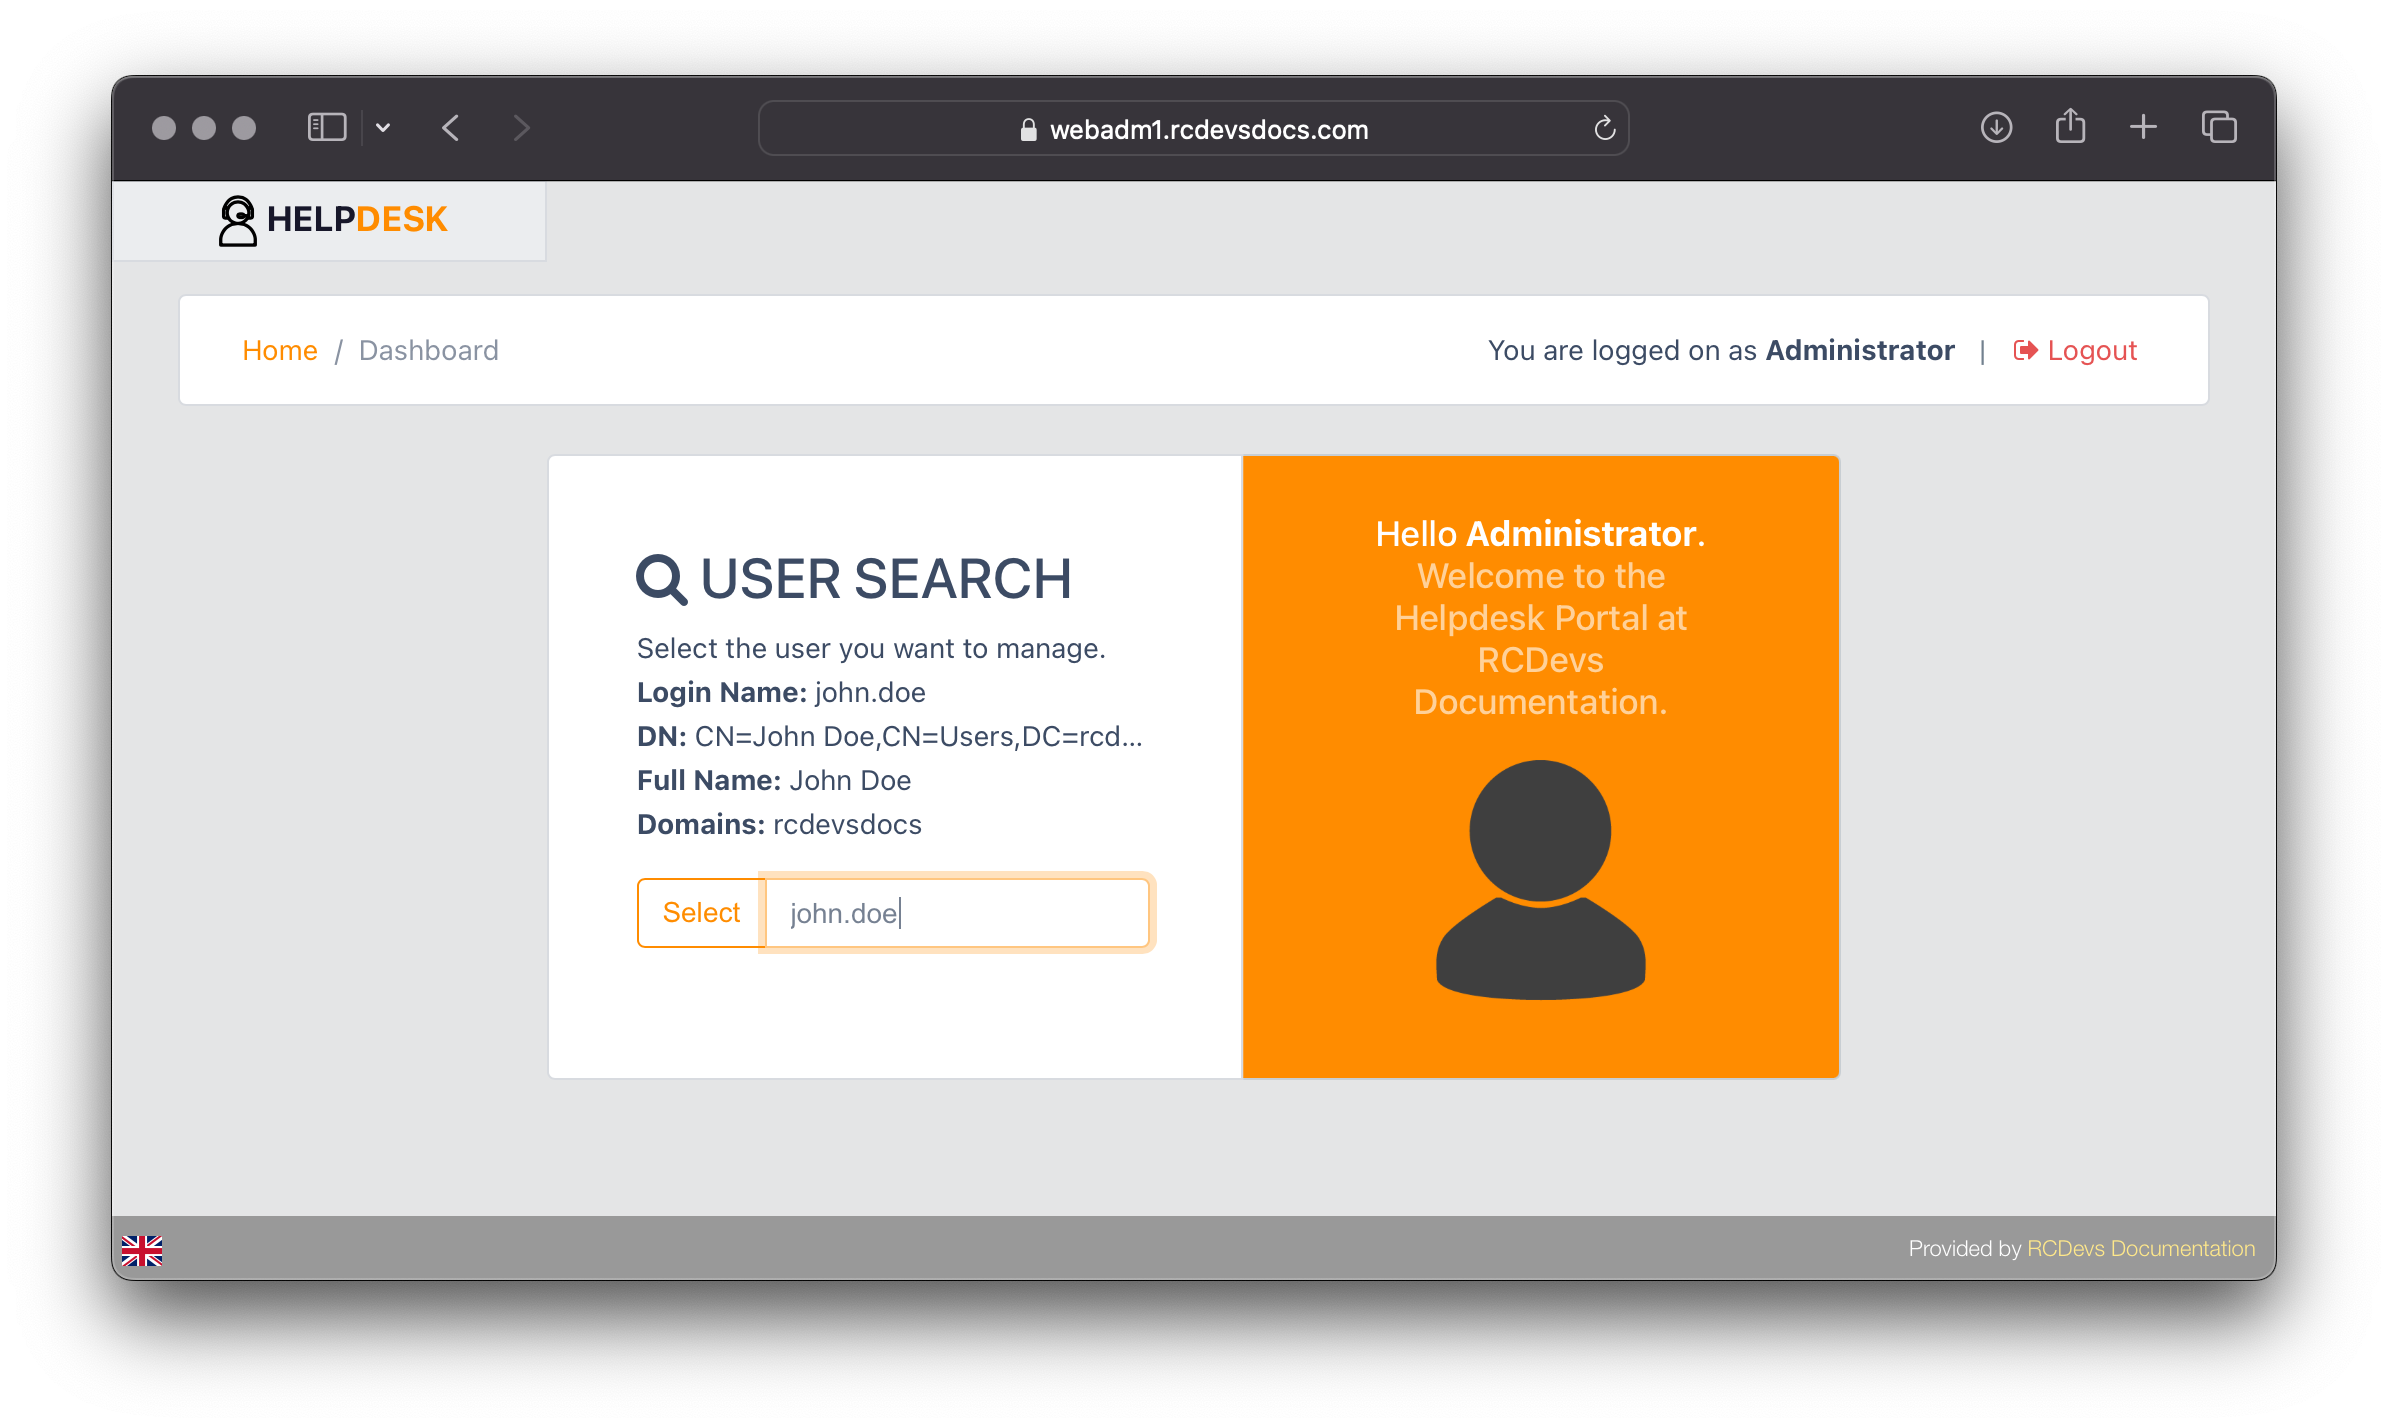
Once the account is found, click the Select button to access the account details.
User Activation
If the user account is not yet activated (licensed), you must activate it before proceeding with any other actions in the Help Desk portal.
Click on Activate button:

After activating the account, you will be taken to the user's Dashboard (Home) page.

OTP Tokens management
Click on the OTP tab for the user you want to register an OTP token. The following page will appear, with available actions based on the permissions set in the Help Desk configuration.
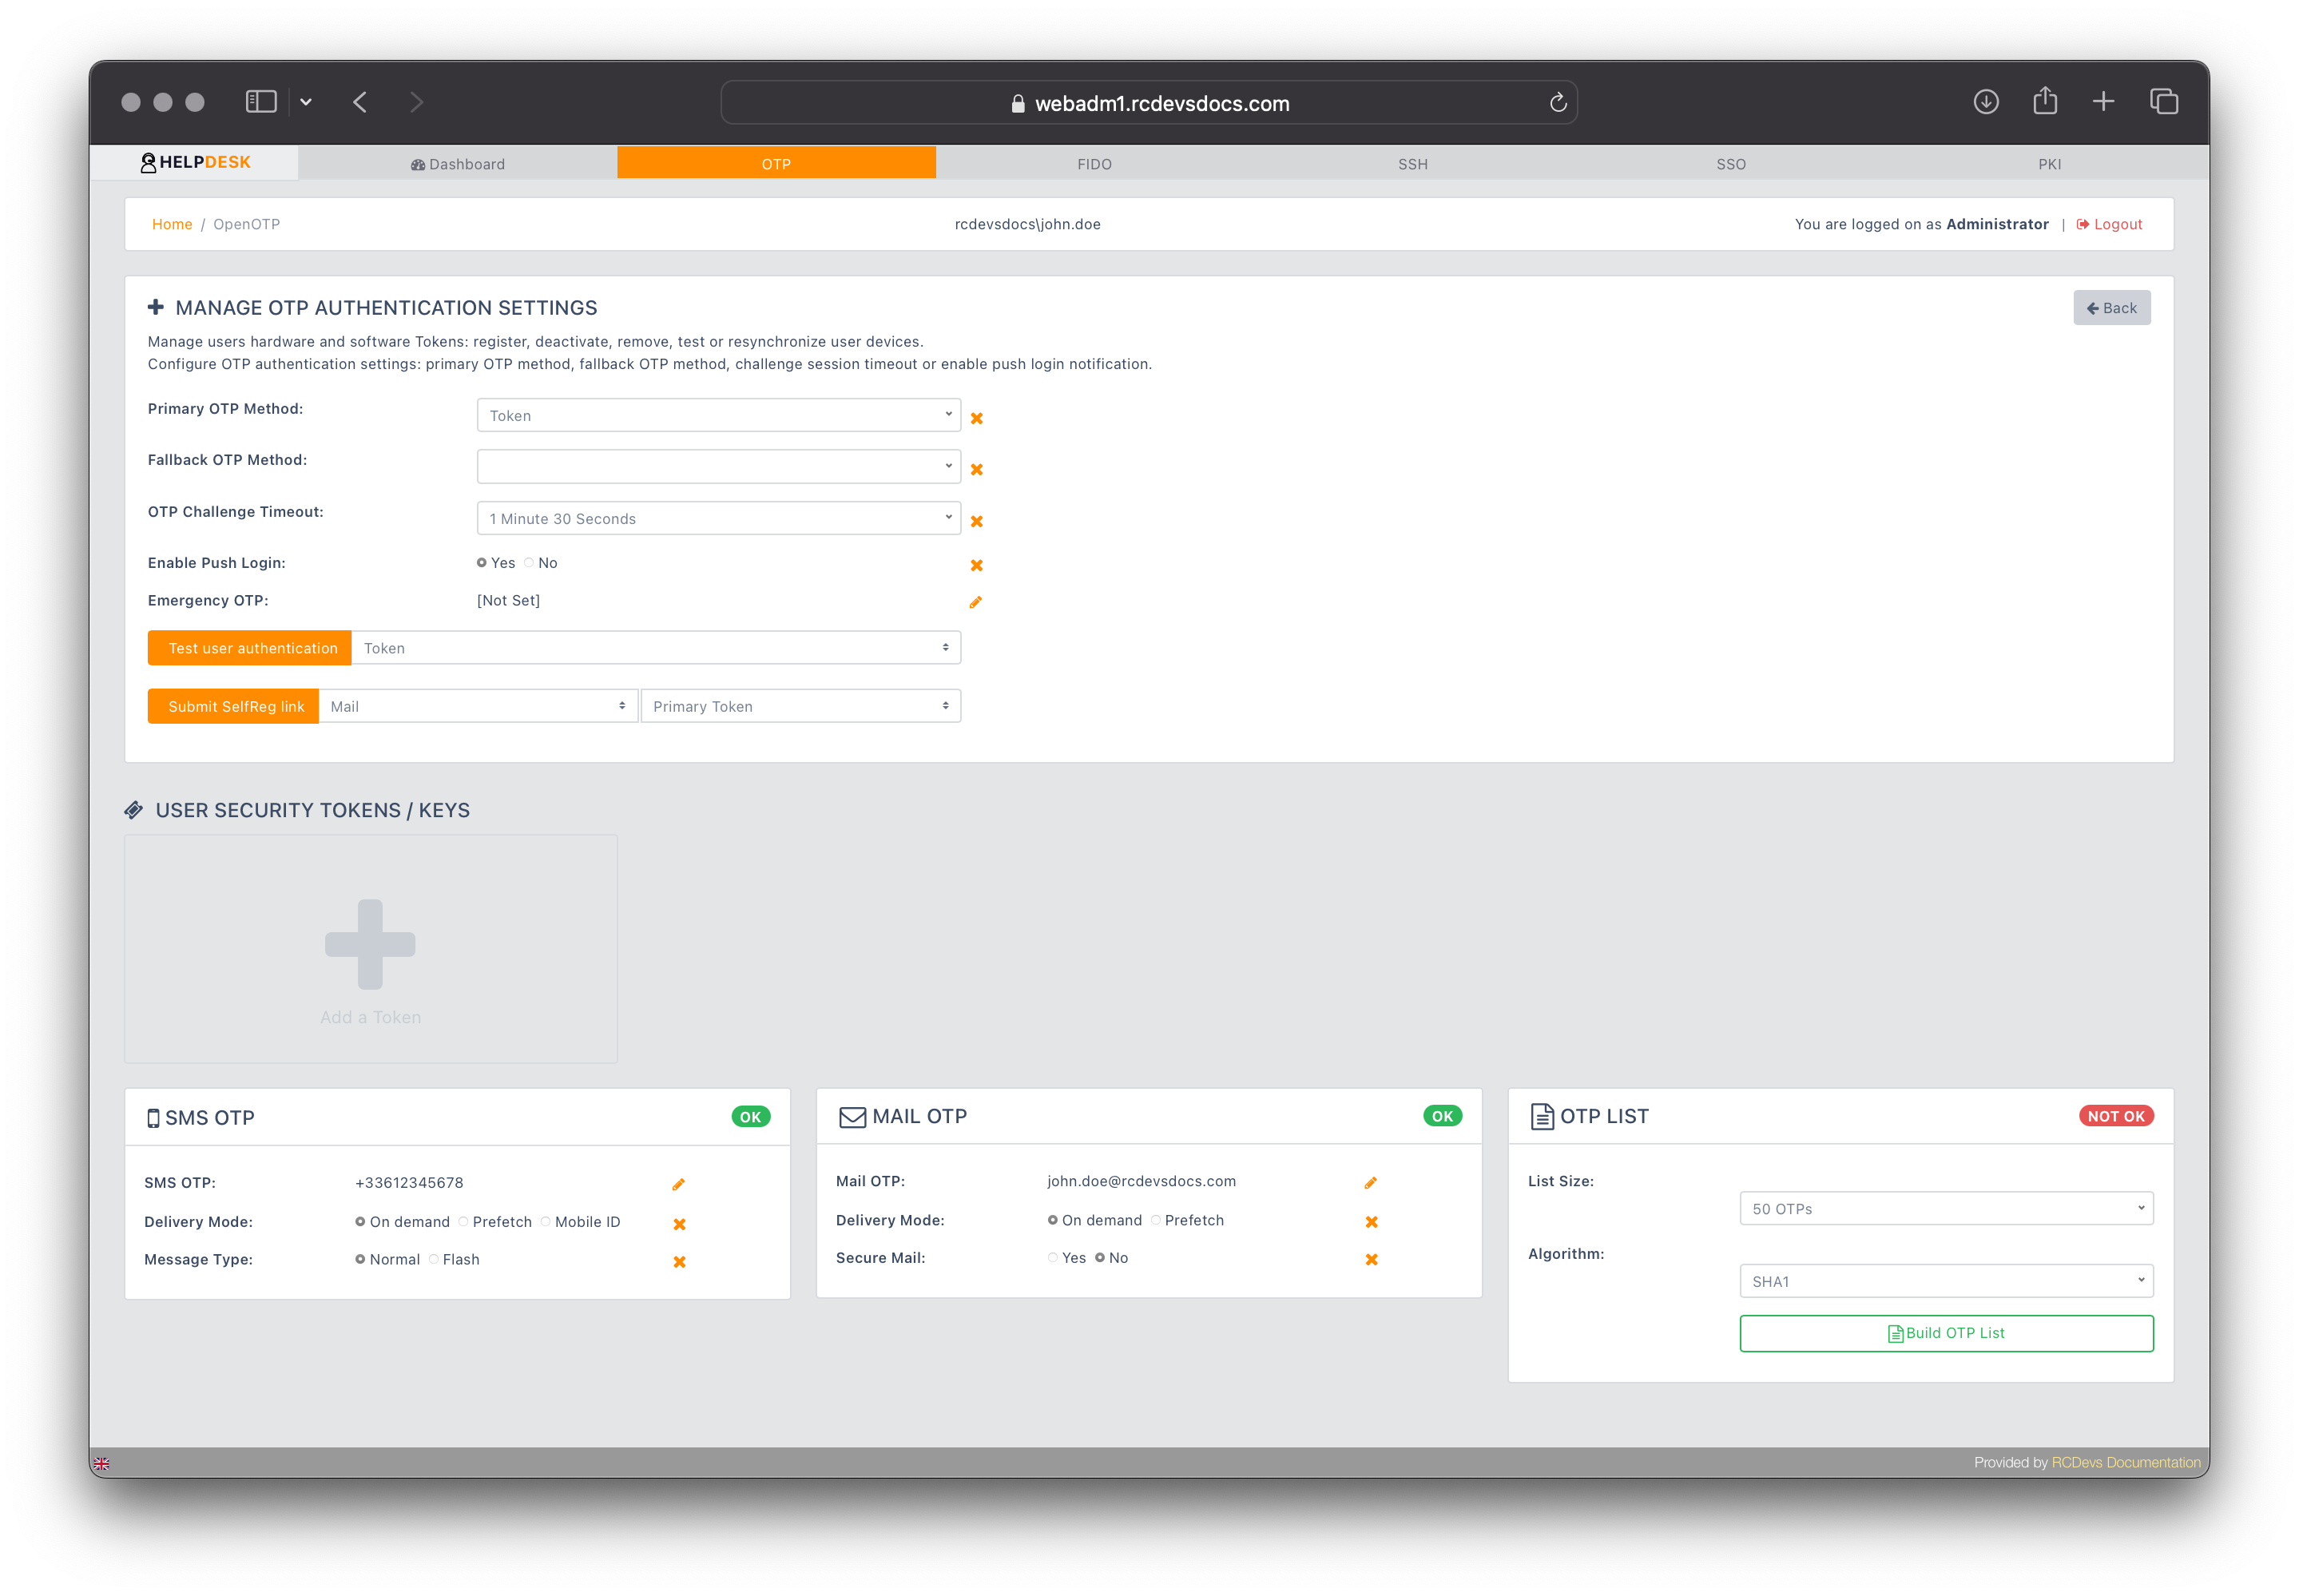
In the User Security Token/Keys section, click the Add Token button to begin the token registration process.
If you have not configured a Default Token Type in your Helpdesk settings, you will be prompted to choose the type of token you want to register.
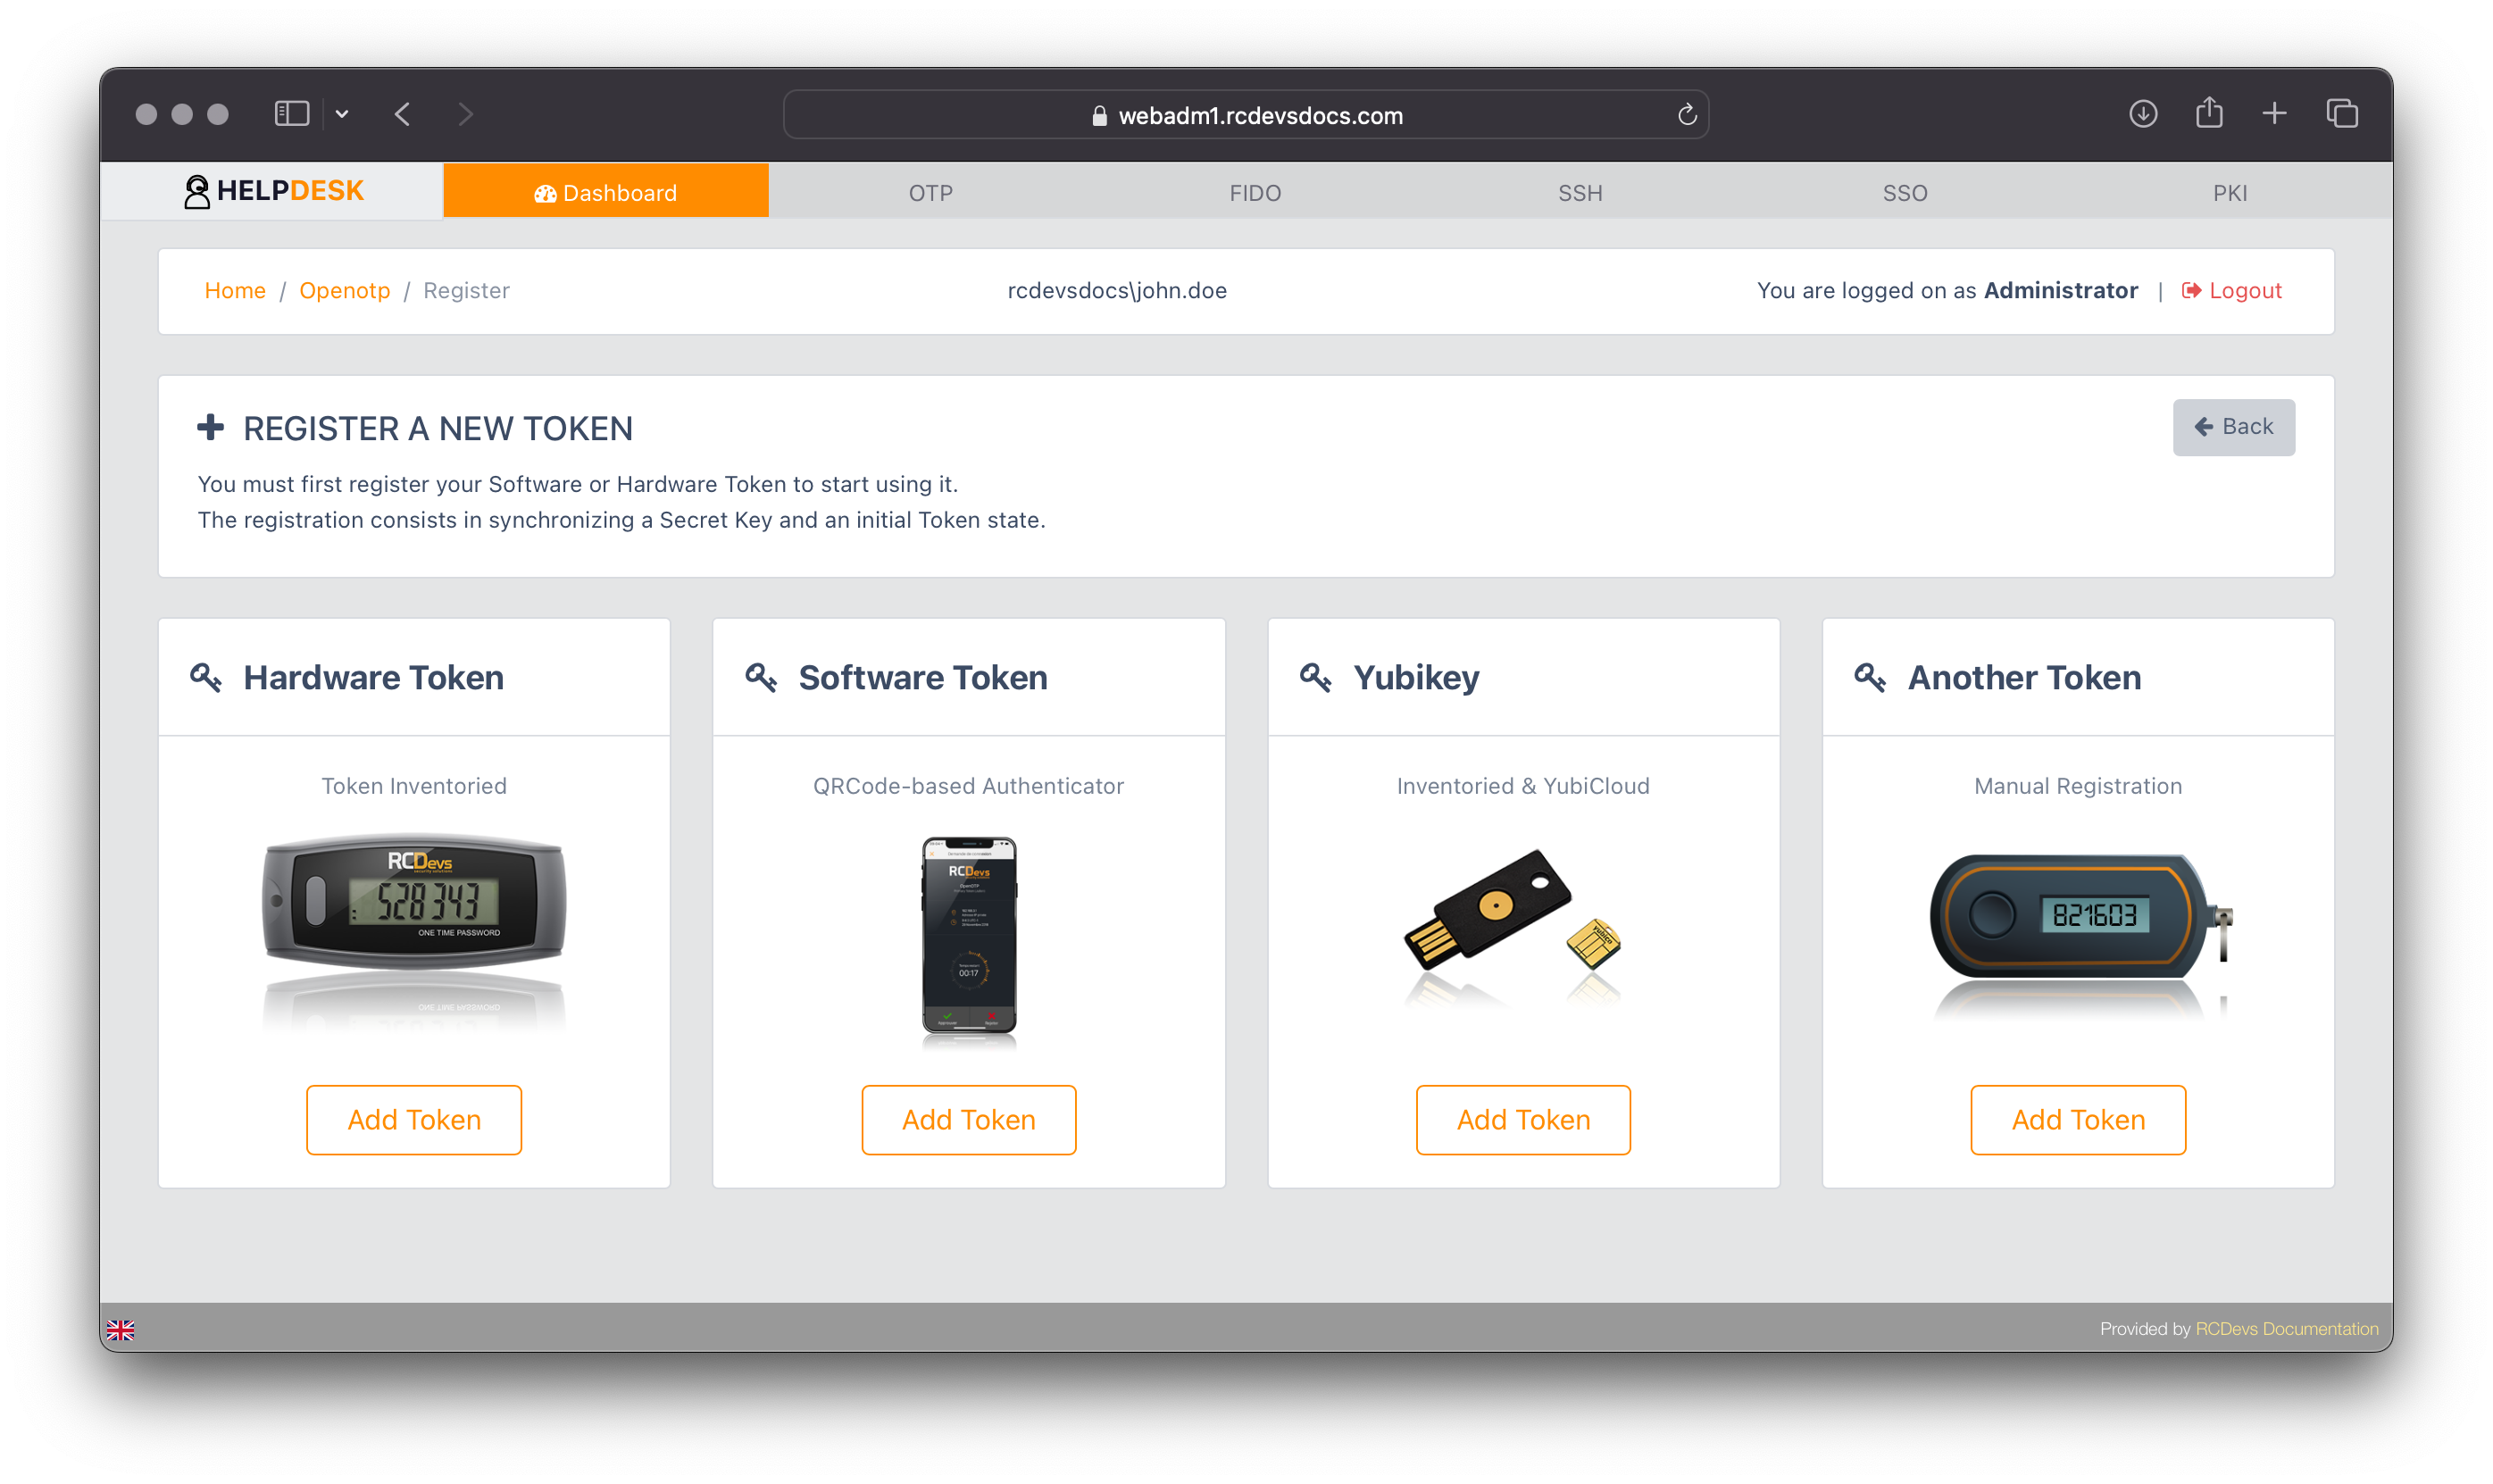
If you have configured a Default Token Type in your Helpdesk settings, it will be pre-selected for registration.
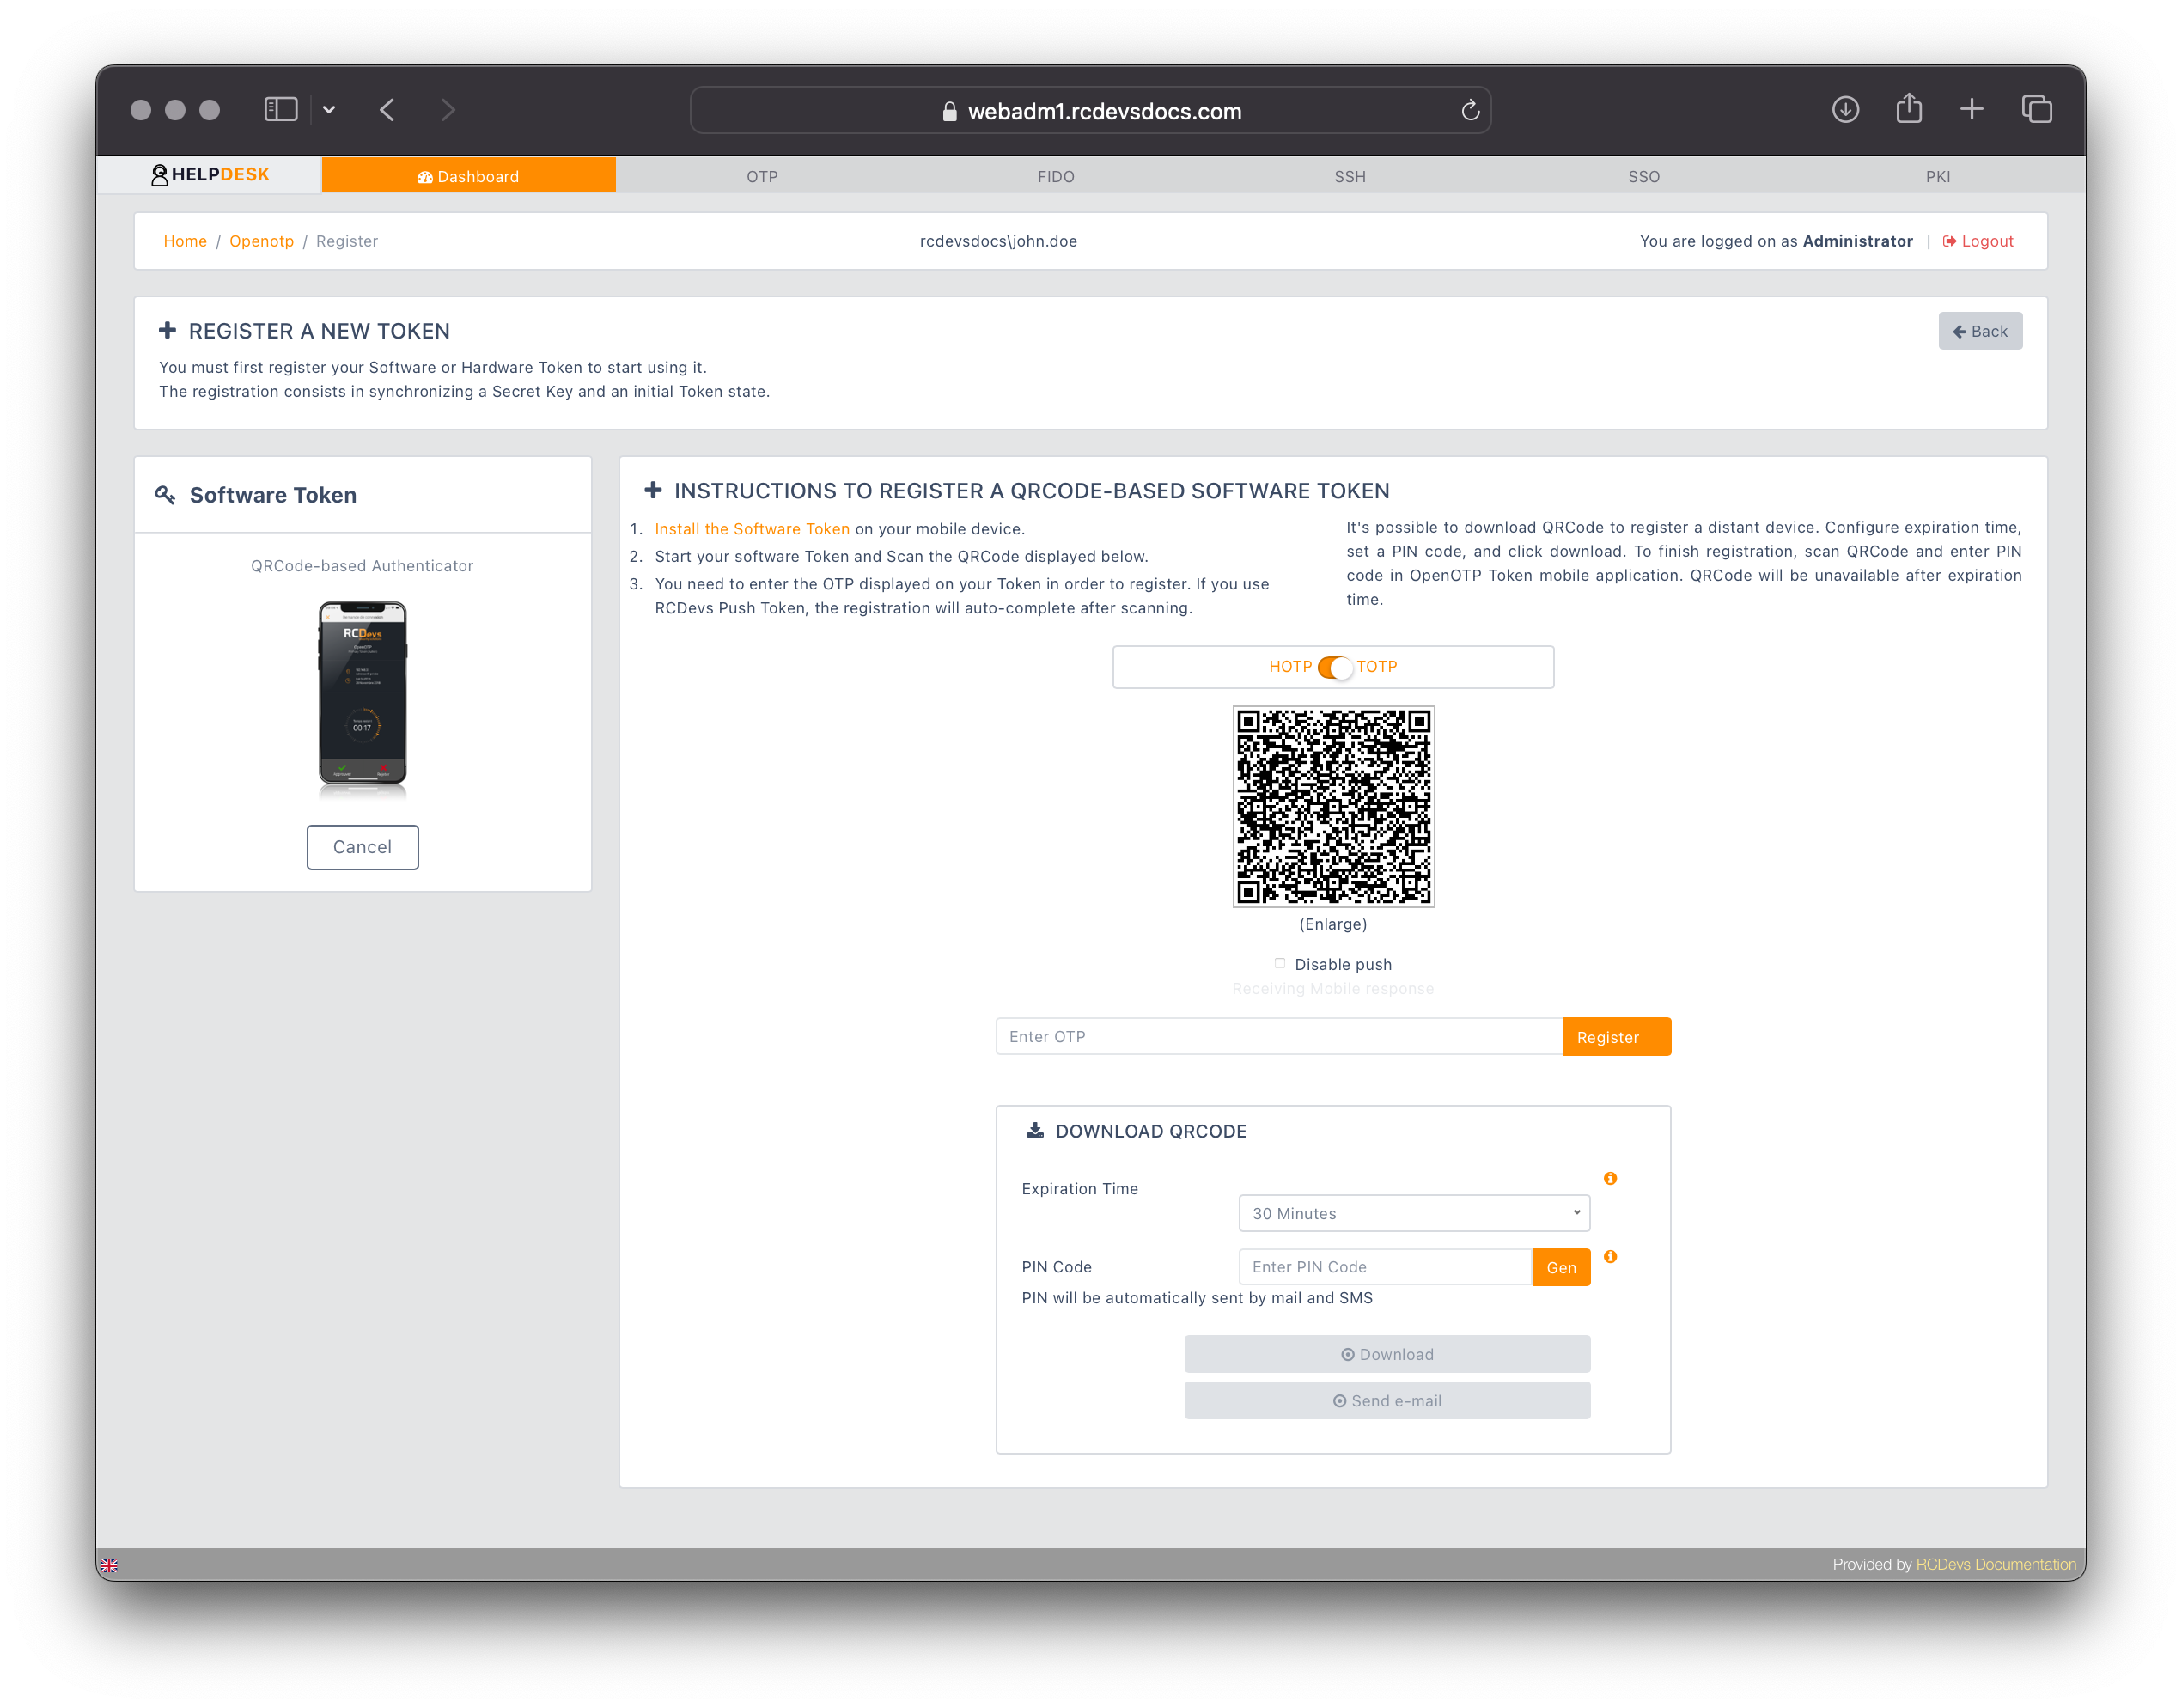
The user can scan the QR code to enroll their OTP token. They must optionally provide the One-Time Password and click Register if the token is not a Push Token.
If Push Token mode is enabled, the enrollment process will proceed automatically after scanning the QR code with the OpenOTP Token application. With Push Token mode enabled, you can also:
- Submit the QR code enrollment by email.
- Download the QR code.
In both scenarios, the enrollment session associated with the QR code is protected by a PIN code, which must be configured and which is valid for the duration specified. Once the enrollment is complete, you will return to the previous screen. Click on the Home tab to return to the user profile view and see the enrolled token.

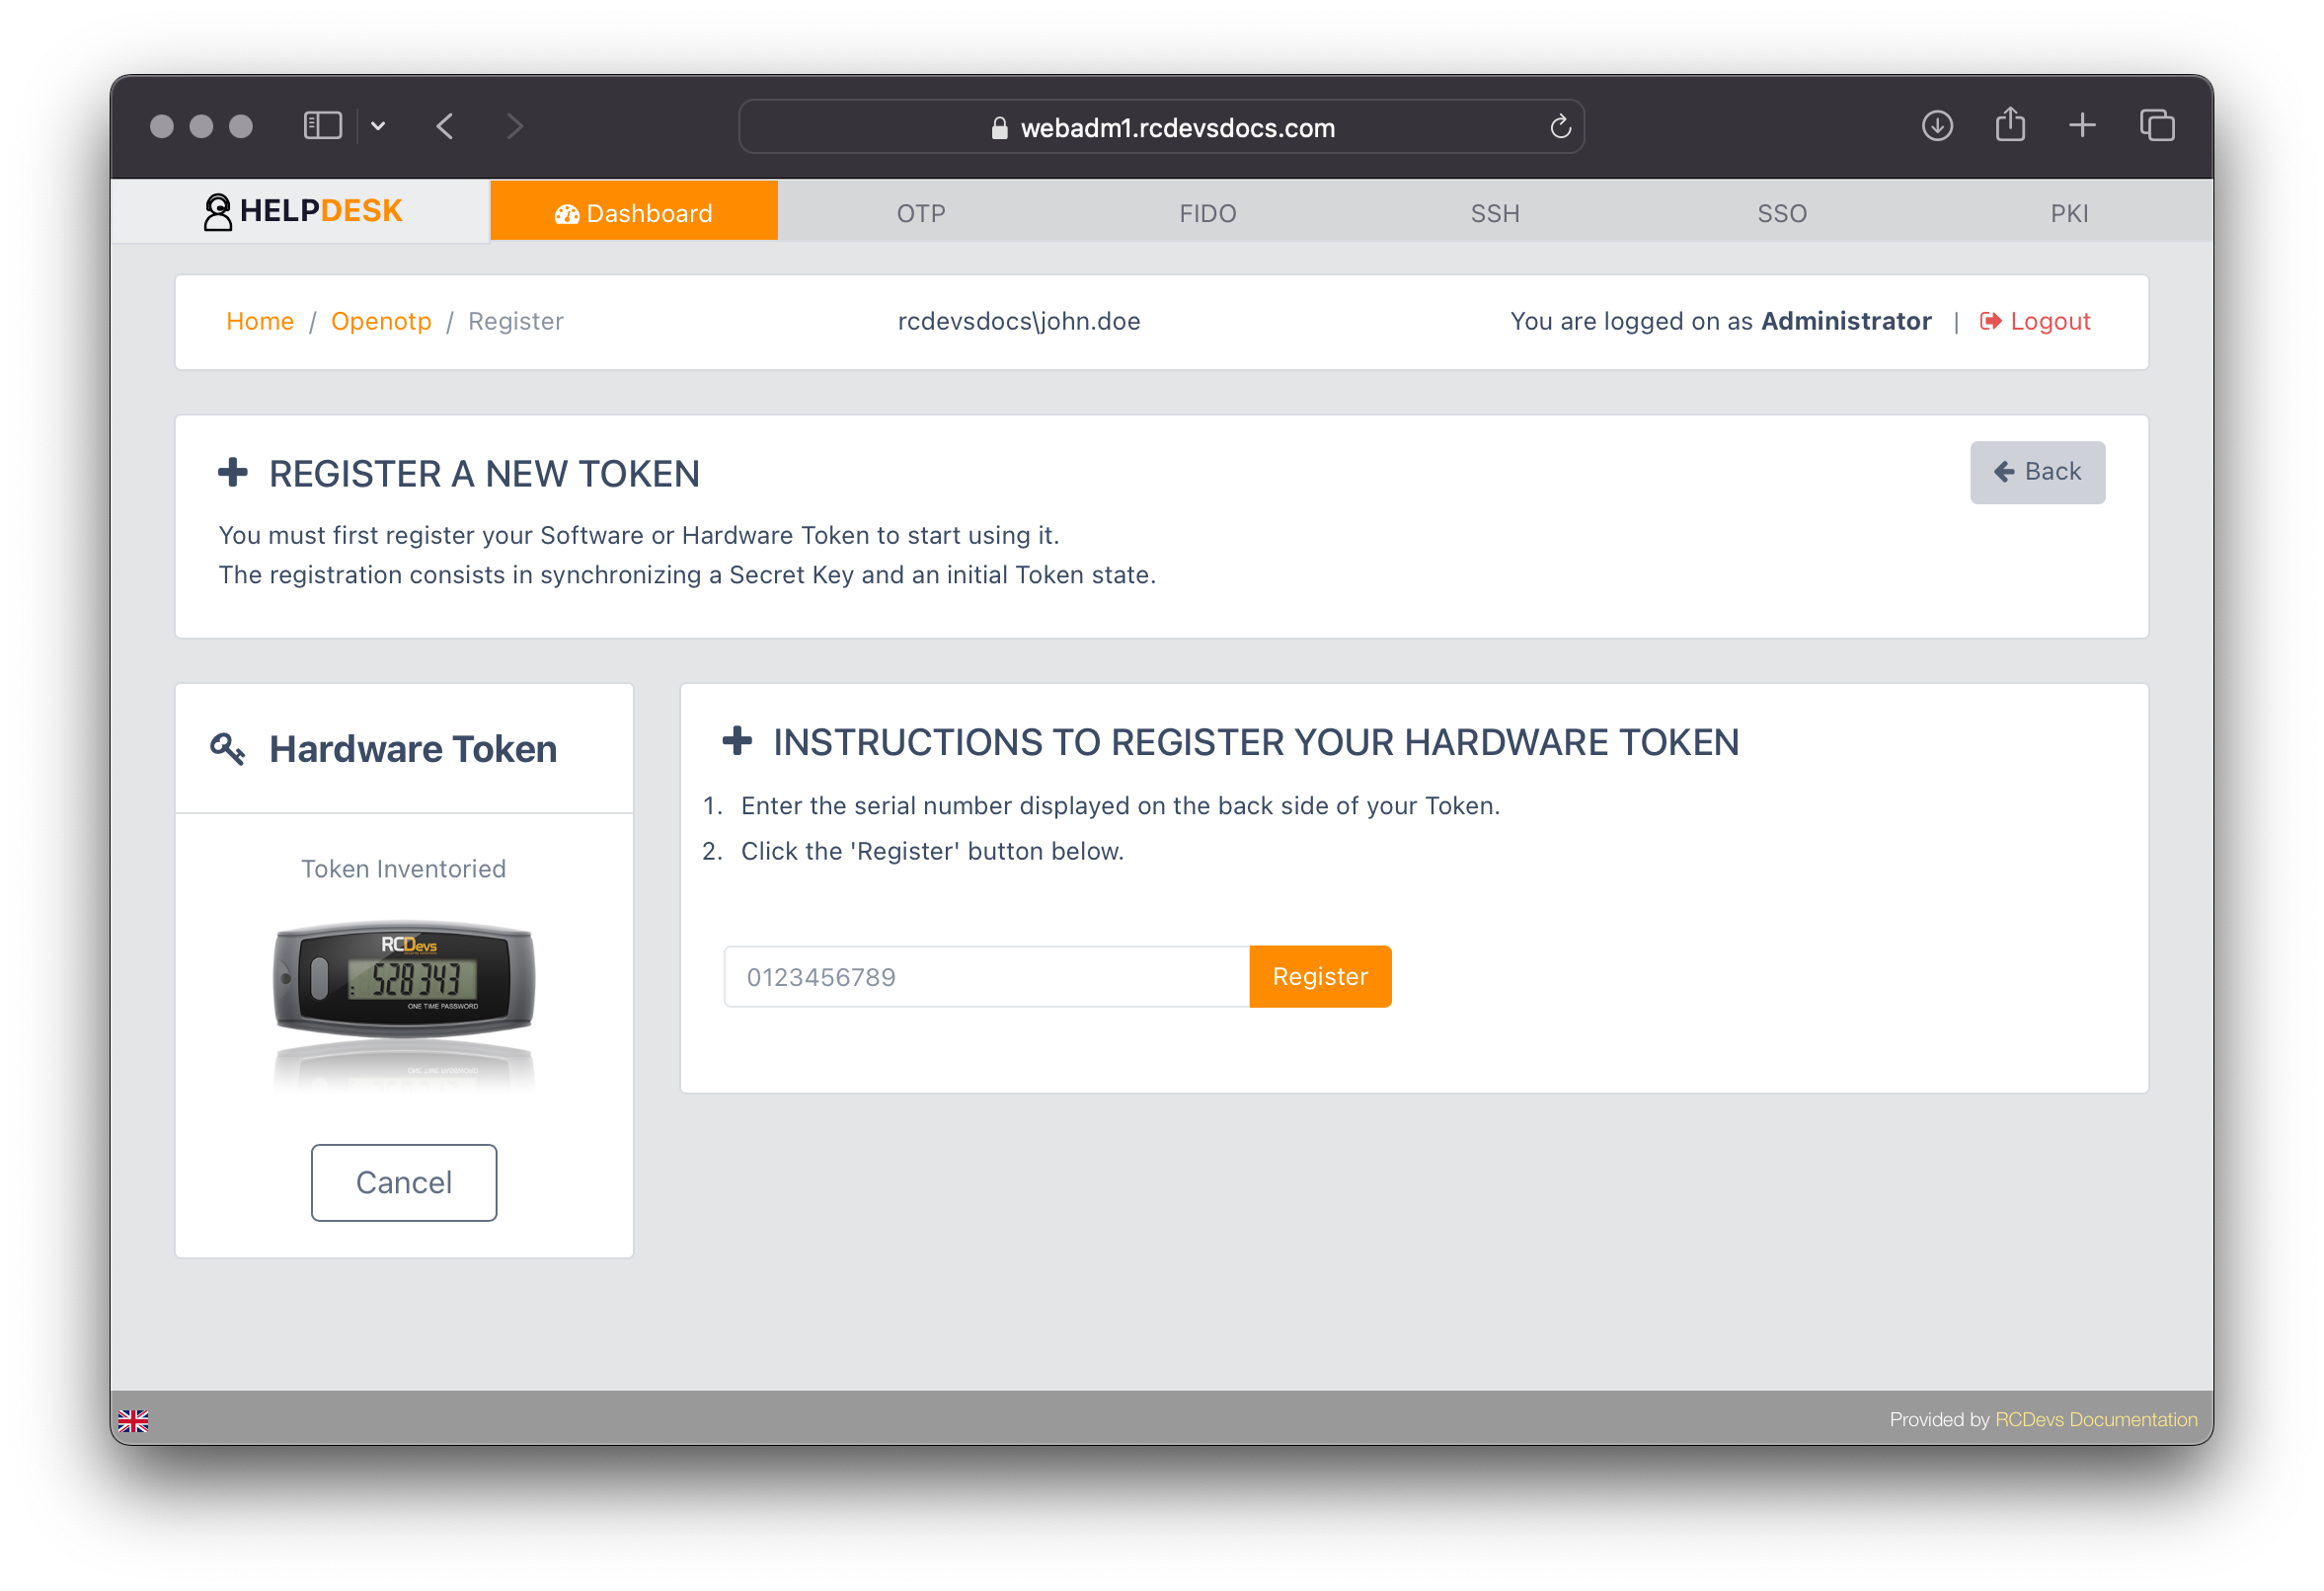
To enroll a hardware token, it must first be inventoried in WebADM. Simply provide the token's serial number, assign it to the user account, and click Register.
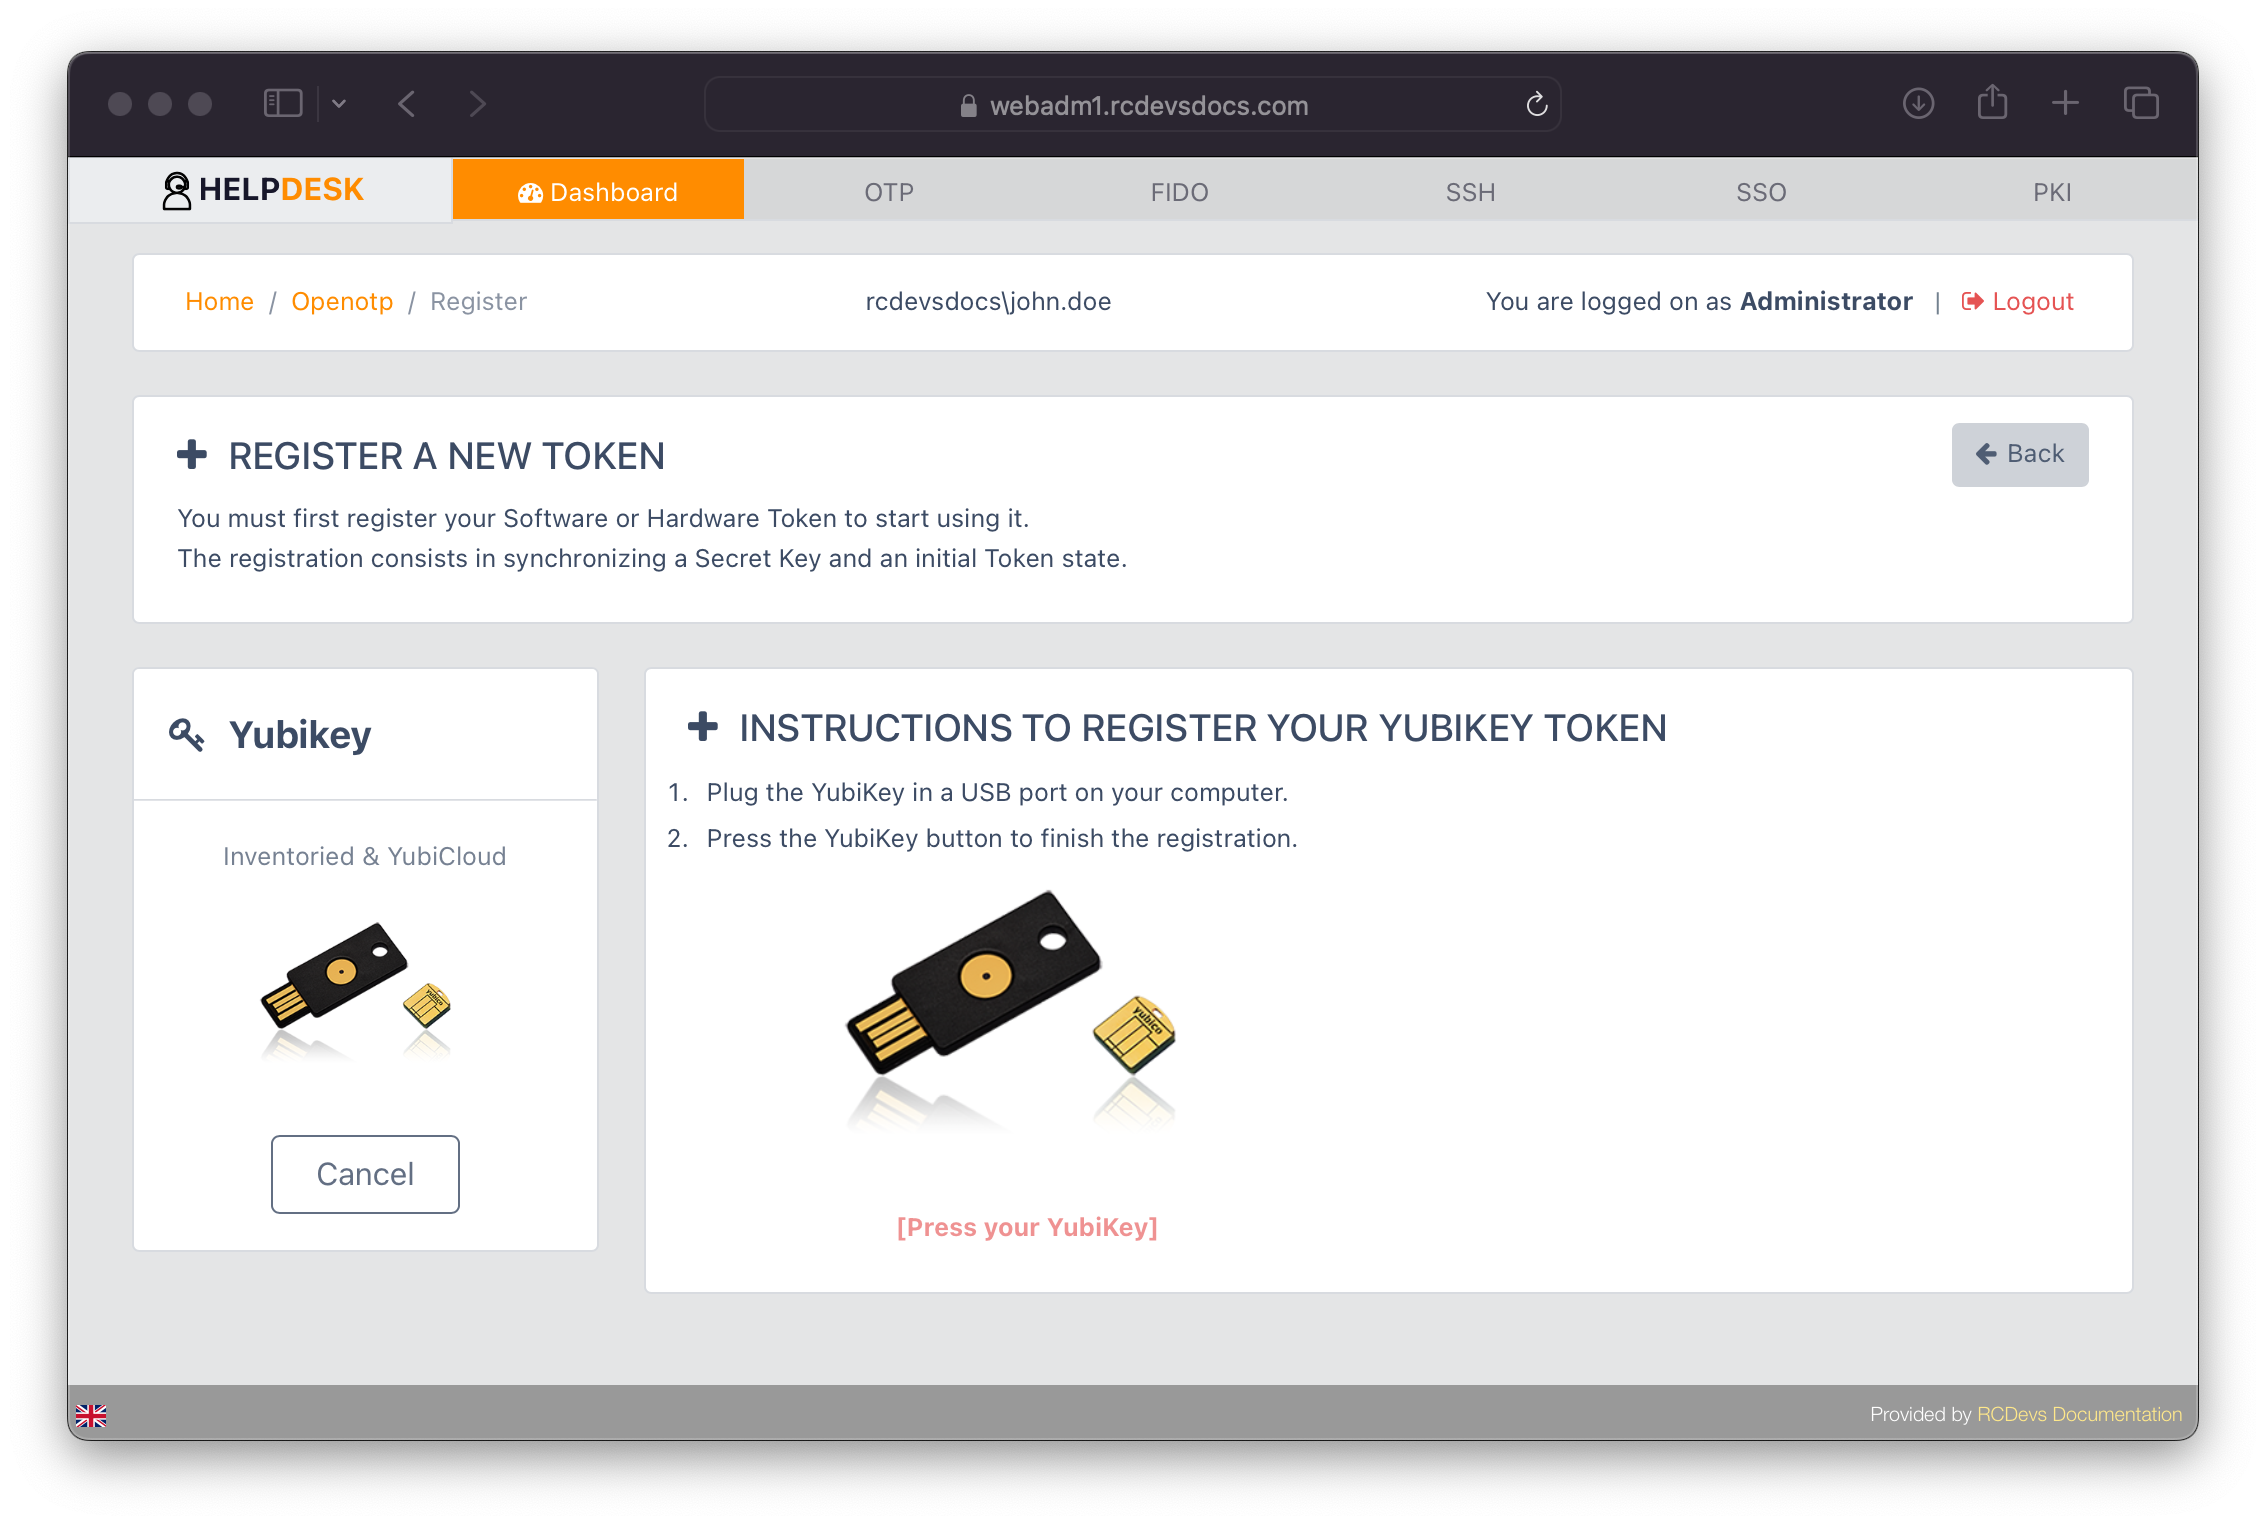
To enroll a YubiKey token, it must first be inventoried in WebADM or registered with the YubiCloud validation server. If using the YubiCloud validation server, it must be configured in the OpenOTP settings beforehand. Complete the enrollment by pressing the YubiKey.
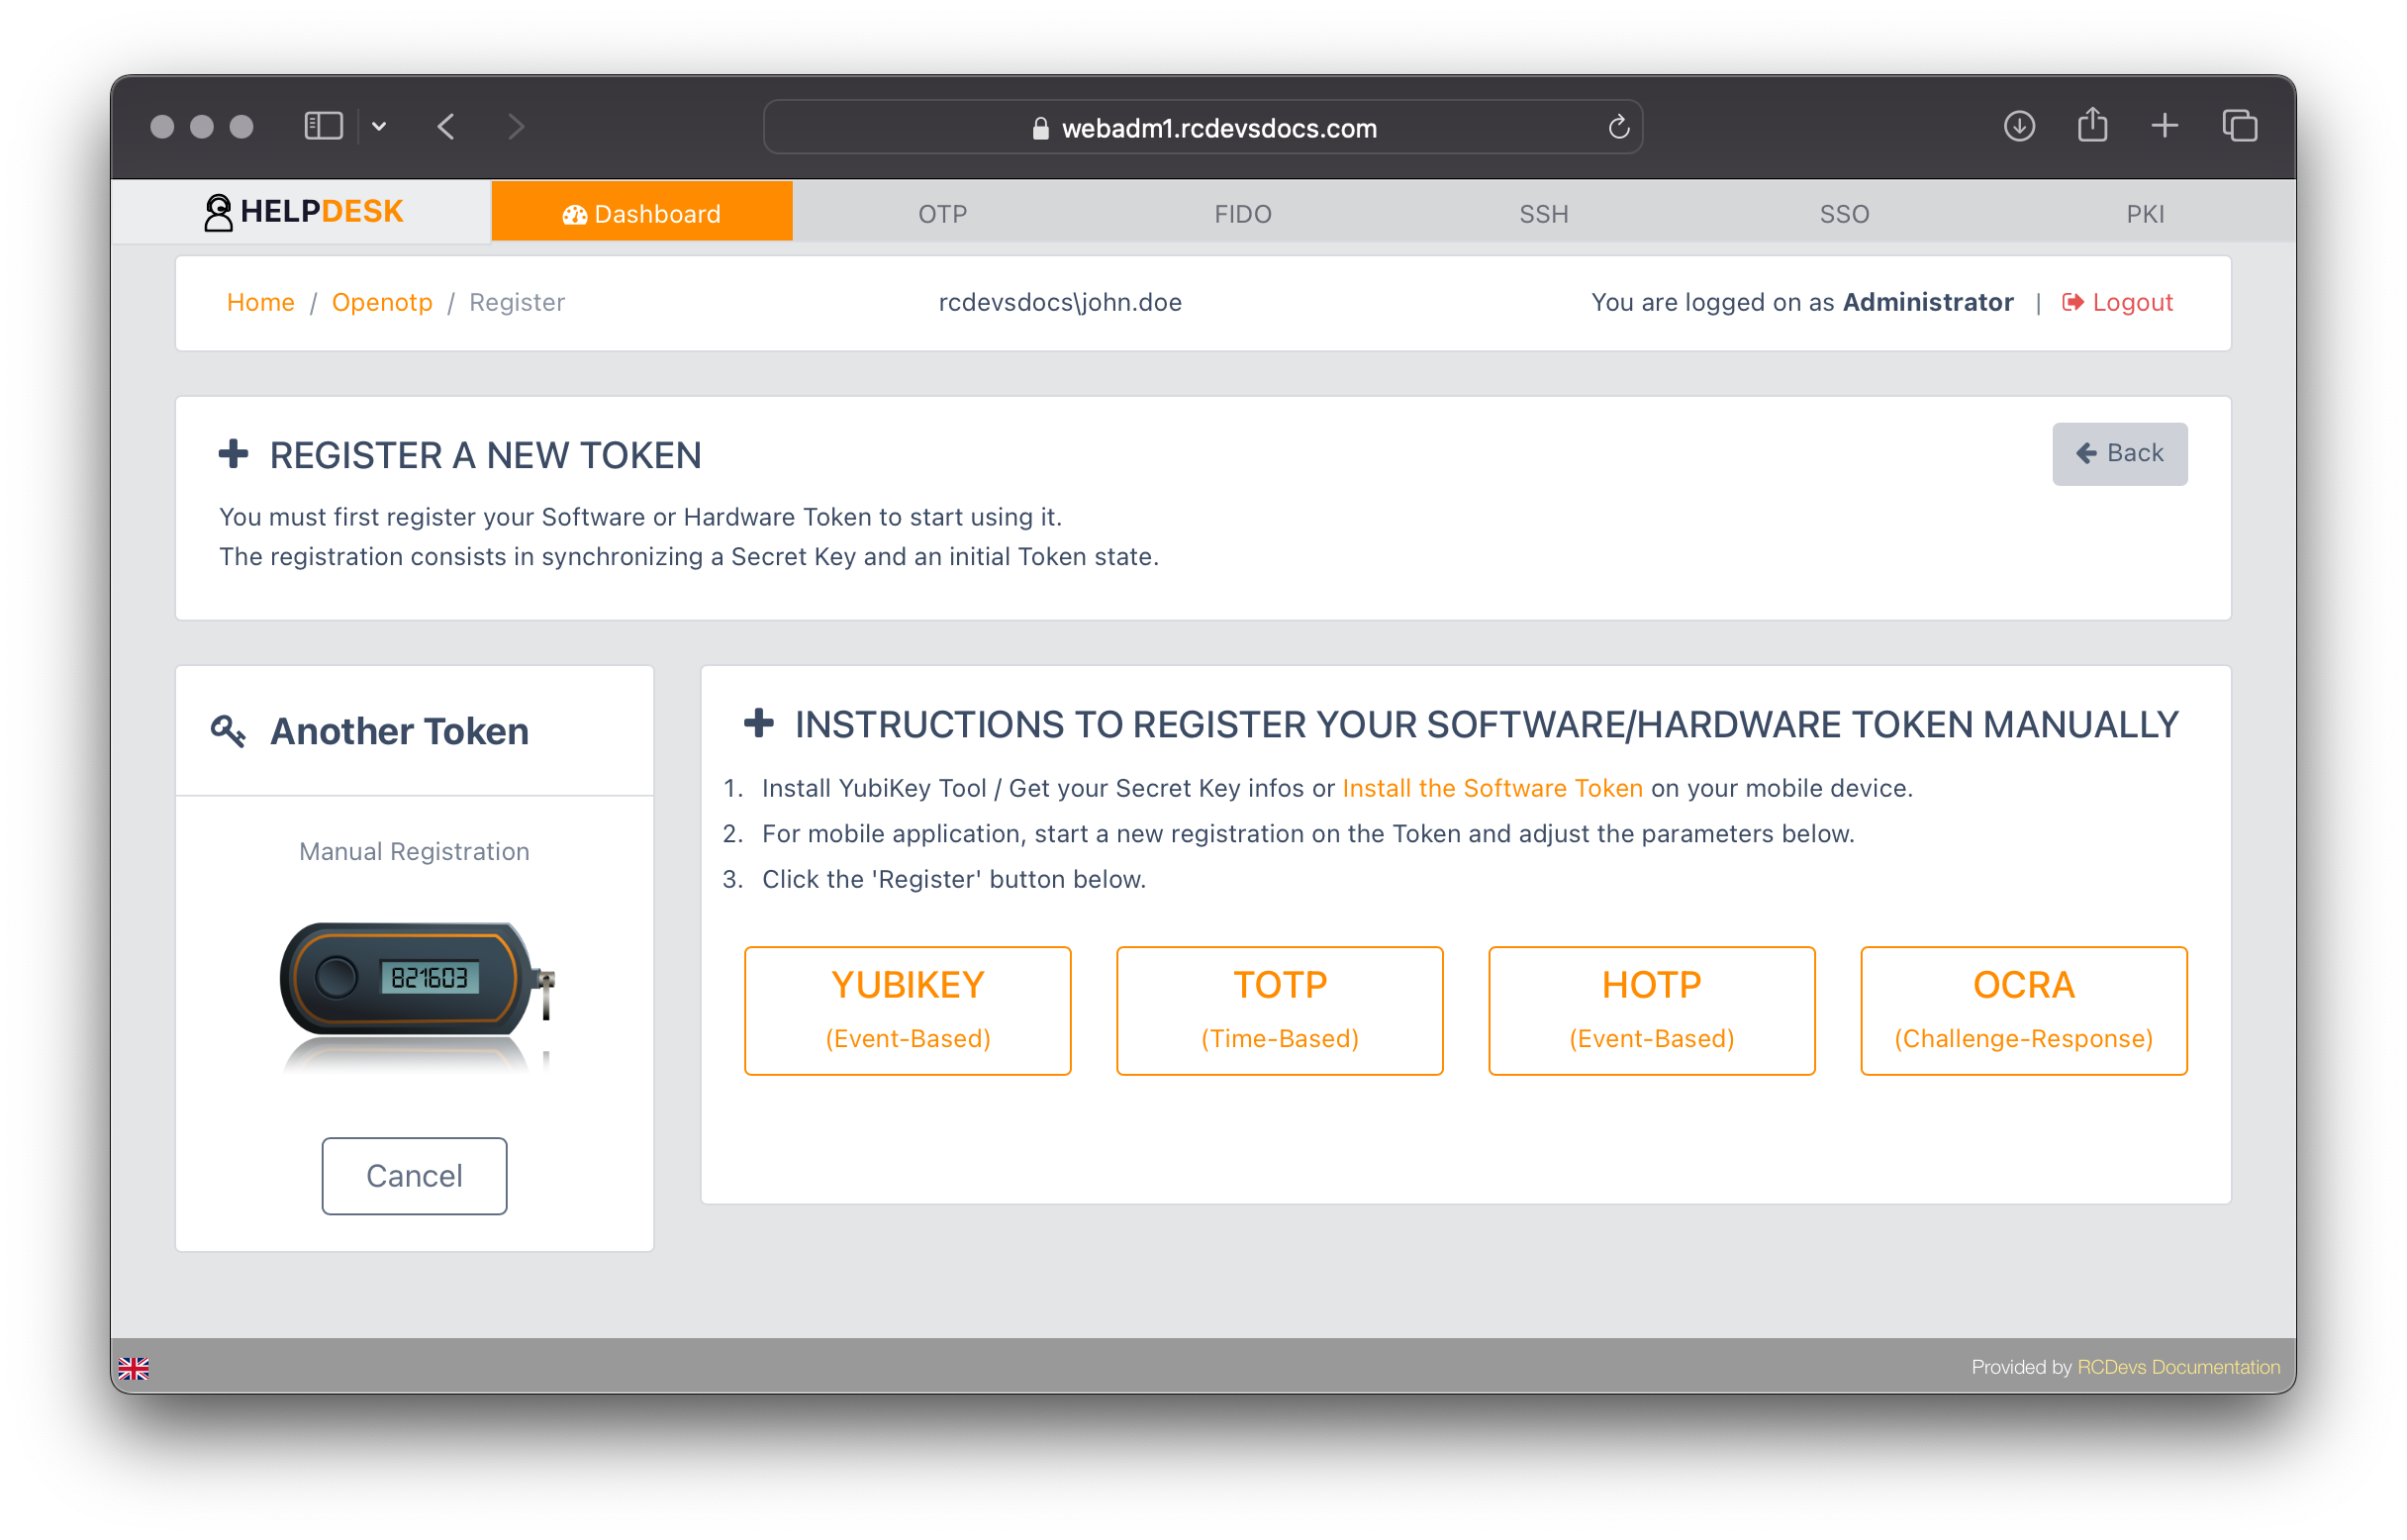
For enrolling any other token types, follow the provided instructions.
To remove a token from the user account, click the trash icon next to the corresponding token.
FIDO2 & PassKeys management
Click on the FIDO tab for the user you want to register a FIDO2 token or PassKey. The following page will appear, with available actions based on the permissions set in the Help Desk configuration.
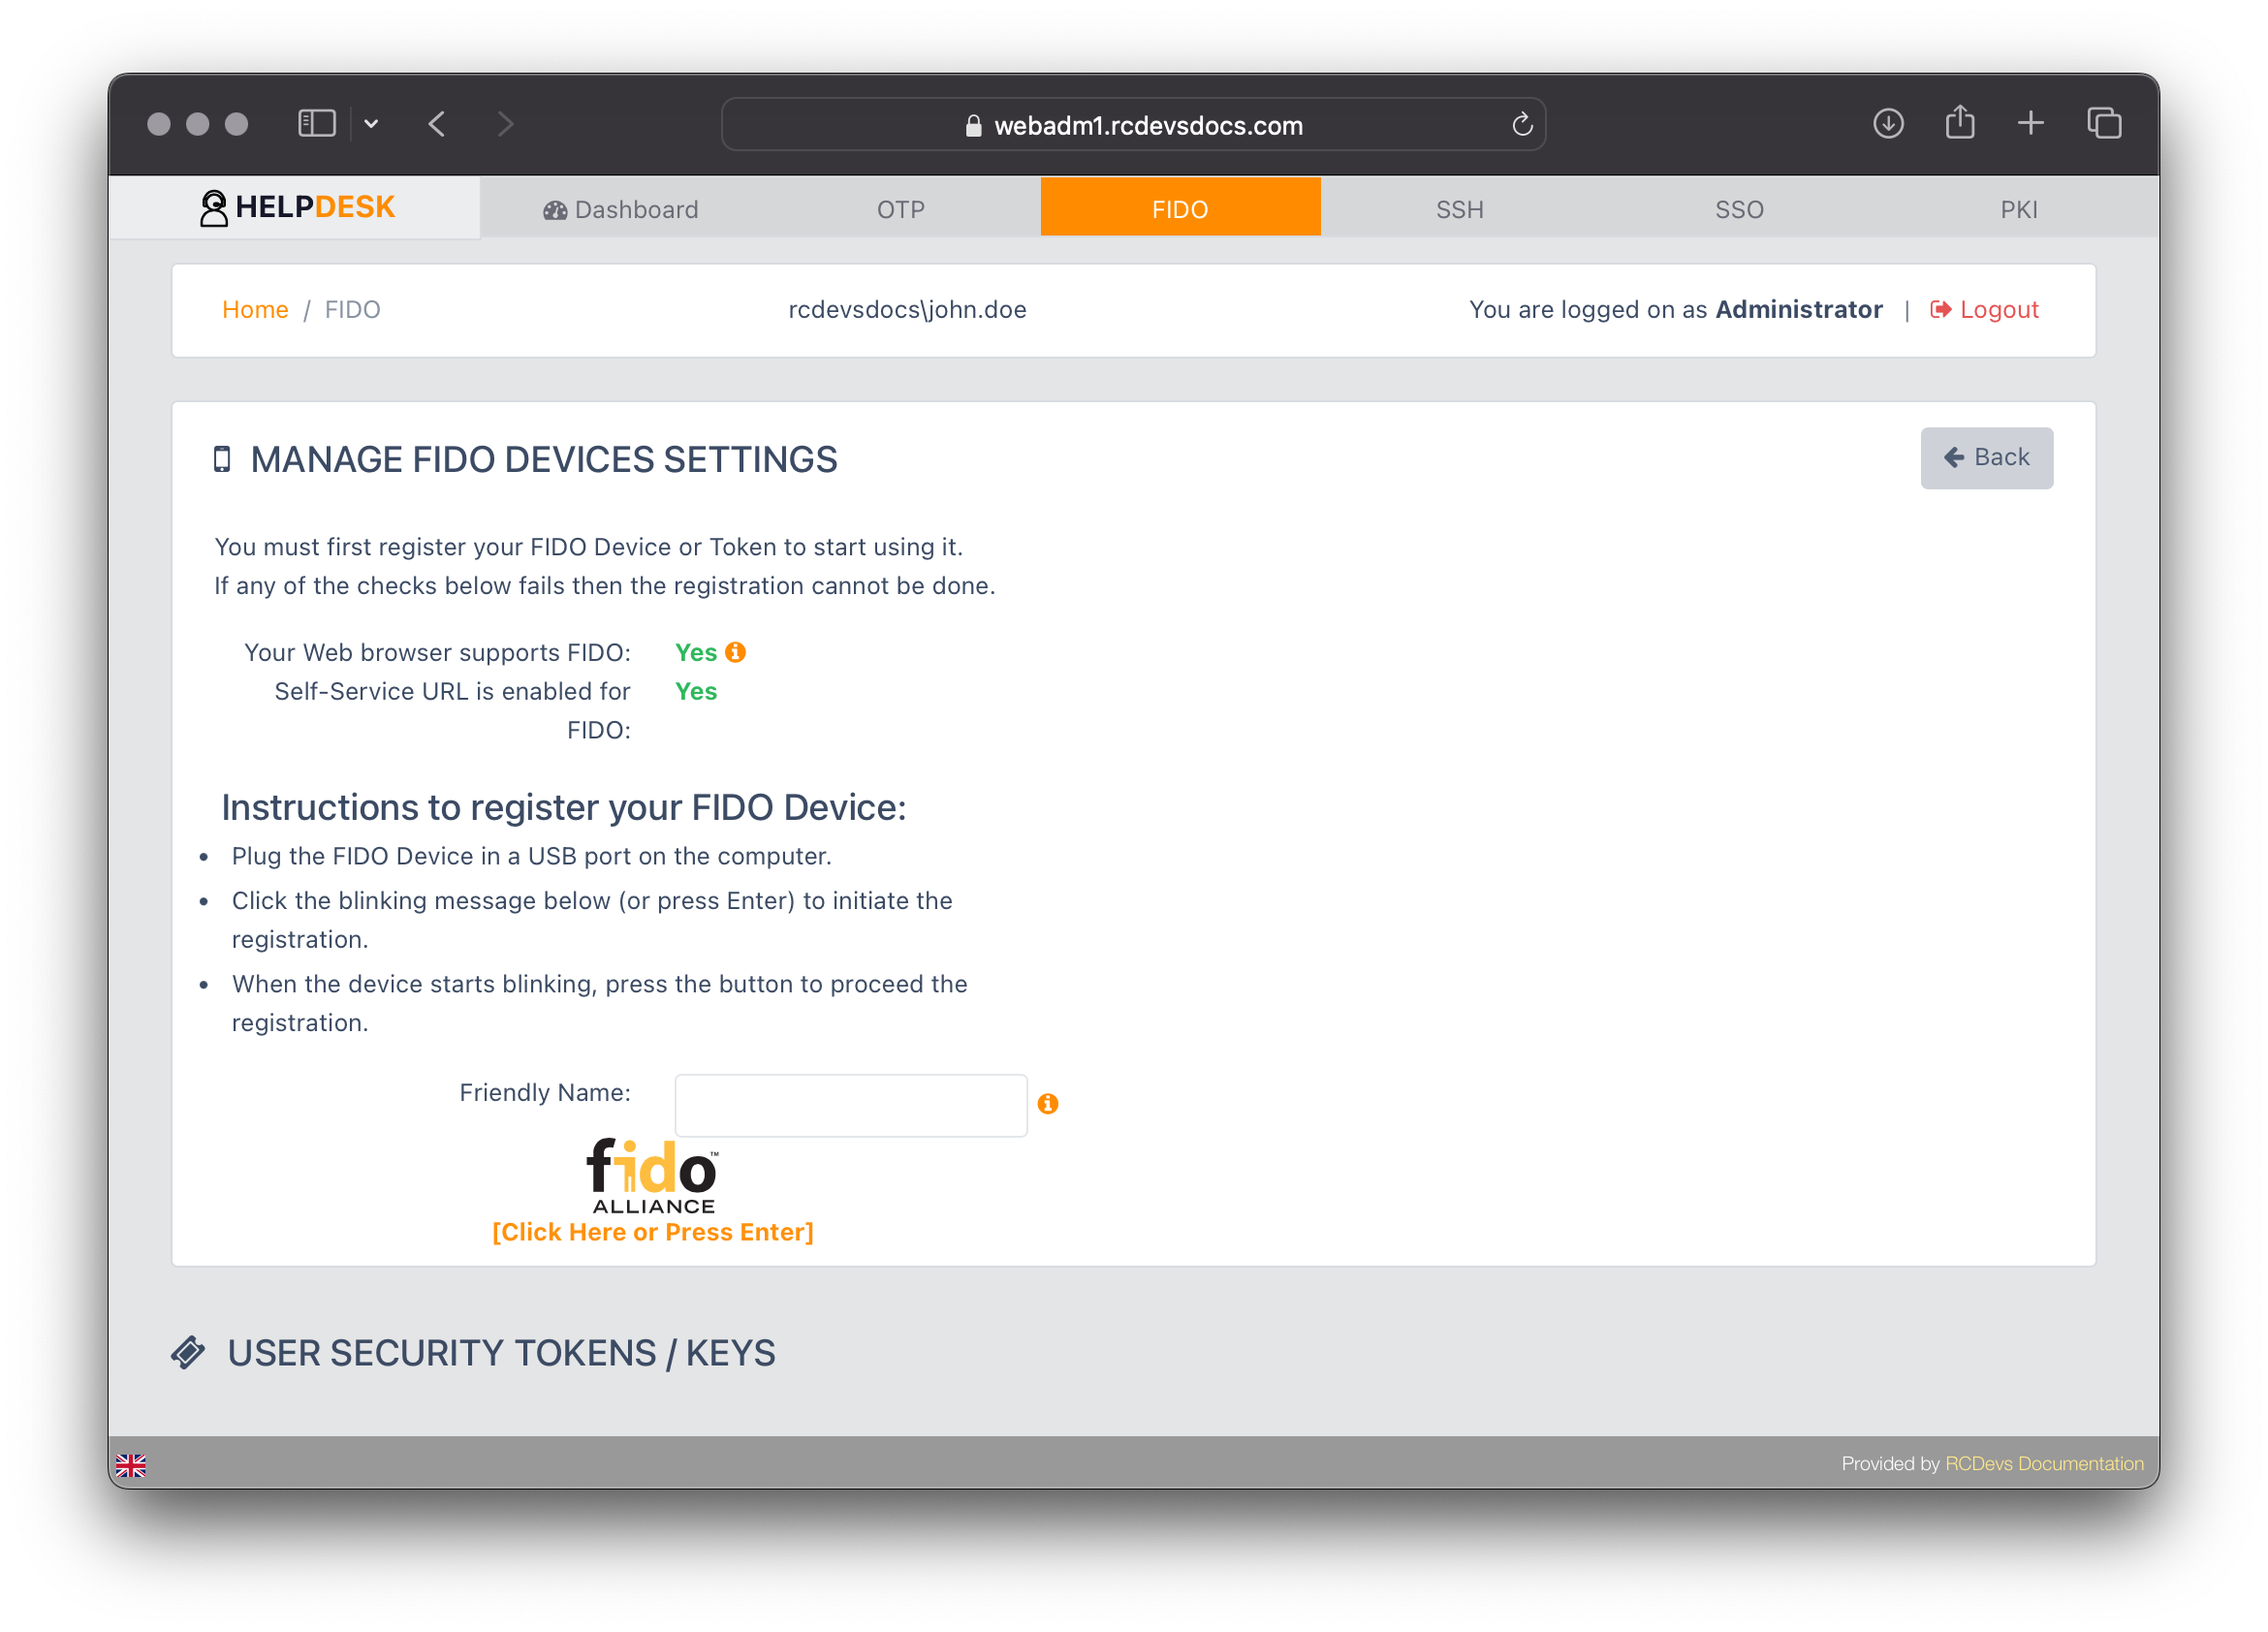
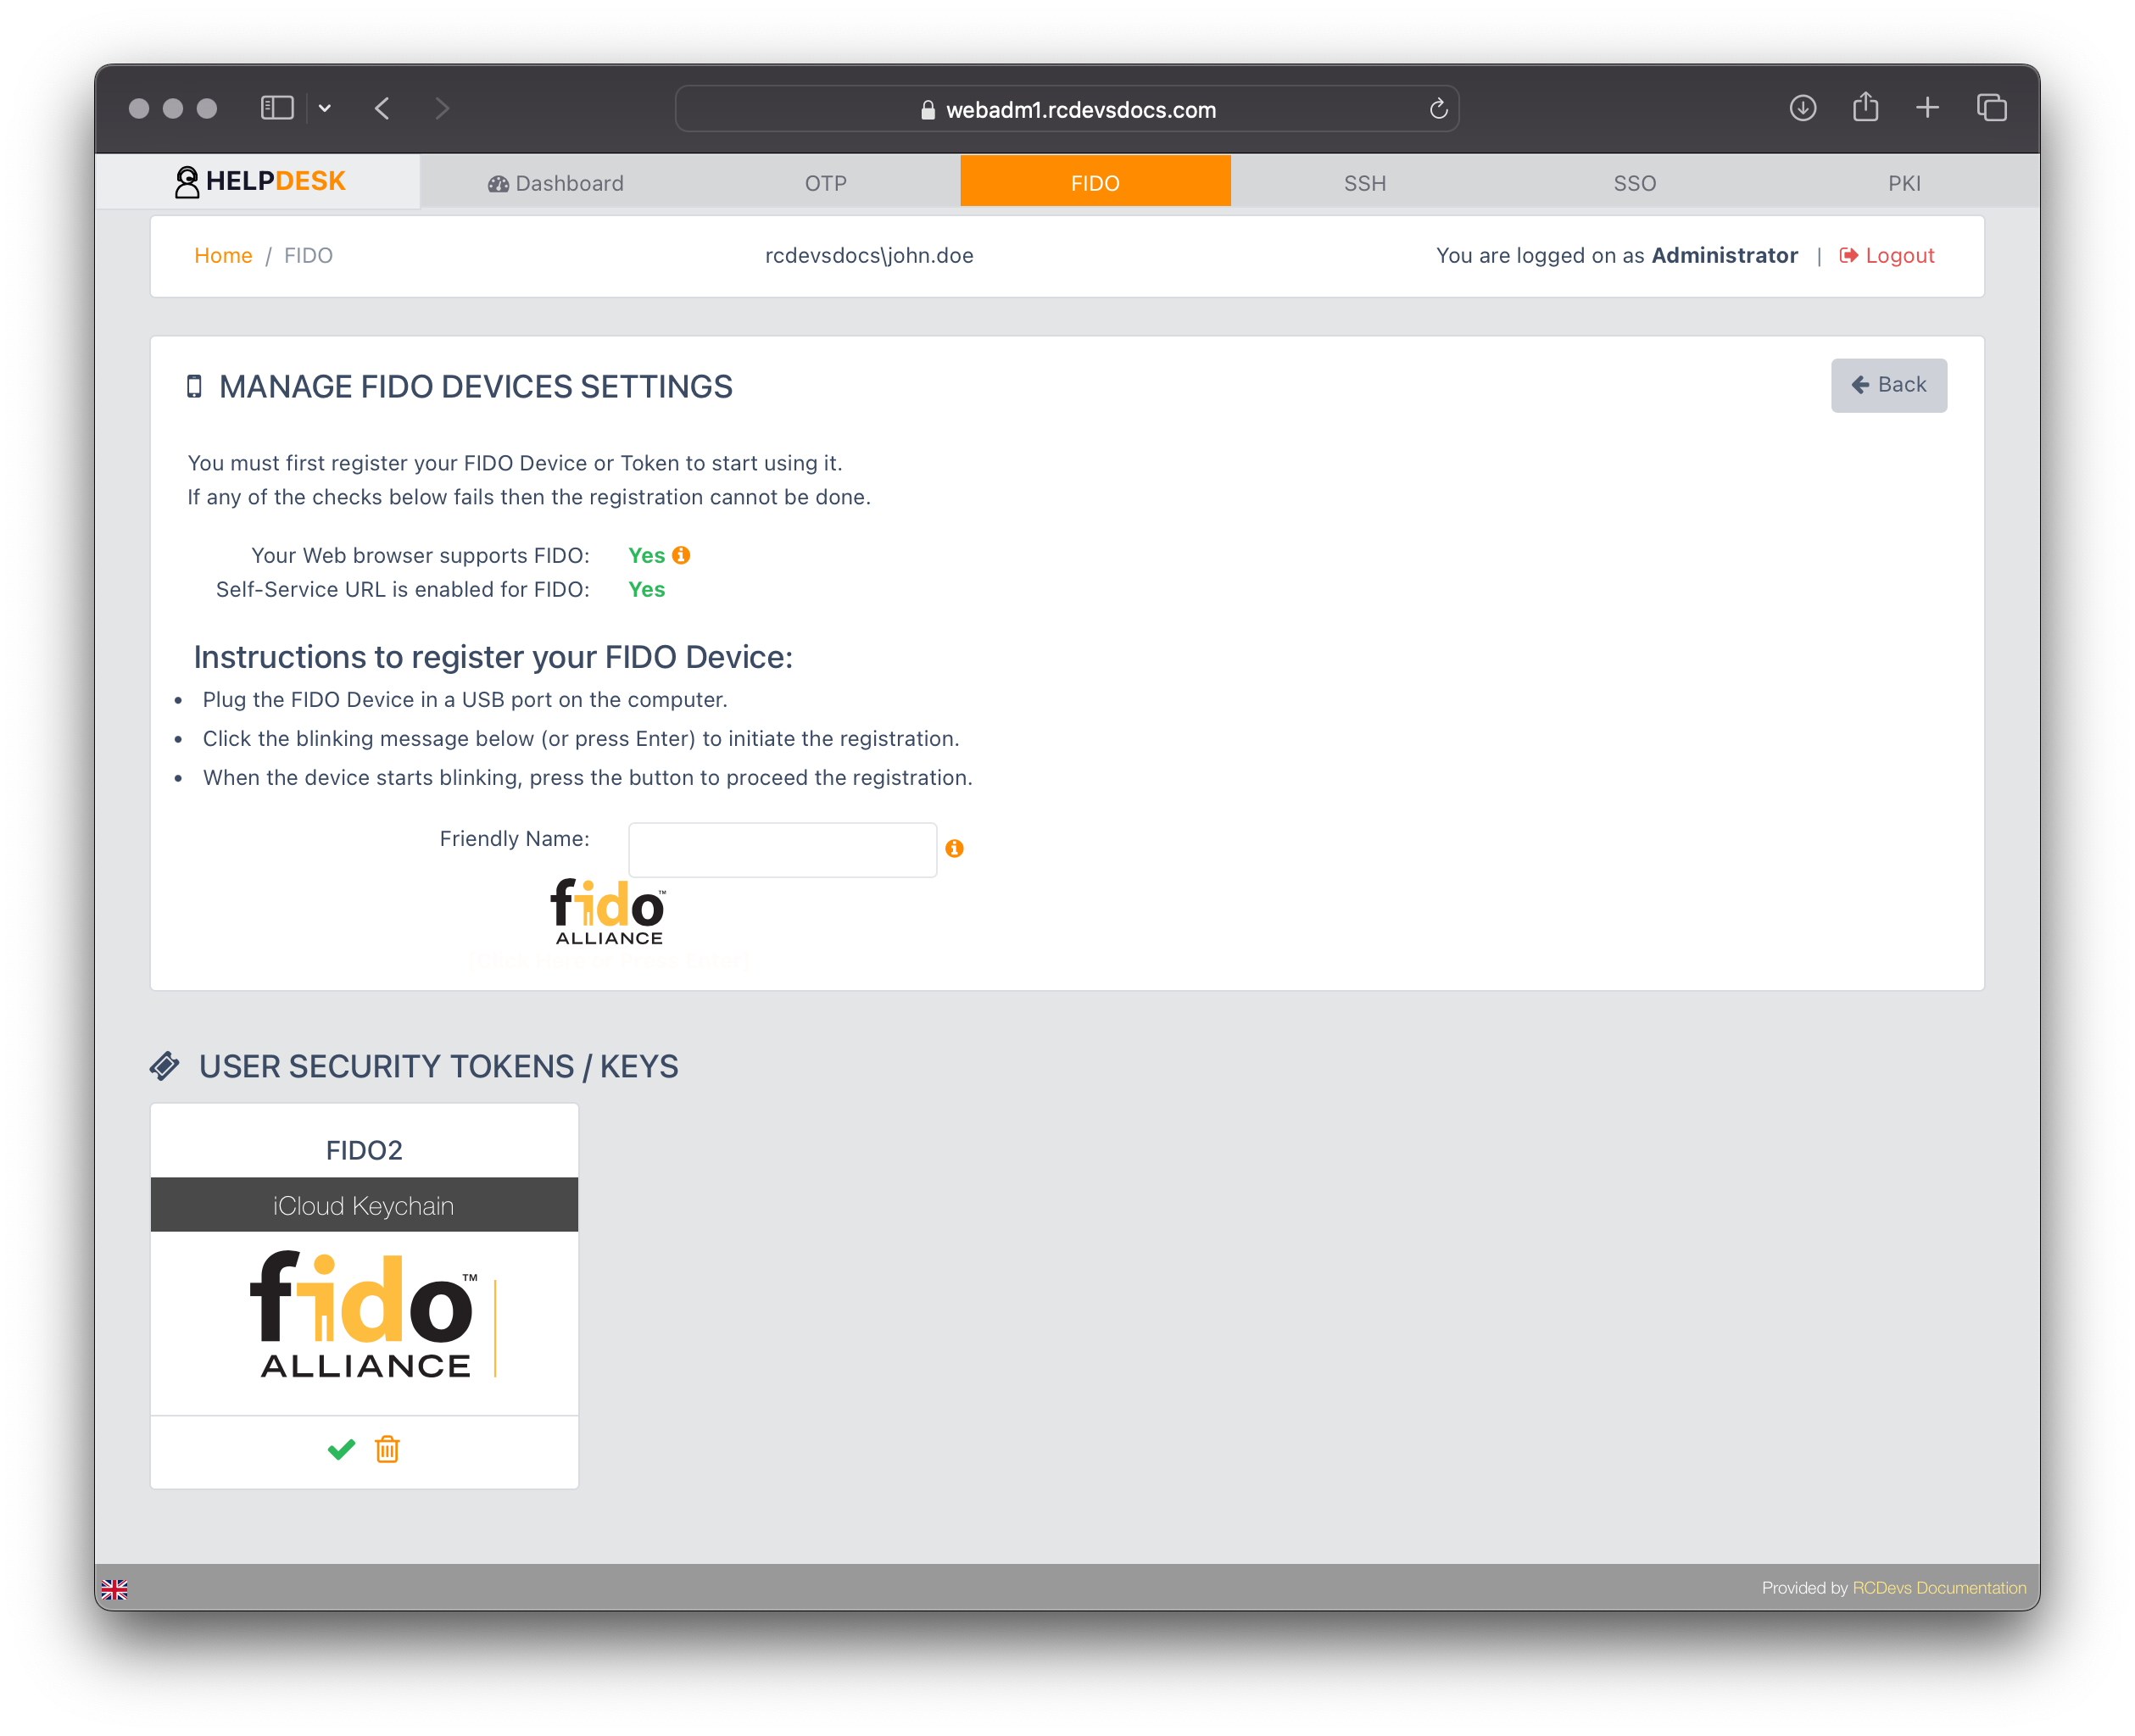
You can optionally provide a Friendly Name to identify the device you are registering. Then, click the blinking orange message to start the FIDO registration process.
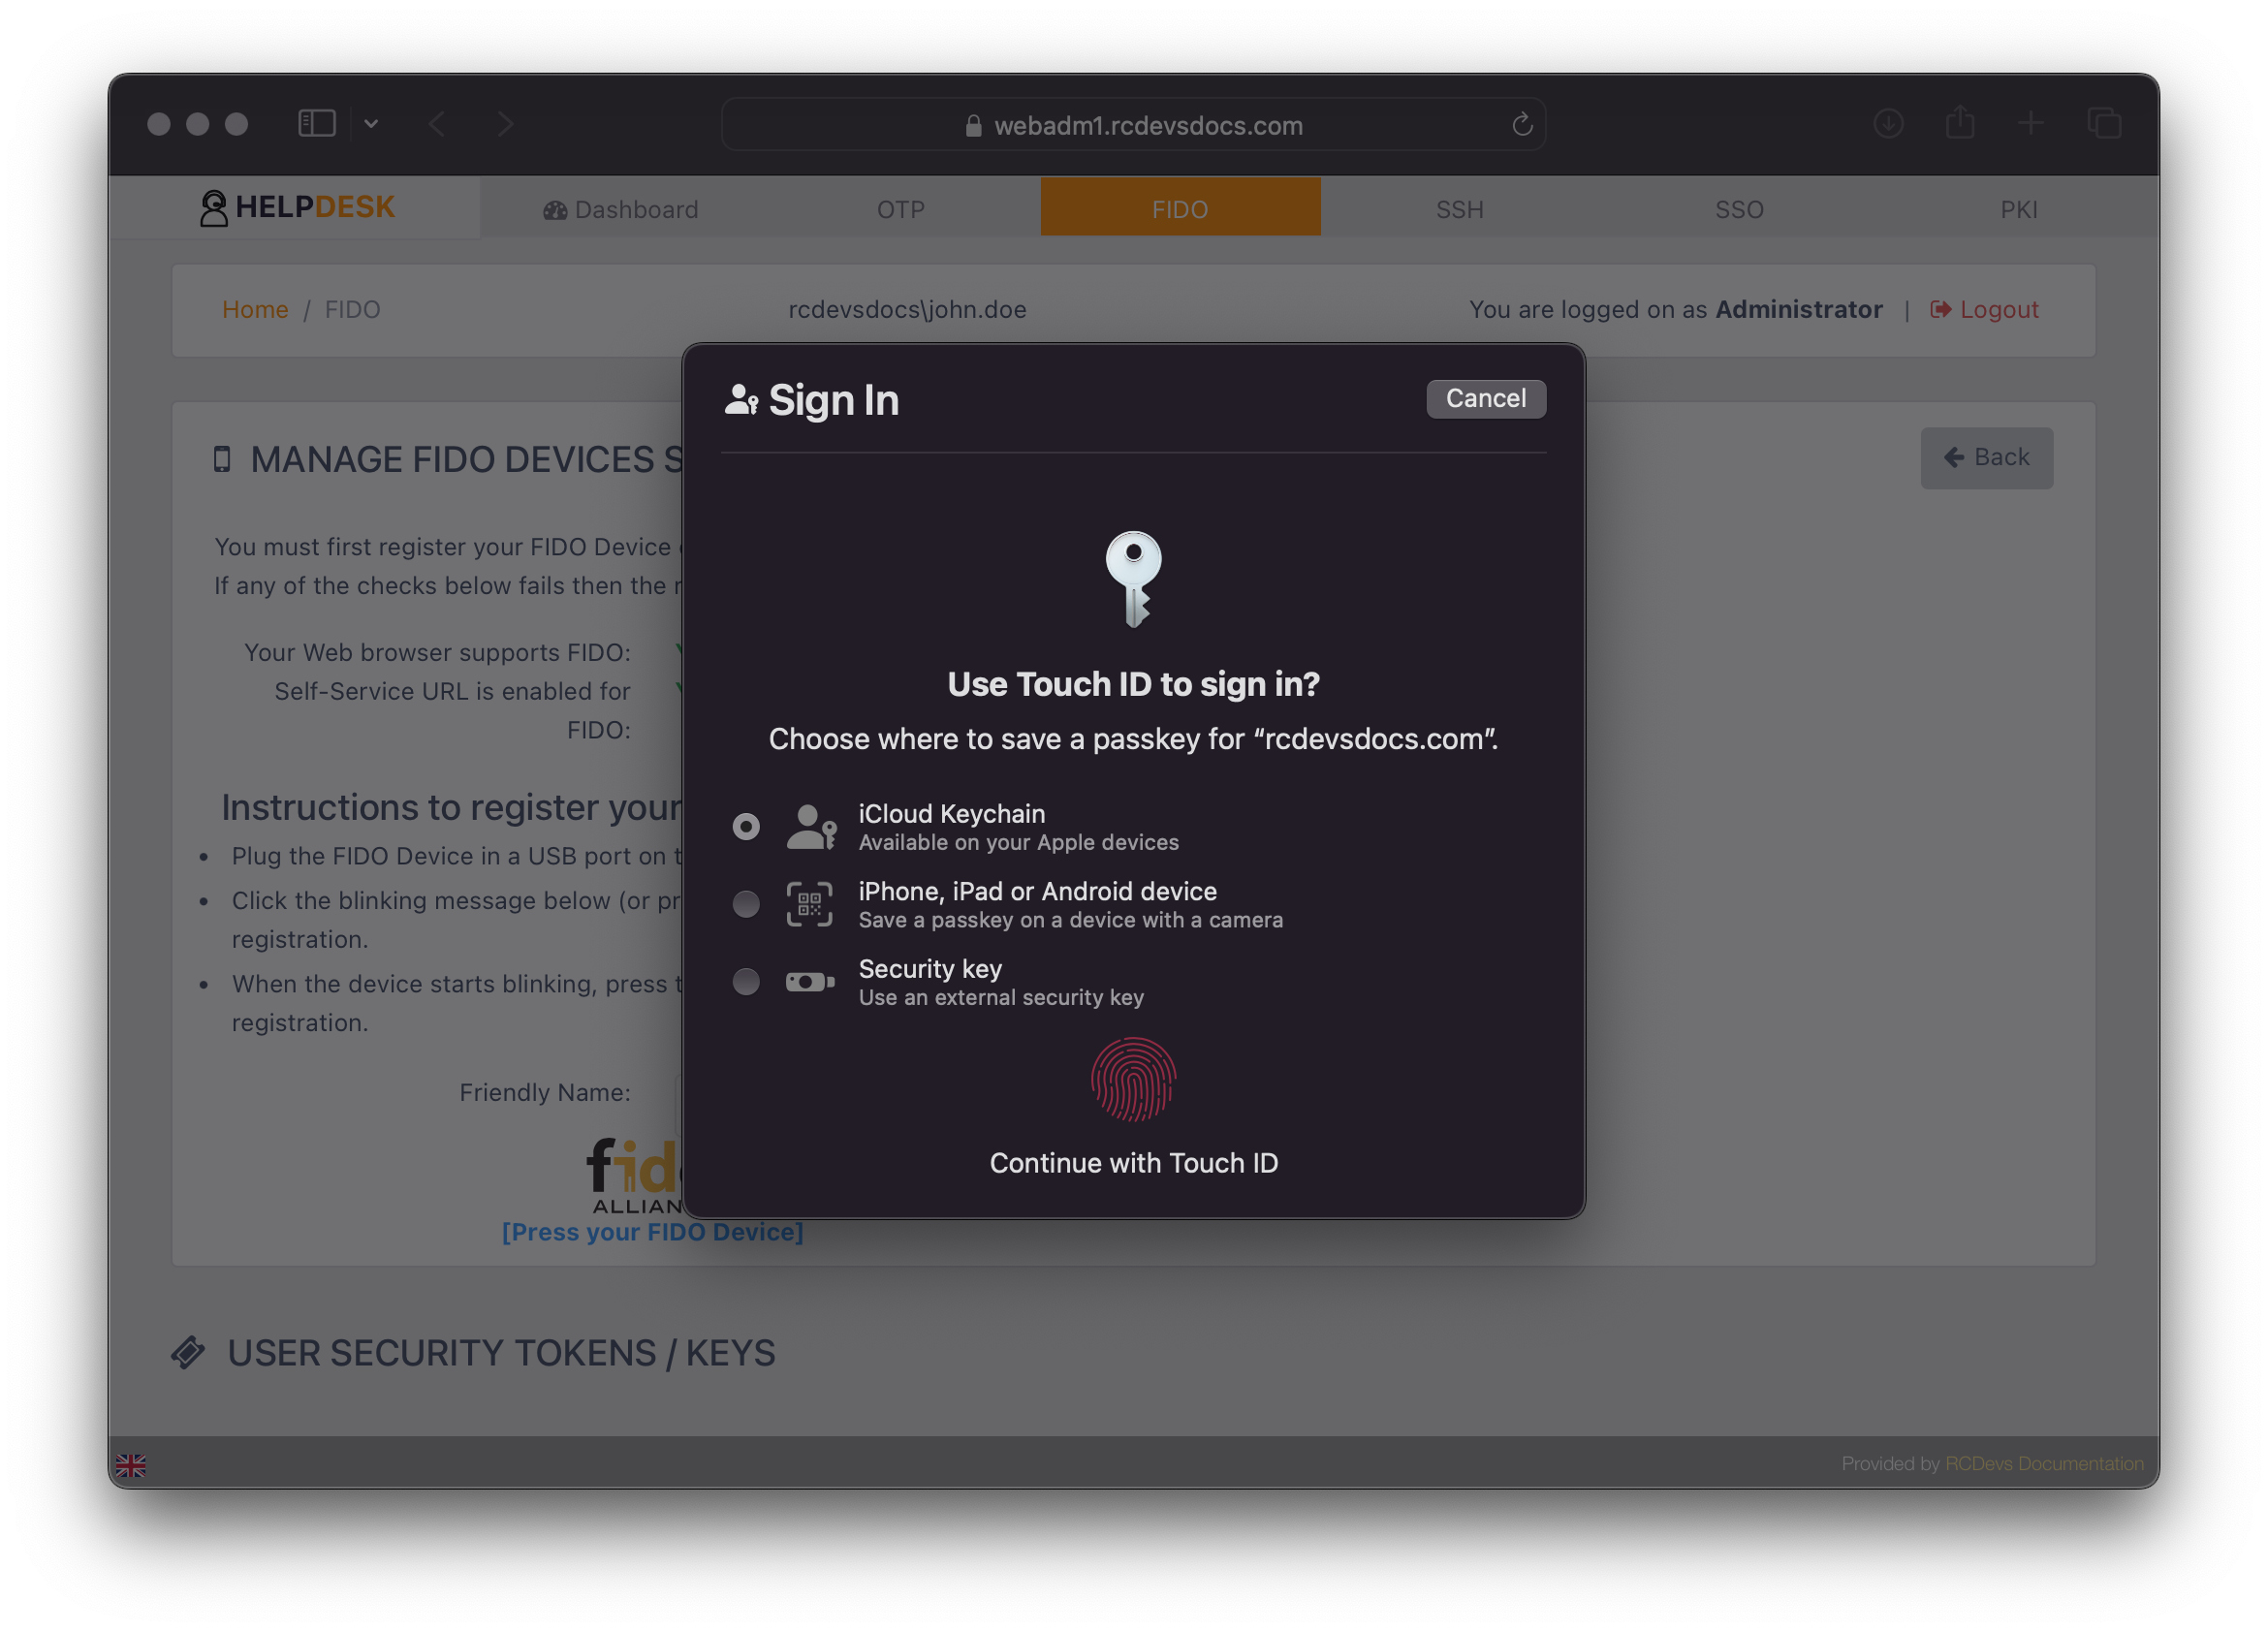
Depending on your web browser, the options may vary. For example, when using Safari on a macOS device, you might see several enrollment choices:
- Use the iCloud Keychain
- Use a Passkey from iOS or Android devices
- Use a security key
Select the option you prefer and follow the prompted instructions.
After the enrollment, you will see the registered device listed.
After registering a FIDO2 security key, a second device will appear in the list of registered devices:
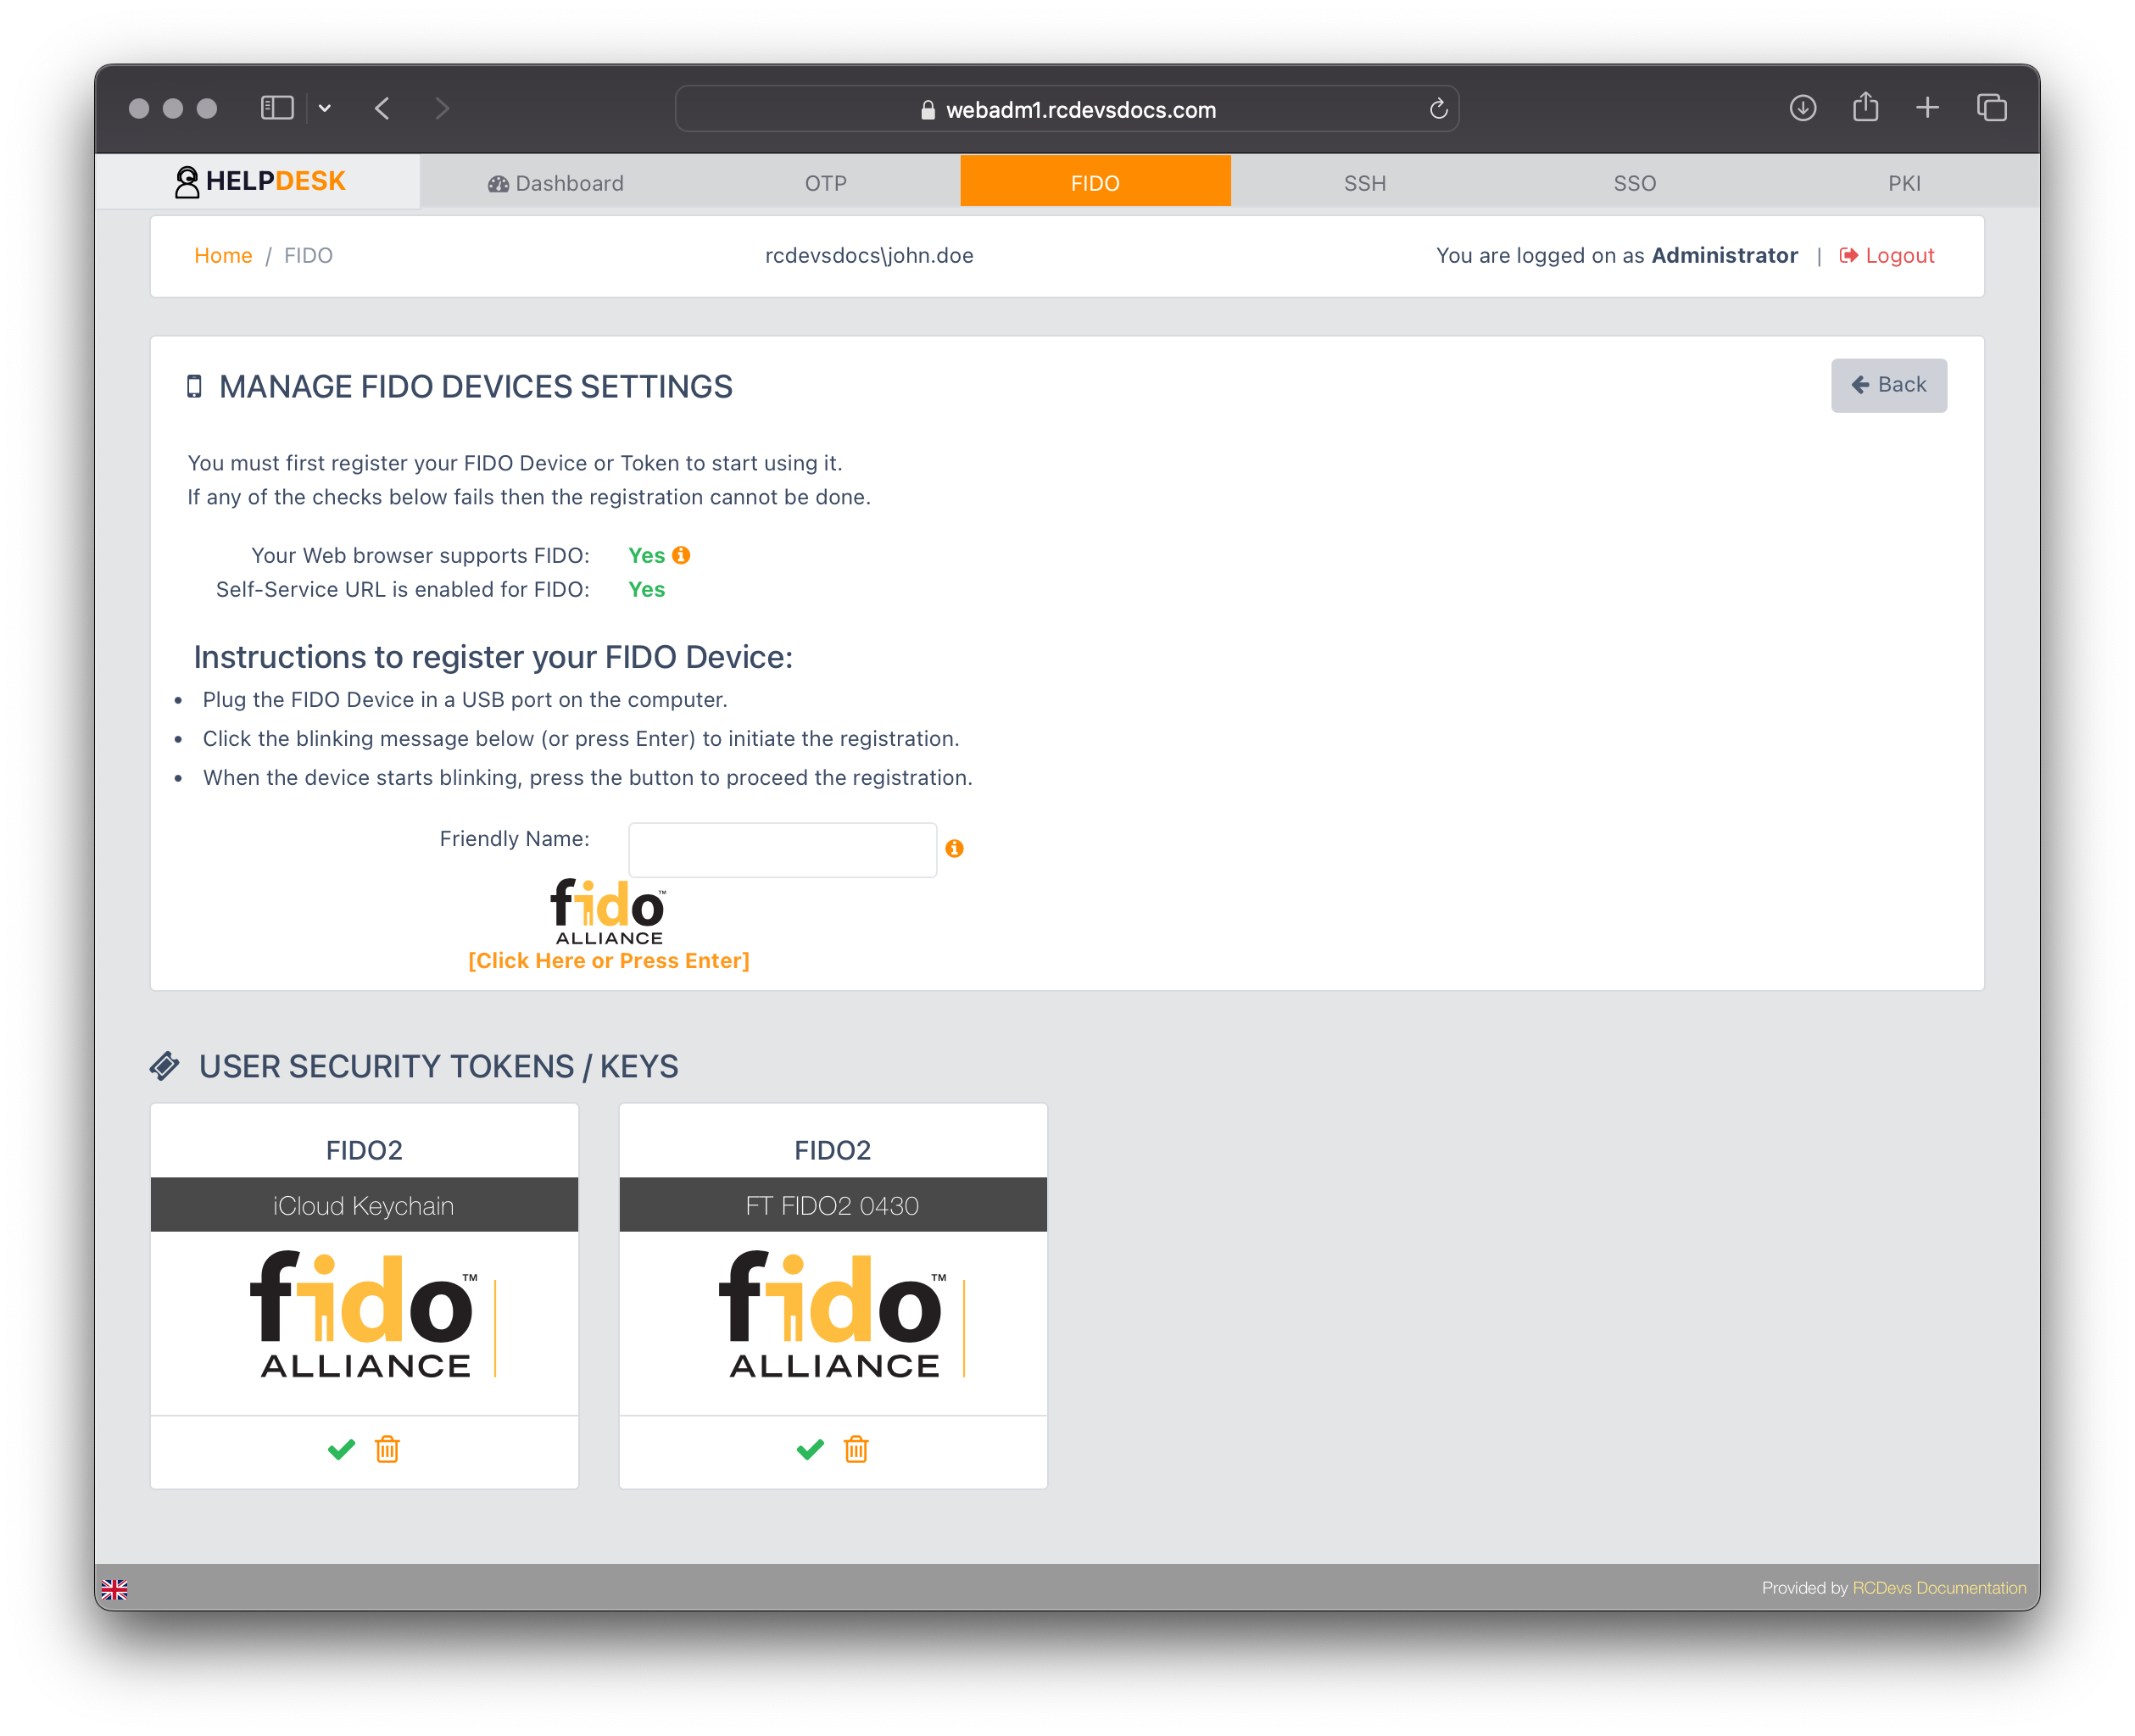
To remove a FIDO or Passkey from the user account, click the trash icon next to the corresponding enrollment.
SSH Keys management
Click on the SSH tab for the user you want to register an SSH key for Spankey usages. The following page will appear, with available actions based on the permissions set in the Help Desk configuration.
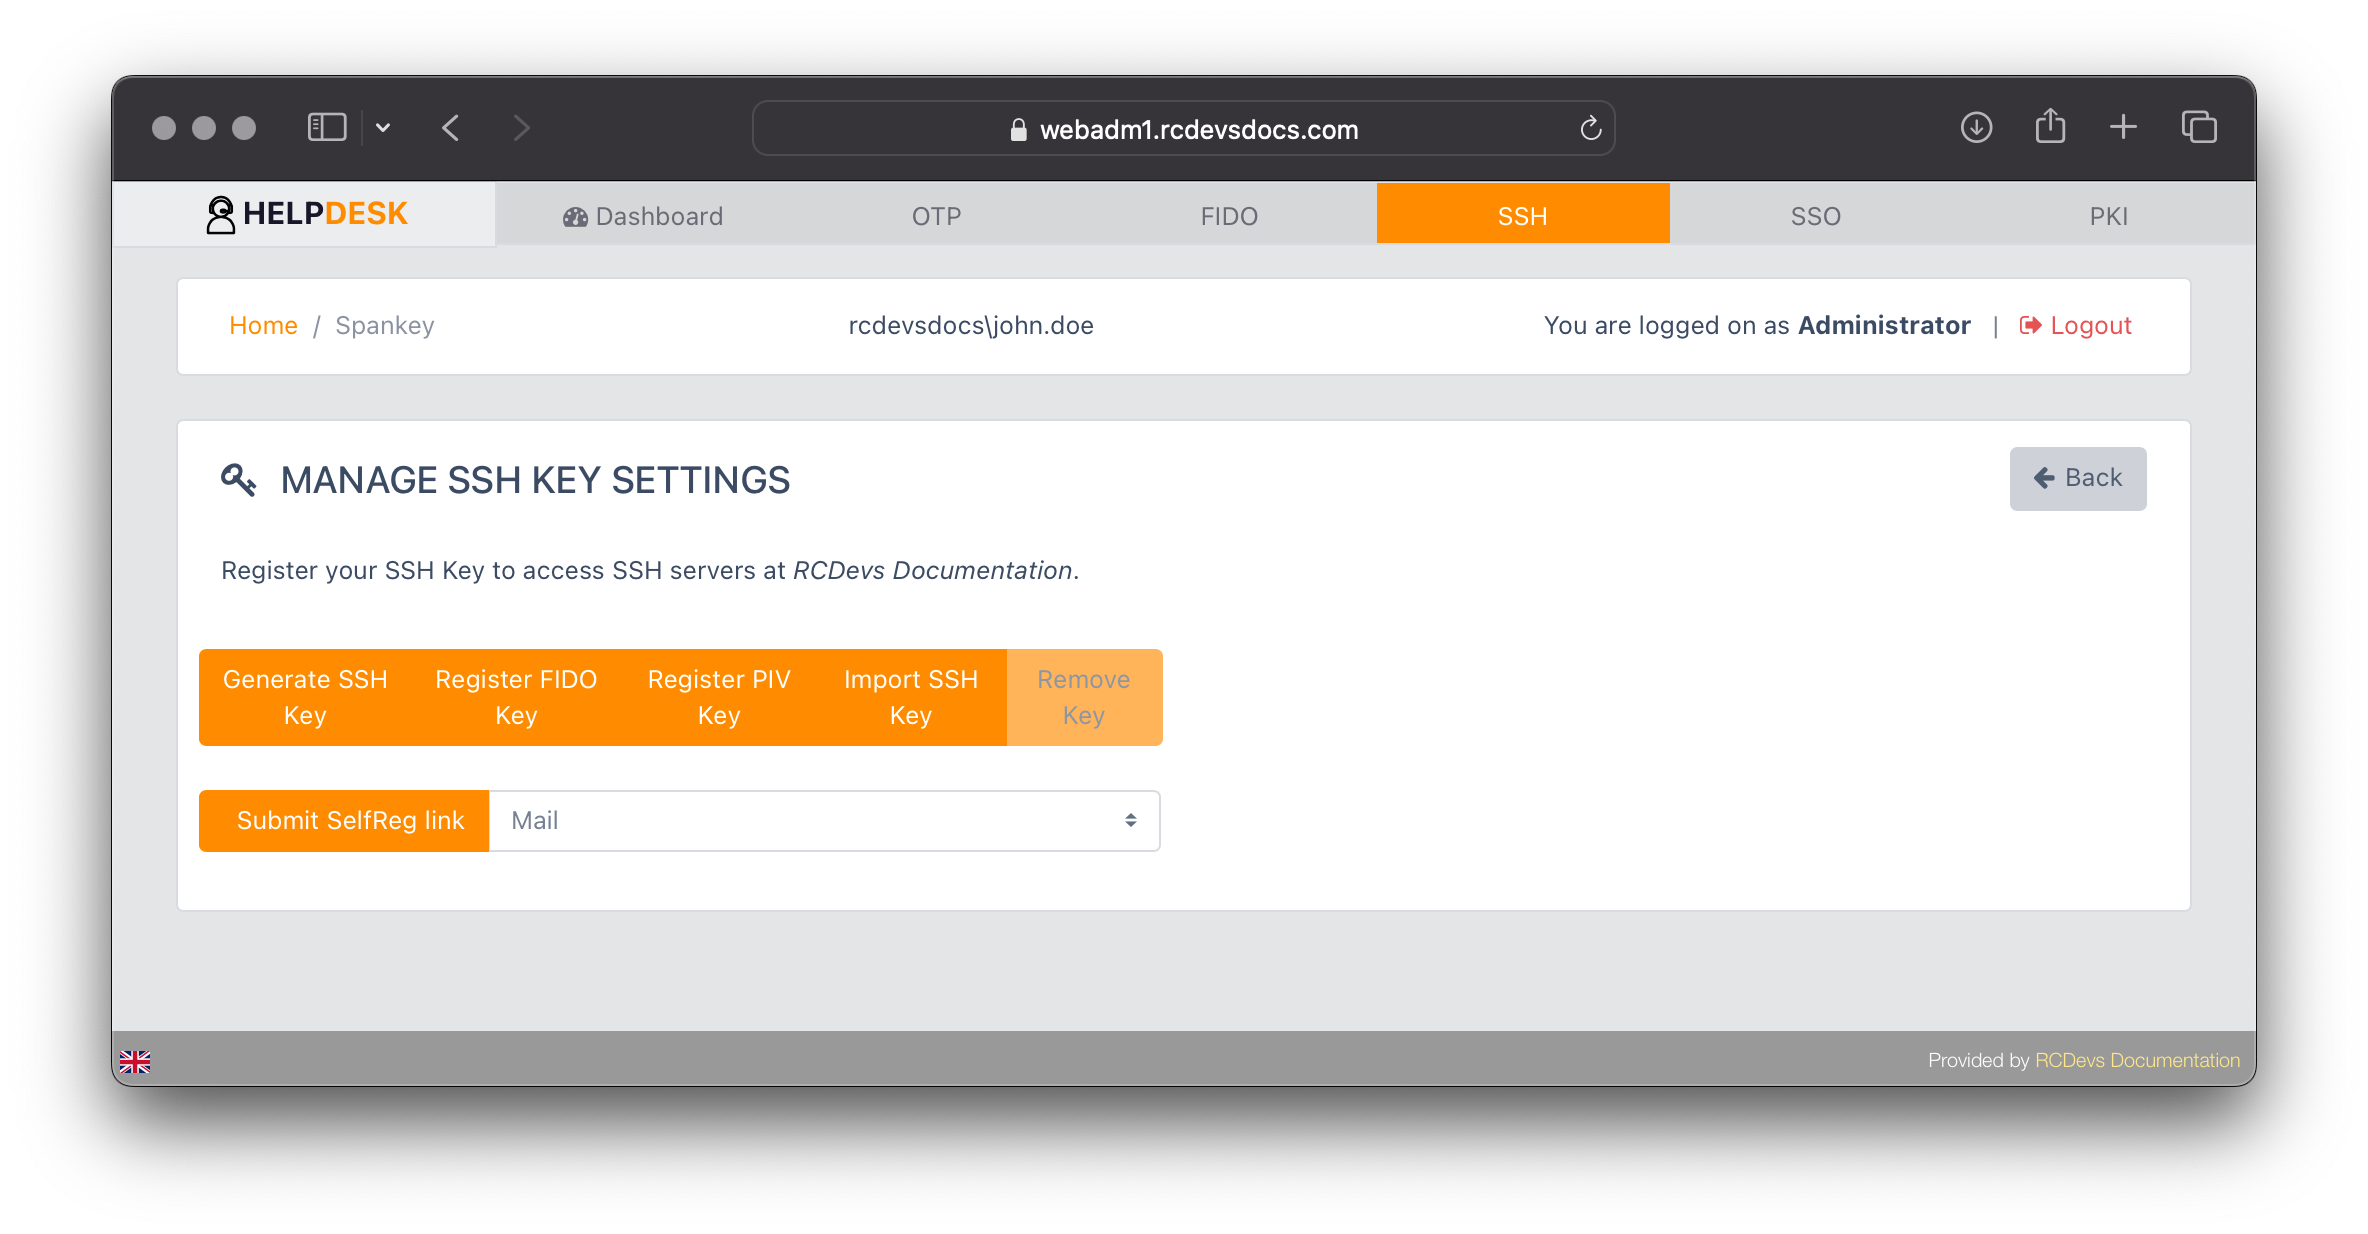
The SSH key can be directly registered by the Help Desk administrator, who will then provide the key to the end user. Alternatively, the administrator can submit a SelfReg link, granting the end user access to the User Self-Registration portal, where they can enroll their key themselves. Of course, the Self-Registration portal must be installed and configured to allow SSH key registration.
In the example below, we select the option to generate an SSH key. If permitted by yatour Help Desk and Spankey server configurations, you can configure the Key Format and Key Length. Additionally, the key can be protected by a password. If a password is configured, you will need to provide it when using the SSH private key to log in to a system. Choose your export format and click Register
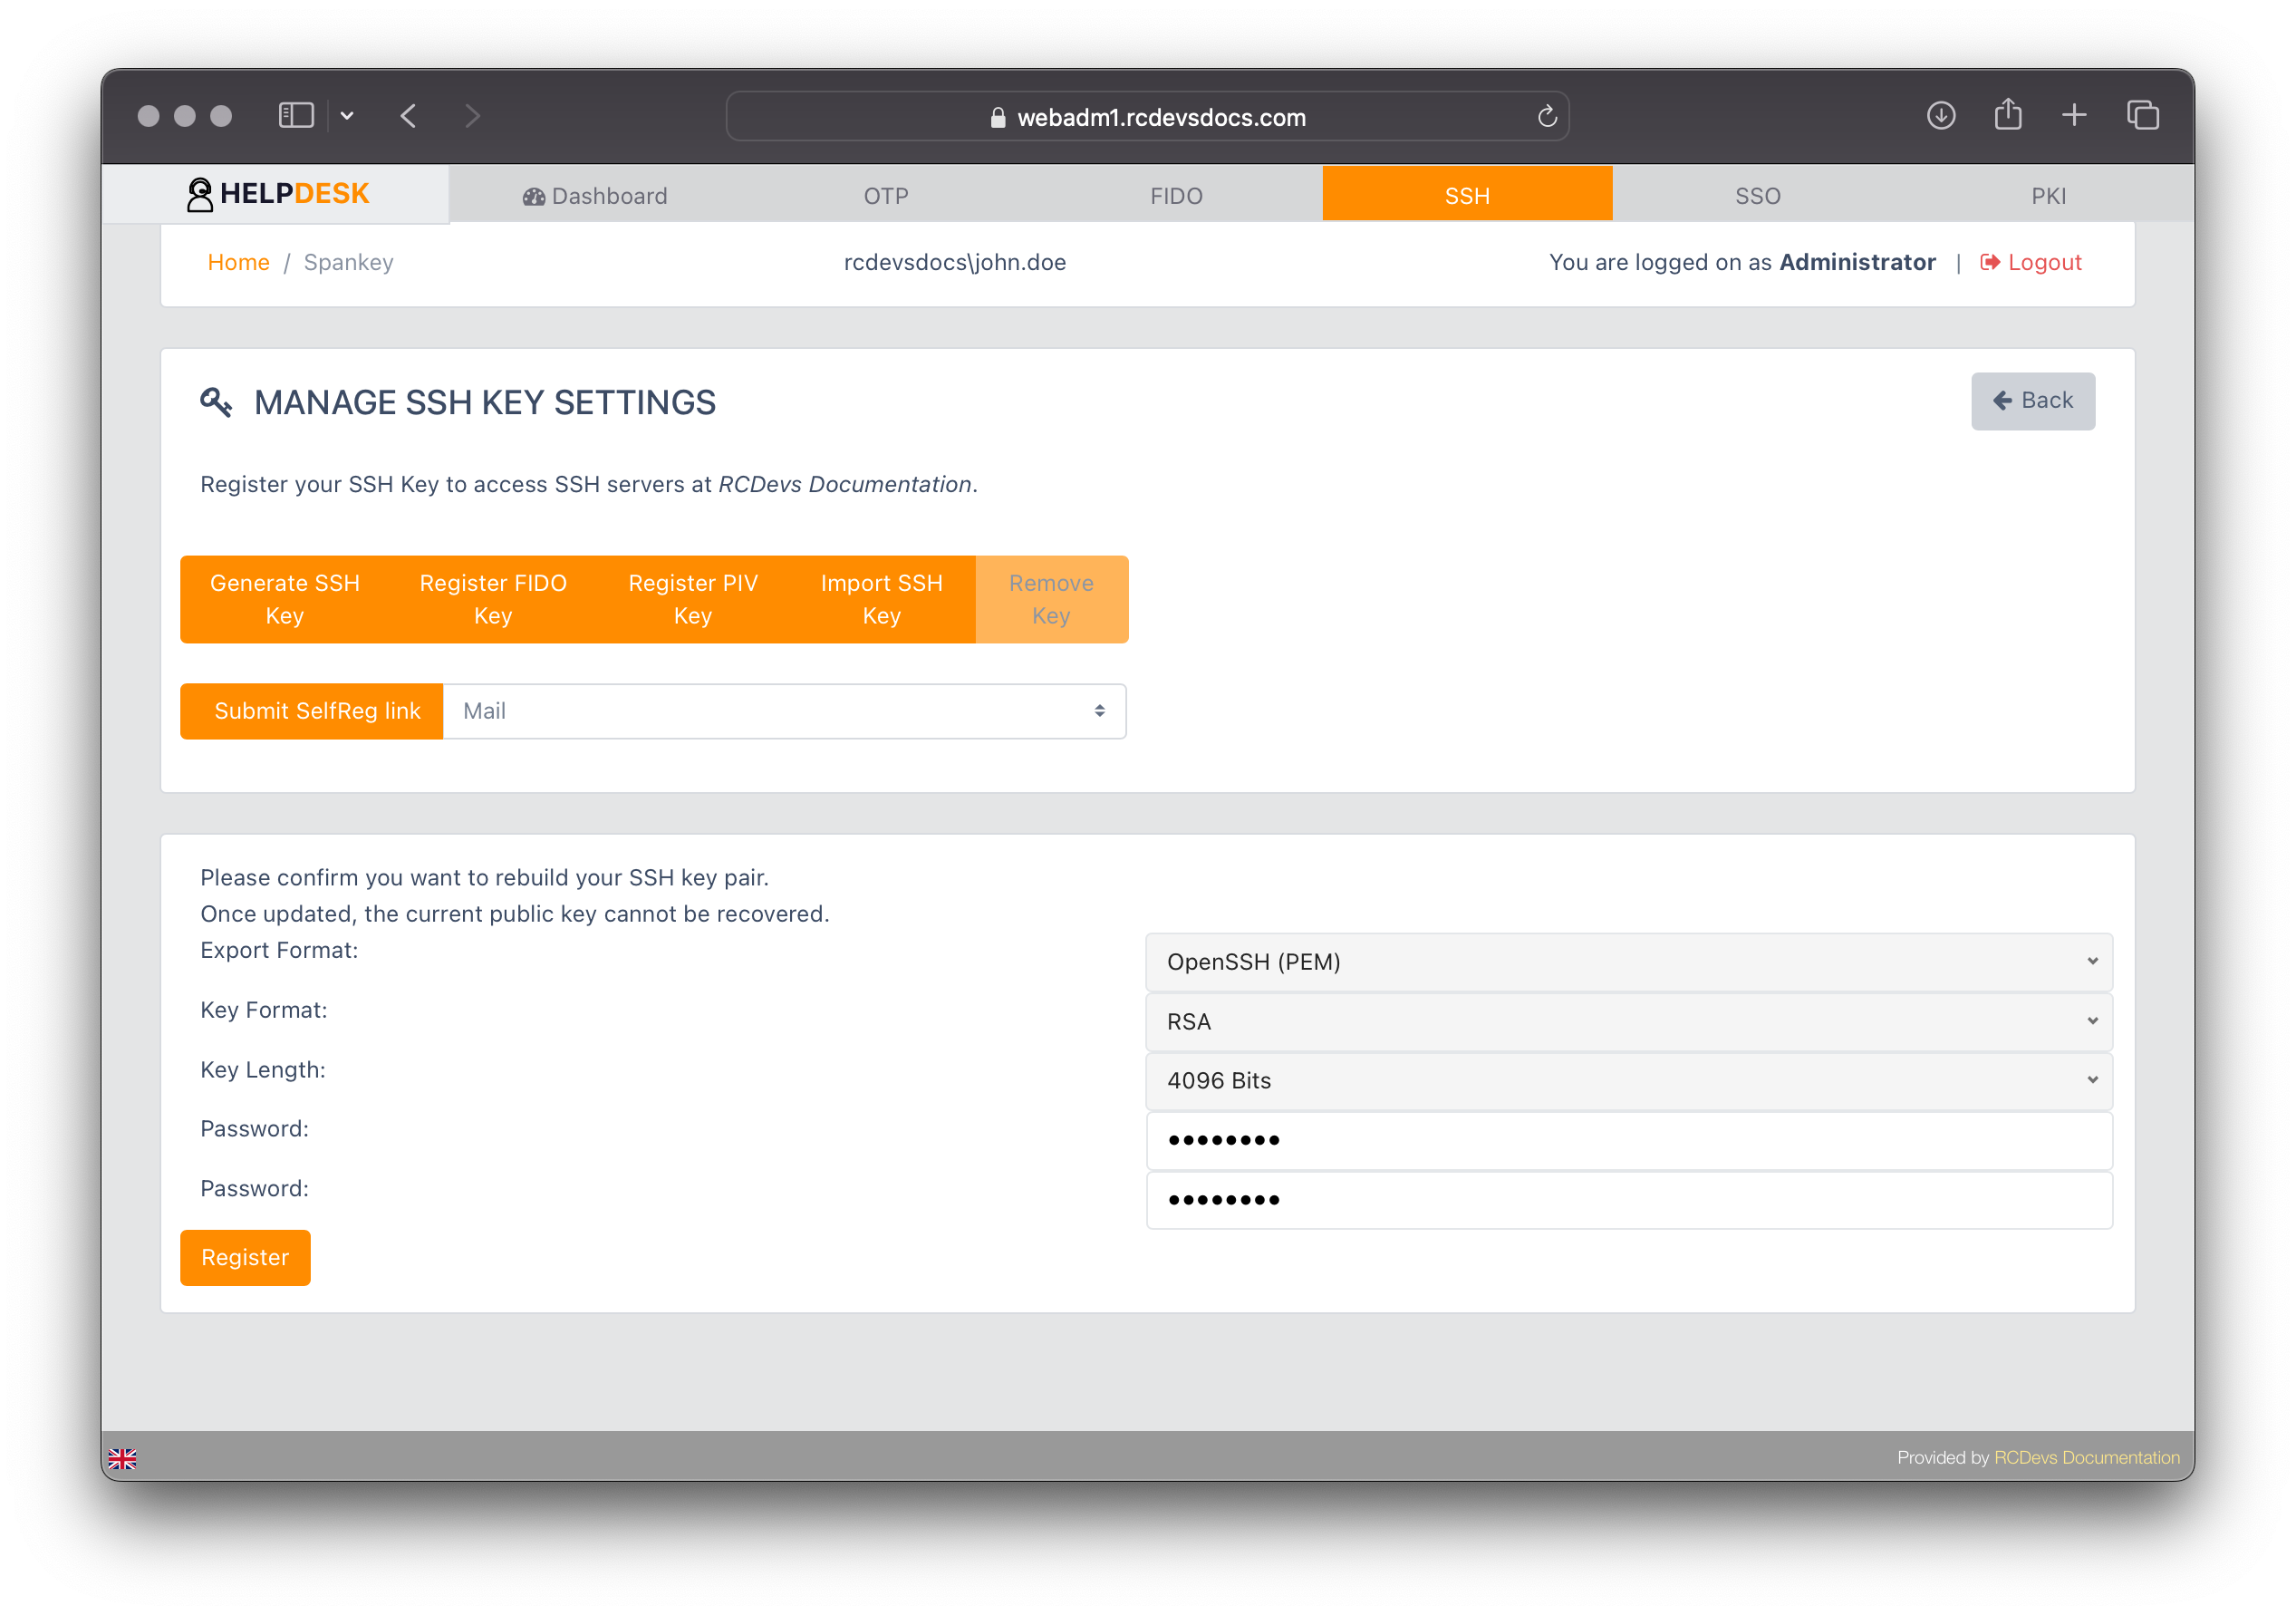
After the registration process, you will be redirected to the SSH tab view.
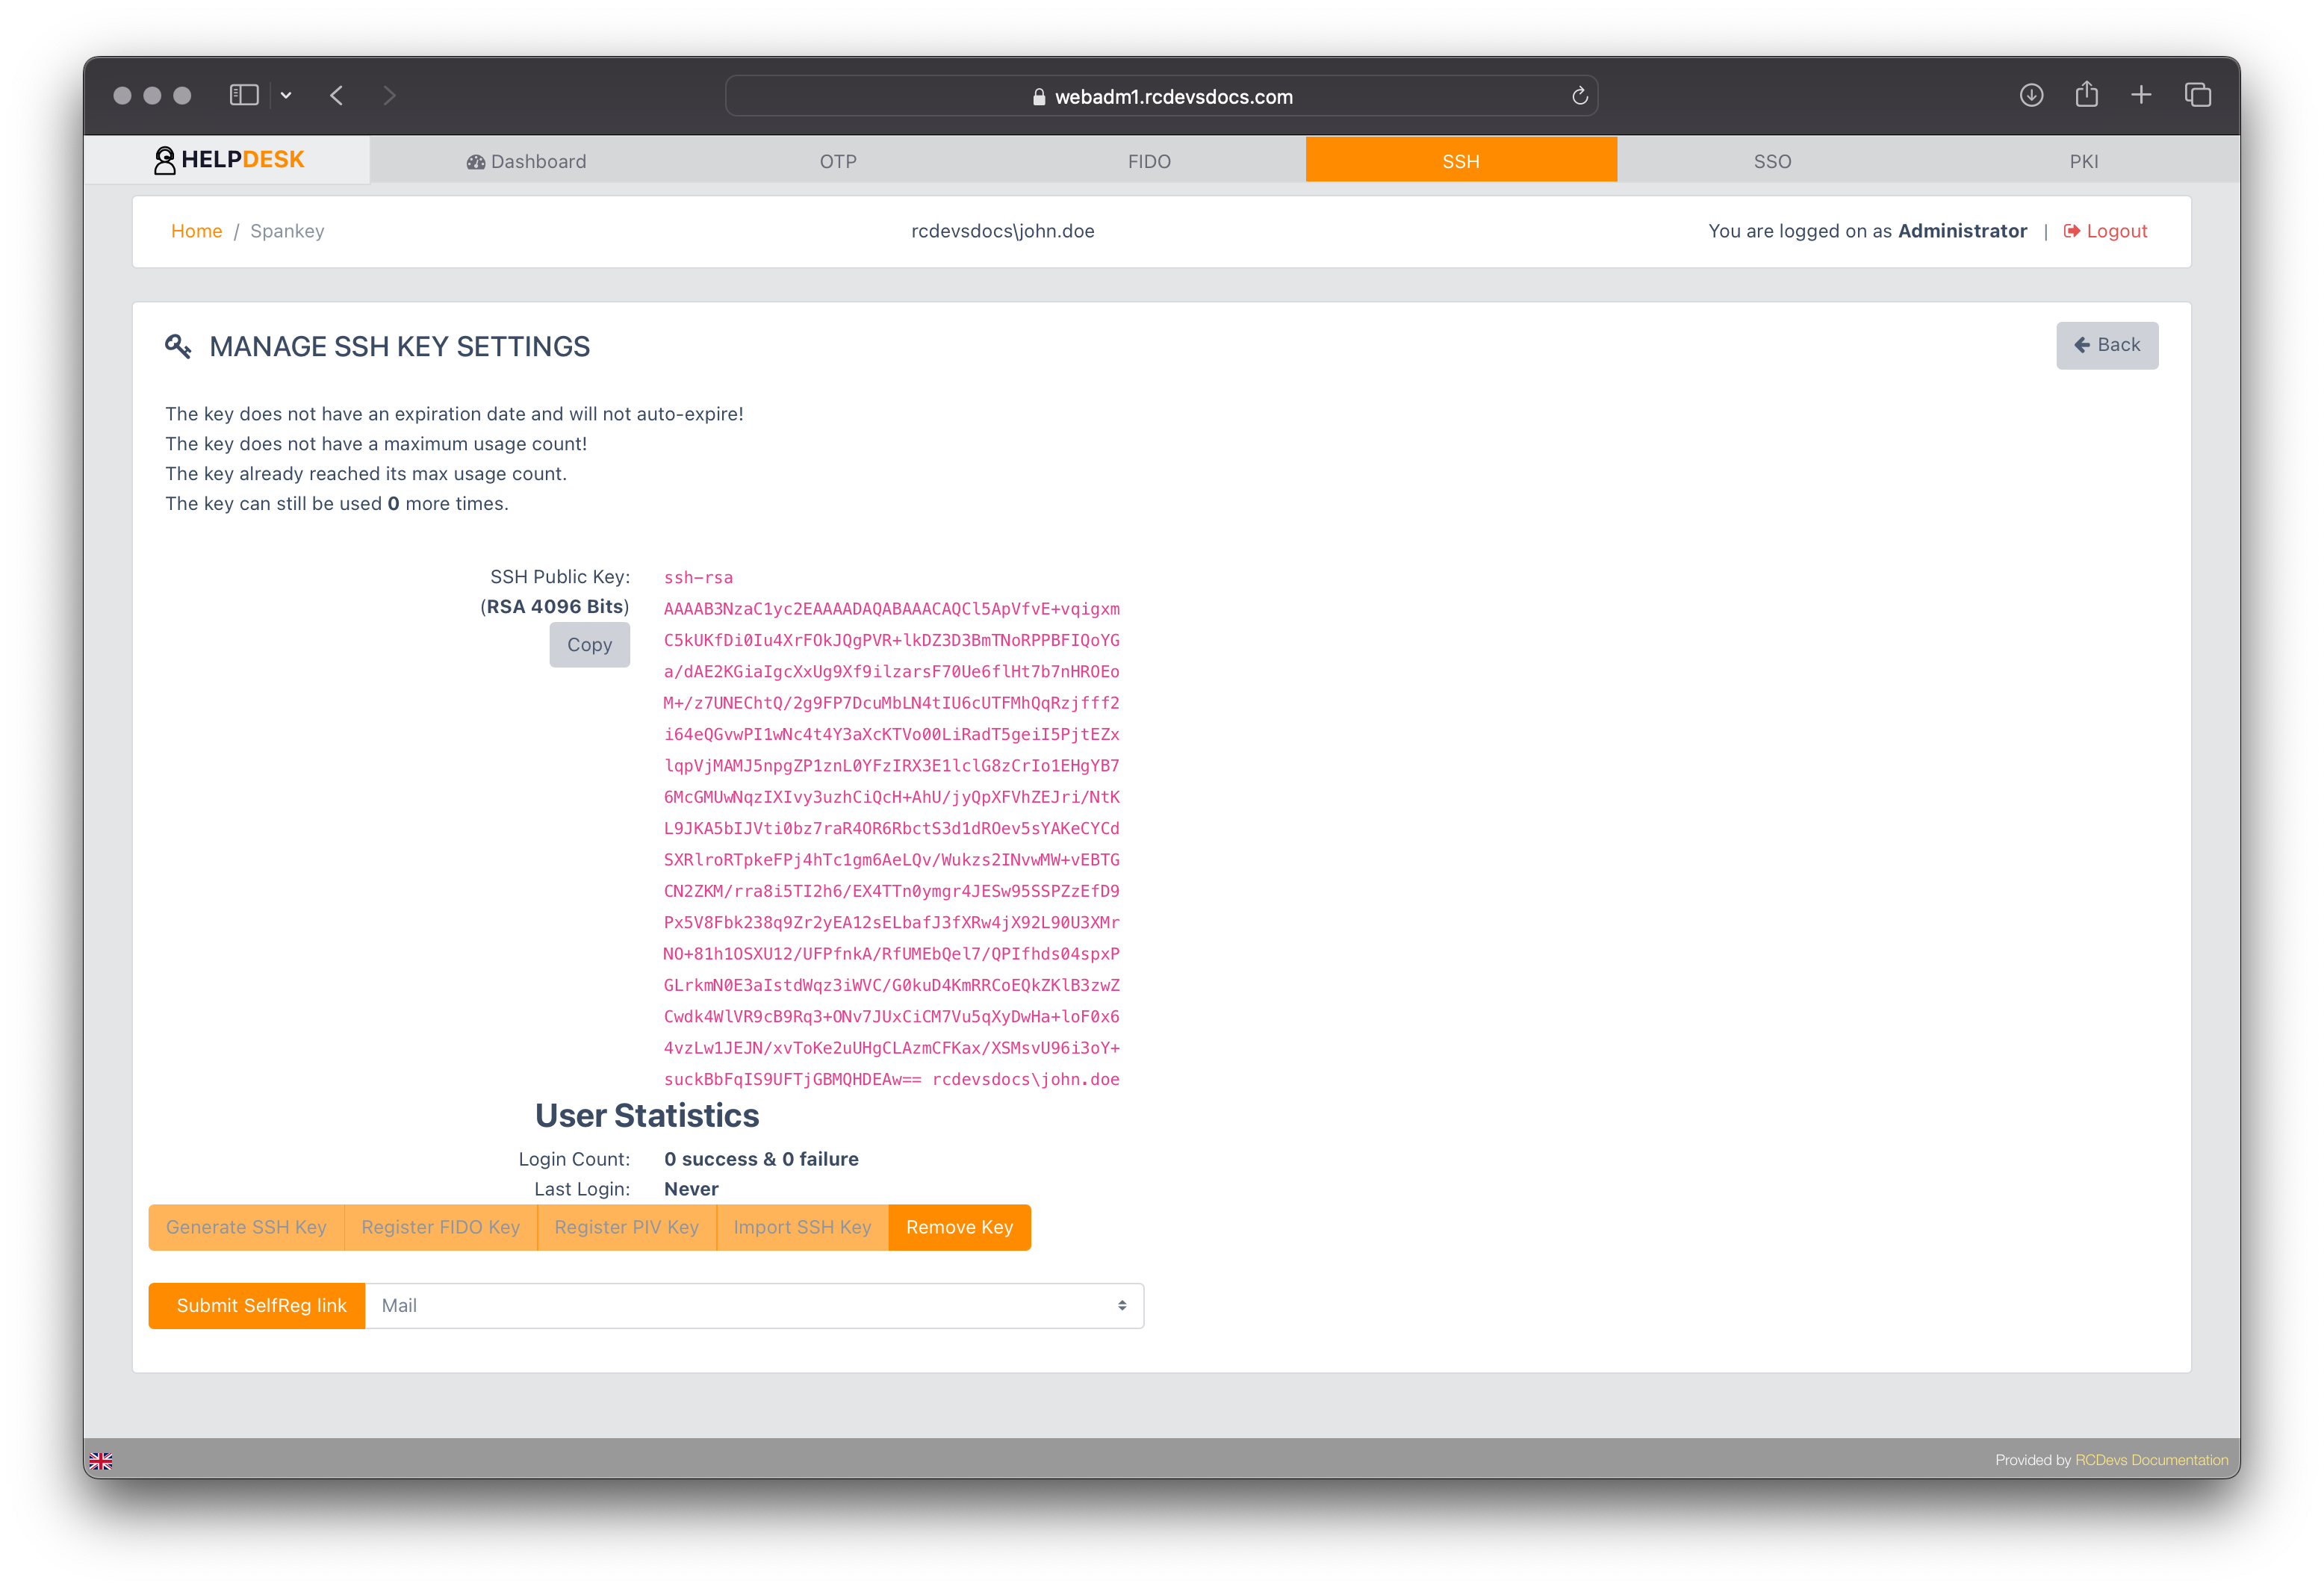
To remove an SSH from the user account, click the Remove Key button.
User Certificate management
Click on the PKI tab for the user you want to register an SSL certificate. The following page will appear providing you the following options:
- Download the CA certificate (WebADM CA certificate);
- Import a certificate;
- Add a new certificate
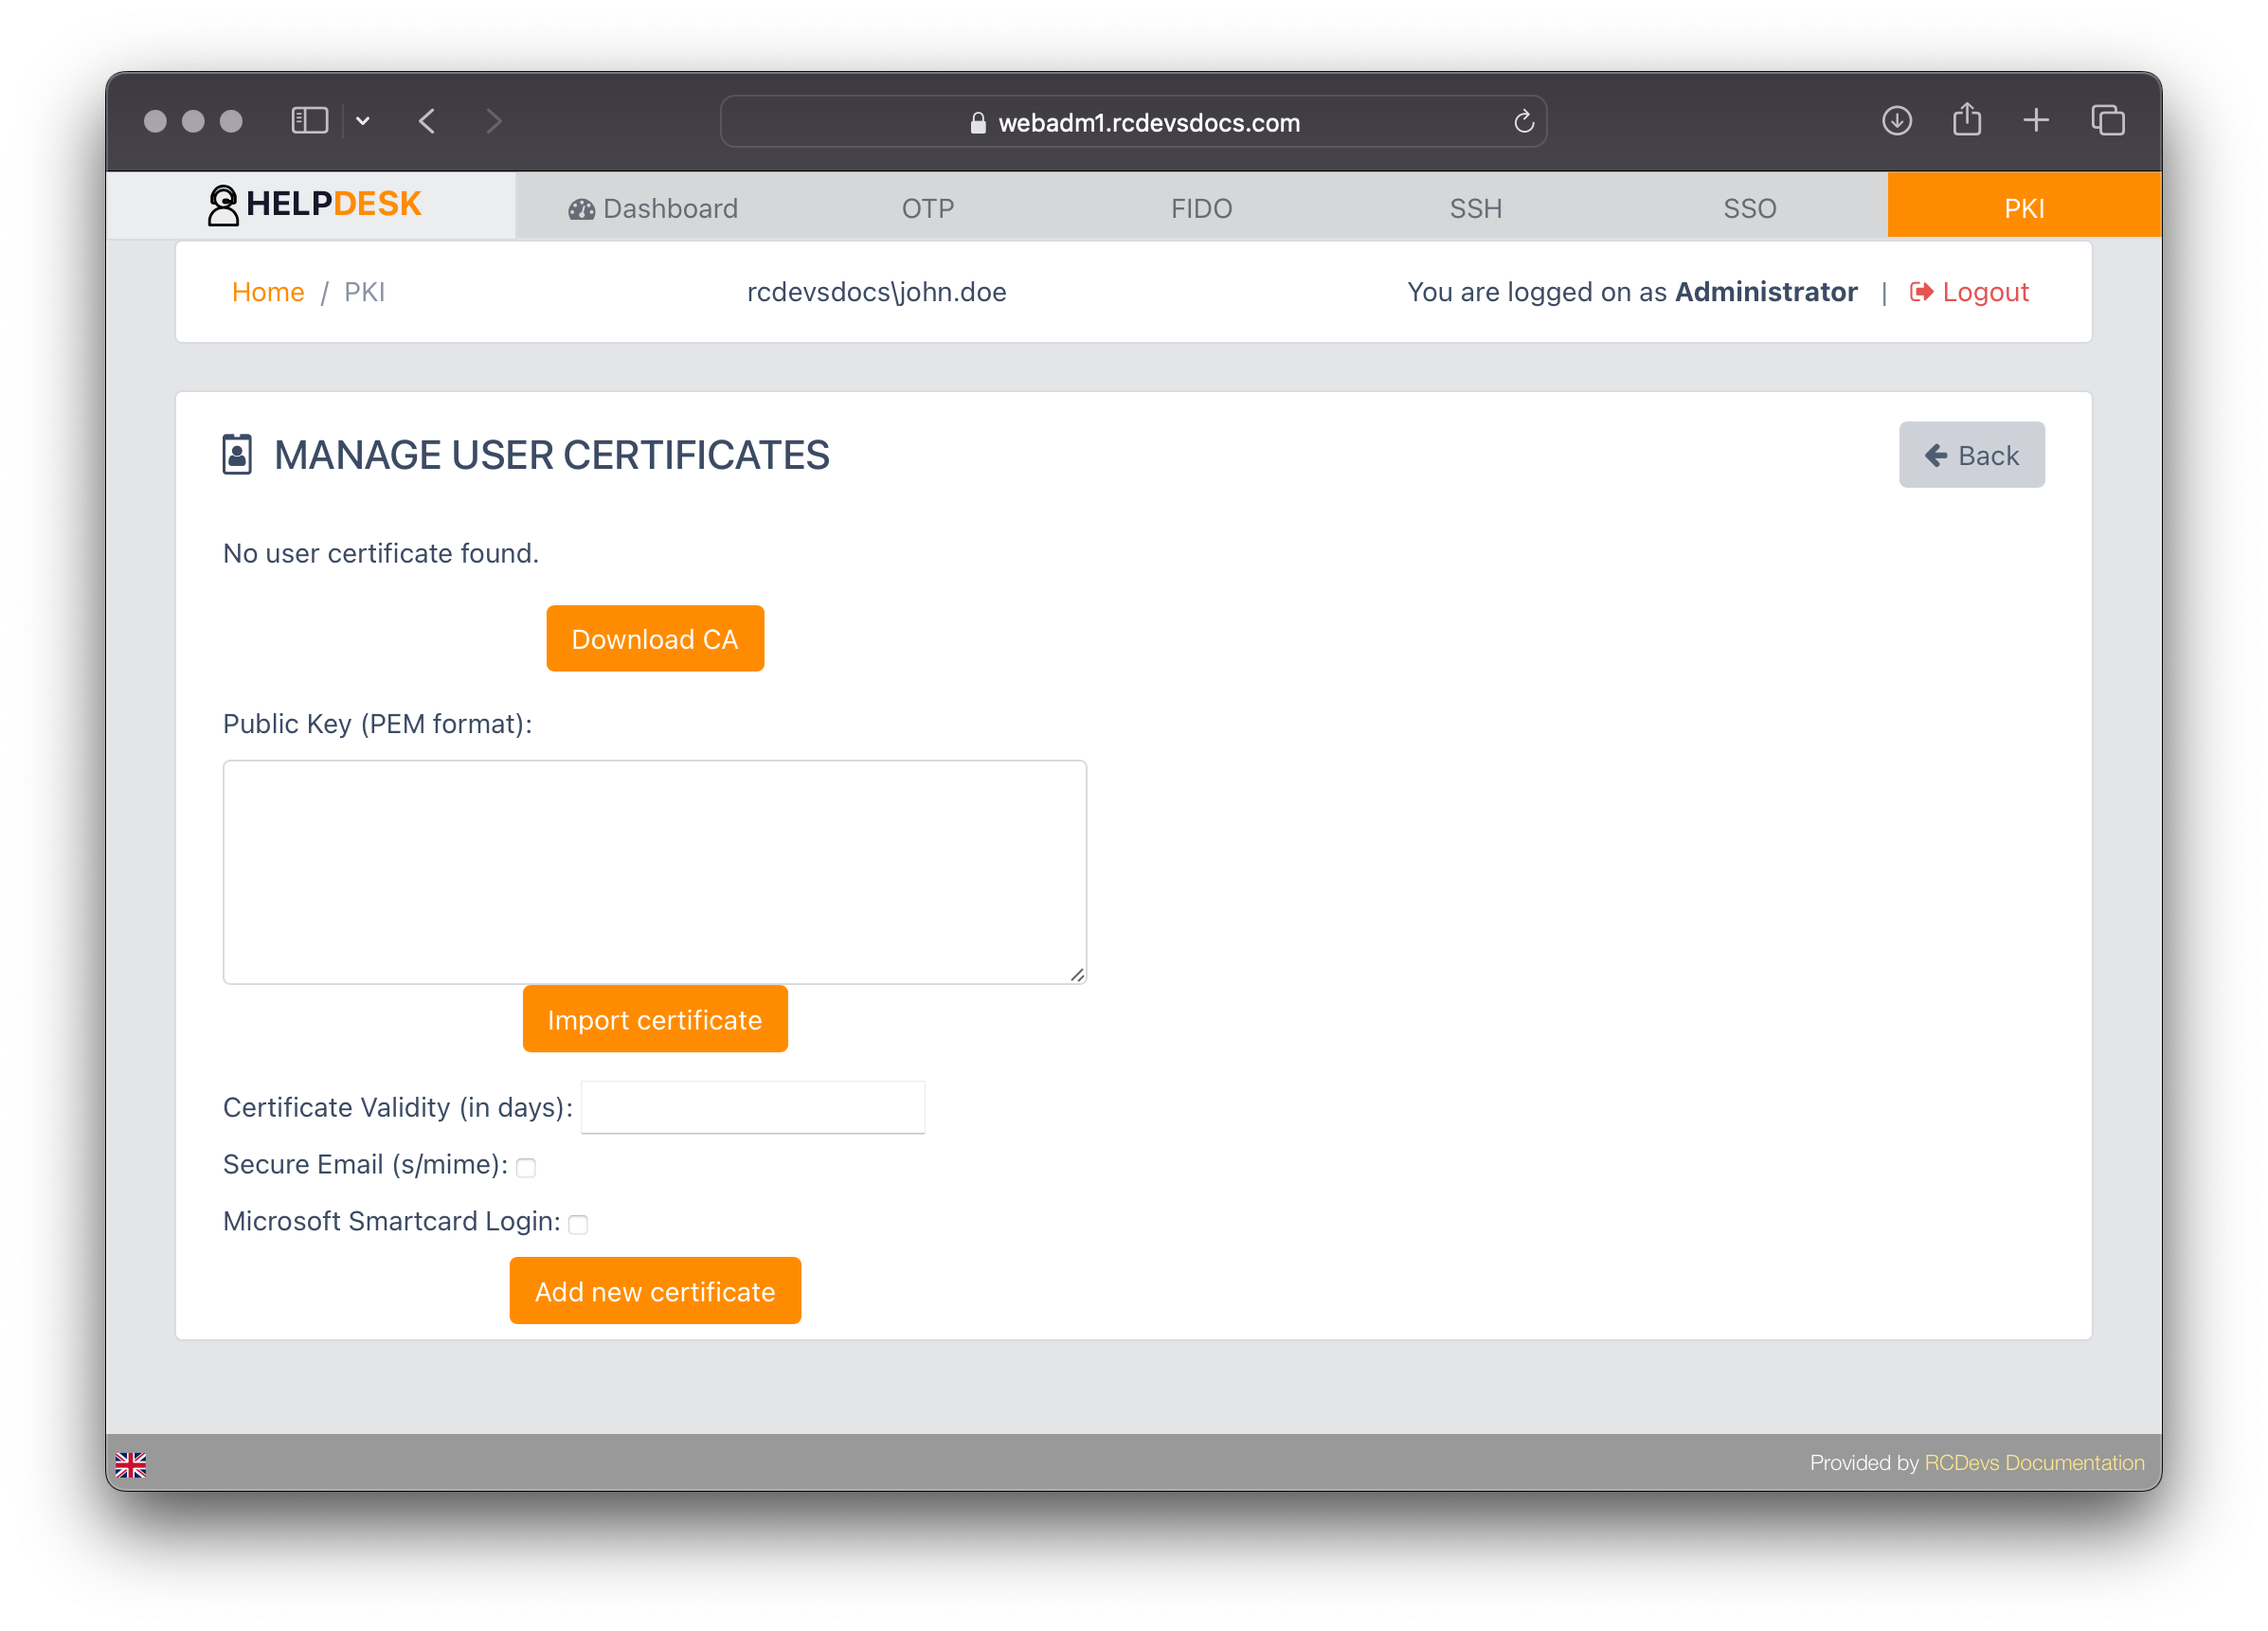
When adding a new certificate, you can optionally provide:
- A validity period in days. If not specified, it will default to the values configured in the Rsignd settings.
- Enable S/MIME for email signing and encryption.
- Enable Smartcard login support for the certificate.
Configure the desired settings and click the Add New Certificate button. The p12 bundle will be automatically downloaded and protected by a password
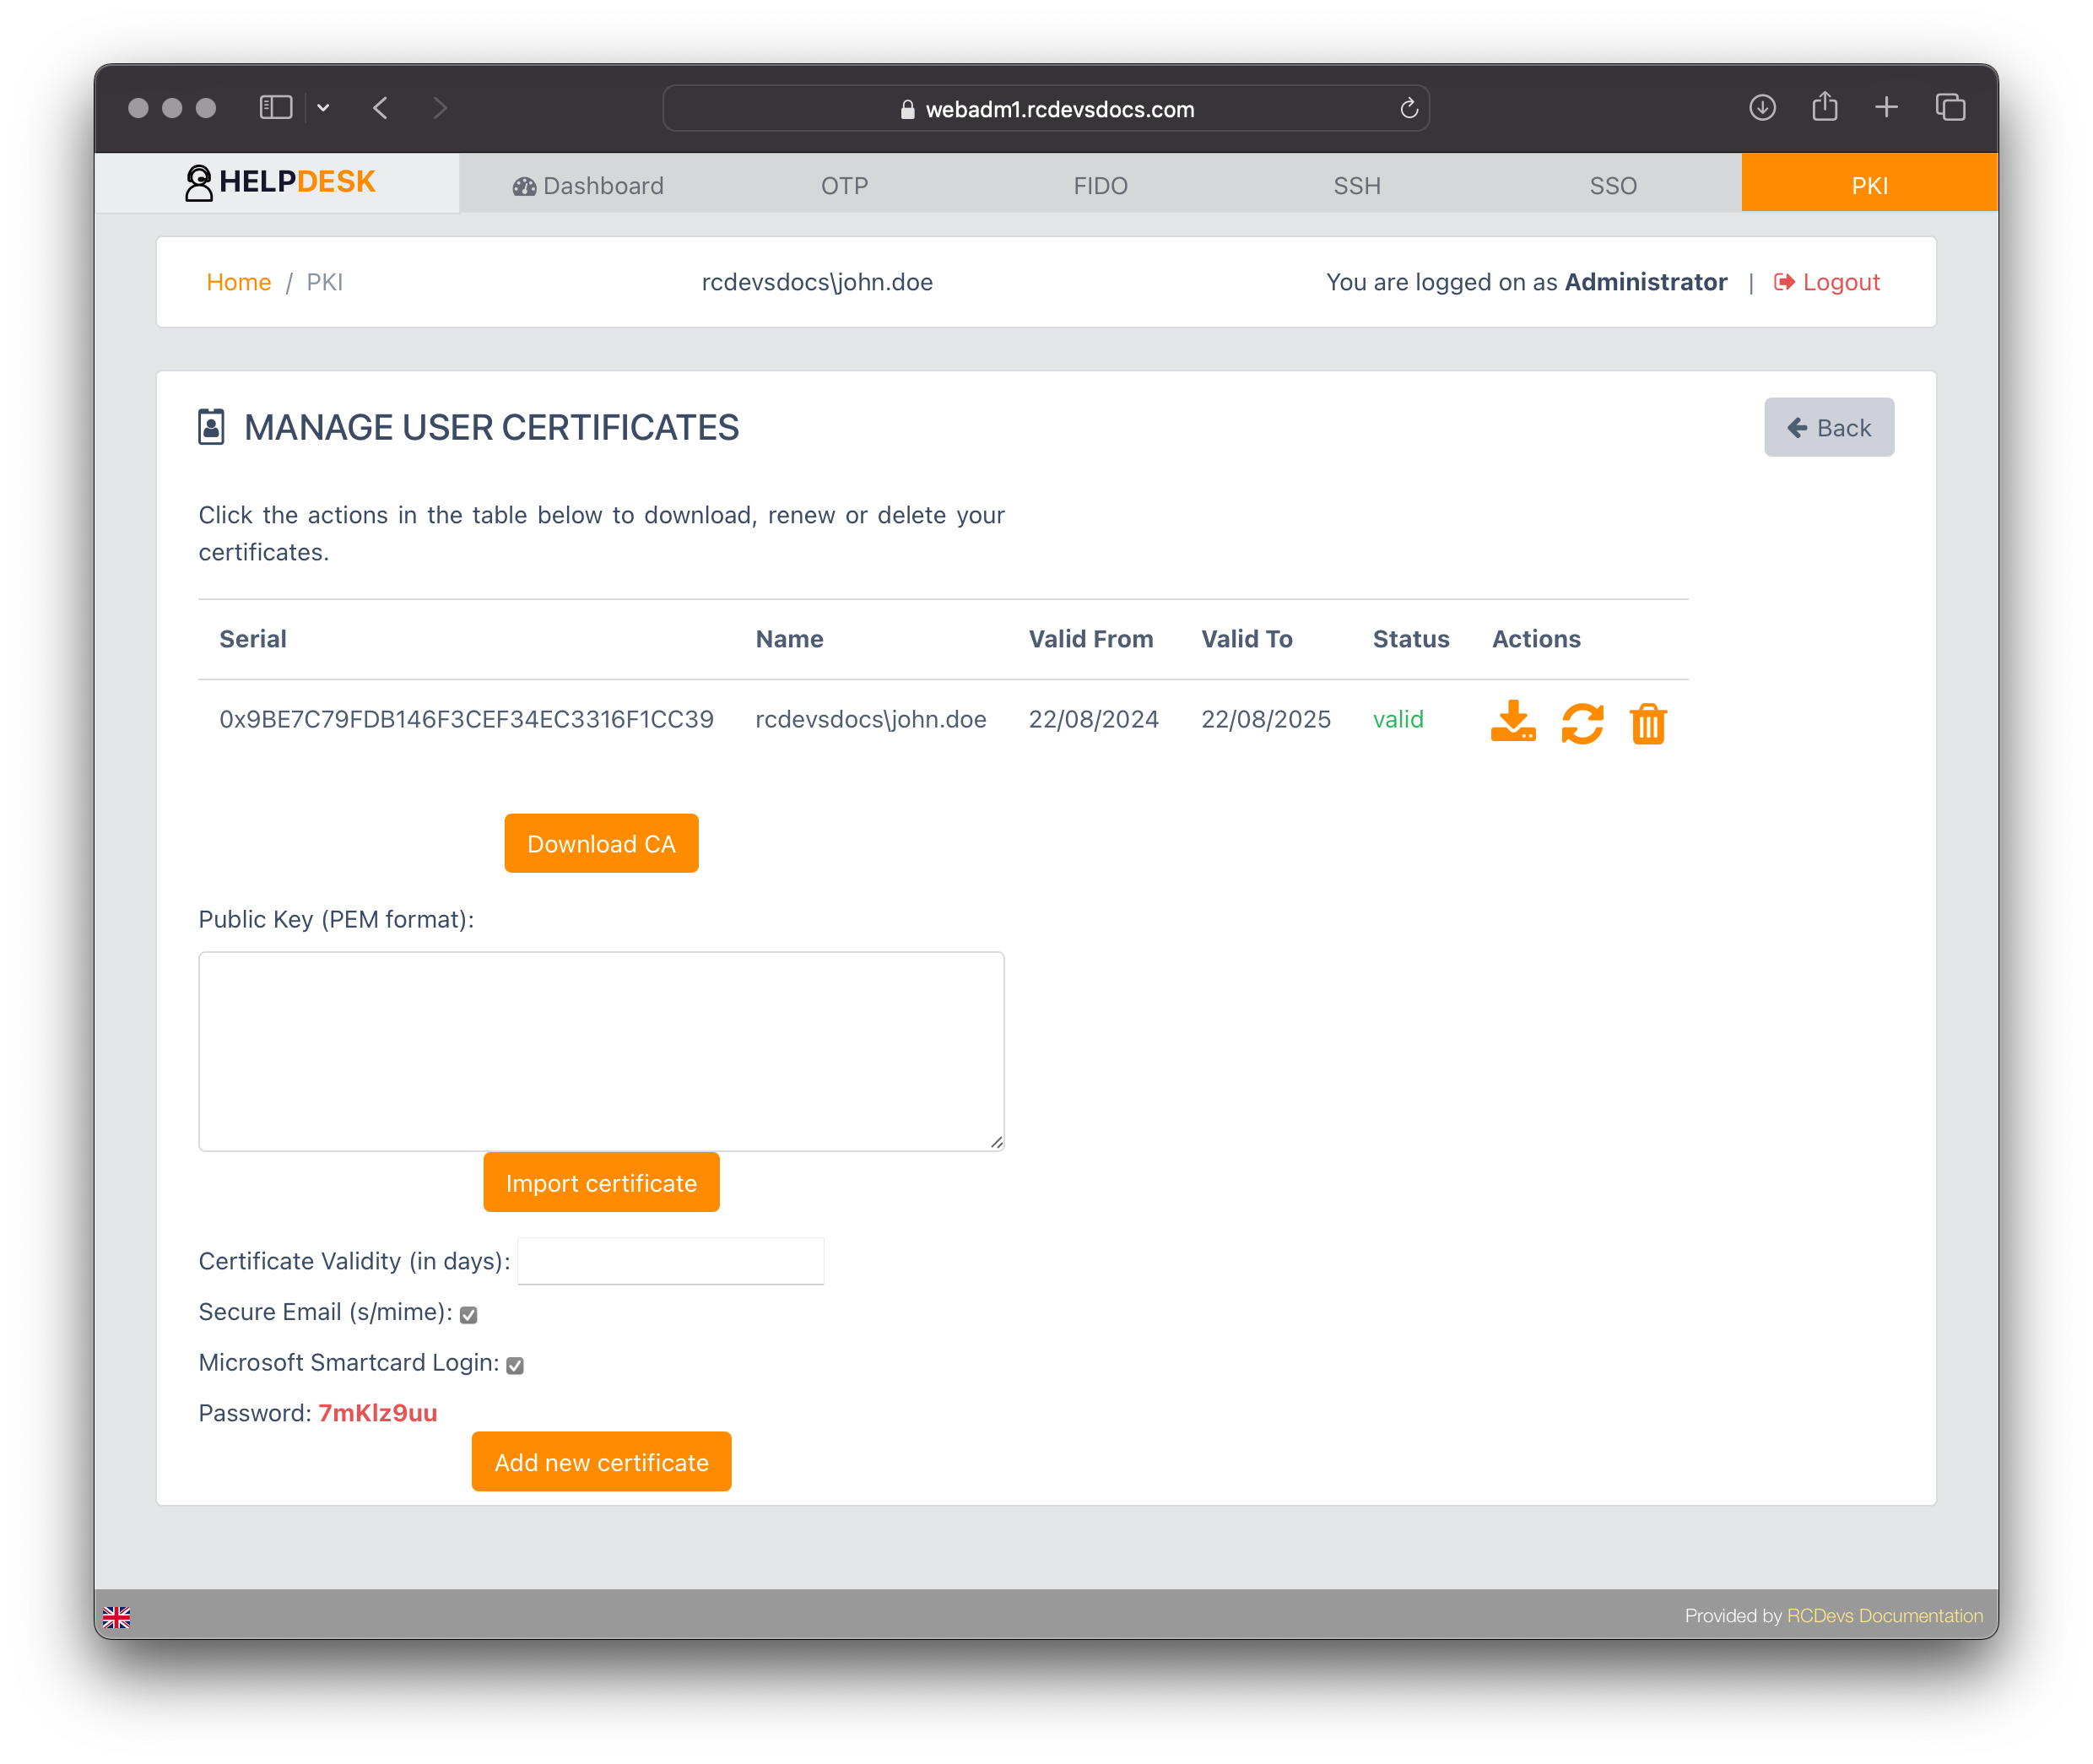
The password will be displayed at the bottom of the page after the certificate has been issued.
You can remove or renew the certificate by clicking the trash or renew icons. To download the public part of the certificate, click the Download icon. The private key of a registered certificate can not be re-downloaded.
