Overview
In this guide, we demonstrate the AWS integration with the RCDevs Identity Provider through SAML. With AWS client and SAML integration there is 2 supported flows:
Service Provider-Initiated Authentication
In an SP-initiated authentication flow, the process is initiated by the Service Provider (SP). Here’s how it works:
- User Request: The user tries to access a resource or service at the SP.
- Authentication Request: The SP generates an SAML request and redirects the user to the Identity Provider (IdP) with this request.
- IdP Authentication: The IdP authenticates the user, typically prompting for credentials.
- SAML Assertion: Once authenticated, the IdP generates a SAML assertion and redirects the user back to the SP with this assertion.
- Access Granted: The SP validates the SAML assertion and grants access to the user.
Identity Provider-Initiated Authentication
In an IdP-initiated authentication flow, the process is initiated by the Identity Provider (IdP). Here’s how it works:
- User Request: The user accesses the IdP directly and logs in.
- Service Selection: After authentication, the user selects the desired SP from a list of available services.
- SAML Assertion: The IdP generates a SAML assertion for the selected SP and redirects the user to the SP with this assertion.
- Access Granted: The SP validates the SAML assertion and grants access to the user.
IdP configuration on AWS
First, we save the SAML metadata in a file. For our IdP server, we find it in https://sso.rcdevsdocs.com/ws/saml/.
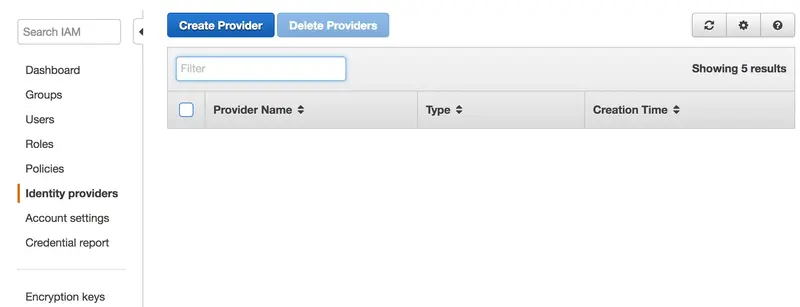
We open AWS console > IAM > Identity providers > Create Provider:
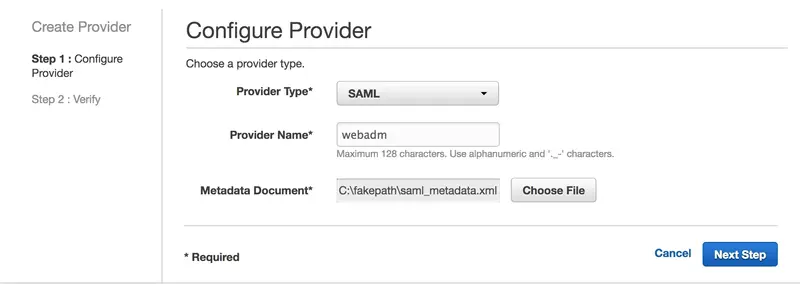
We select SAML, add a Provider Name, insert the metadata file we previously saved and click on Next Step:
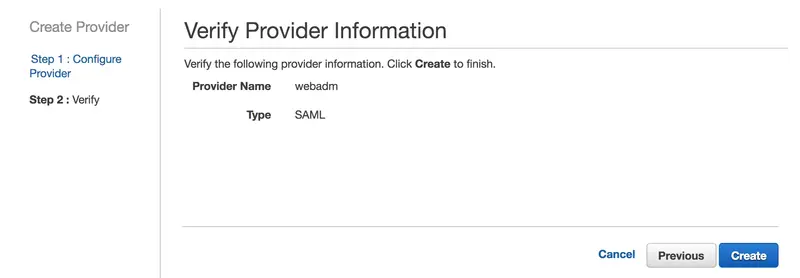
On the next page, click on Create button:
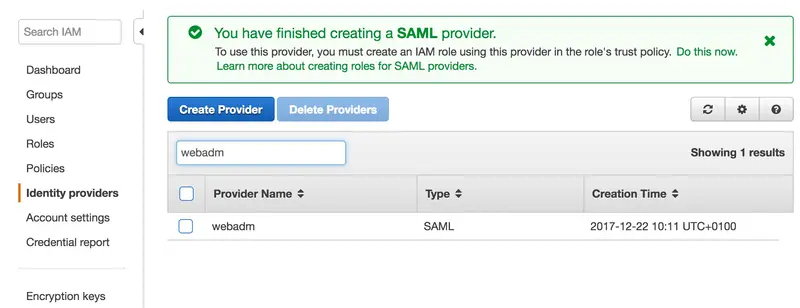
Our Identity Provider is configured in AWS.
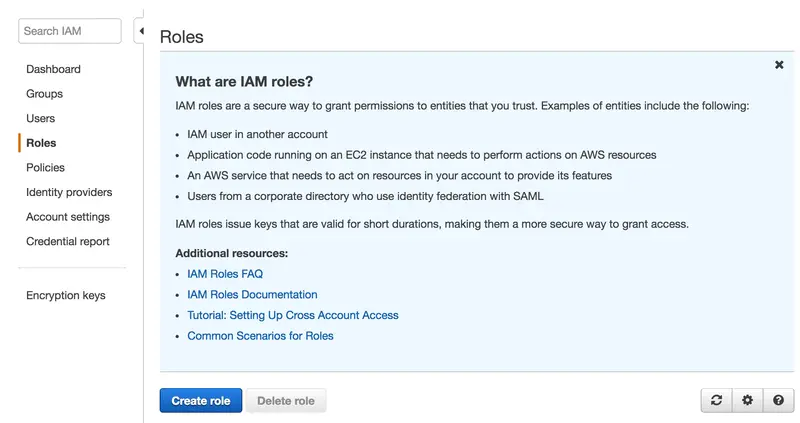
We now have to create a role. Click on Create Roles:
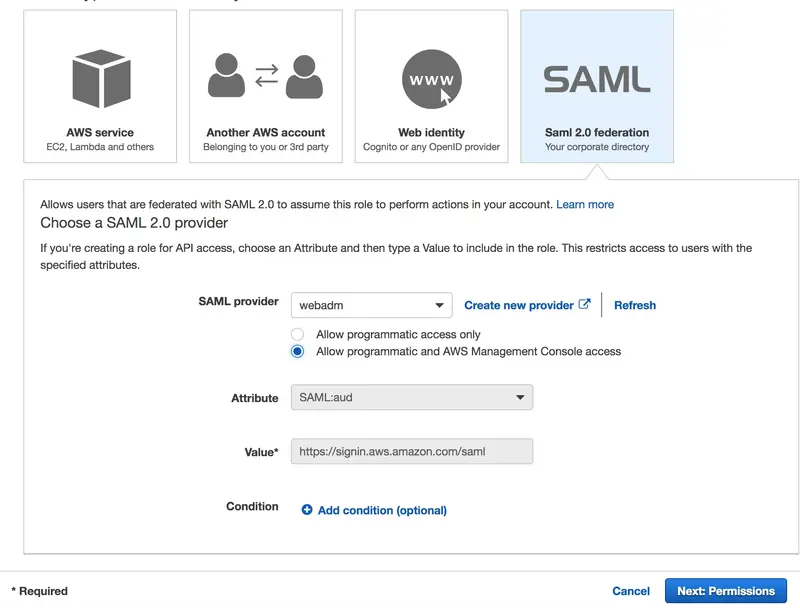
We have to choose here SAML 2.0 Federation, select our SAML IdP, choose AWS Management Console access and click on Next: Permissions:
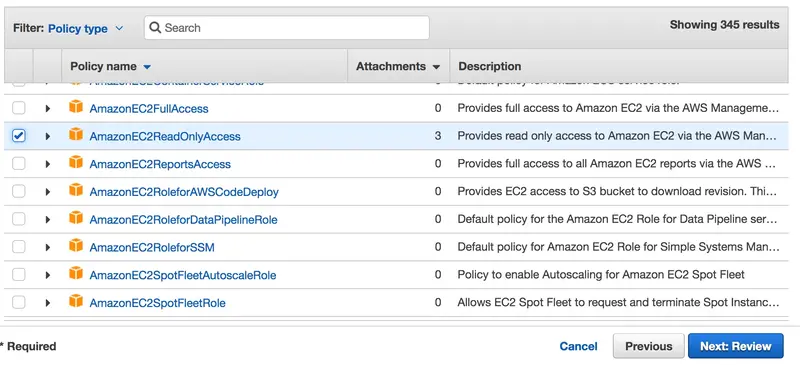
On the next screen, select the desired permission policy(ies) and click on Next: Review.
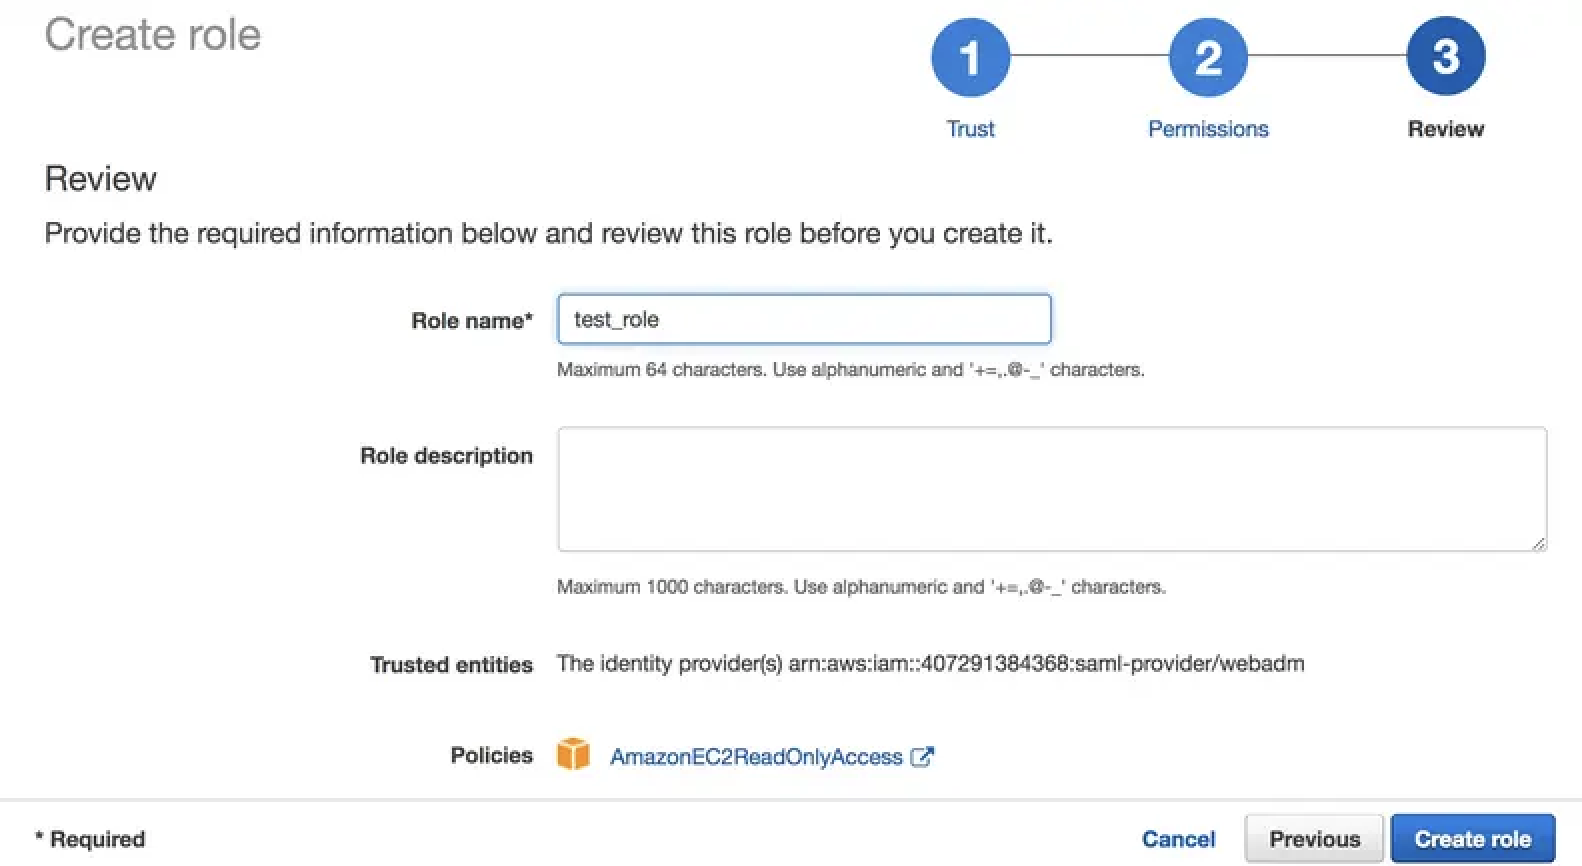
We provide a name to our role and click on Create role:
Our role is now created:
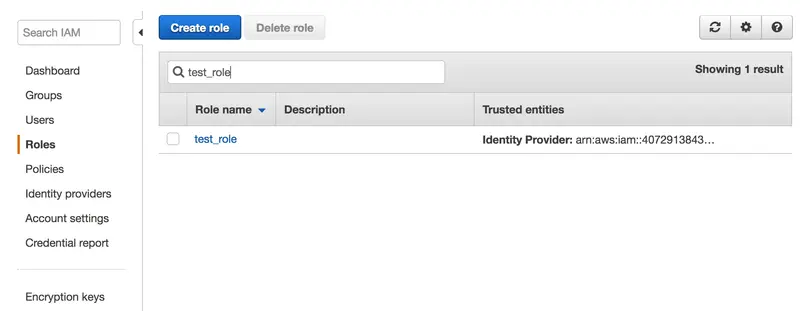
You can click on it to get more details.
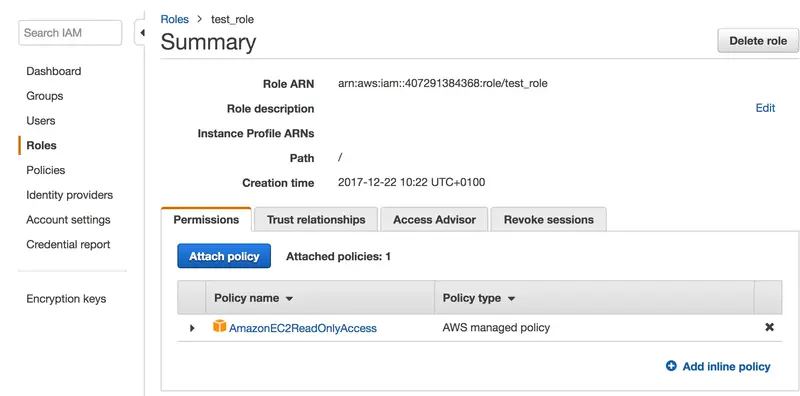
The configuration on AWS is done.
AWS configuration on WebADM
Global configuration
We need now to configure the IdP initiated authentication for AWS.
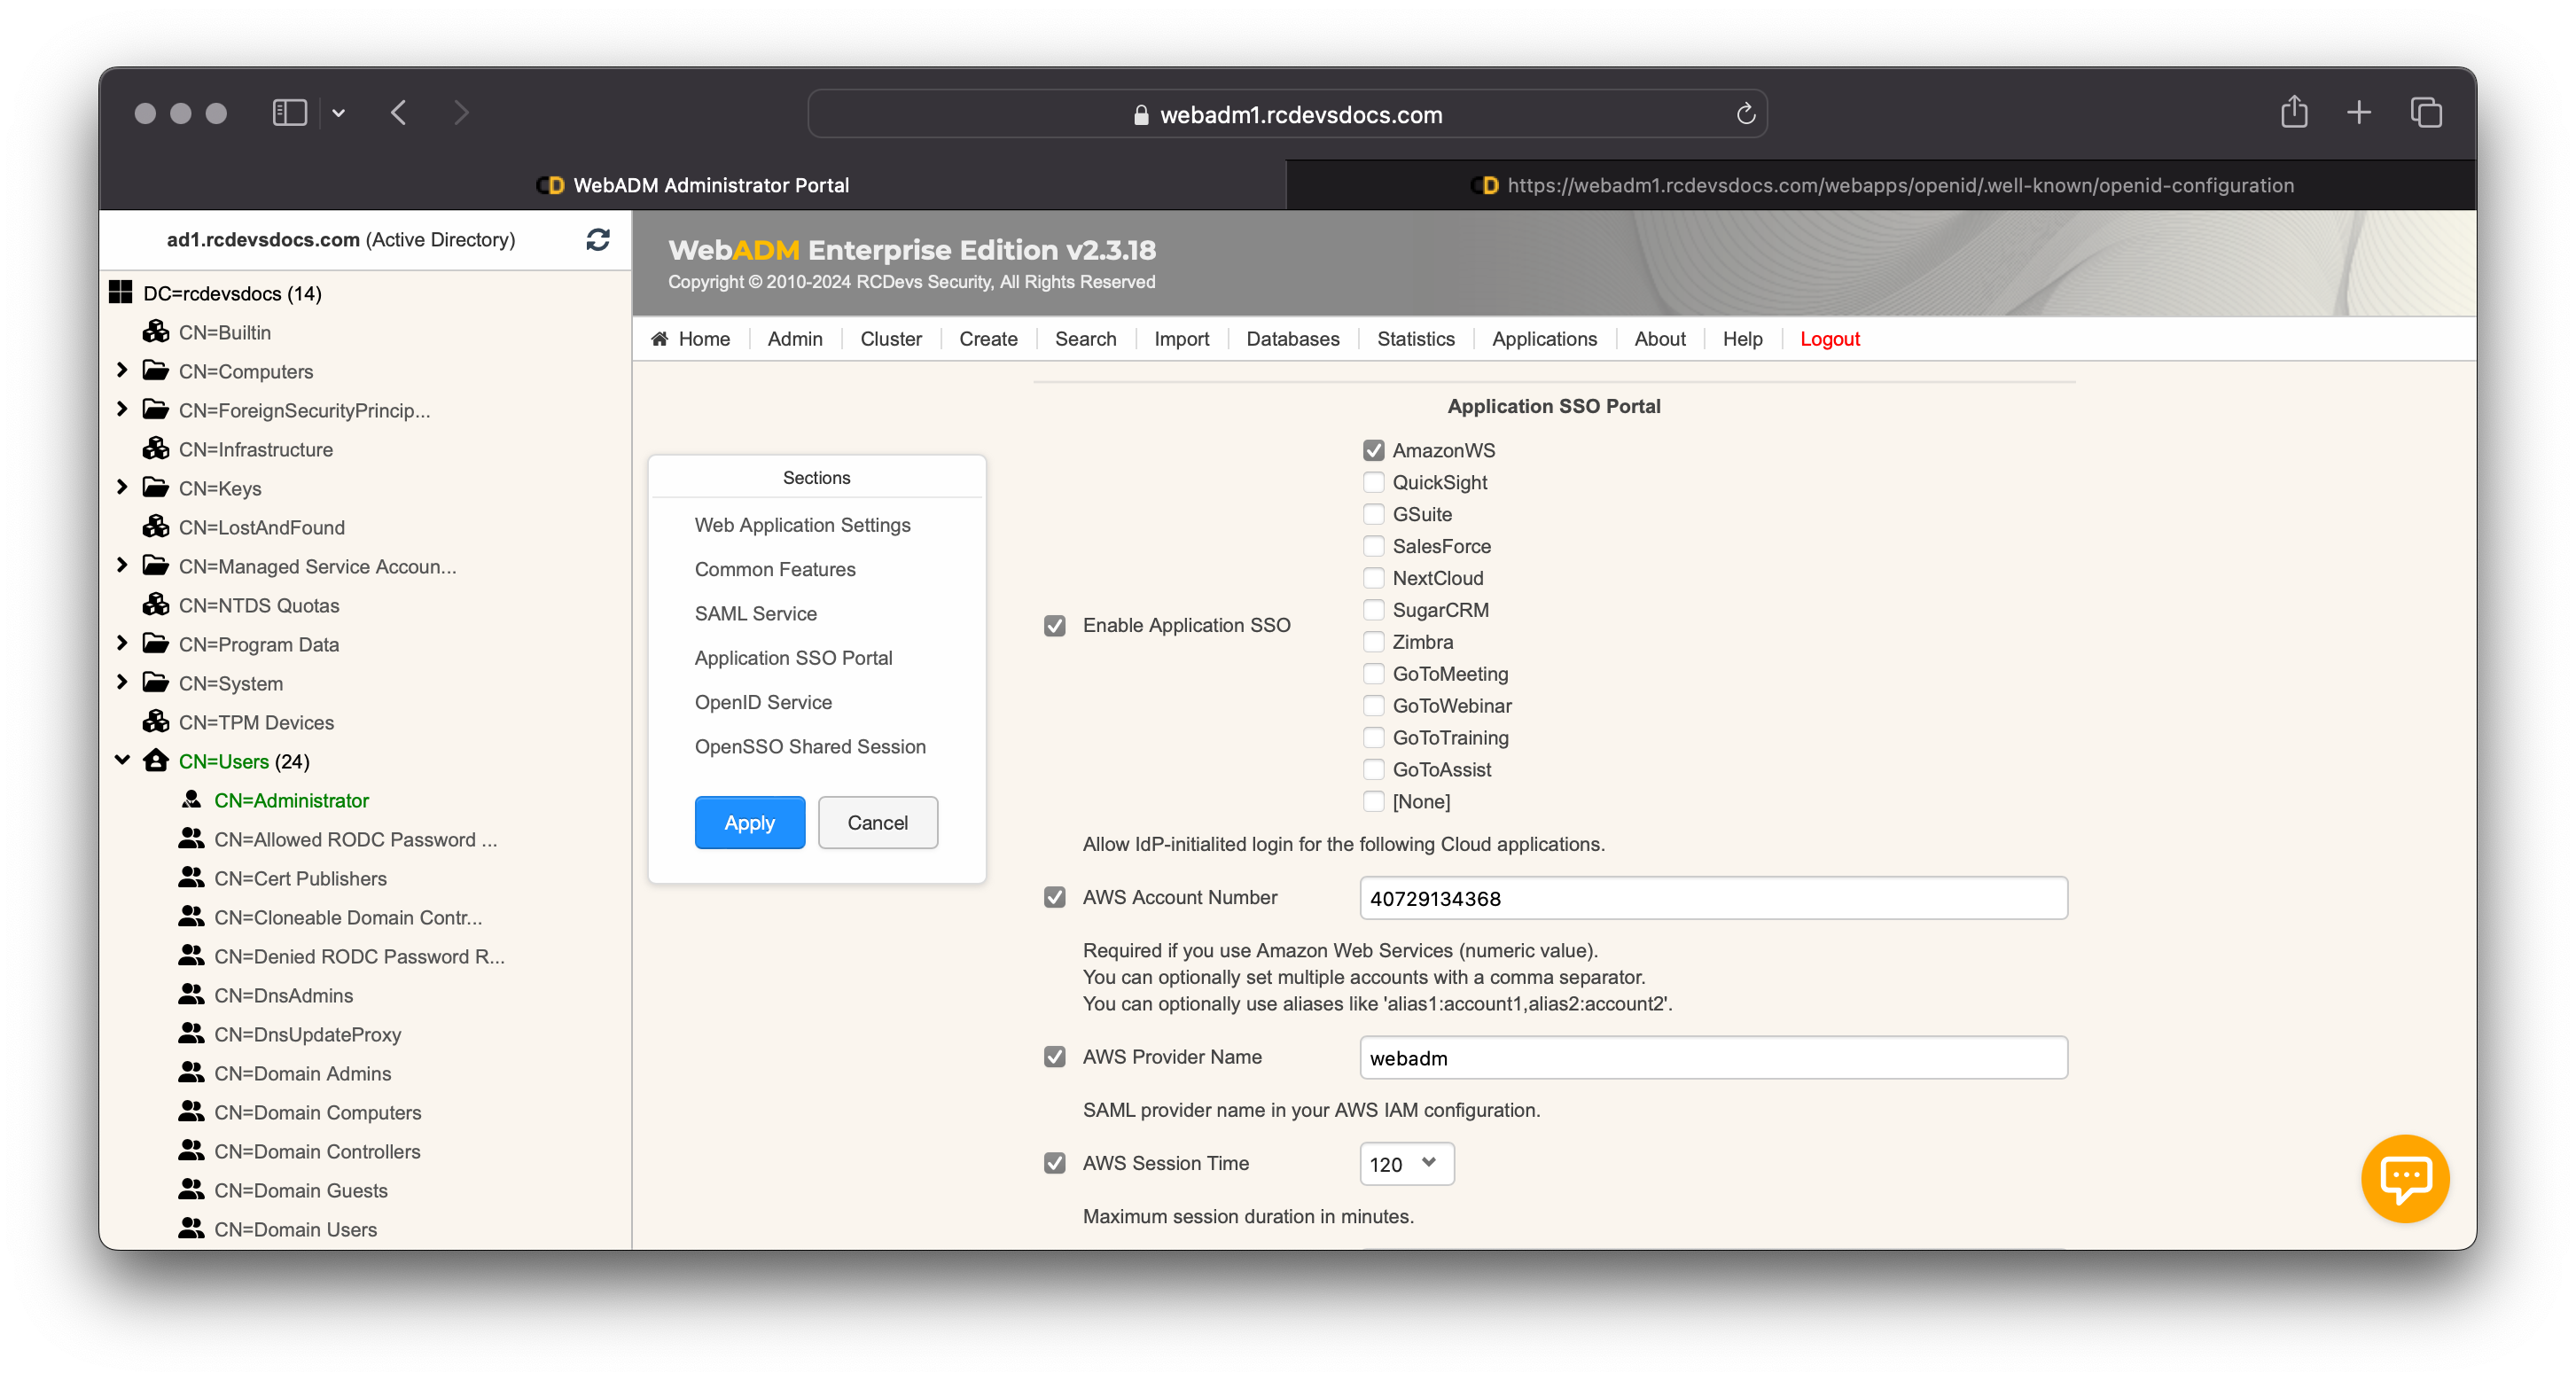
Through the WebADM admin portal, click on Applications tab, Single Sign-on, OpenID & SAML Provider, CONFIGURE.
Enable the checkbox Enable Application SSO and select AmazonWS.
You must afterward configure your AWS Account Number (a numerical value that you can find in the ARN of the AWS role) and AWS Provider Name that we previsouly created. You can also configure the Session timeout returned to AWS.
Once it is configured, you can click Apply.
Role Assignment
Now, we need to assign the role created on AWS to a specific user or group in order for authenticated users to be granted access after the redirection from the IdP to AWS.
In that example, we are going to configure it on an LDAP group named AWS_Users. In order to configure settings on a group, the group must be activated.
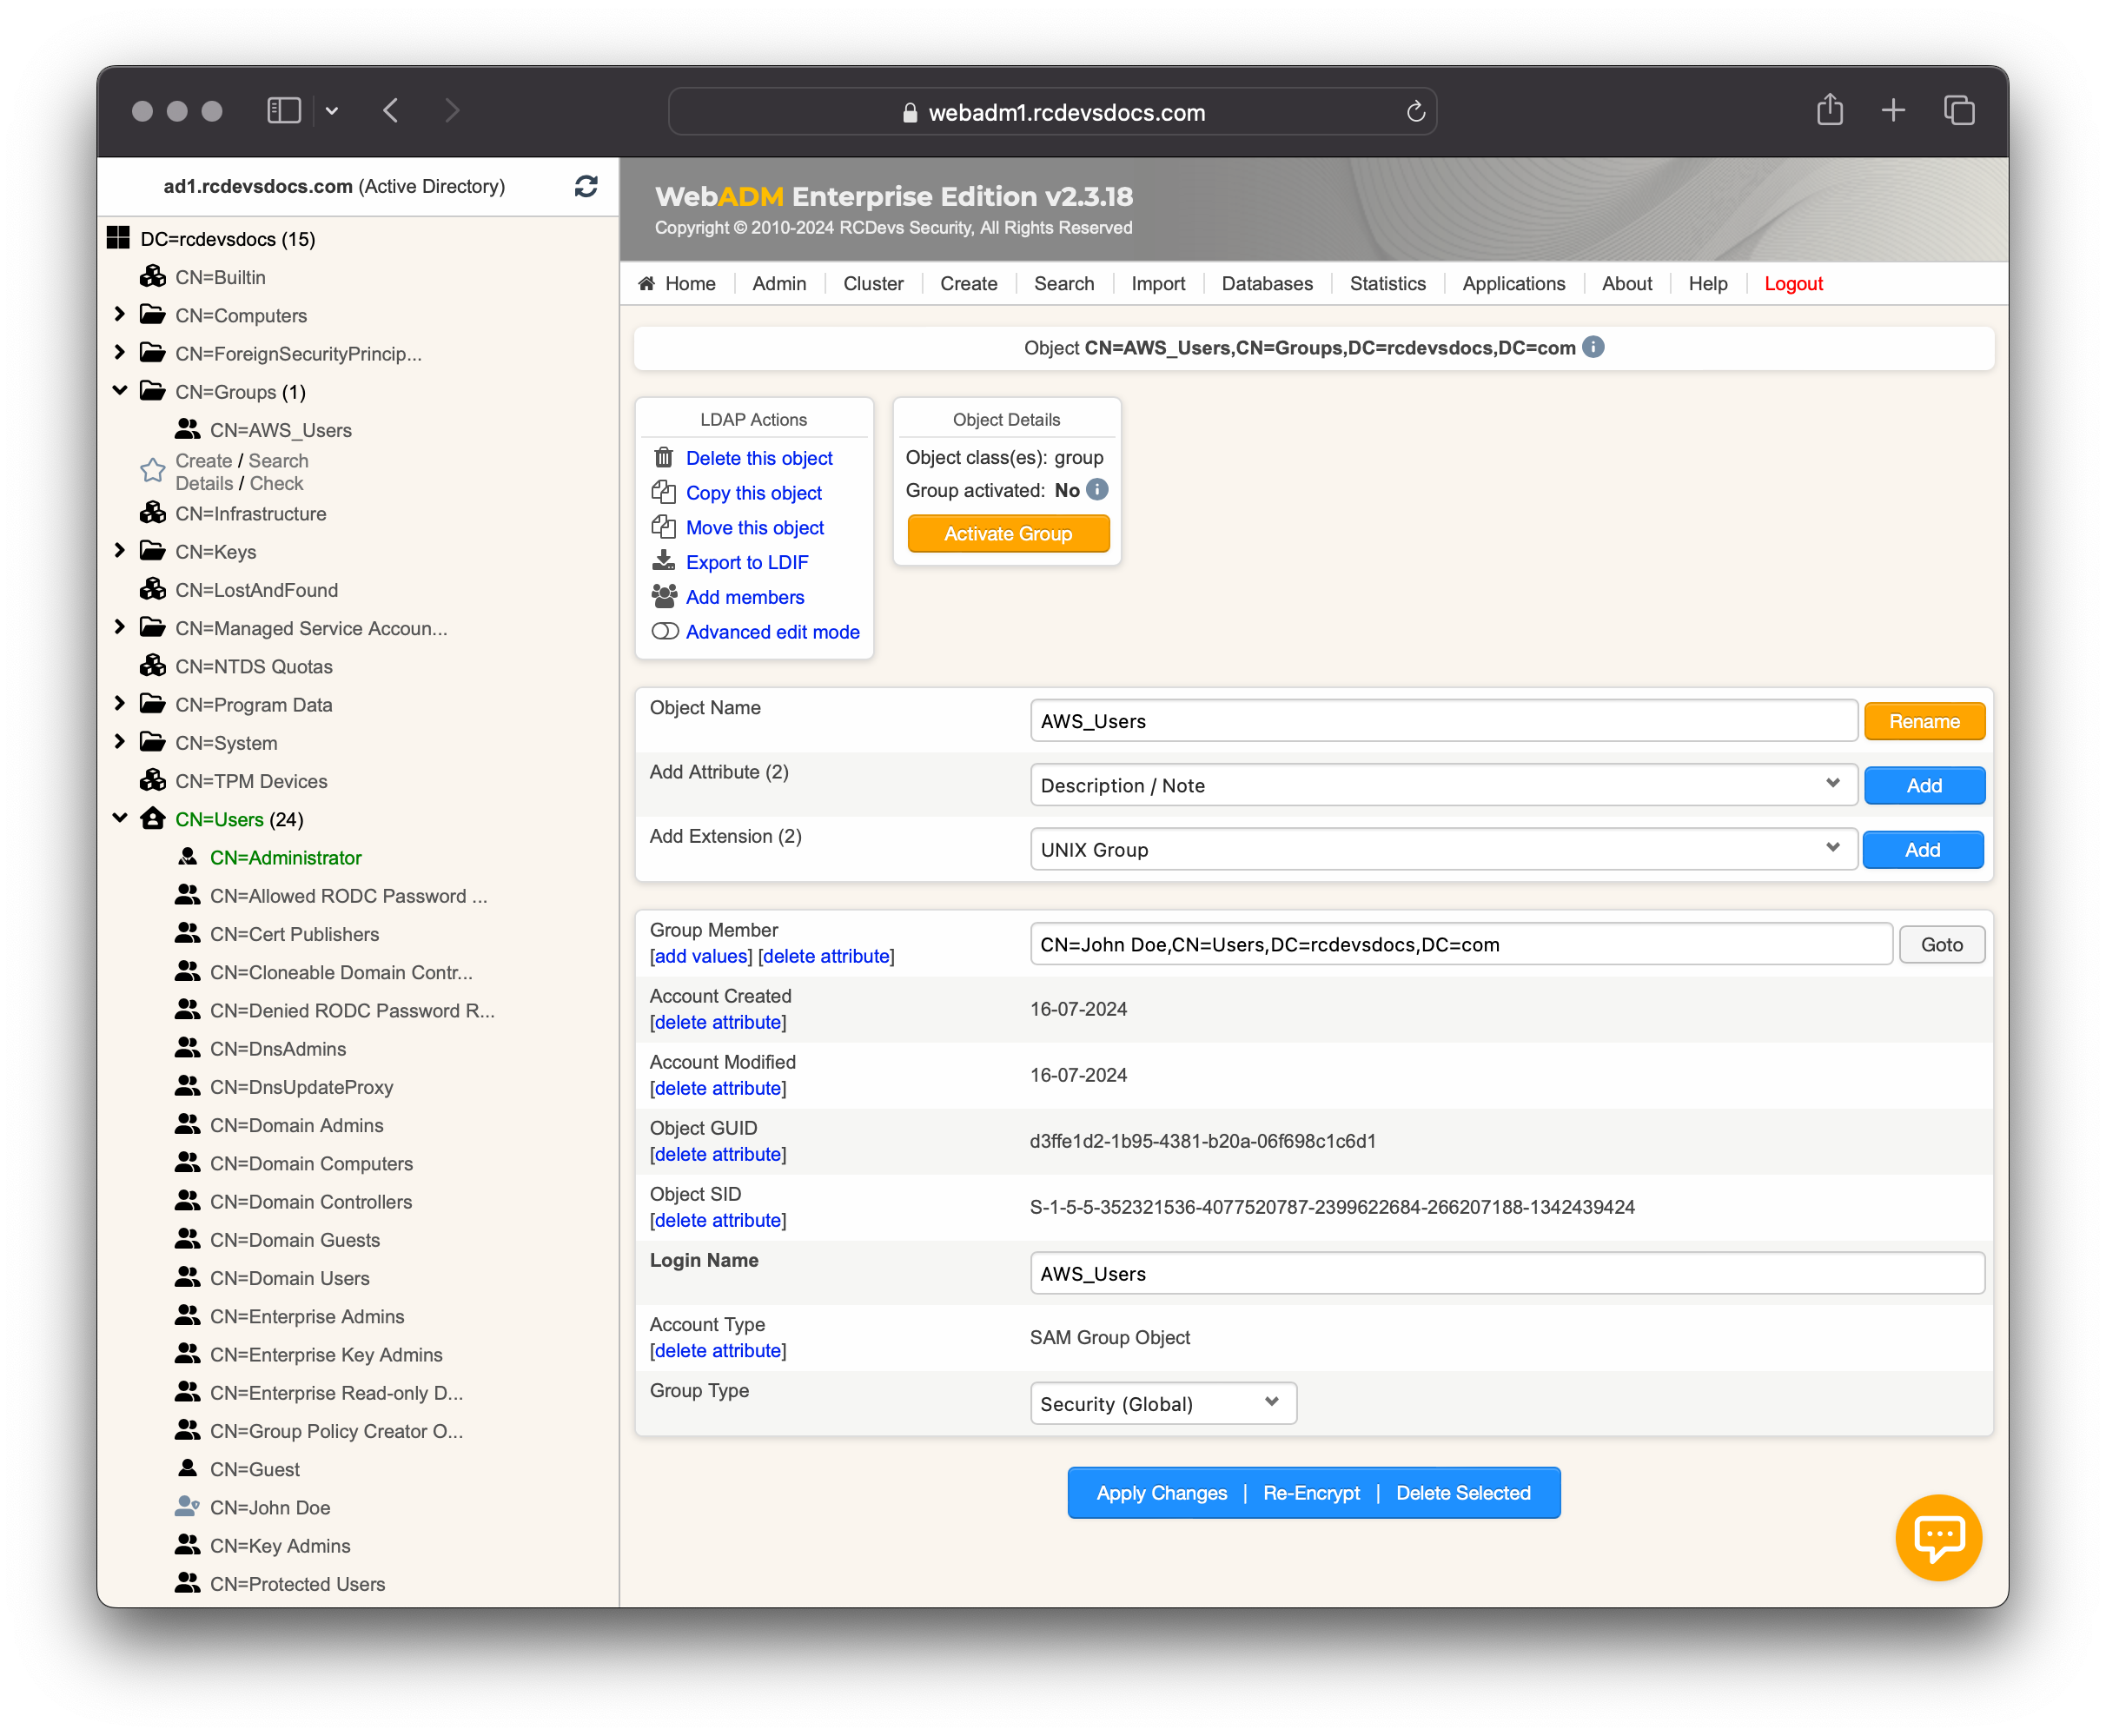
Click on Activate Group and proceed with the activation. Once the group is activated, you can configure settings on it. Click on the Group Settings button. In the Applications box on the left, select OpenID & SAML Provider. Scroll down and configure the AWS Role Names. For all members of that group, the test_role mapping will be done by the IdP and the value will be sent in the SAML Assertion.
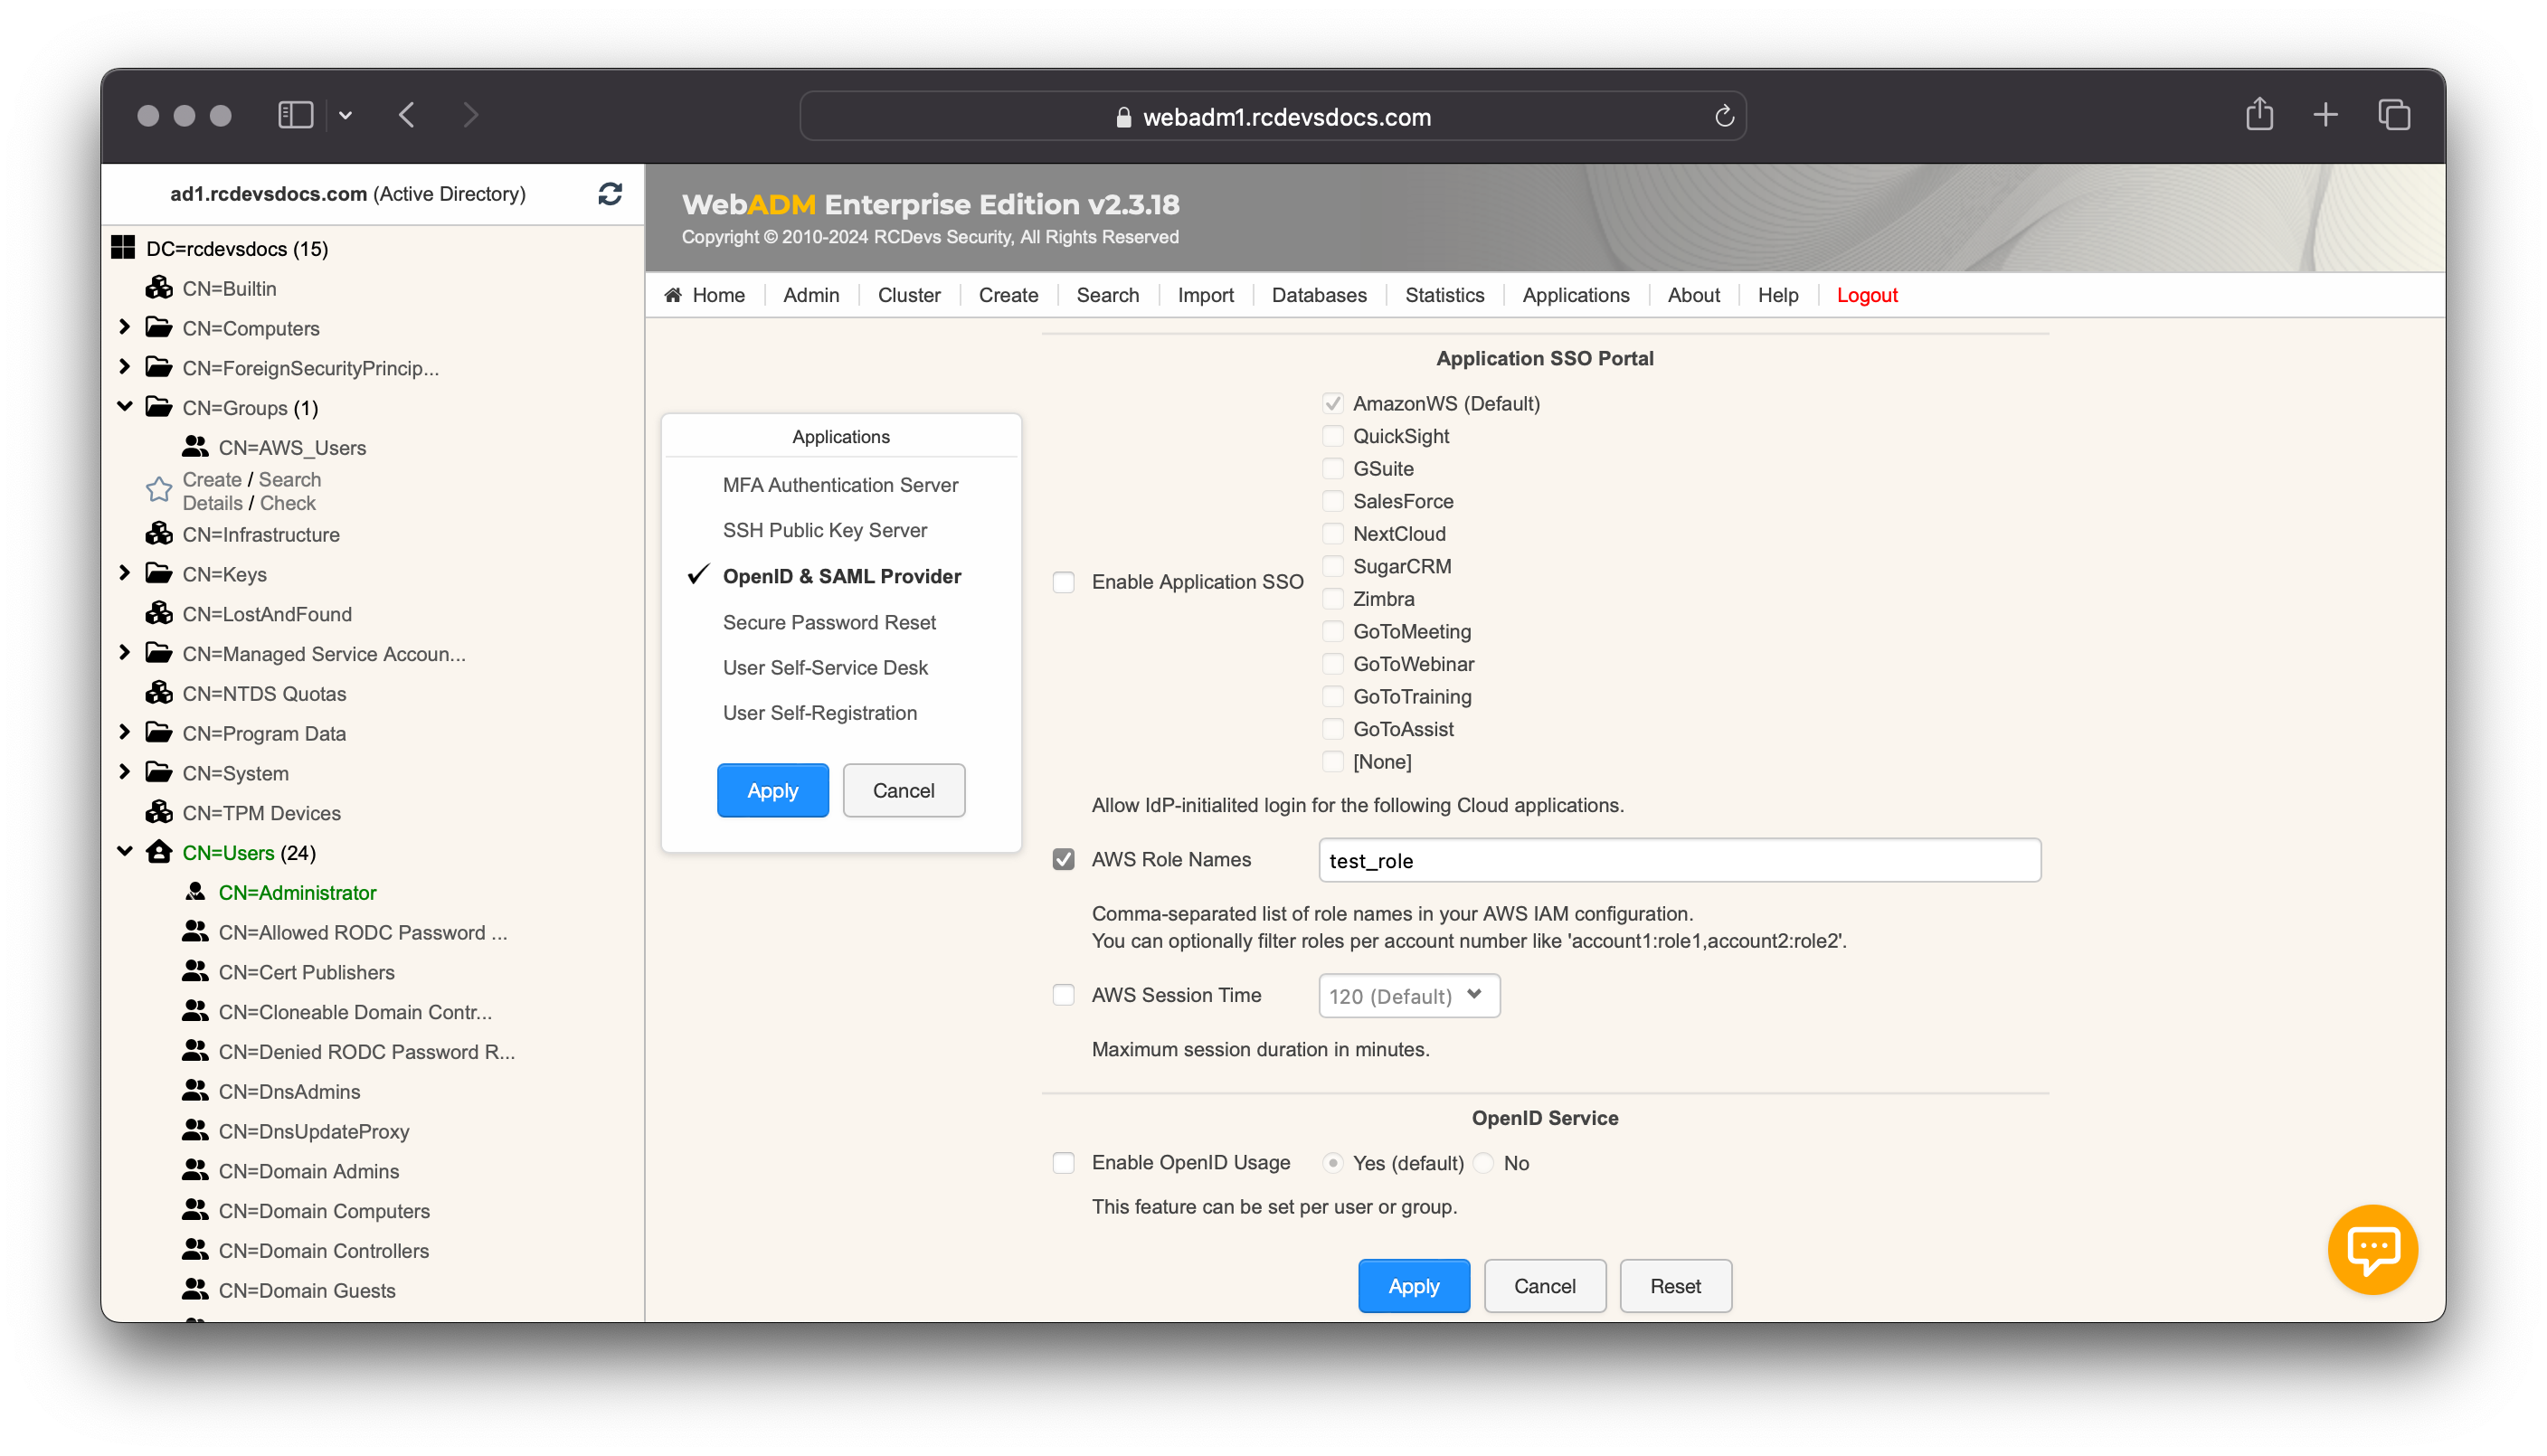
The role mapping is now finished.
Client Policy and Conditional Access
To apply additional restrictions on the login, you can also configure a WebADM Client Policy. In SAML, the matching between a Client Policy and a Service Provider is done through the Issuer value.
Let's create a Client Policy for AWS. Login on WebADM Administrator portal, click on Admin tab, click on Client Policies and then Add Client button. Name your client policy and optionally provide a description:
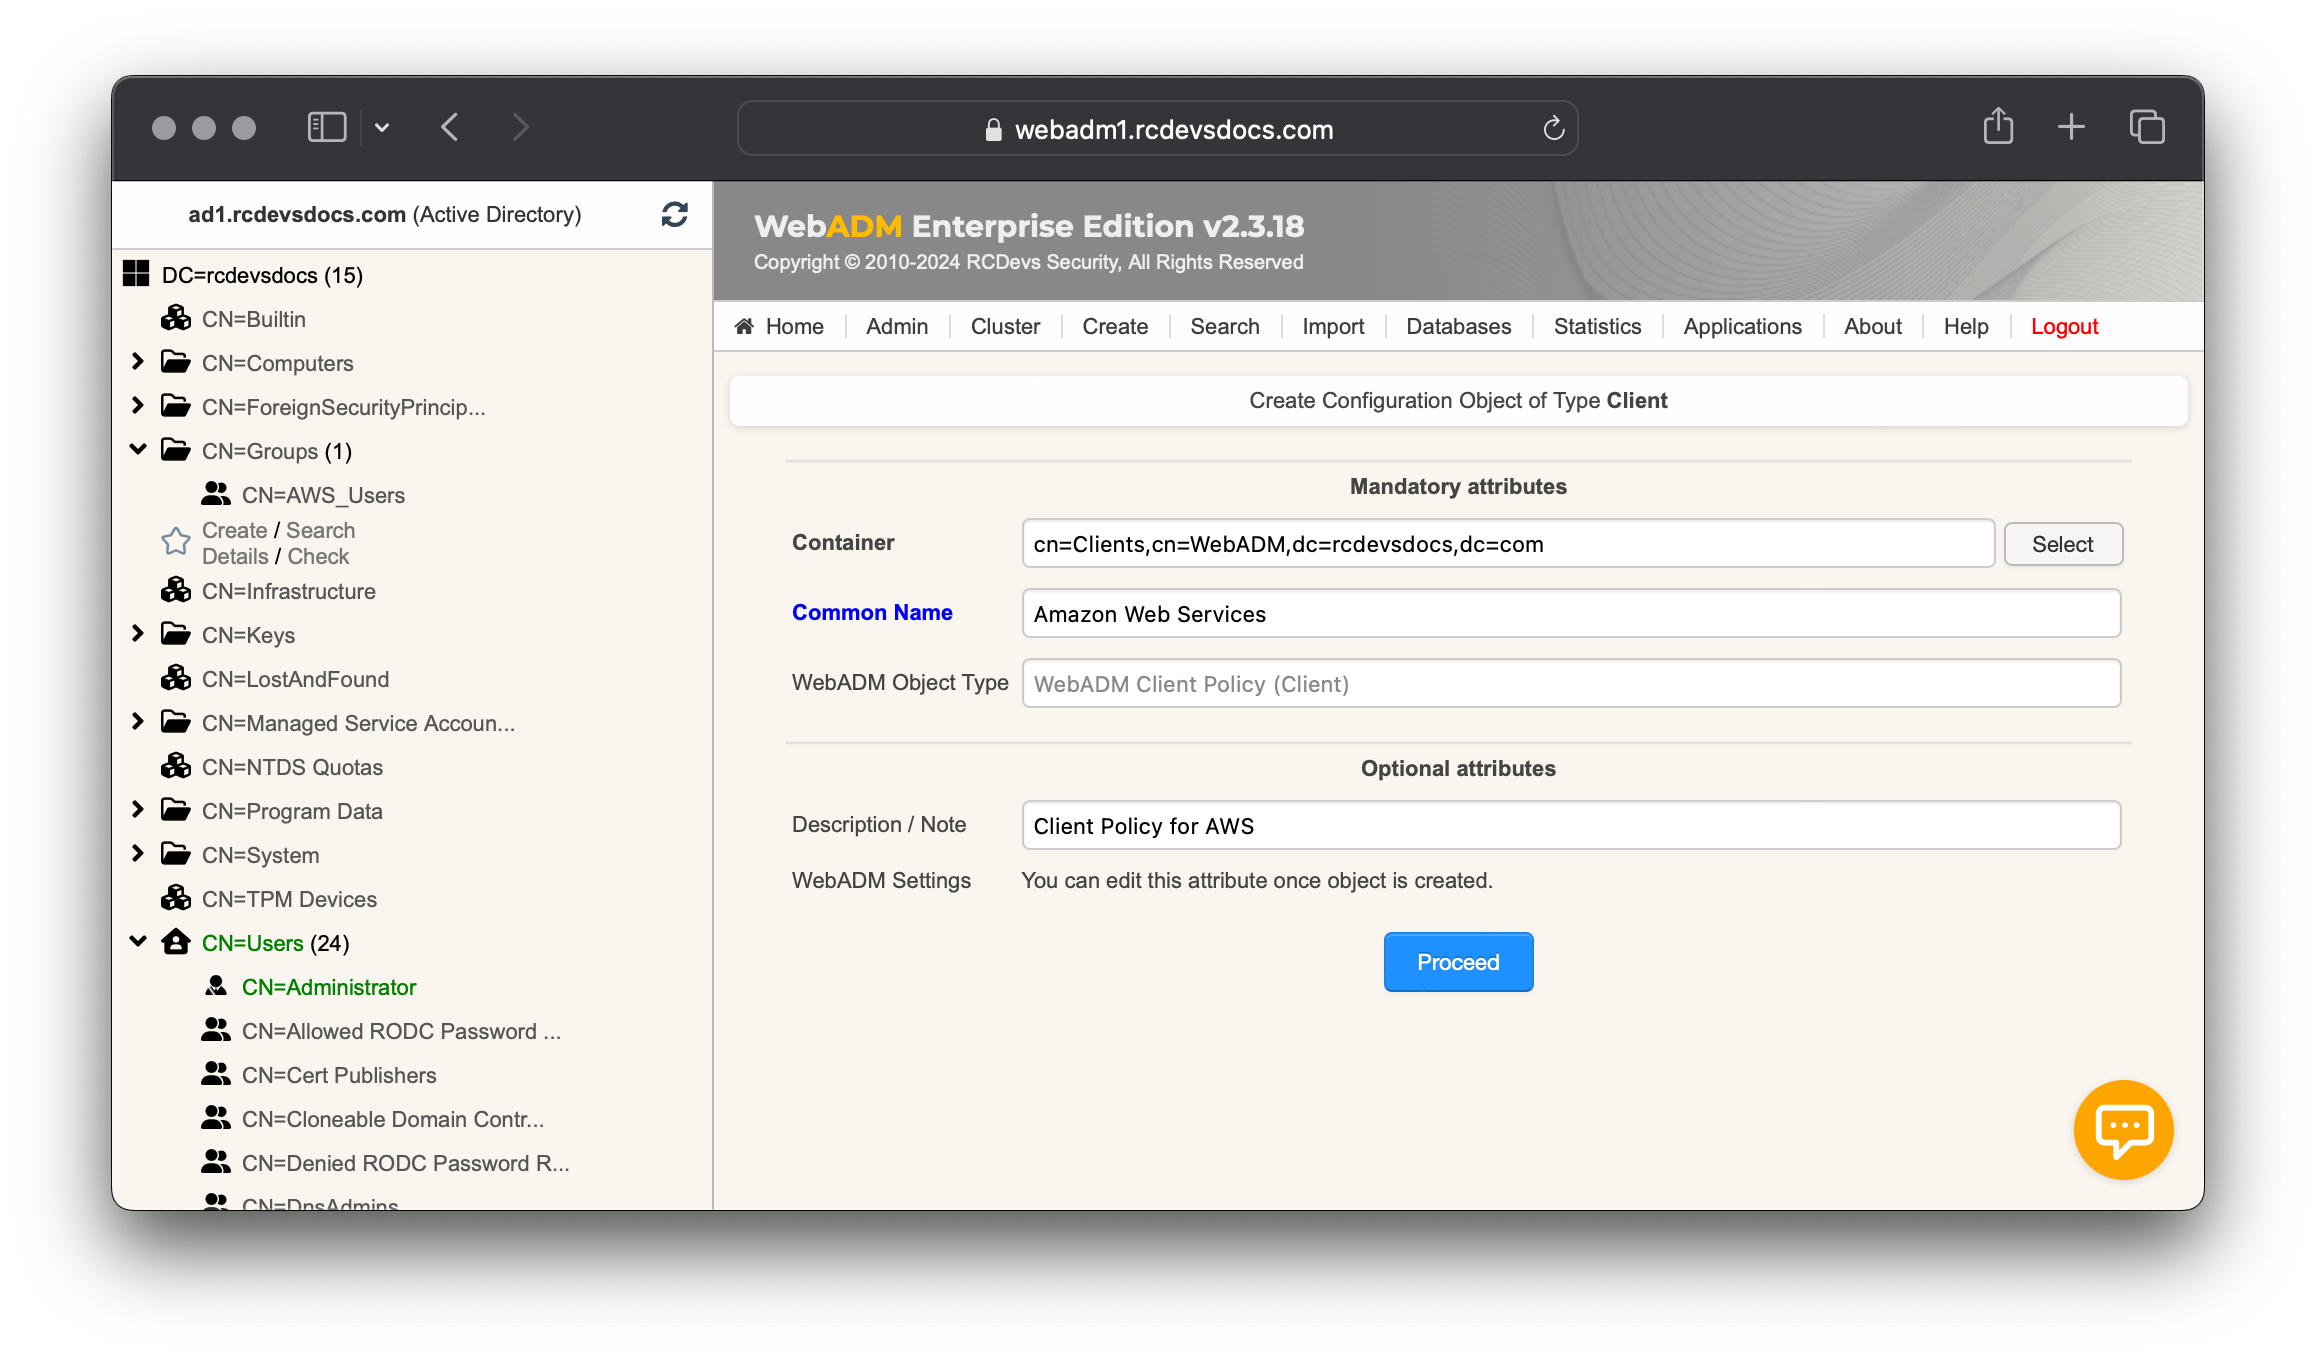
Click on the Proceed and Create Object buttons.
You are now entering the policy configurator. Configure the Default Domain, a Friendly Name (optional), and set the Client Name Aliases to https://signin.aws.amazon.com, which corresponds to the Issuer value of AWS.
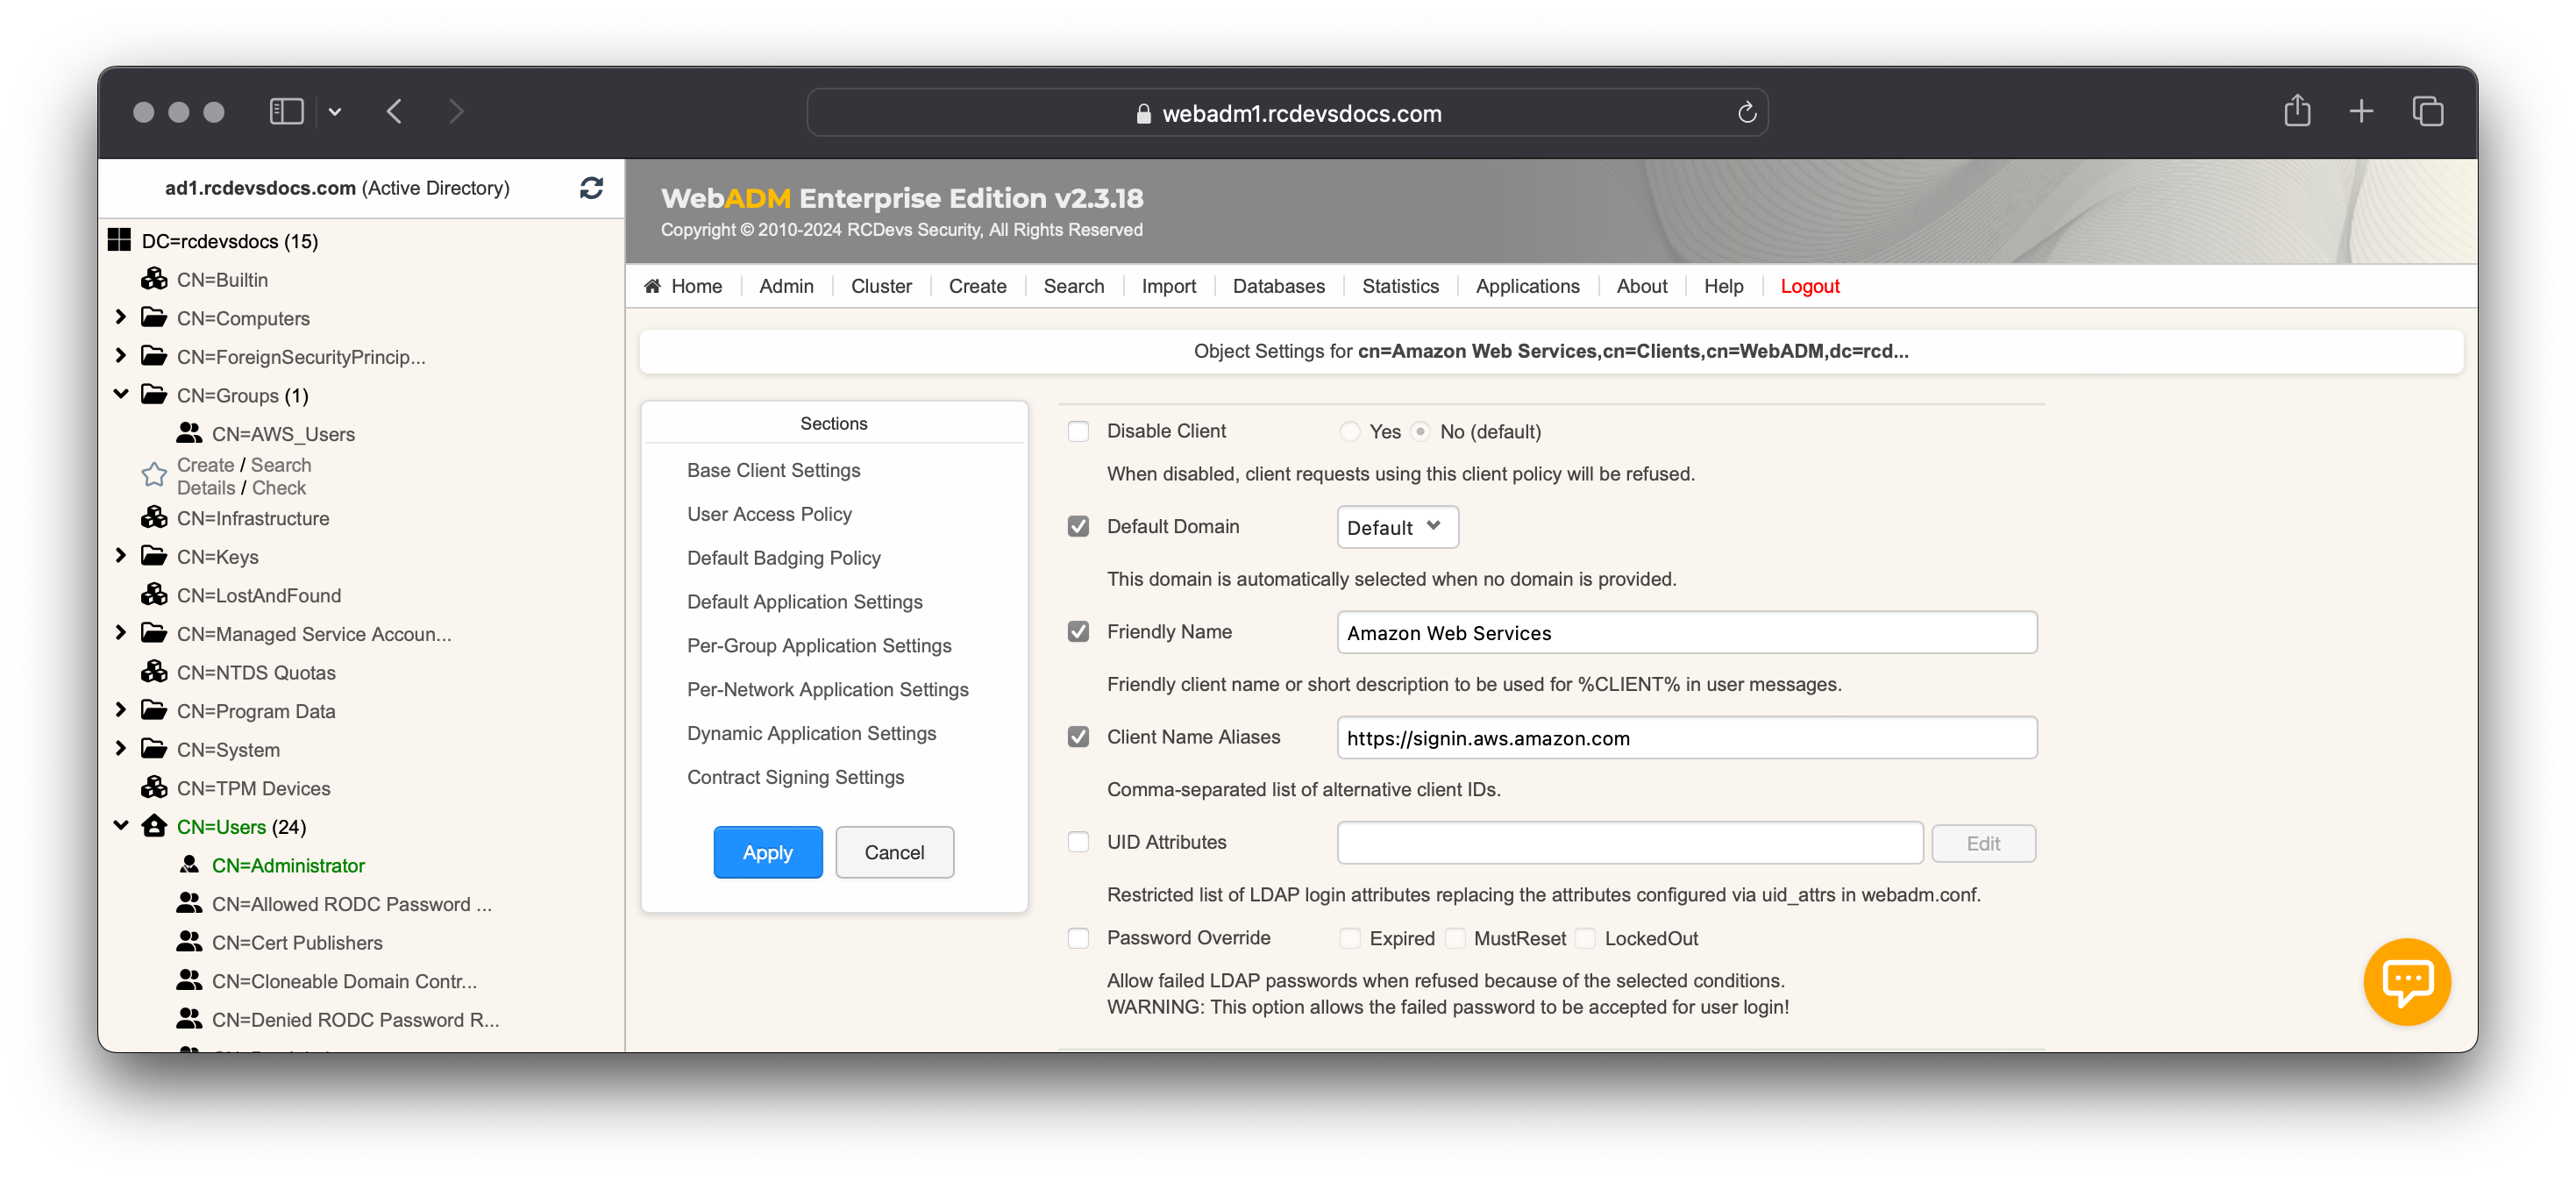
Configure any other settings you wish to apply for AWS authentication.
Once your policy is configured, the configuration is done and you can try to perform an authentication.
Access your IdP login page from the internal or private URL according to how you configured your Identity Provider.
My URLs are:
Public: https://sso.rcdevsdocs.com/openid/index.php
Privates: https://webadm1.rcdevsdocs.com/webapps/openid/index.php and https://webadm2.rcdevsdocs.com/webapps/openid/index.php
My public URL is published through WAProxy.
Perform the authentication on your IdP. After a successful authentication, you will see the following screen redirecting you to AWS or the Application SSO list if multiple apps are configured on the IdP. In that case, select AWS by clicking on the icon.
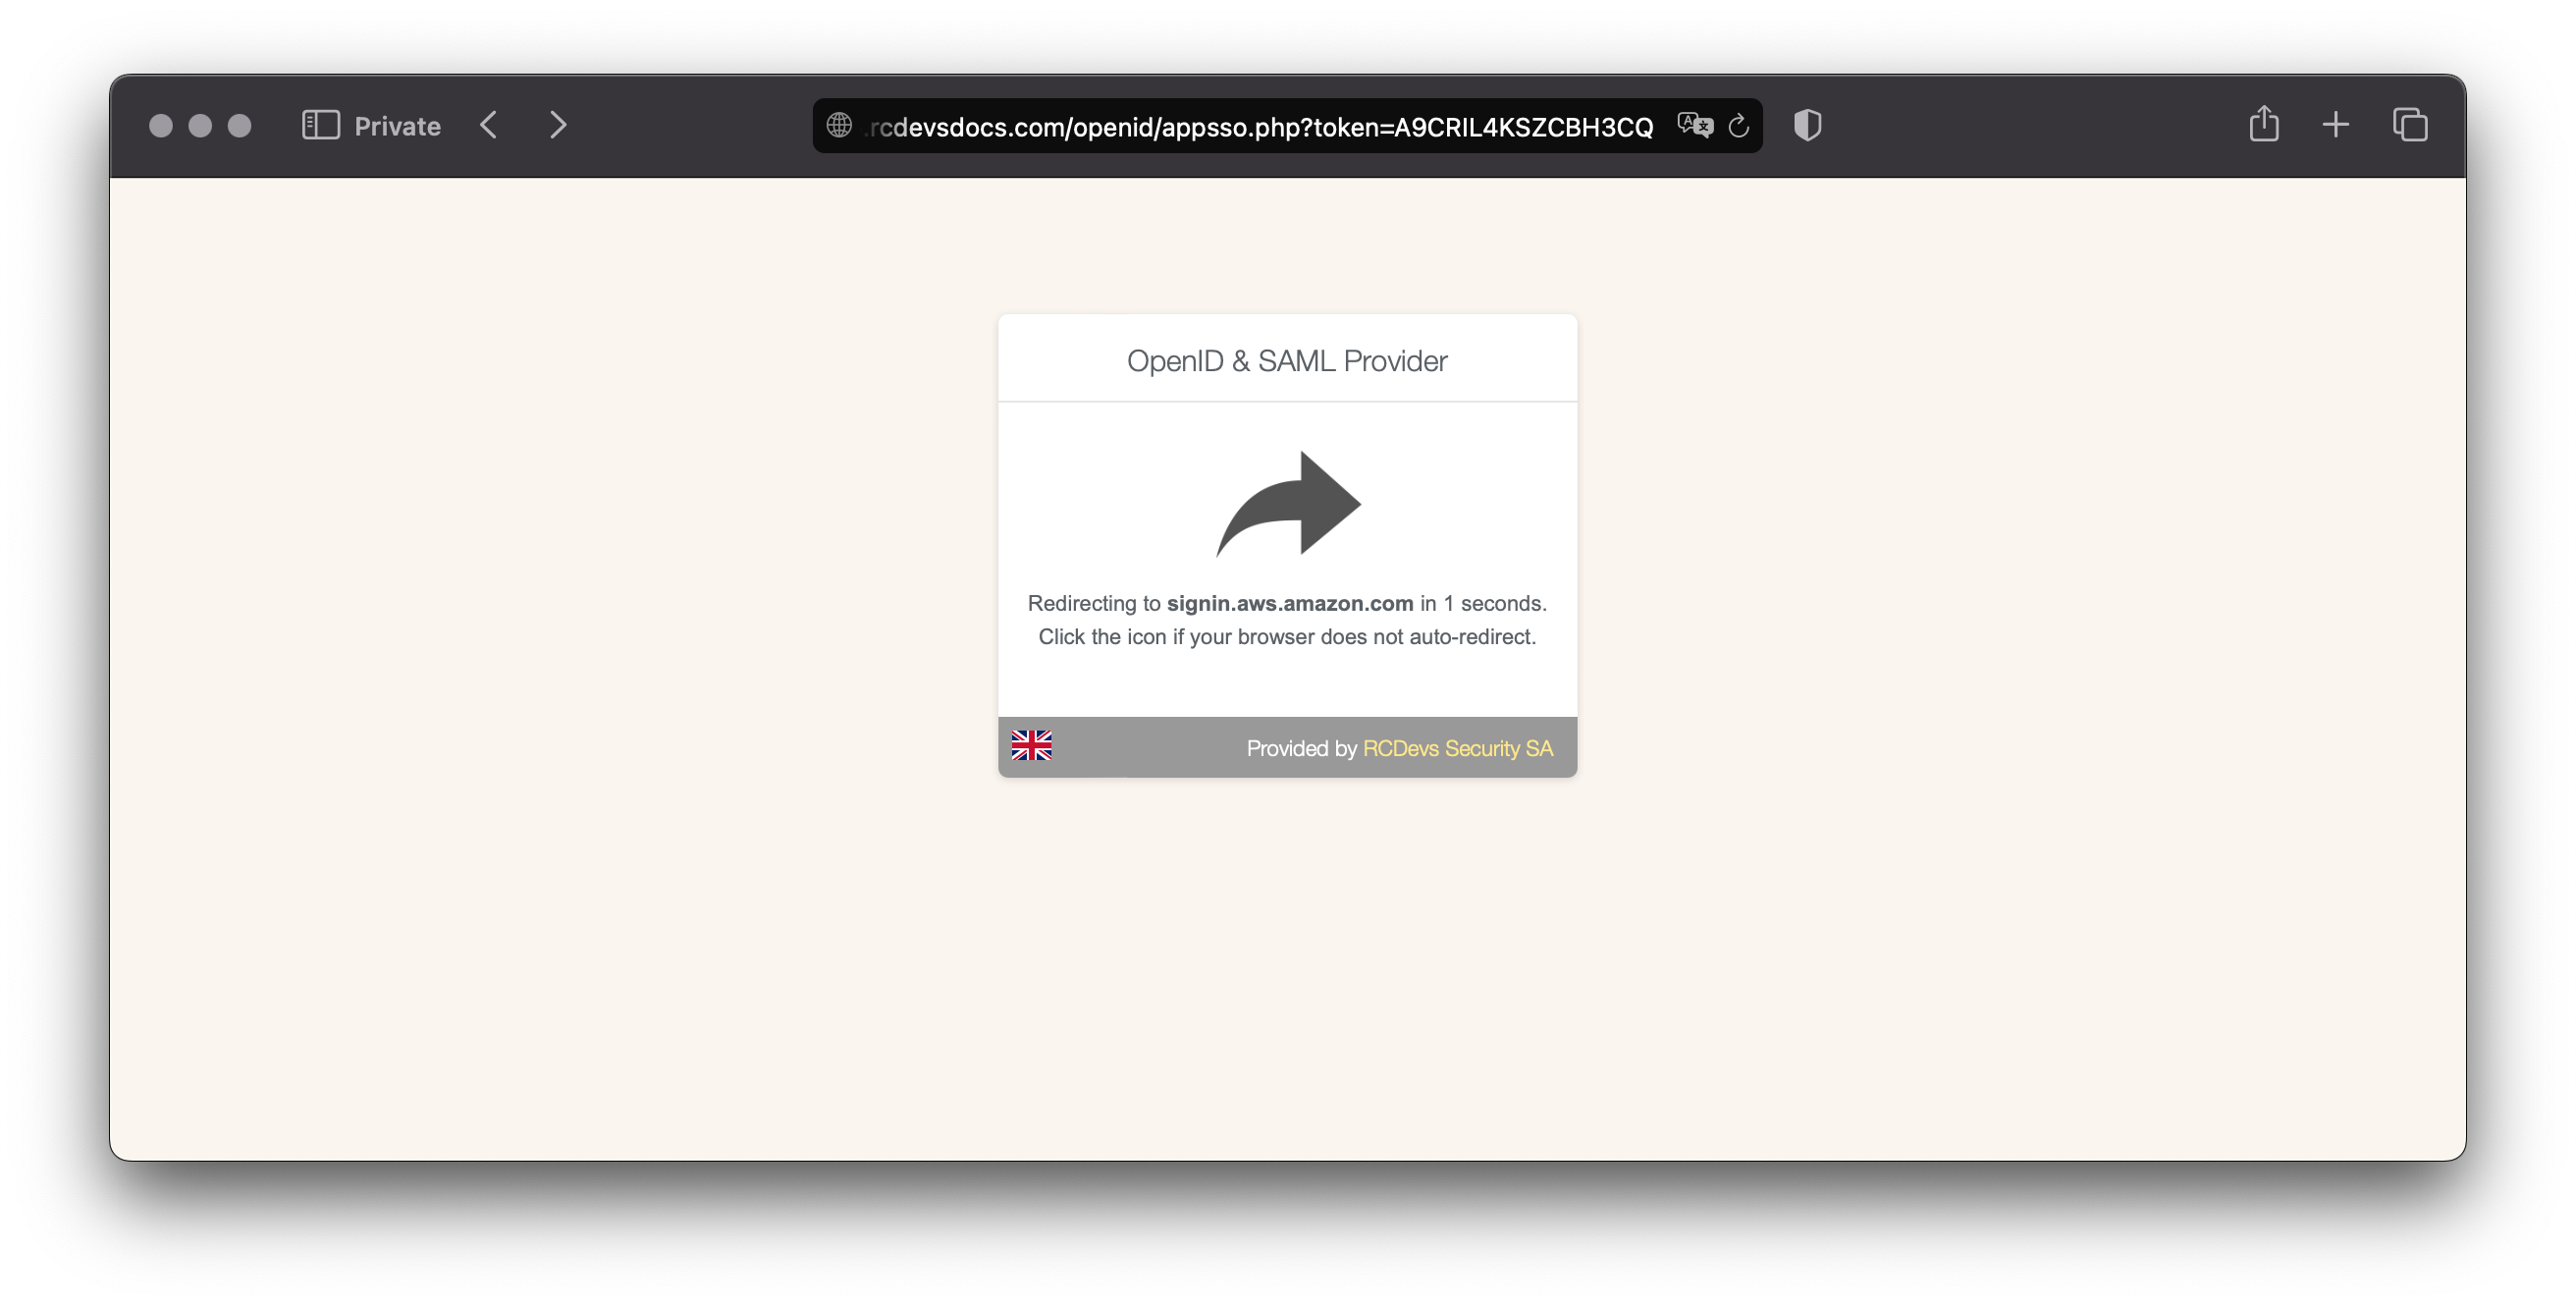
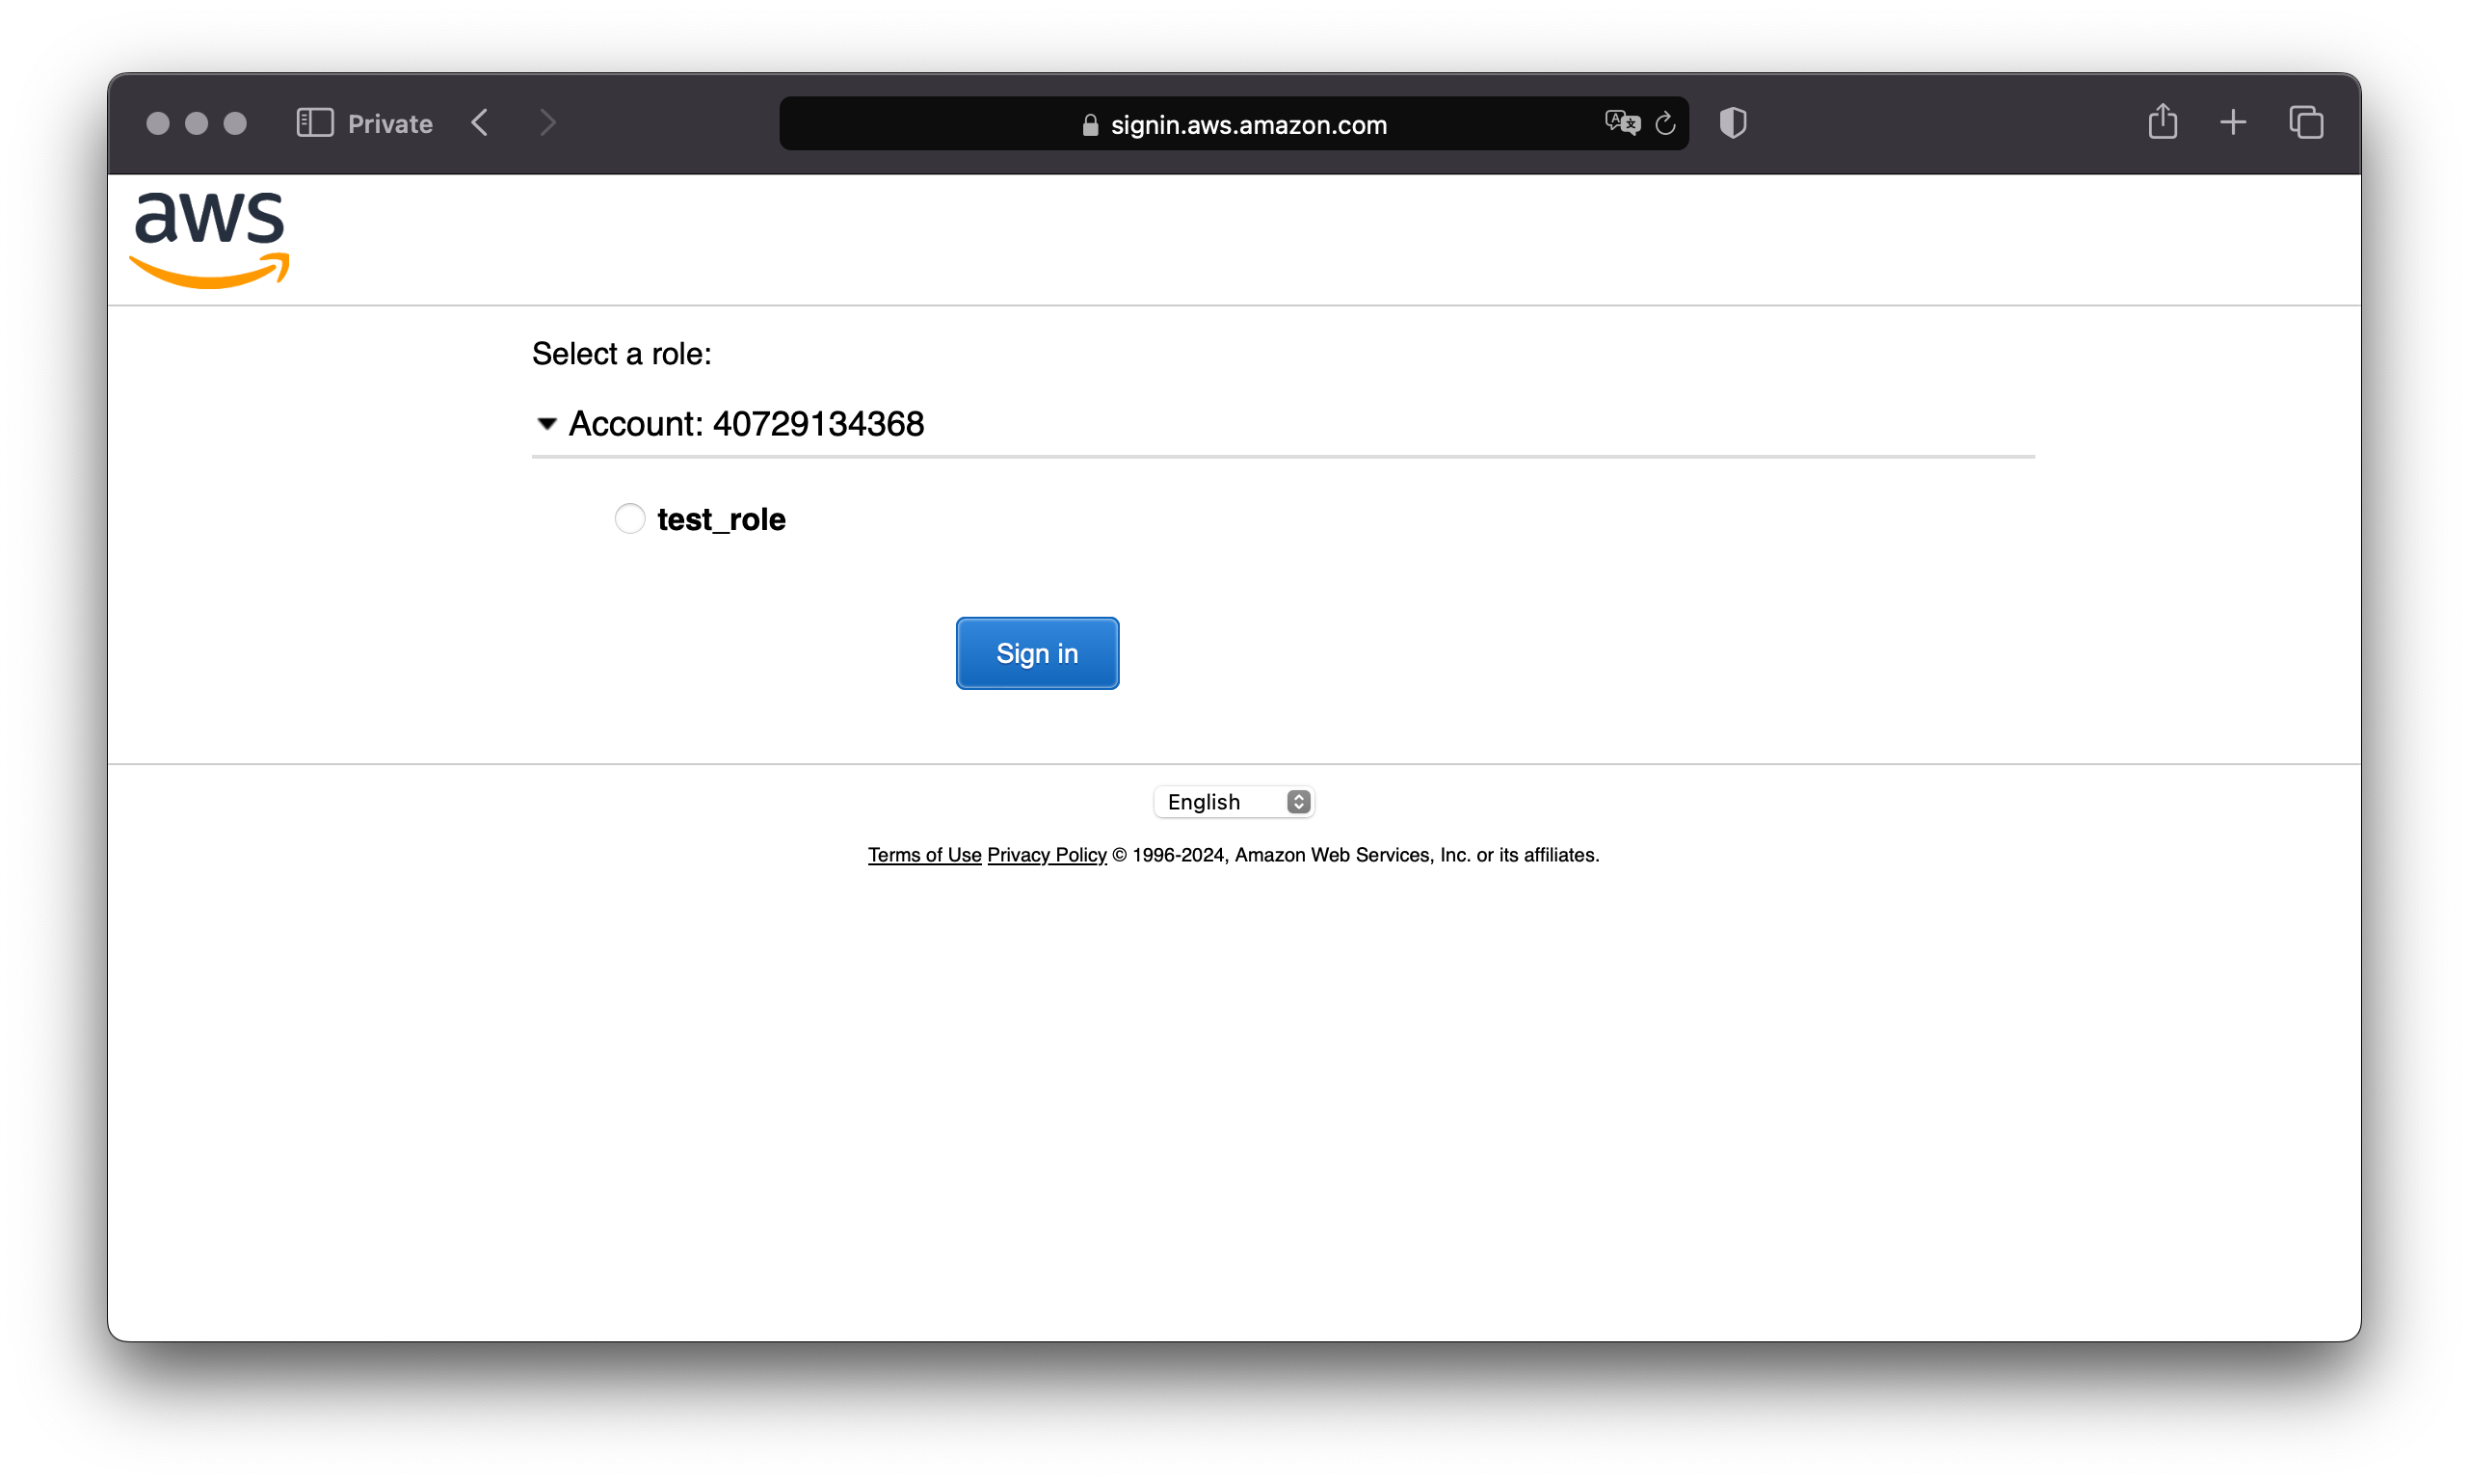
After the redirection on AWS, you are invited to selected the role you are mapped to. Click on the role and then Sign in.
That's it! That authentication test was in an IDP-initiated flow, but there is no extra configuration required if the login has been initiated from AWS in SP-Initiated flow.

