Since version 2.3.21, WebADM can read user accounts, groups, and organizational units from your Google Workspaces organization and create corresponding objects in your LDAP directory. This allows Google accounts to be treated as local accounts, making them fully compatible with all WebADM features, including OpenOTP authentication and any other software that requires LDAP accounts.
To configure this setup, use your Workspaces organization's super administrator account to:
- Create a service account for WebADM.
- Enable domain-wide delegation so the service account can impersonate the super administrator for managing users and groups.
- Generate a secret key for the service account and provide it to WebADM (then delete it, as it is sensitive data).
- Ensure the super administrator has permission to create service account keys, as this is disabled by default in many Workspaces organizations.
Google Workspace does not provide an API to directly validate a username and password remotely. While user passwords can be set via the WebADM Framework, they cannot be verified remotely through Google Workspace. Instead, passwords must be synced and managed through the WebADM Framework, where local password validation can be performed.
Service Account Creation
Open your web browser and go to Google Cloud Console. Log in using your administrator account.
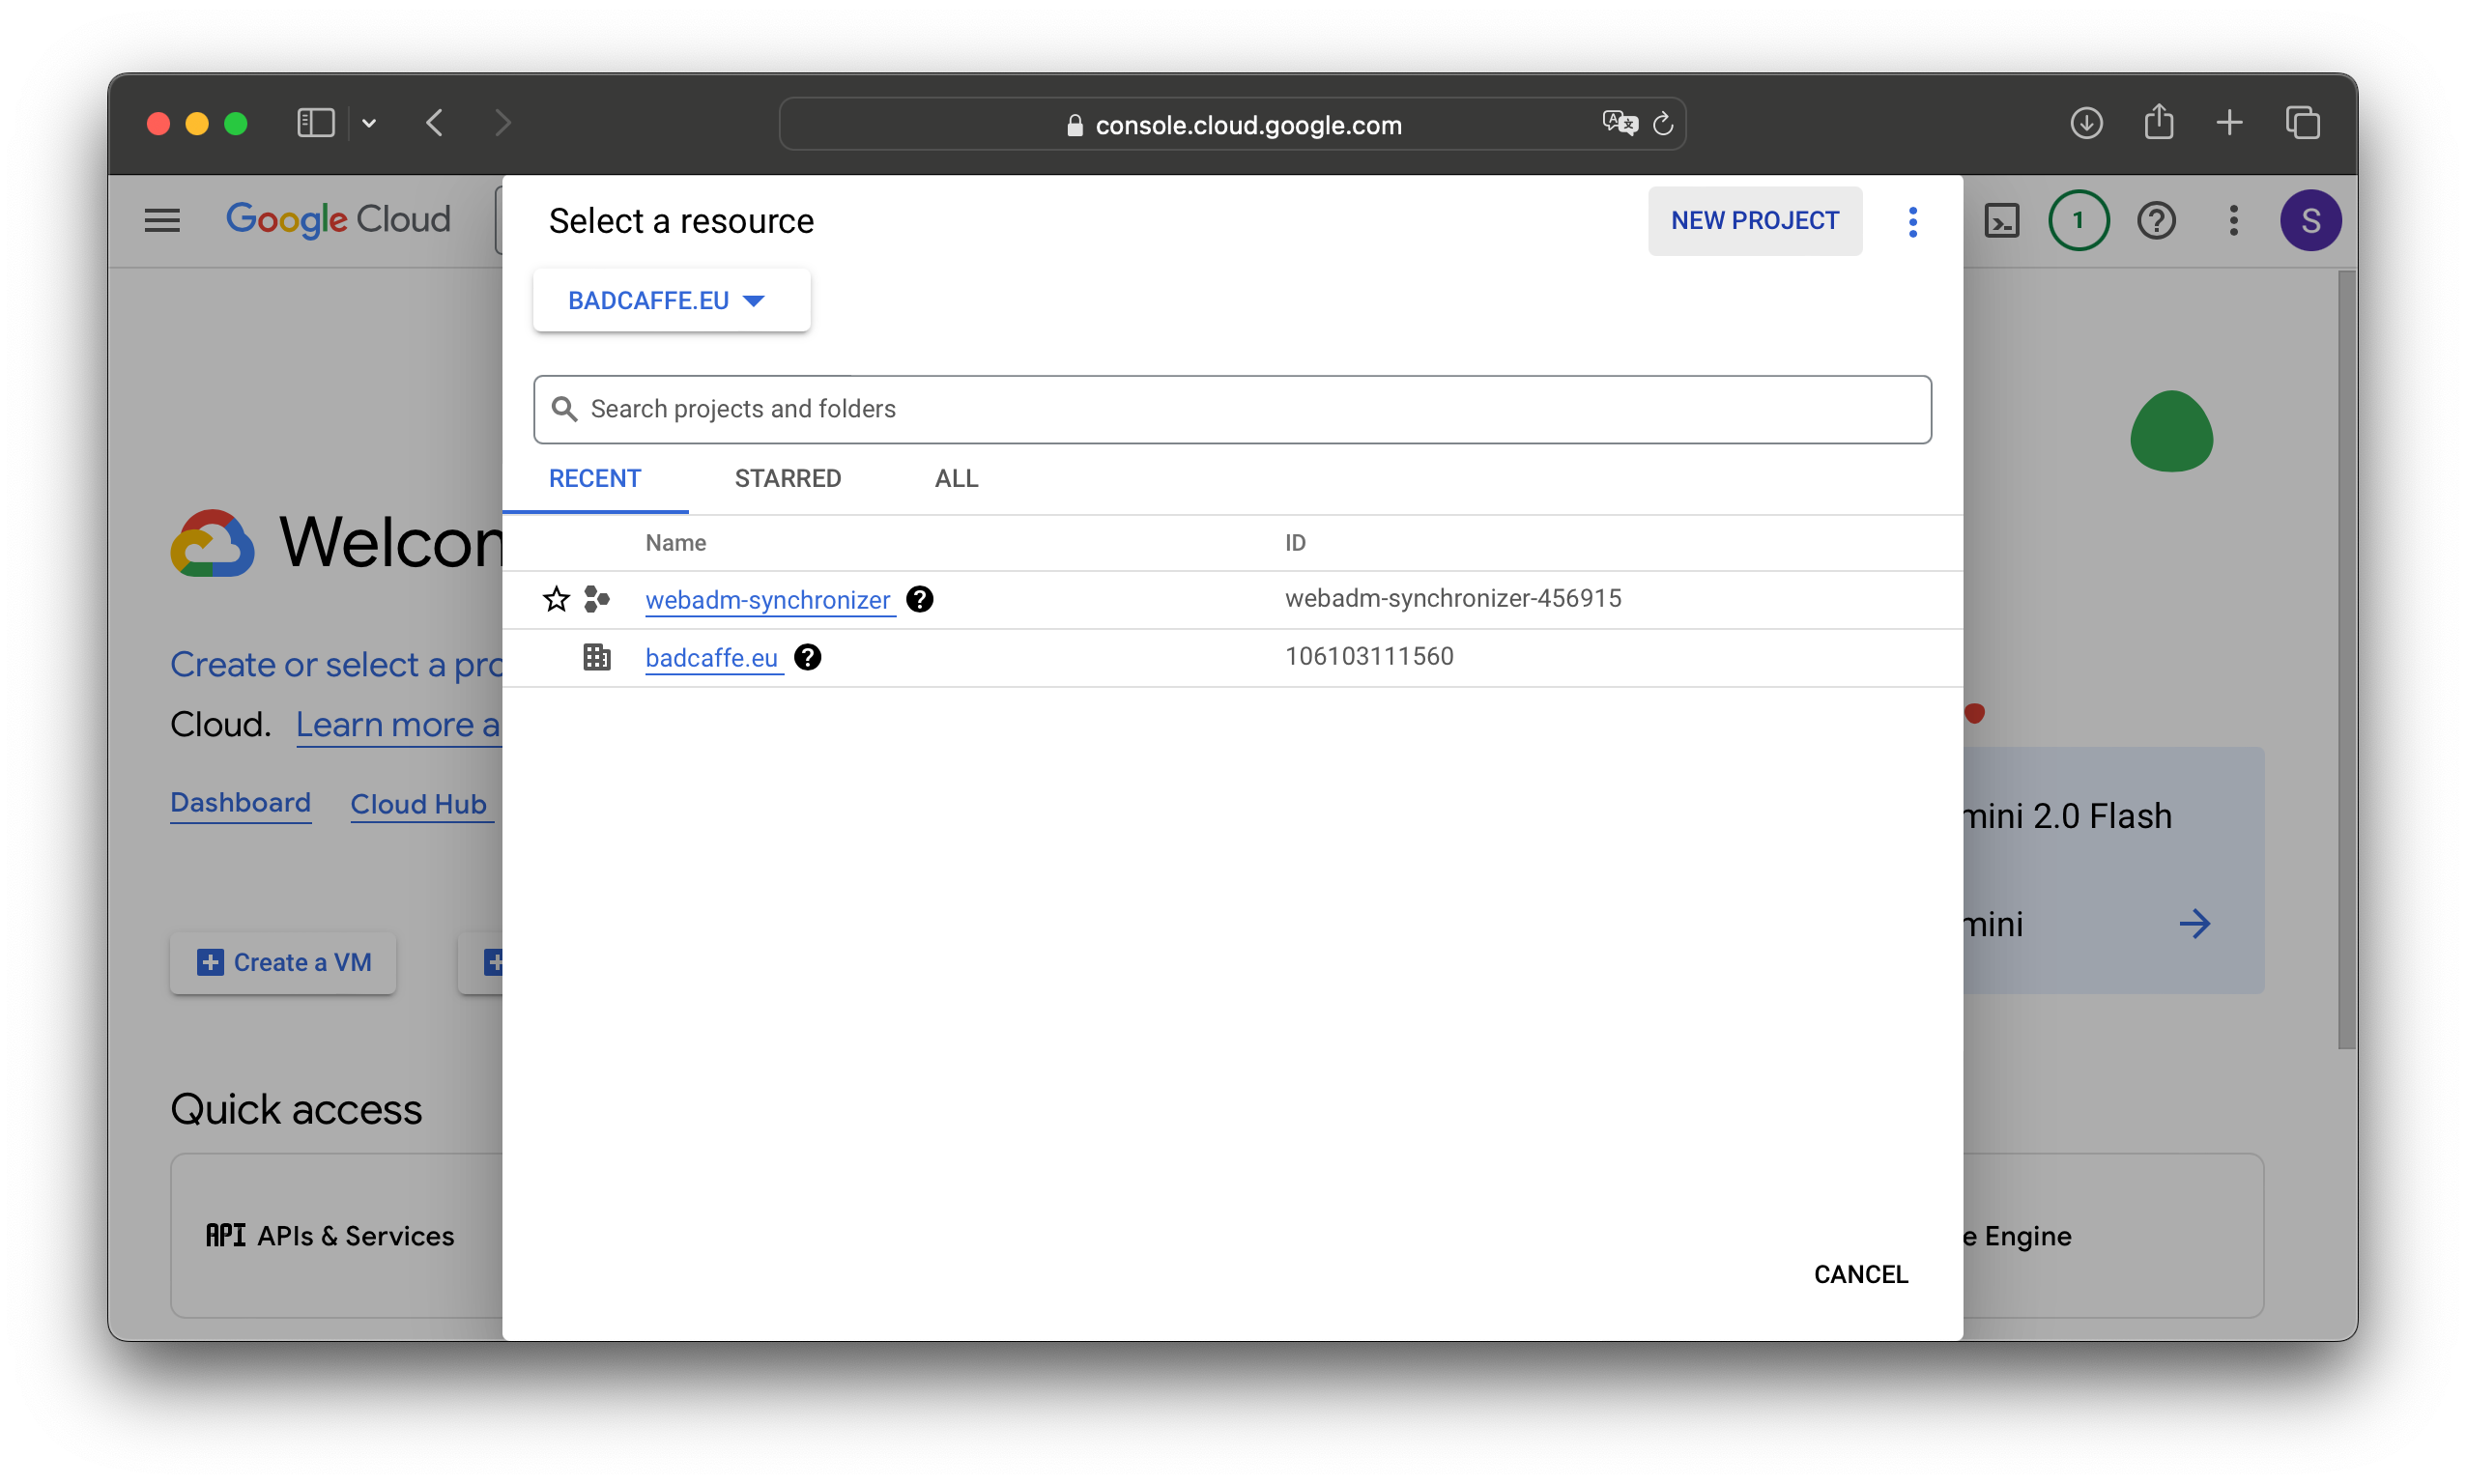
At the top left of the screen, click on your current project name or "Select a project" if none is selected. In the window that appears, choose your organization at the top left, then click on "NEW PROJECT" to create a new project.
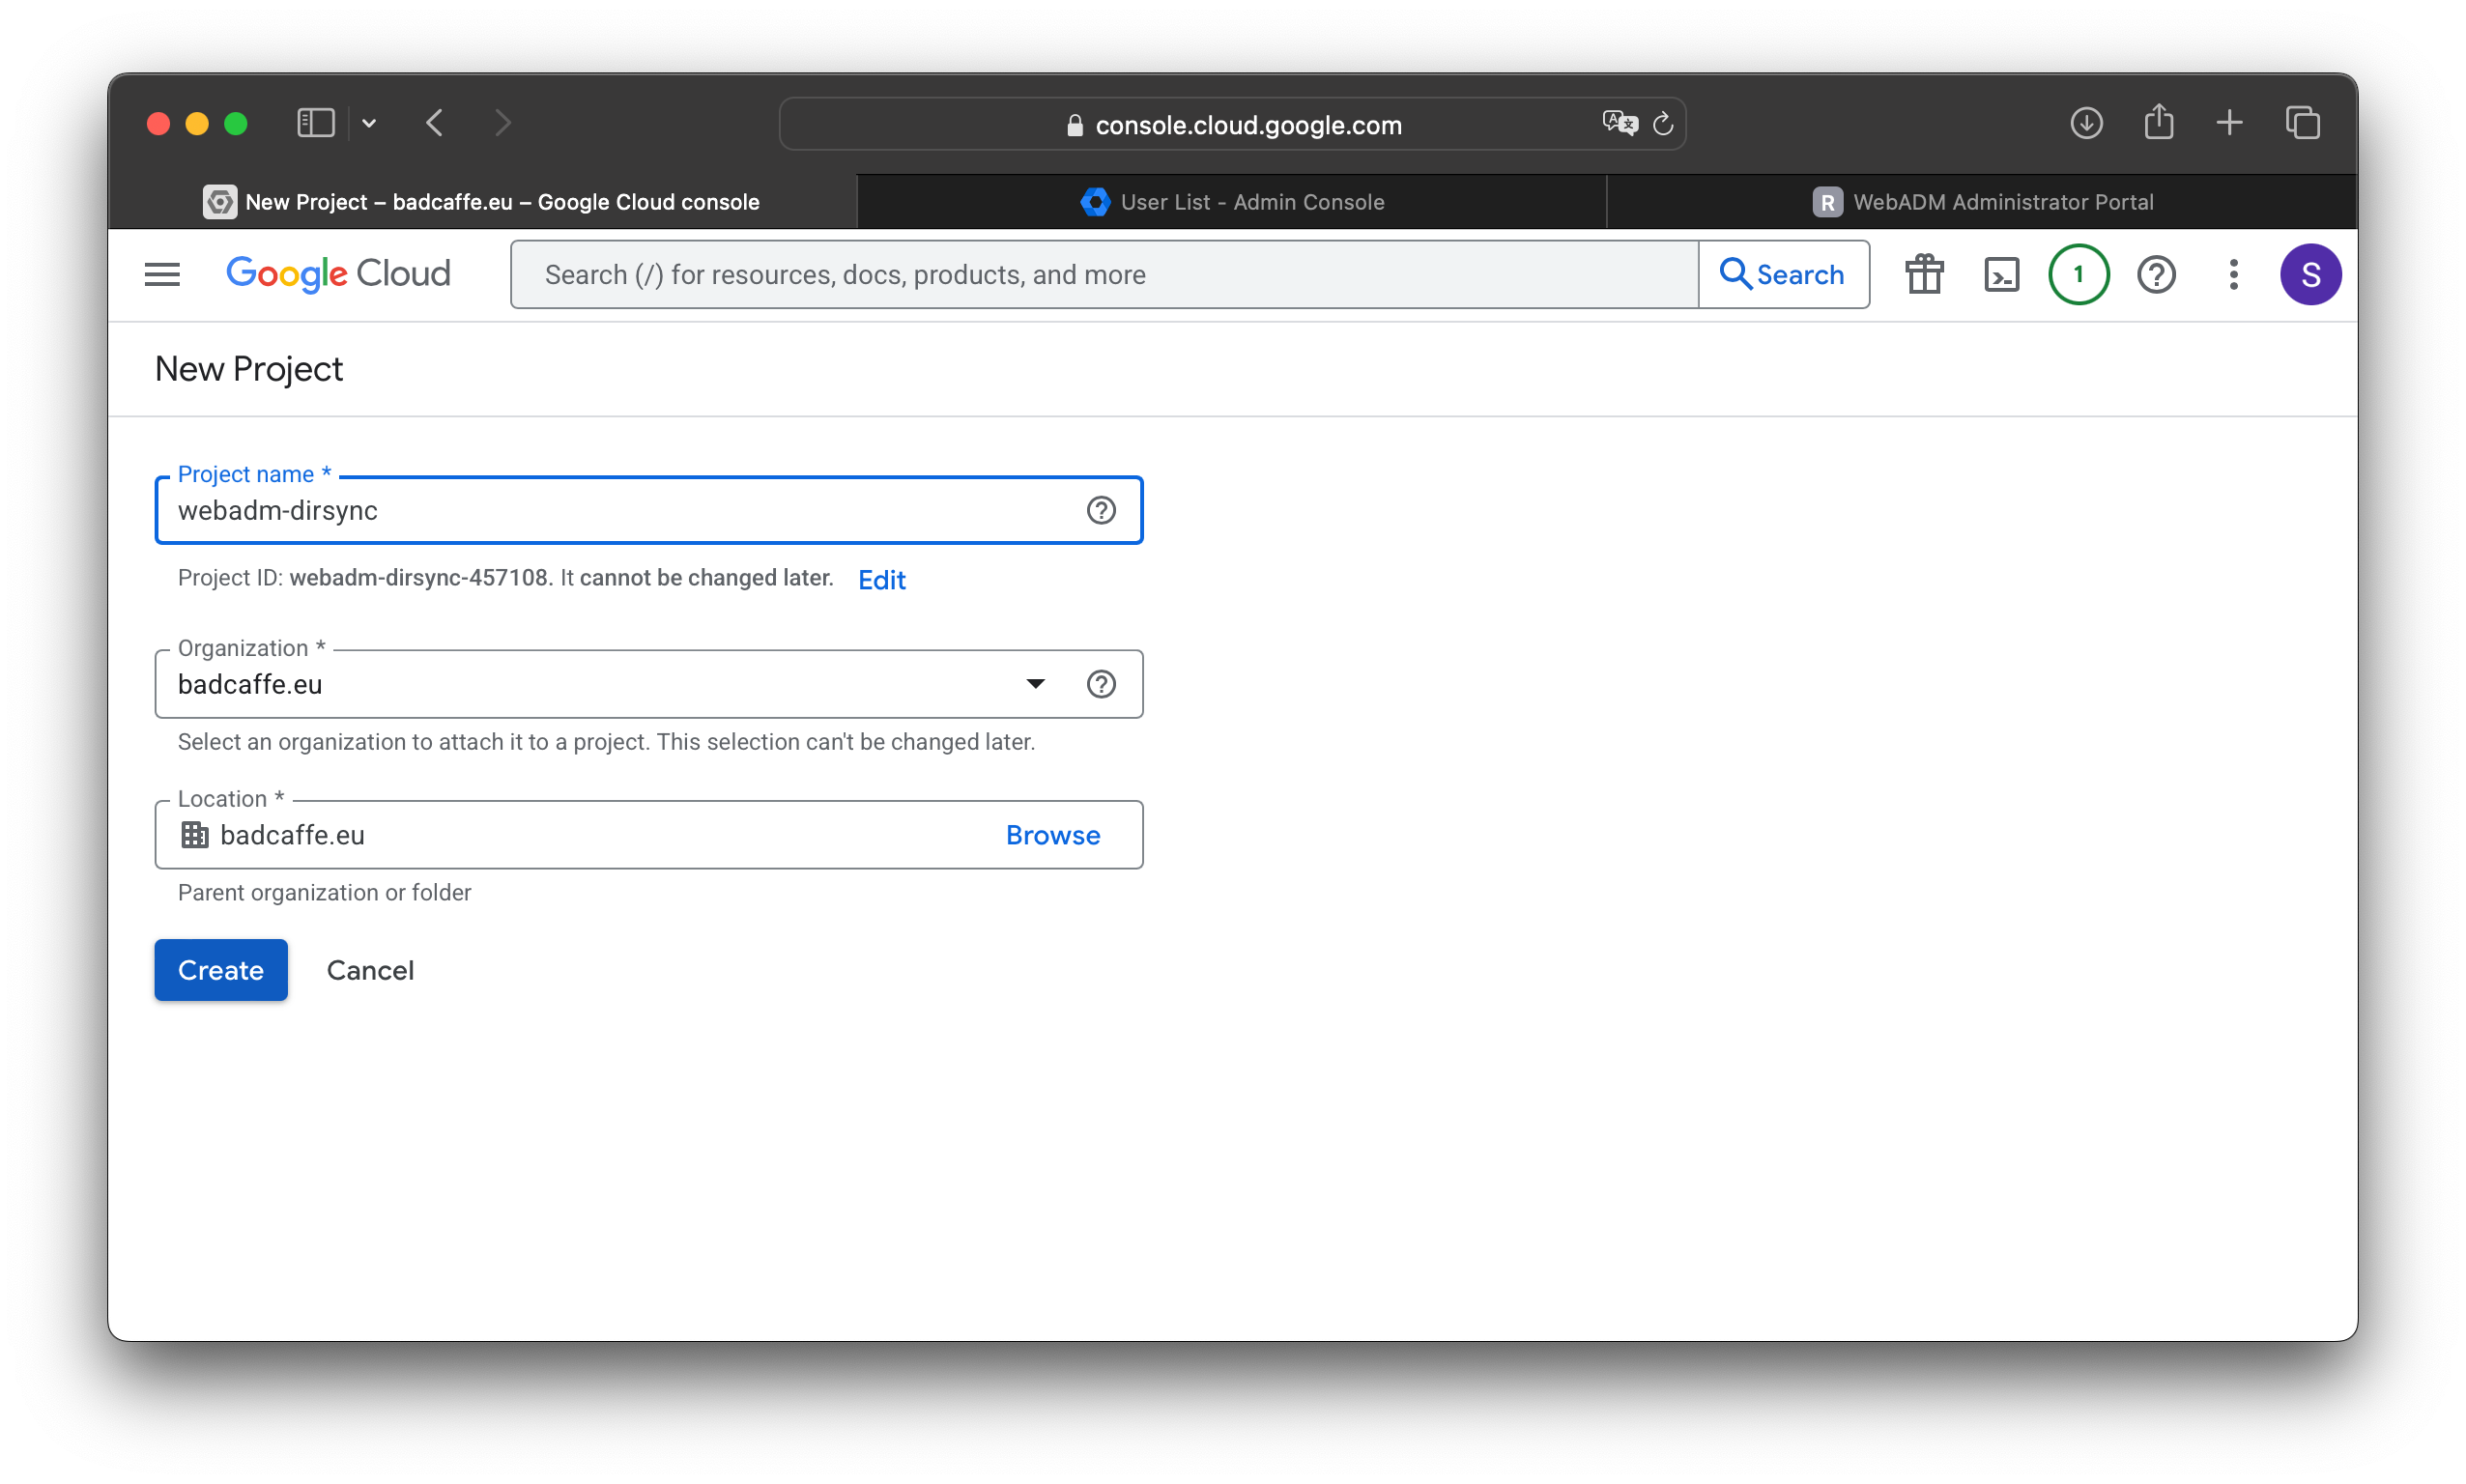
Give the new project a name, such as webadm-dirsync, and click Create.
Click the menu icon in the top left corner (the three horizontal bars), navigate to API & Services, then click Enabled APIs and services.
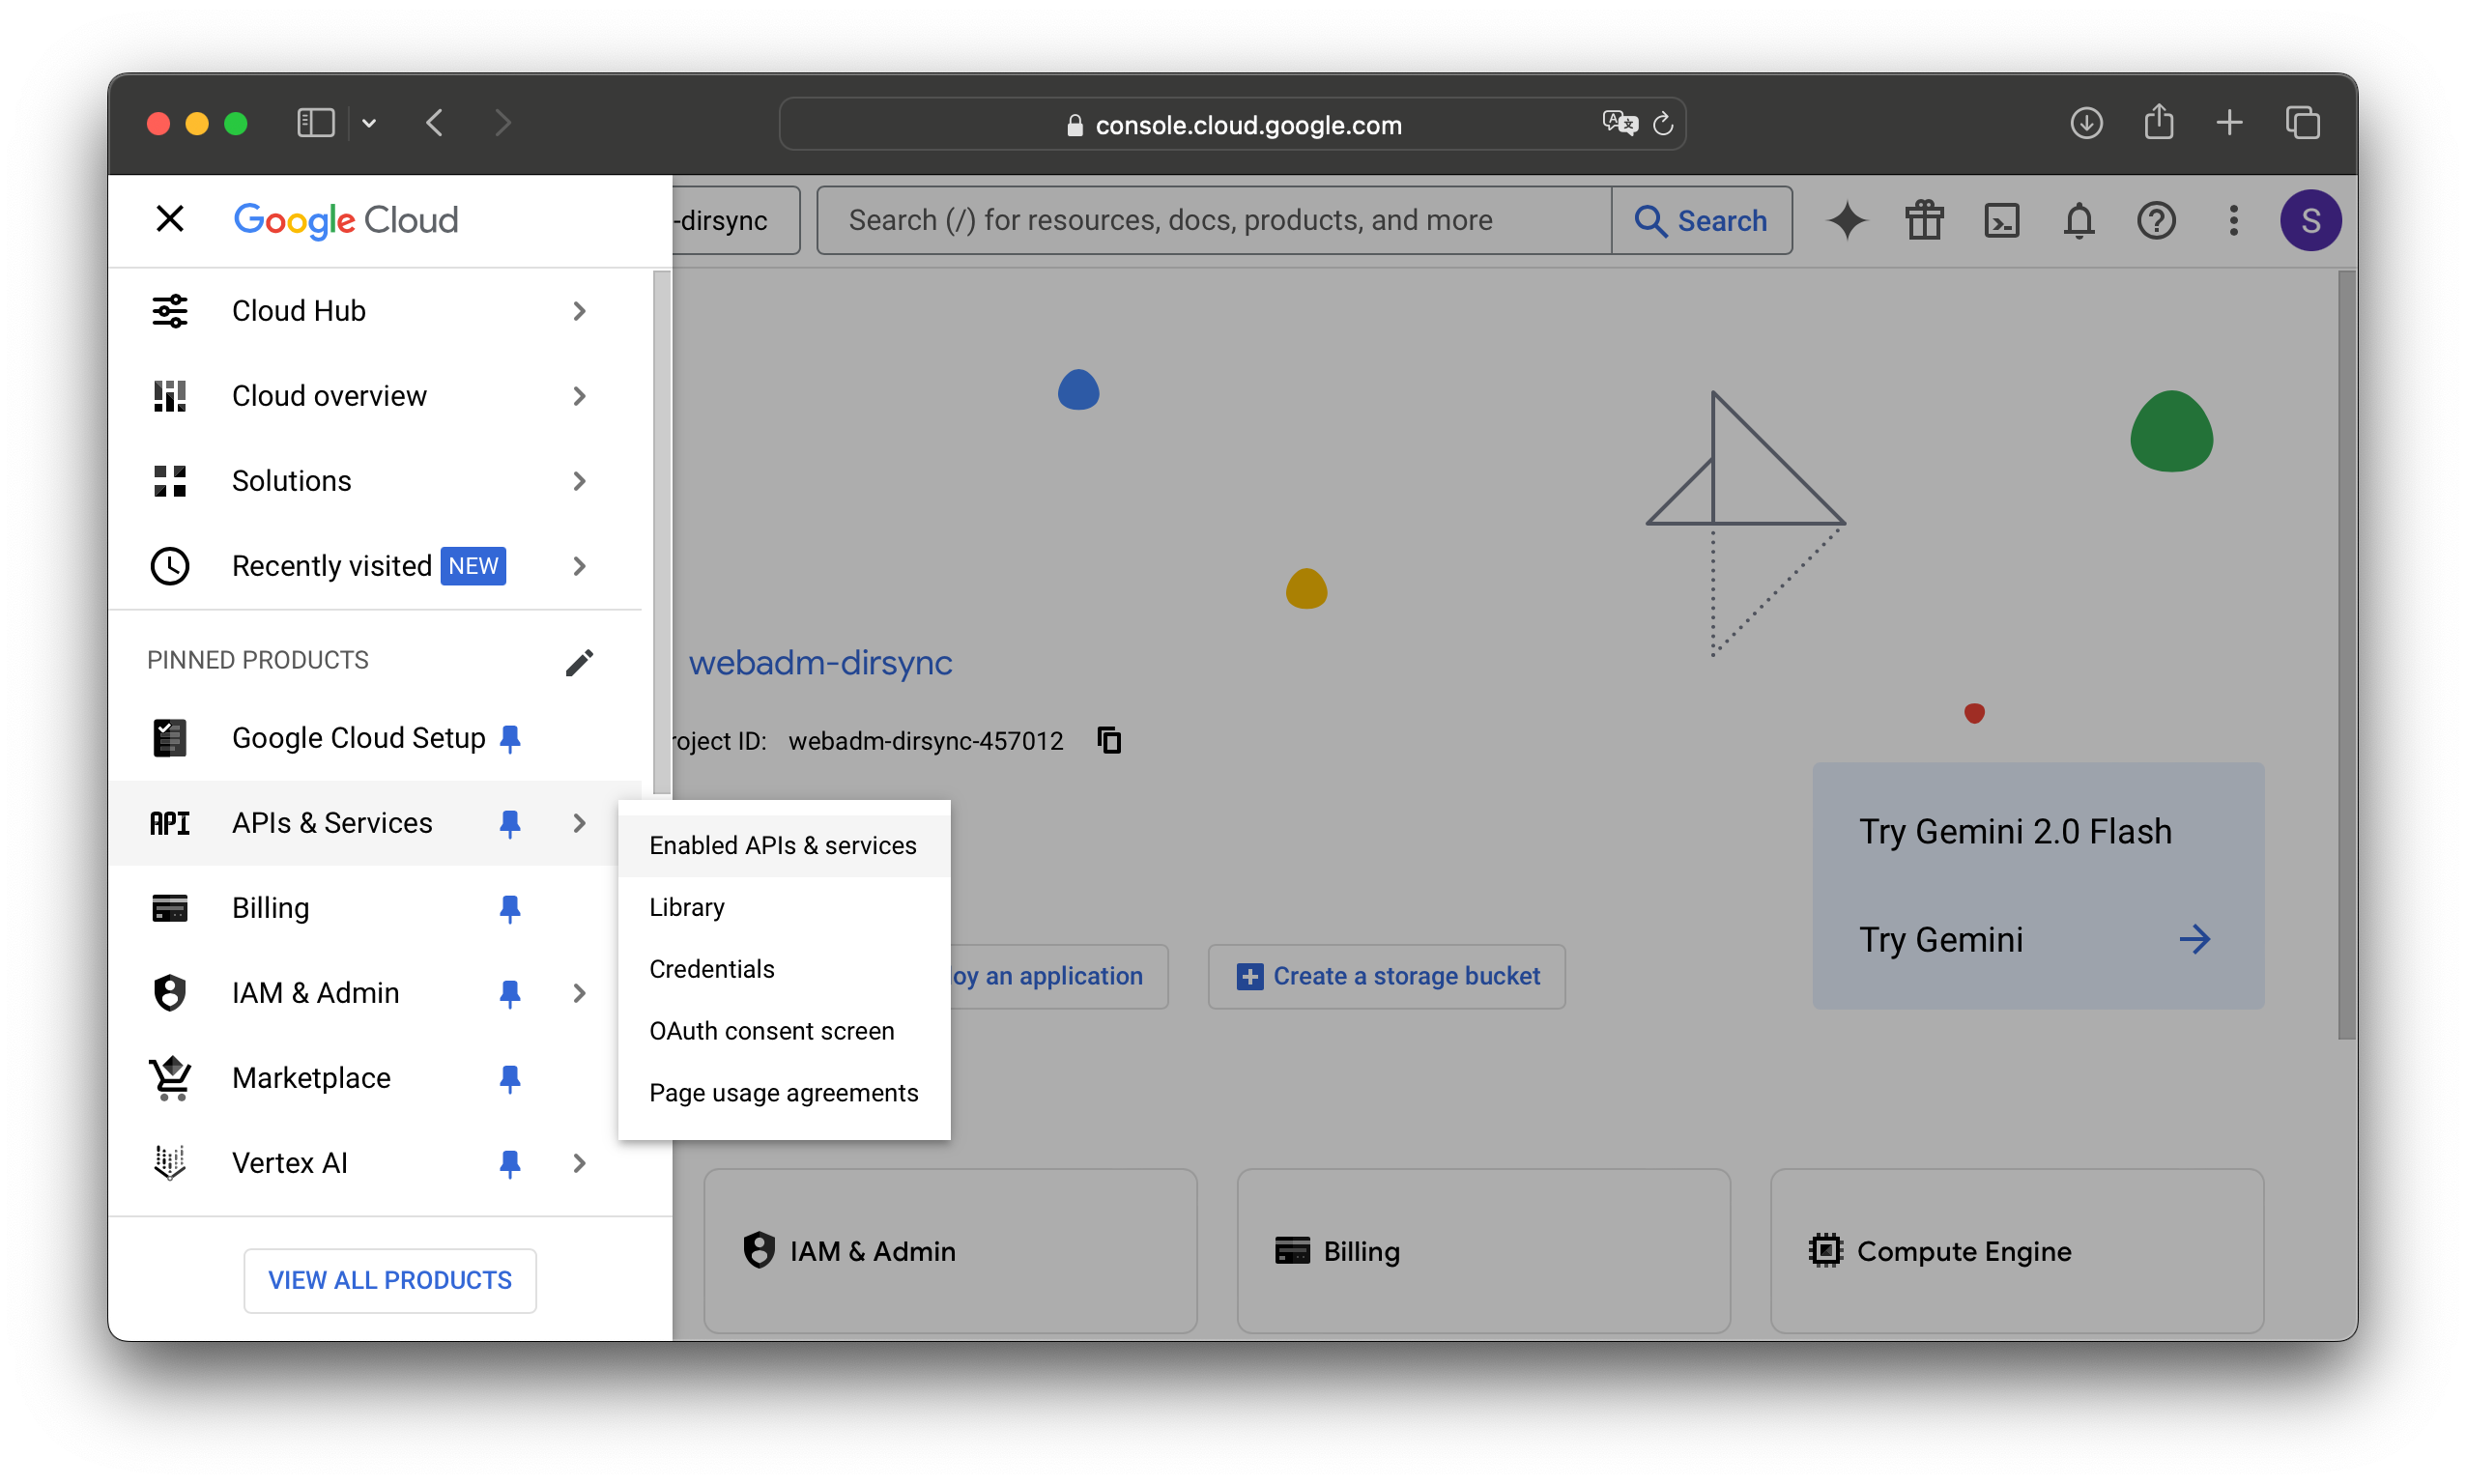
Select your new project in the top left corner, if not already selected, and click + Enable APIs and services.
Search for Admin SDK API, and in the search results, click on Admin SDK API.
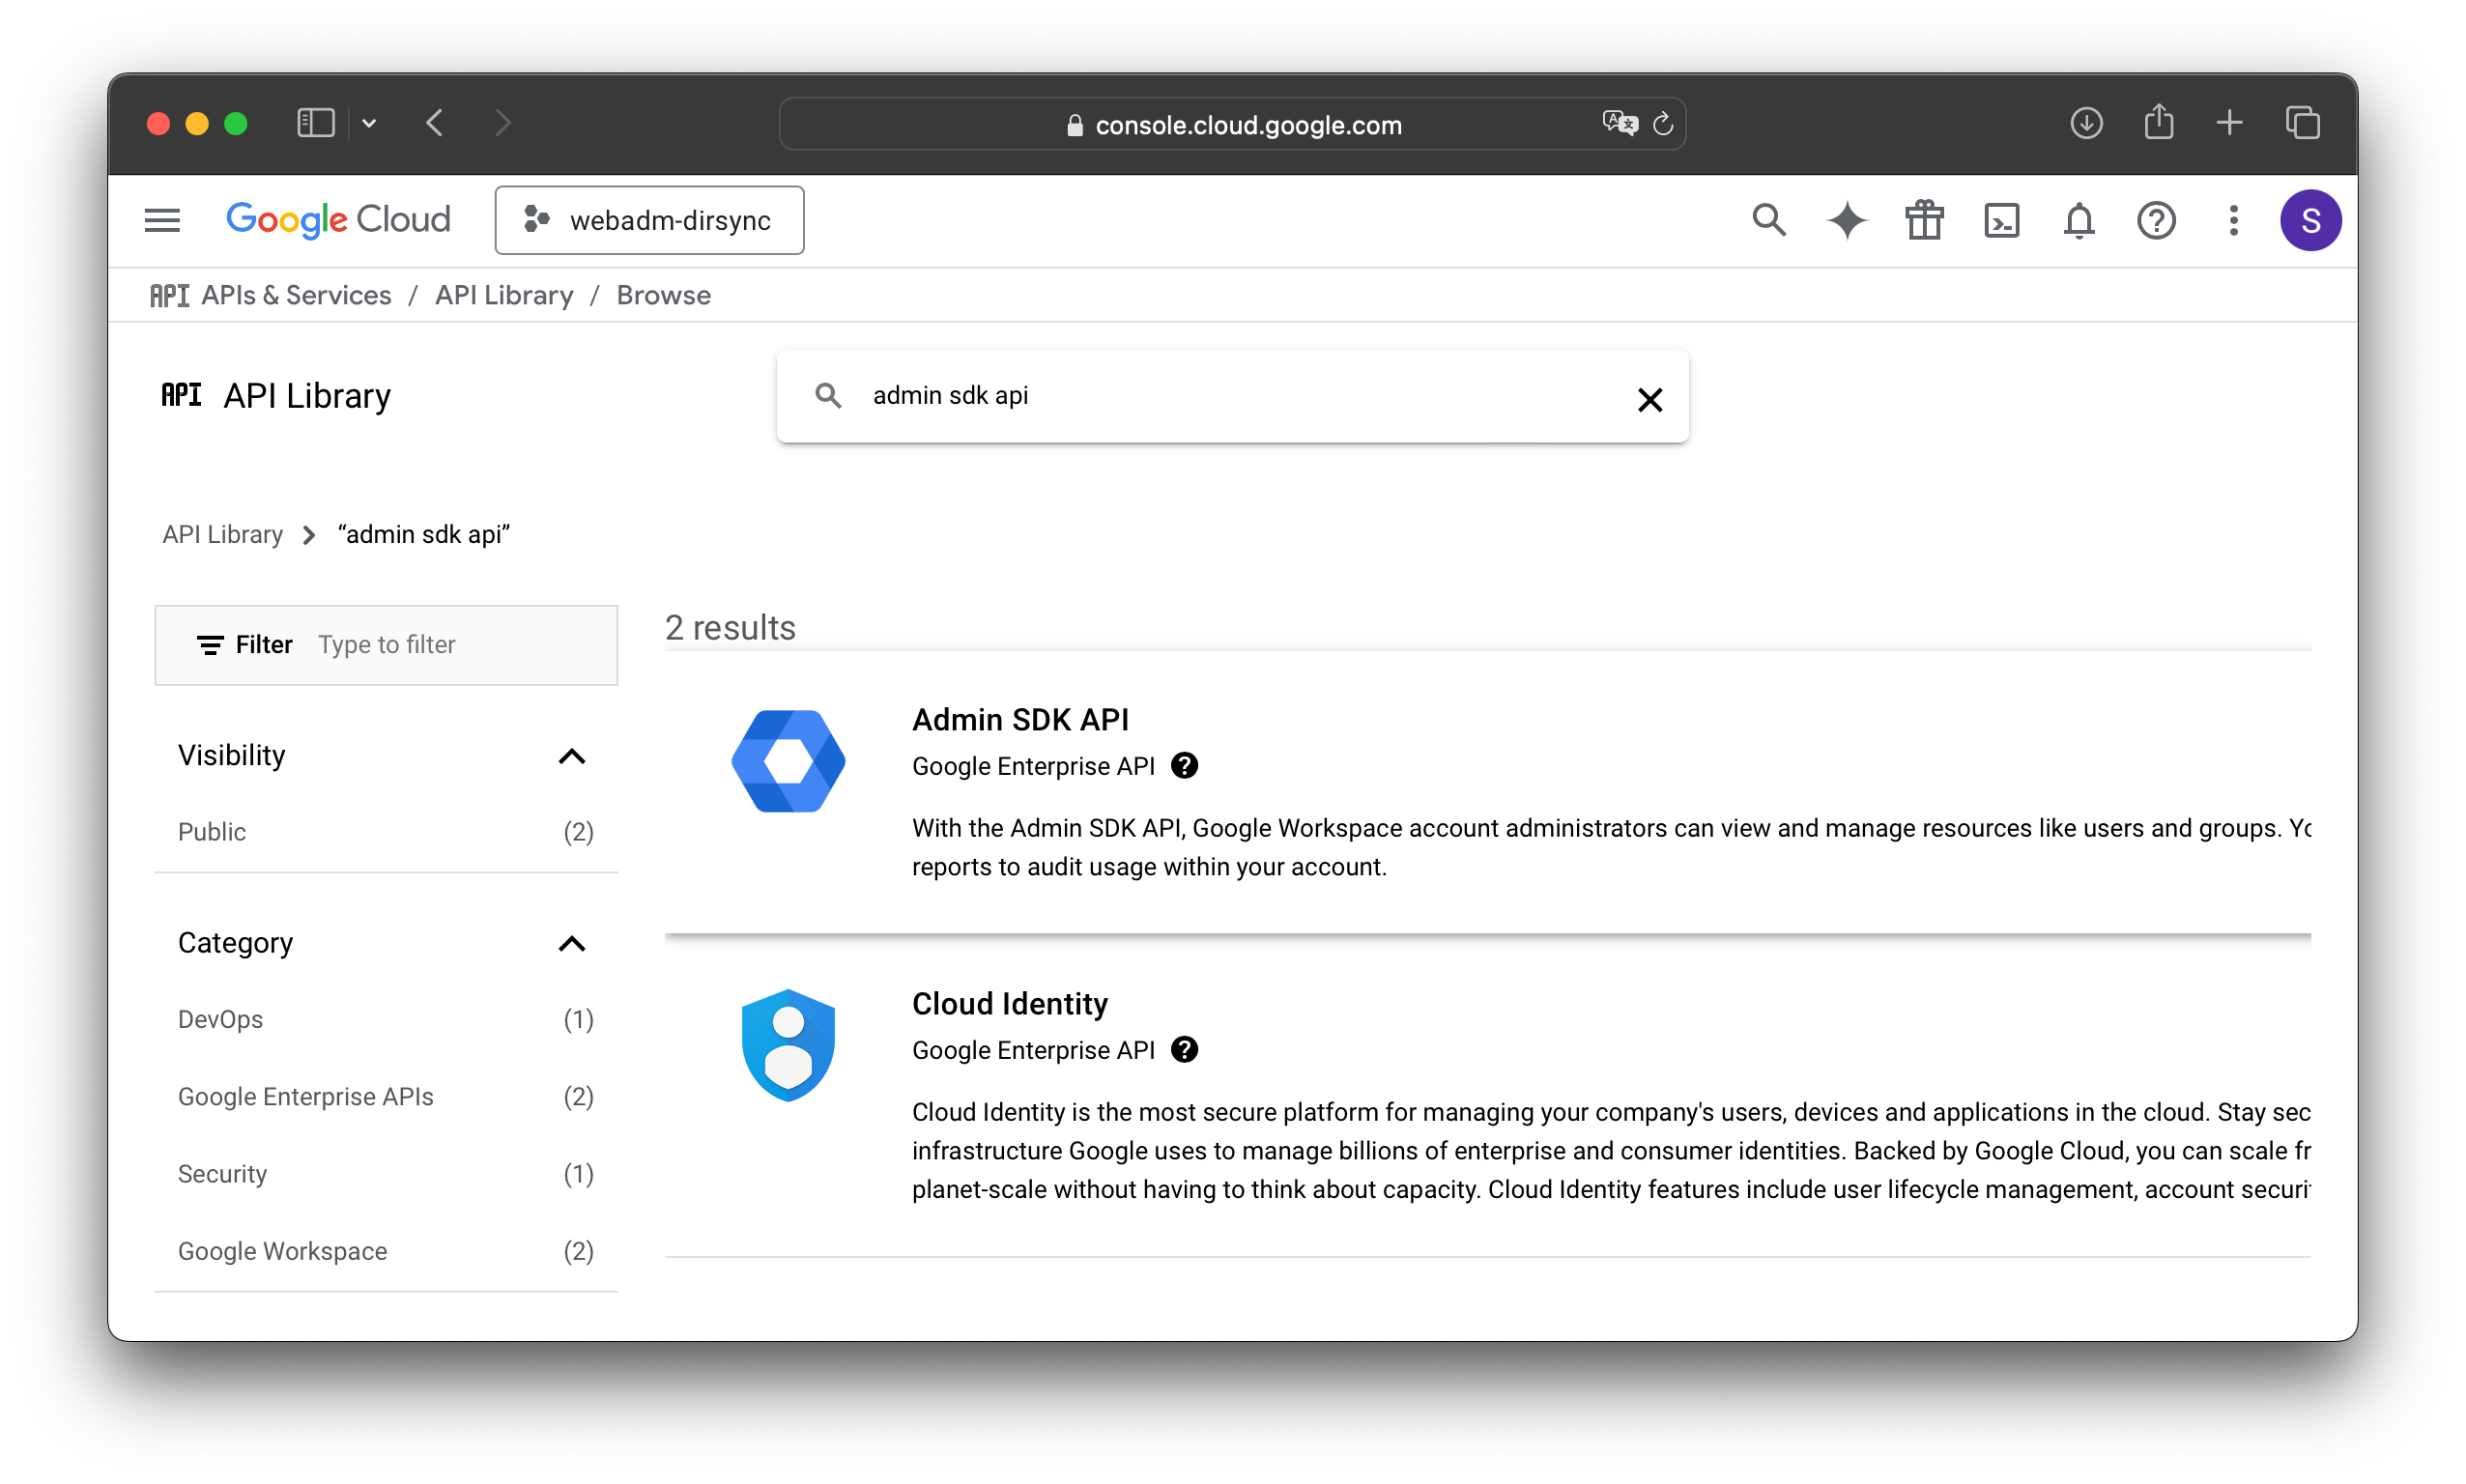
Click ENABLE.

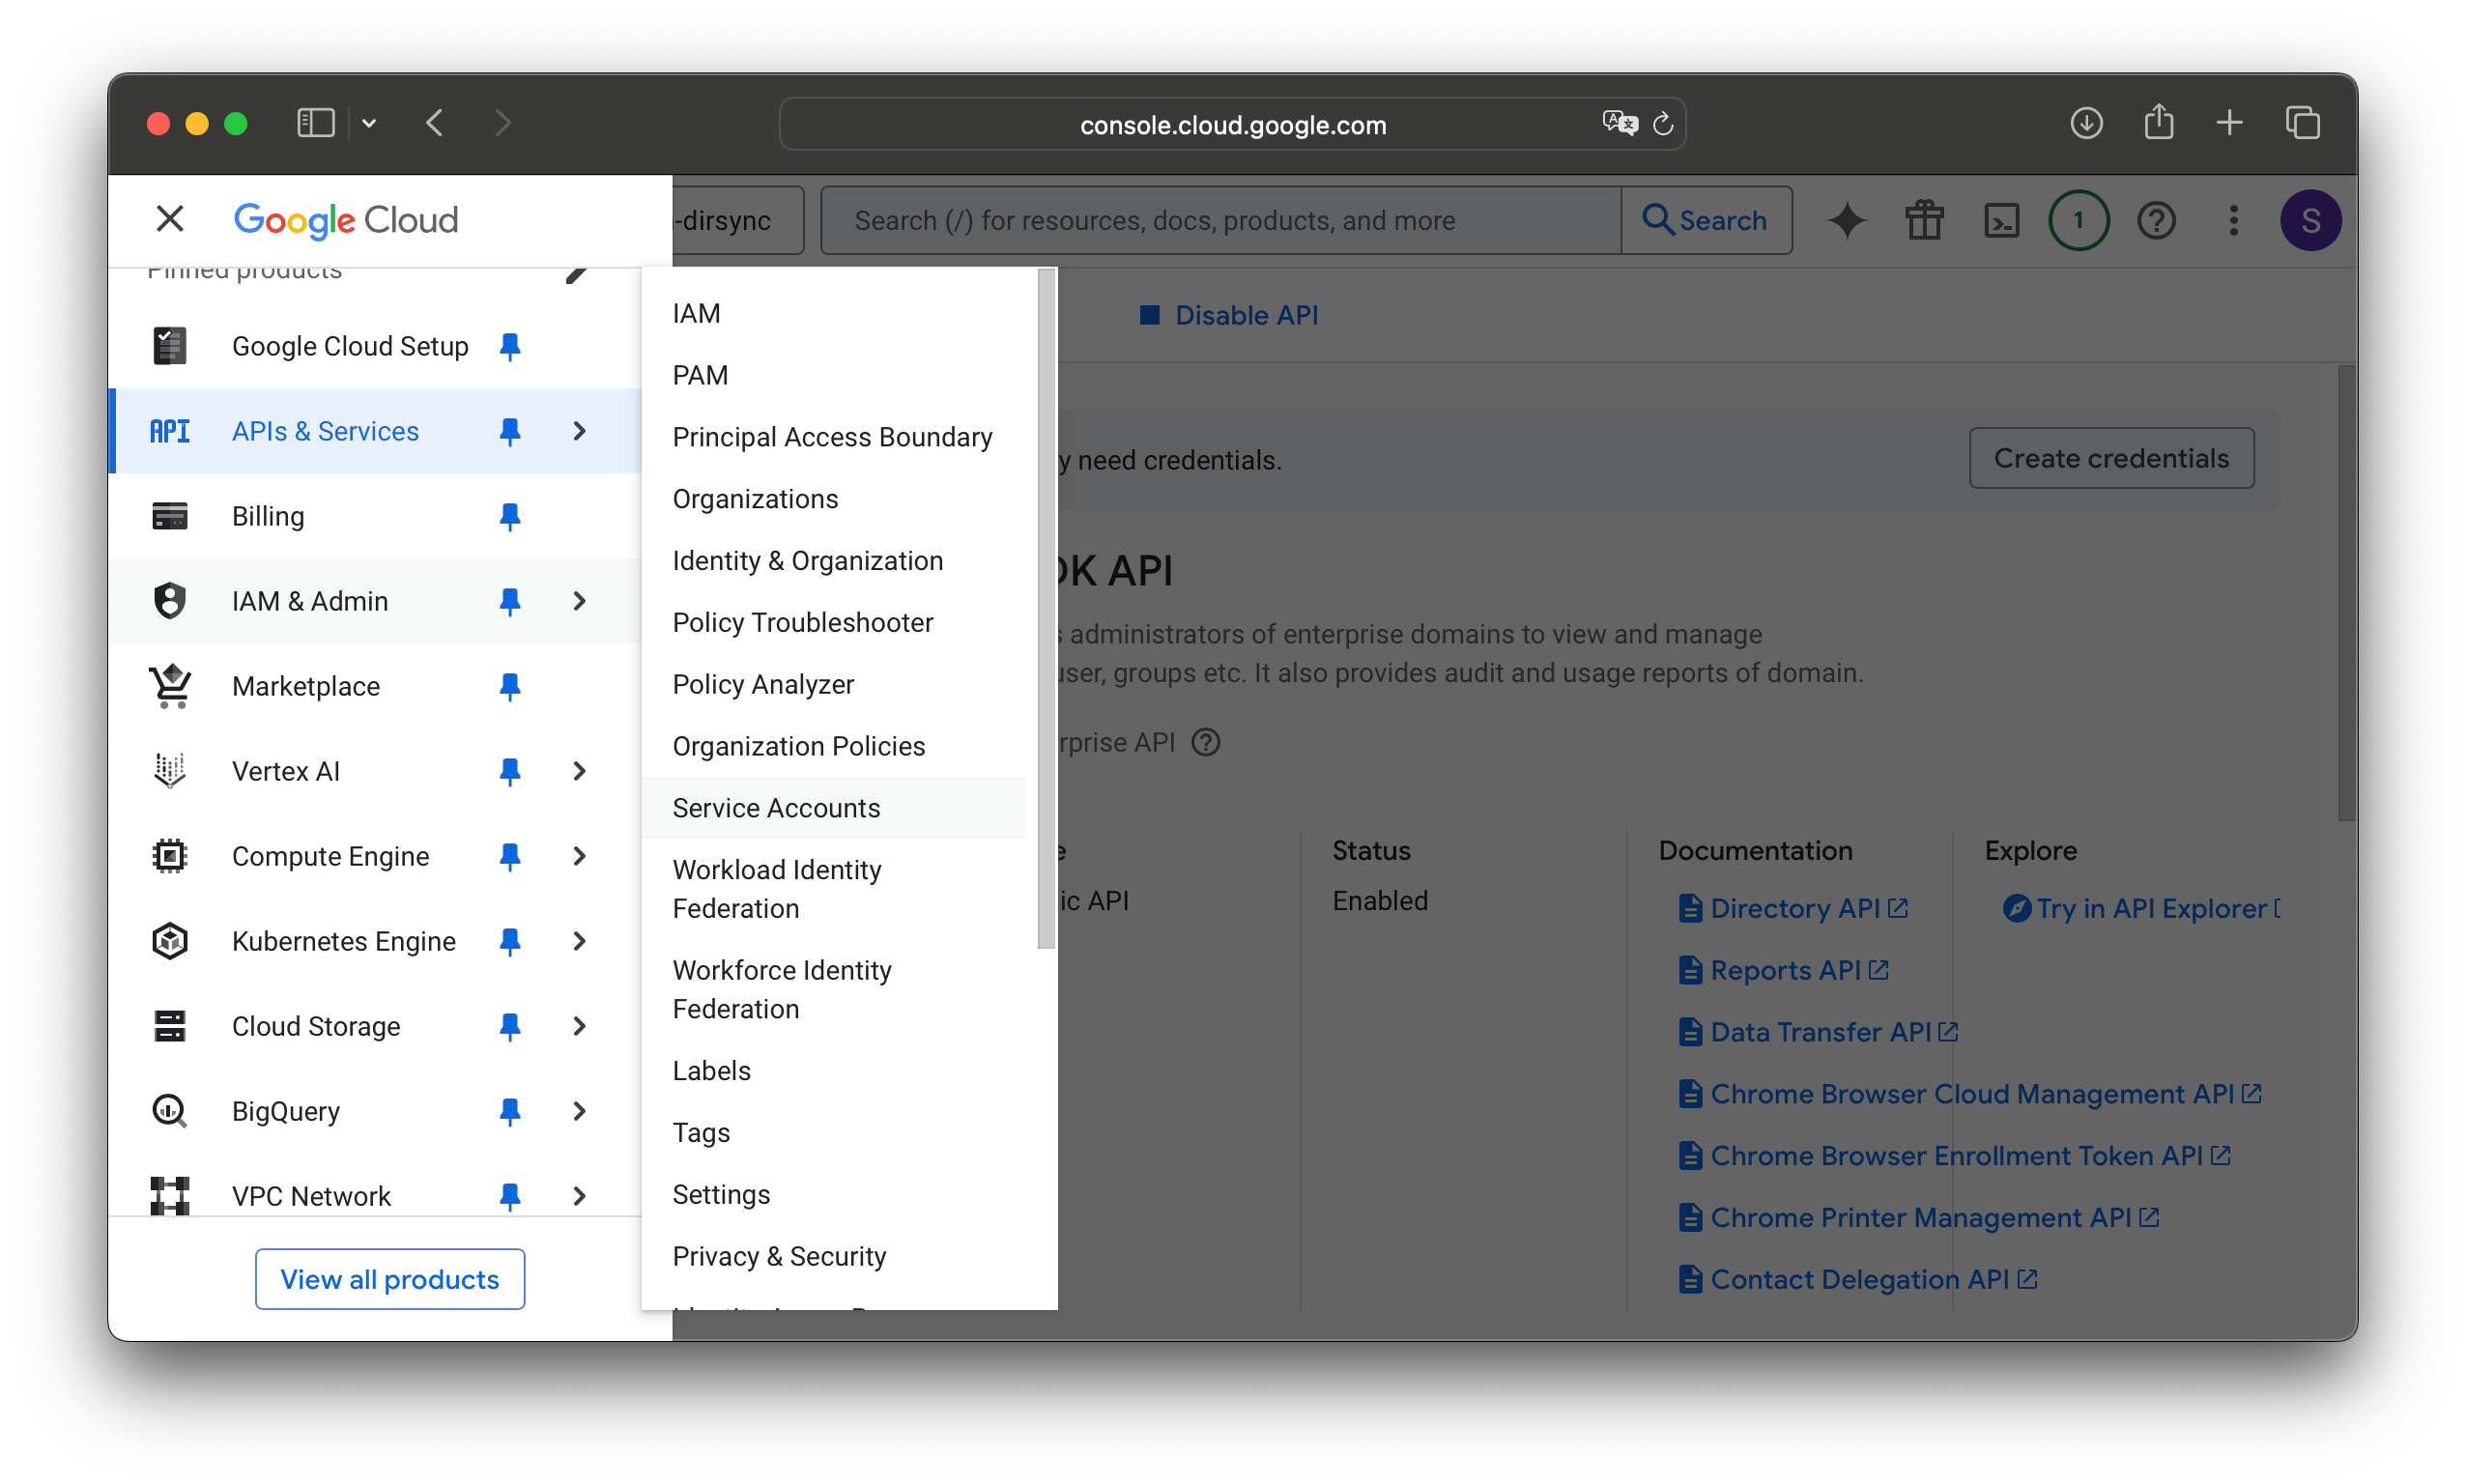
Click the menu icon in the top left corner, hover over API & Services, then click on Service Accounts.
Click + Create Service Account.

Give the account a name, such as webadm-dirsync, then click Create and Continue.
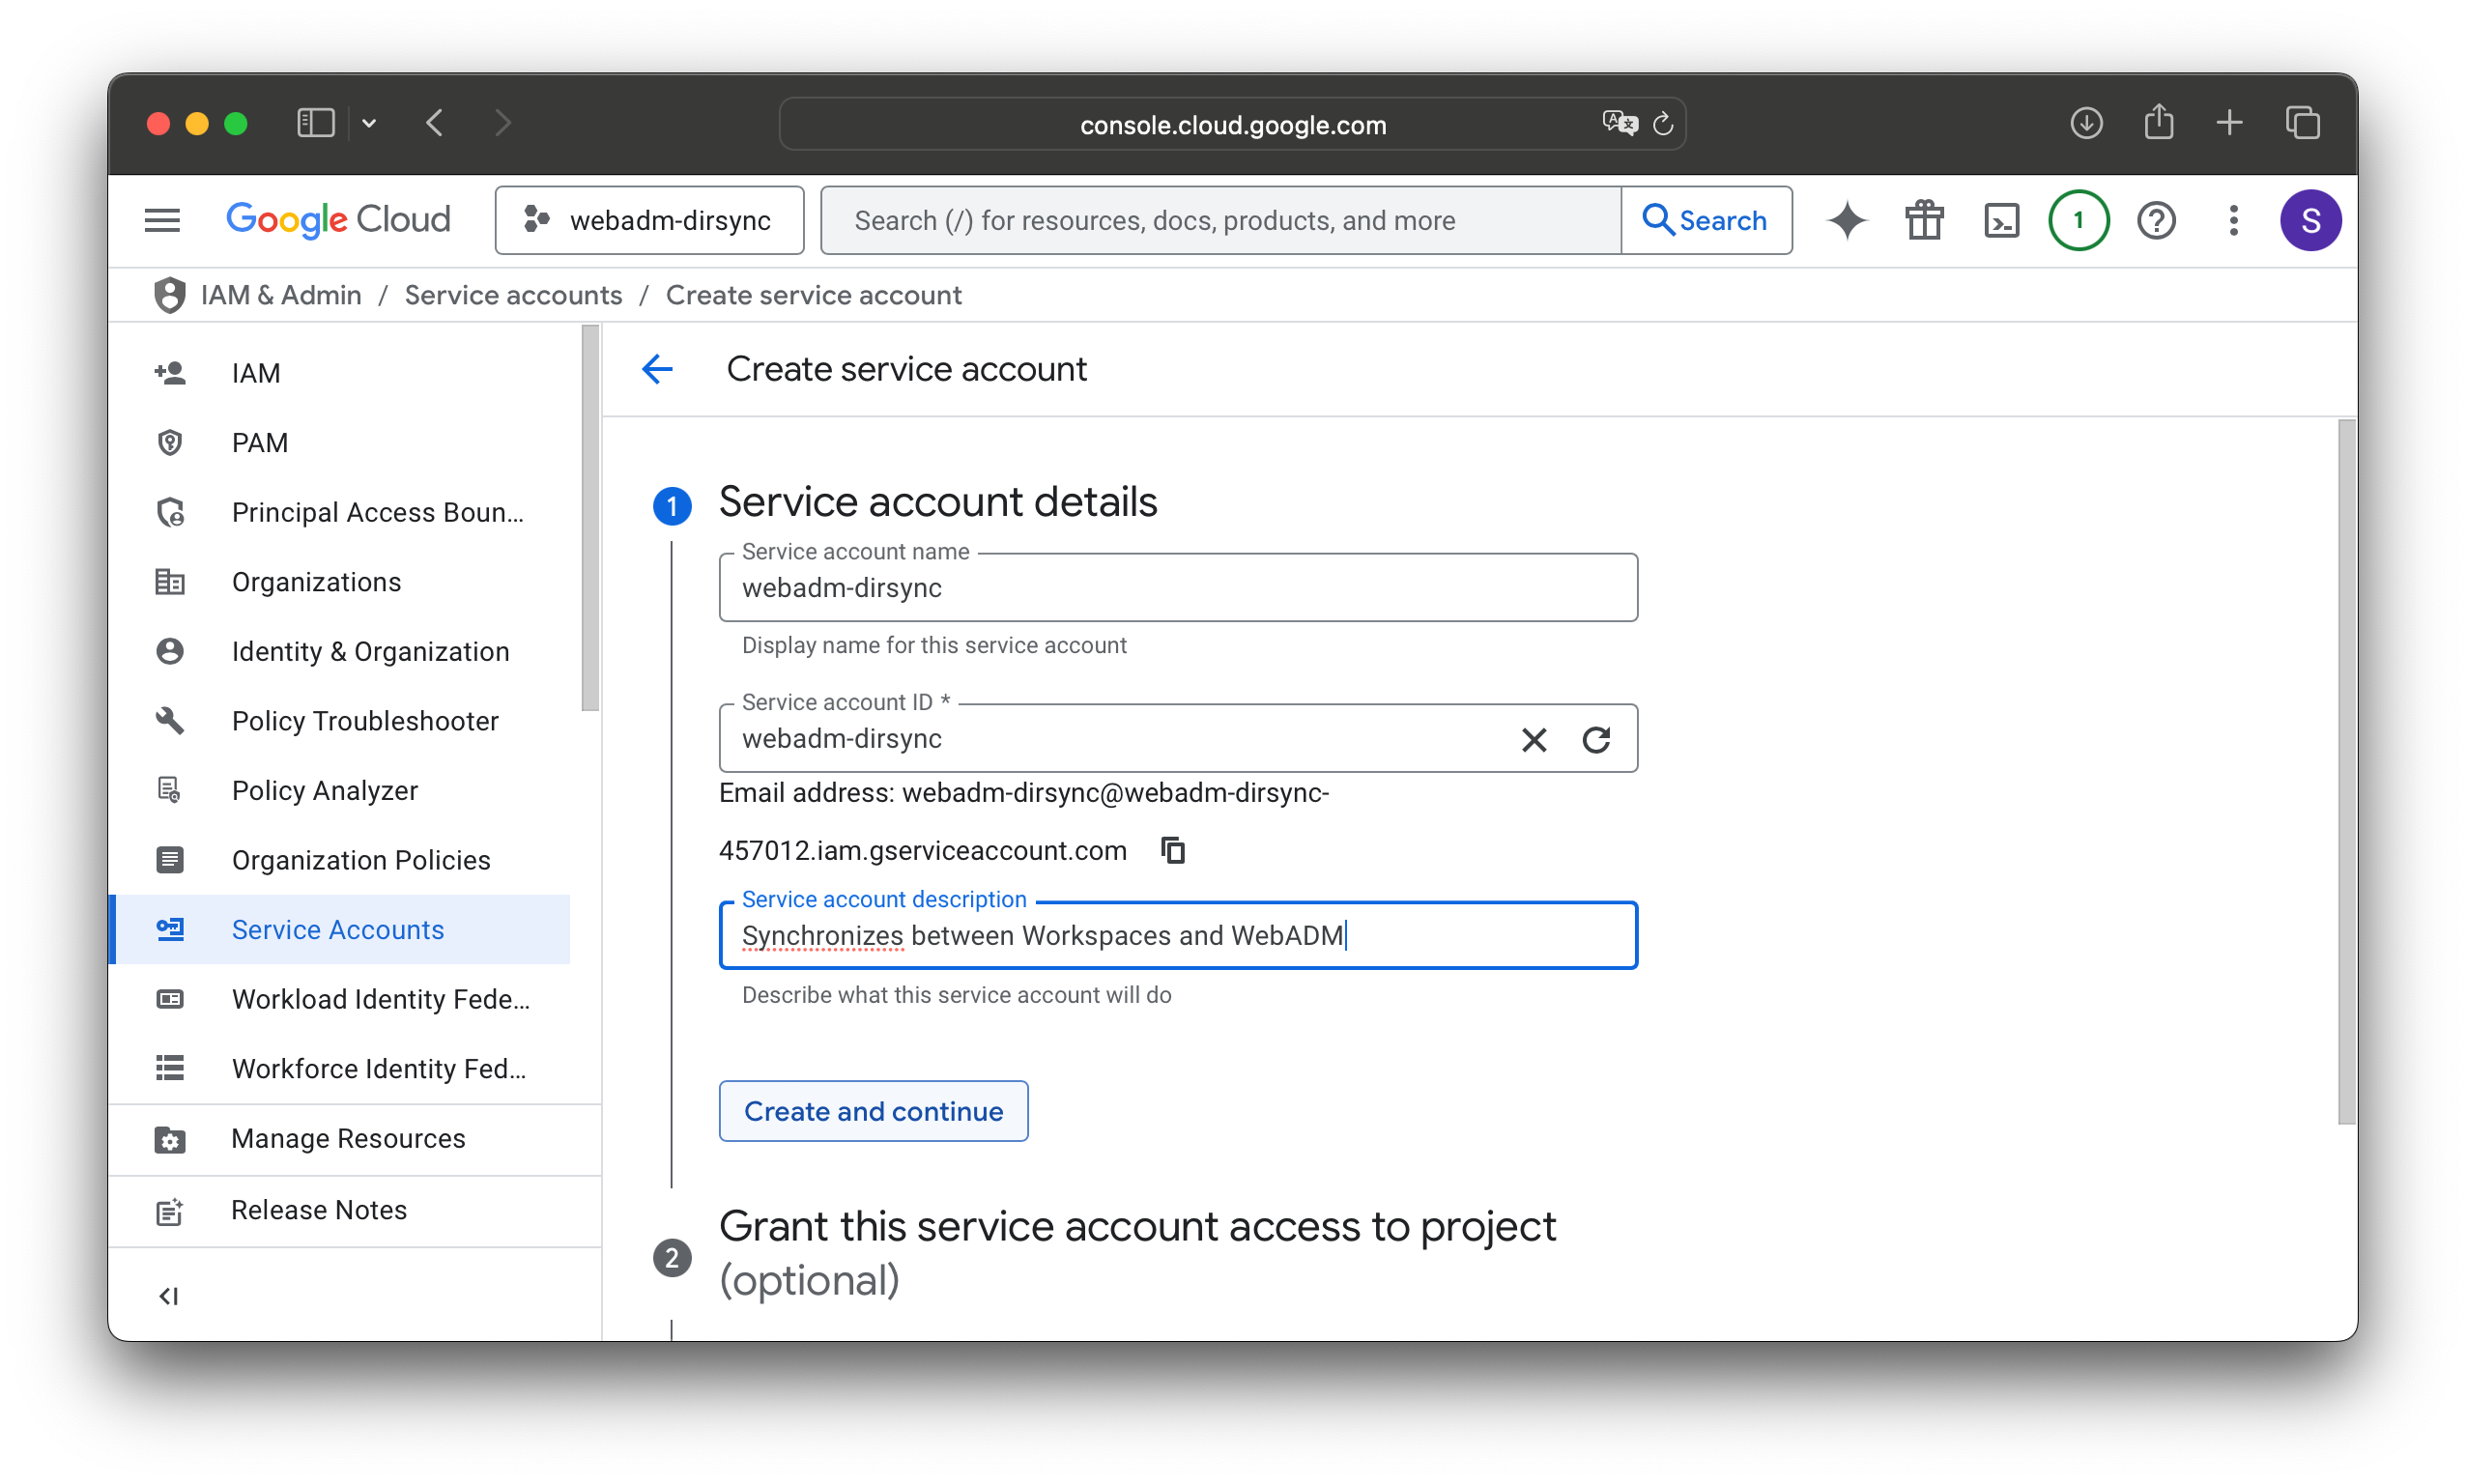
Click on Select a role, hover over Project in the left list, and then click Owner in the right list. Click Continue.
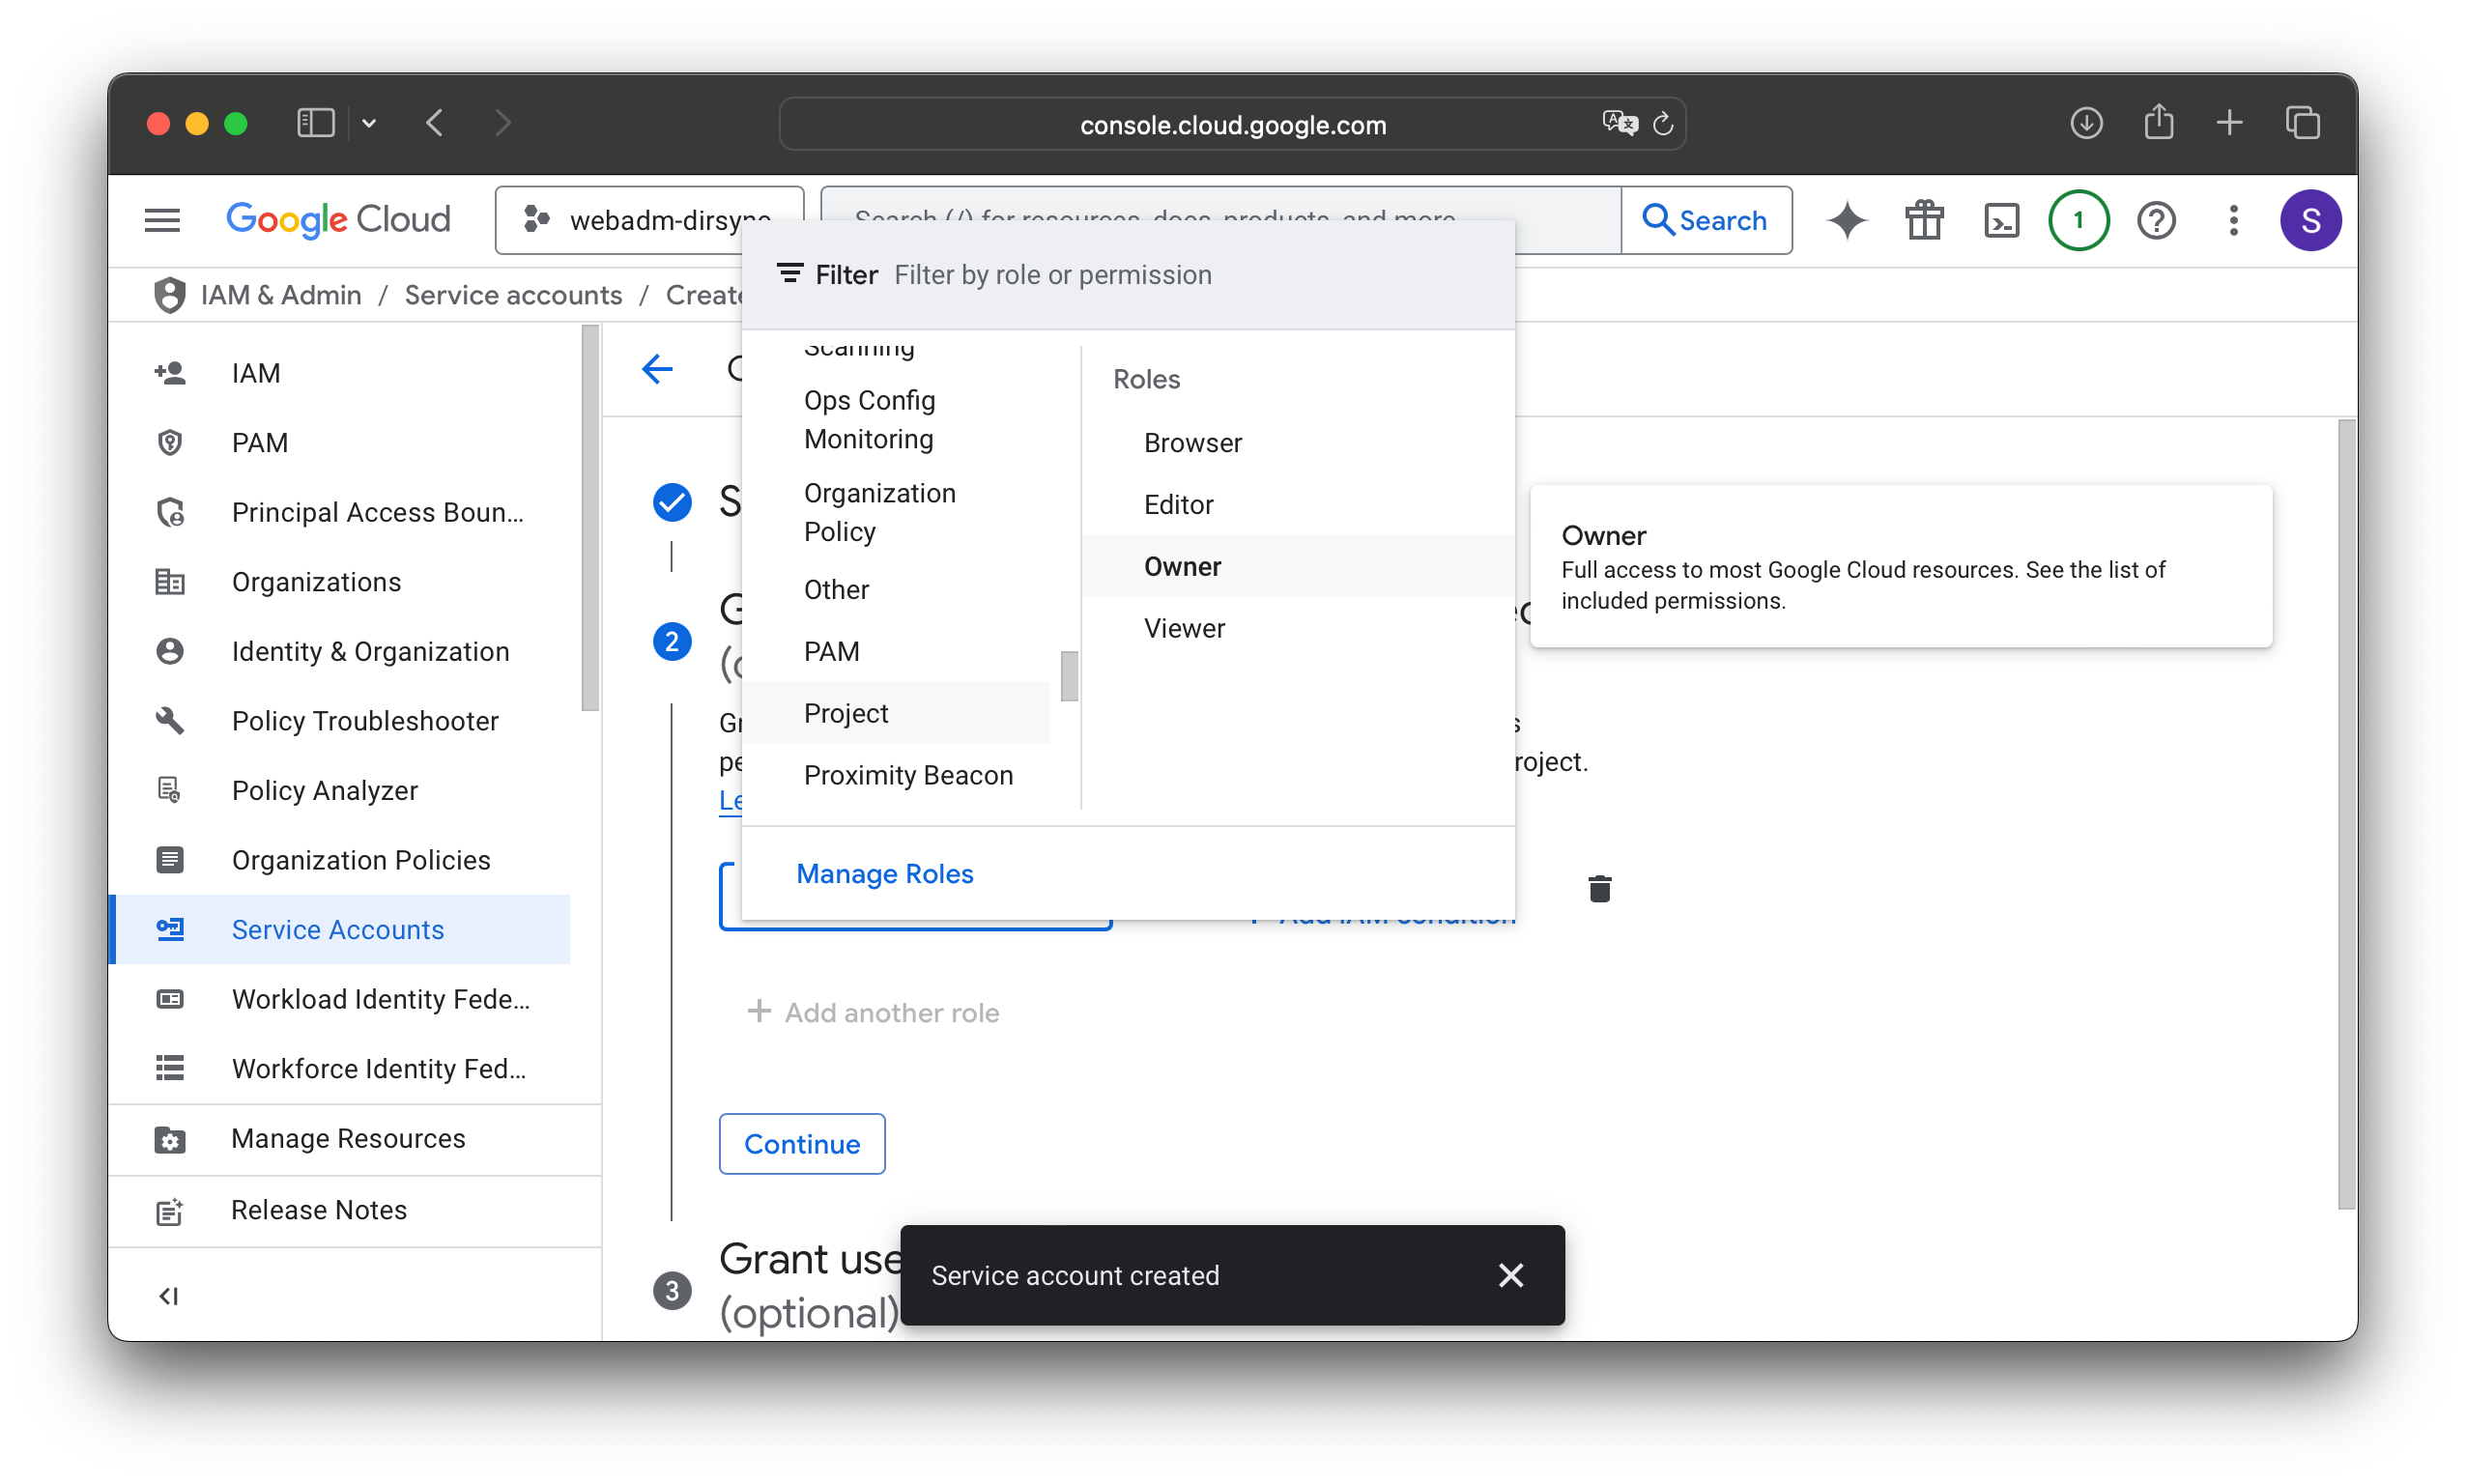
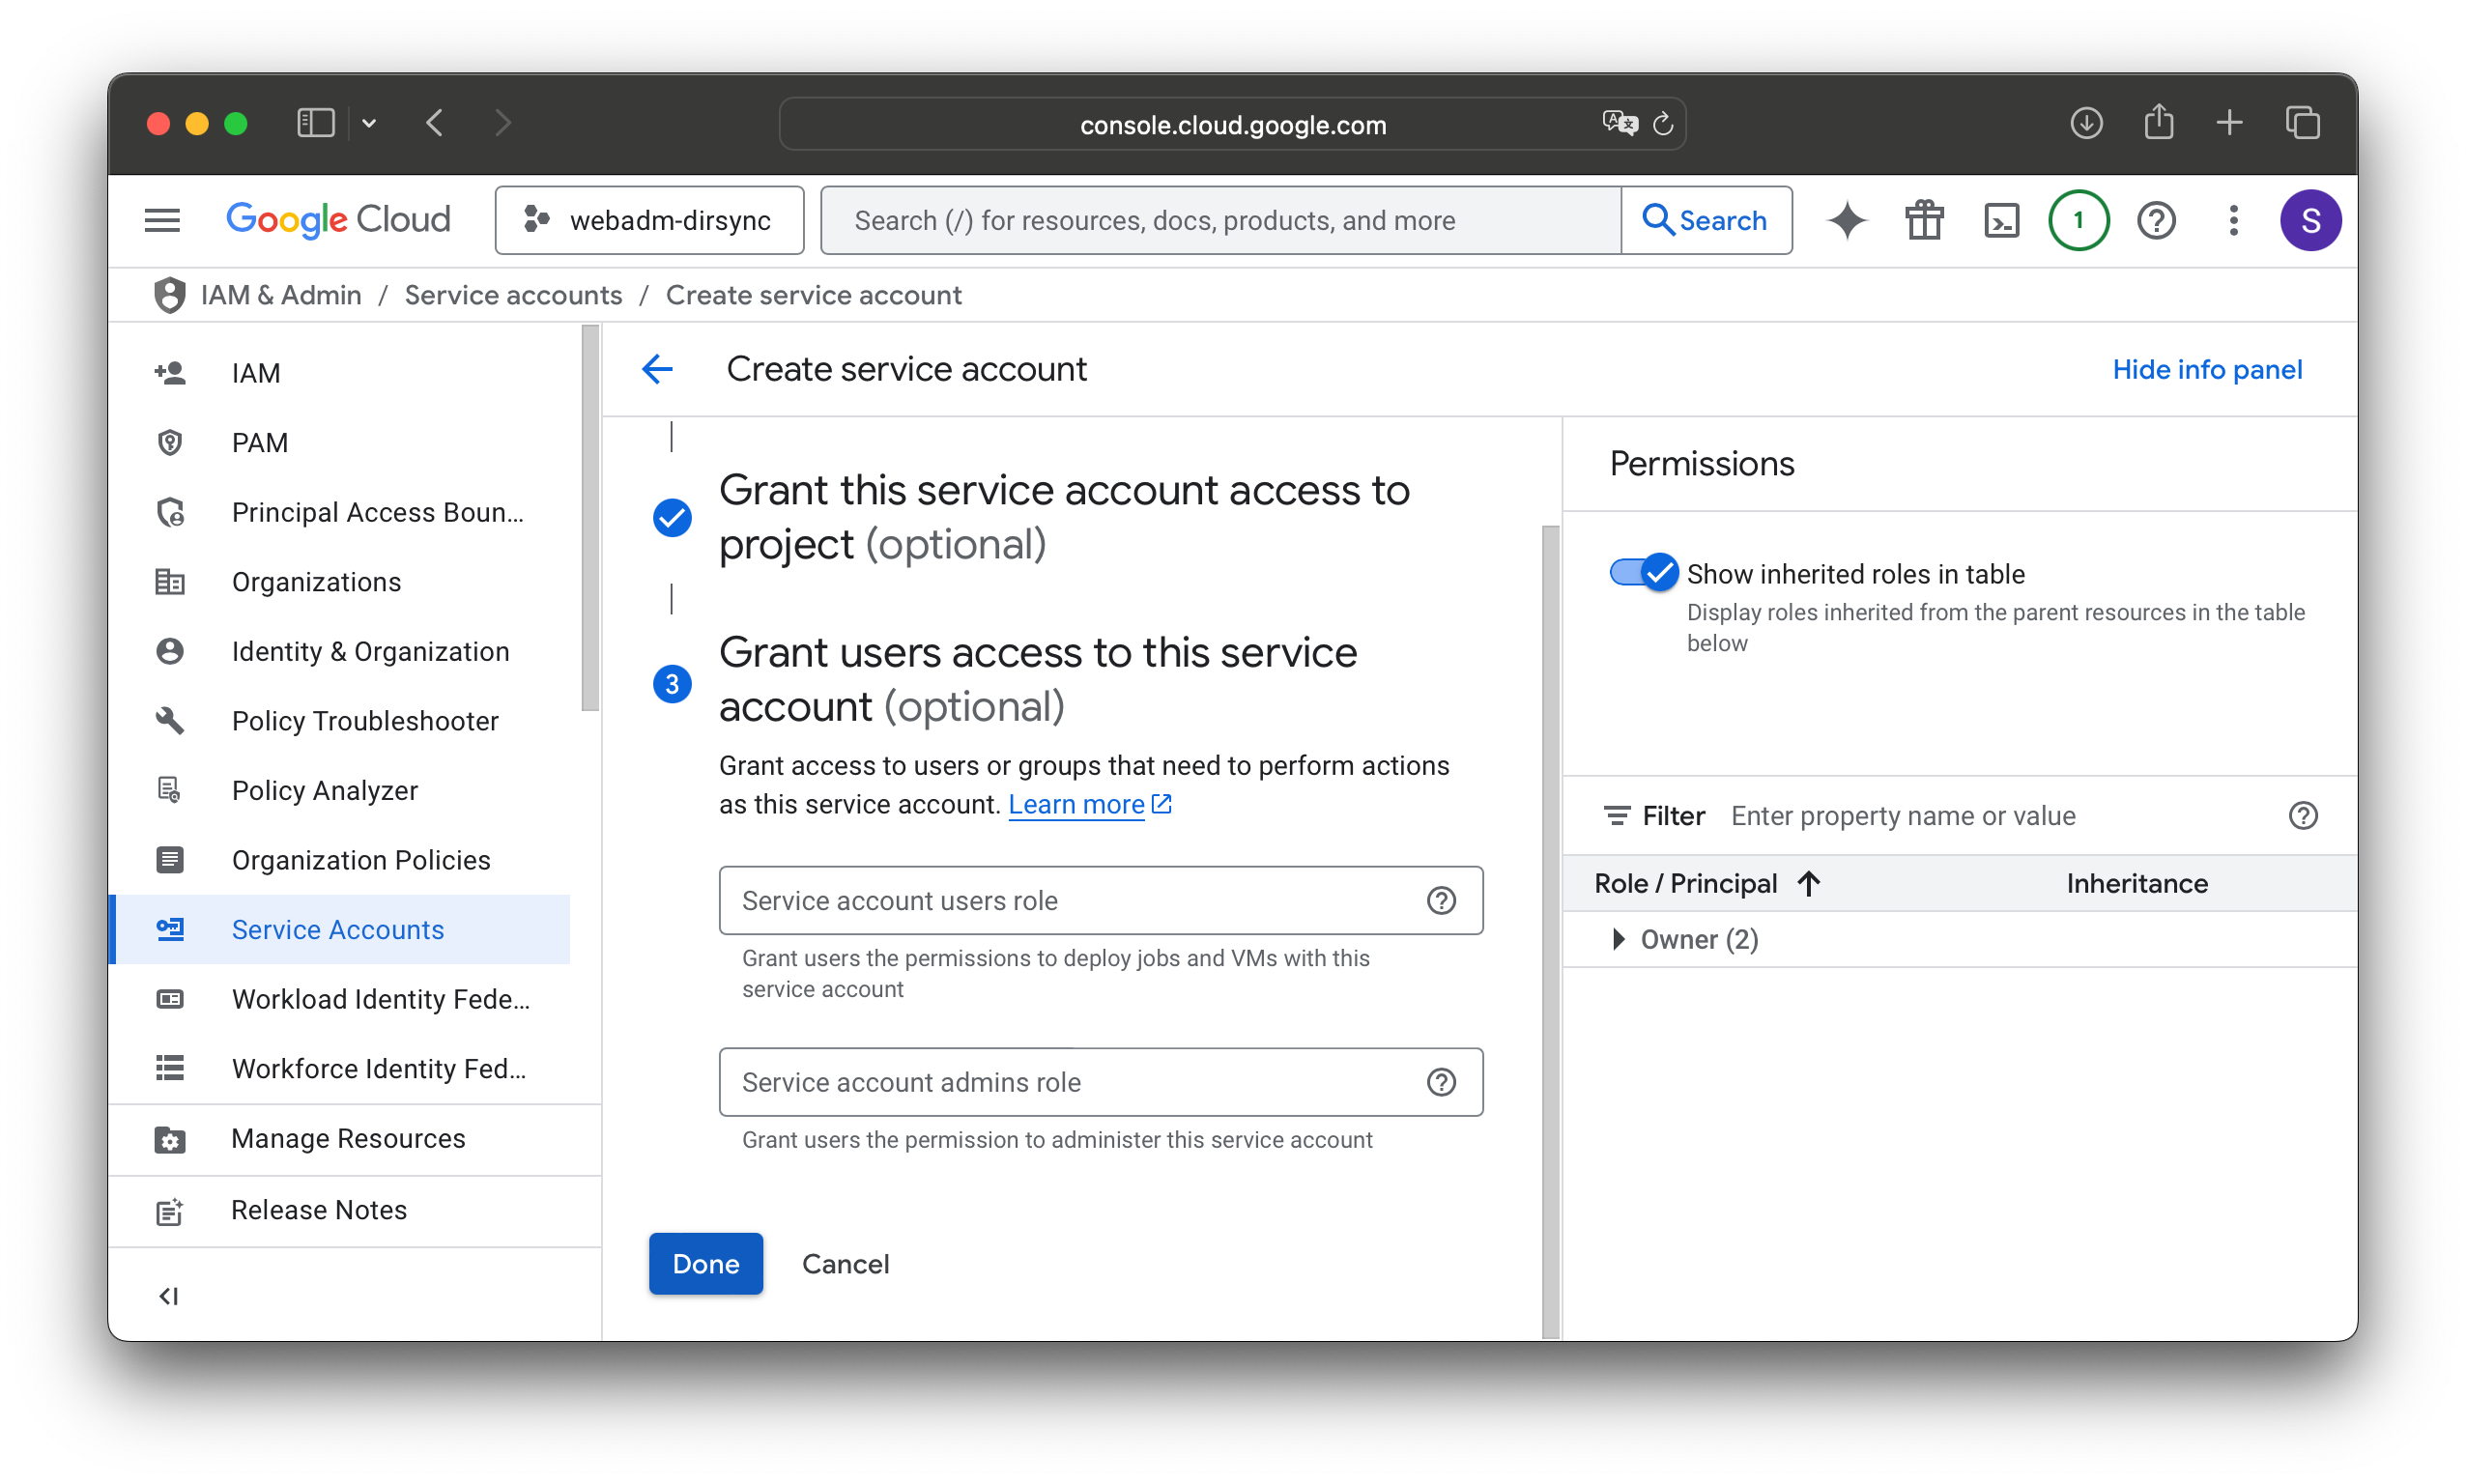
Click Done.
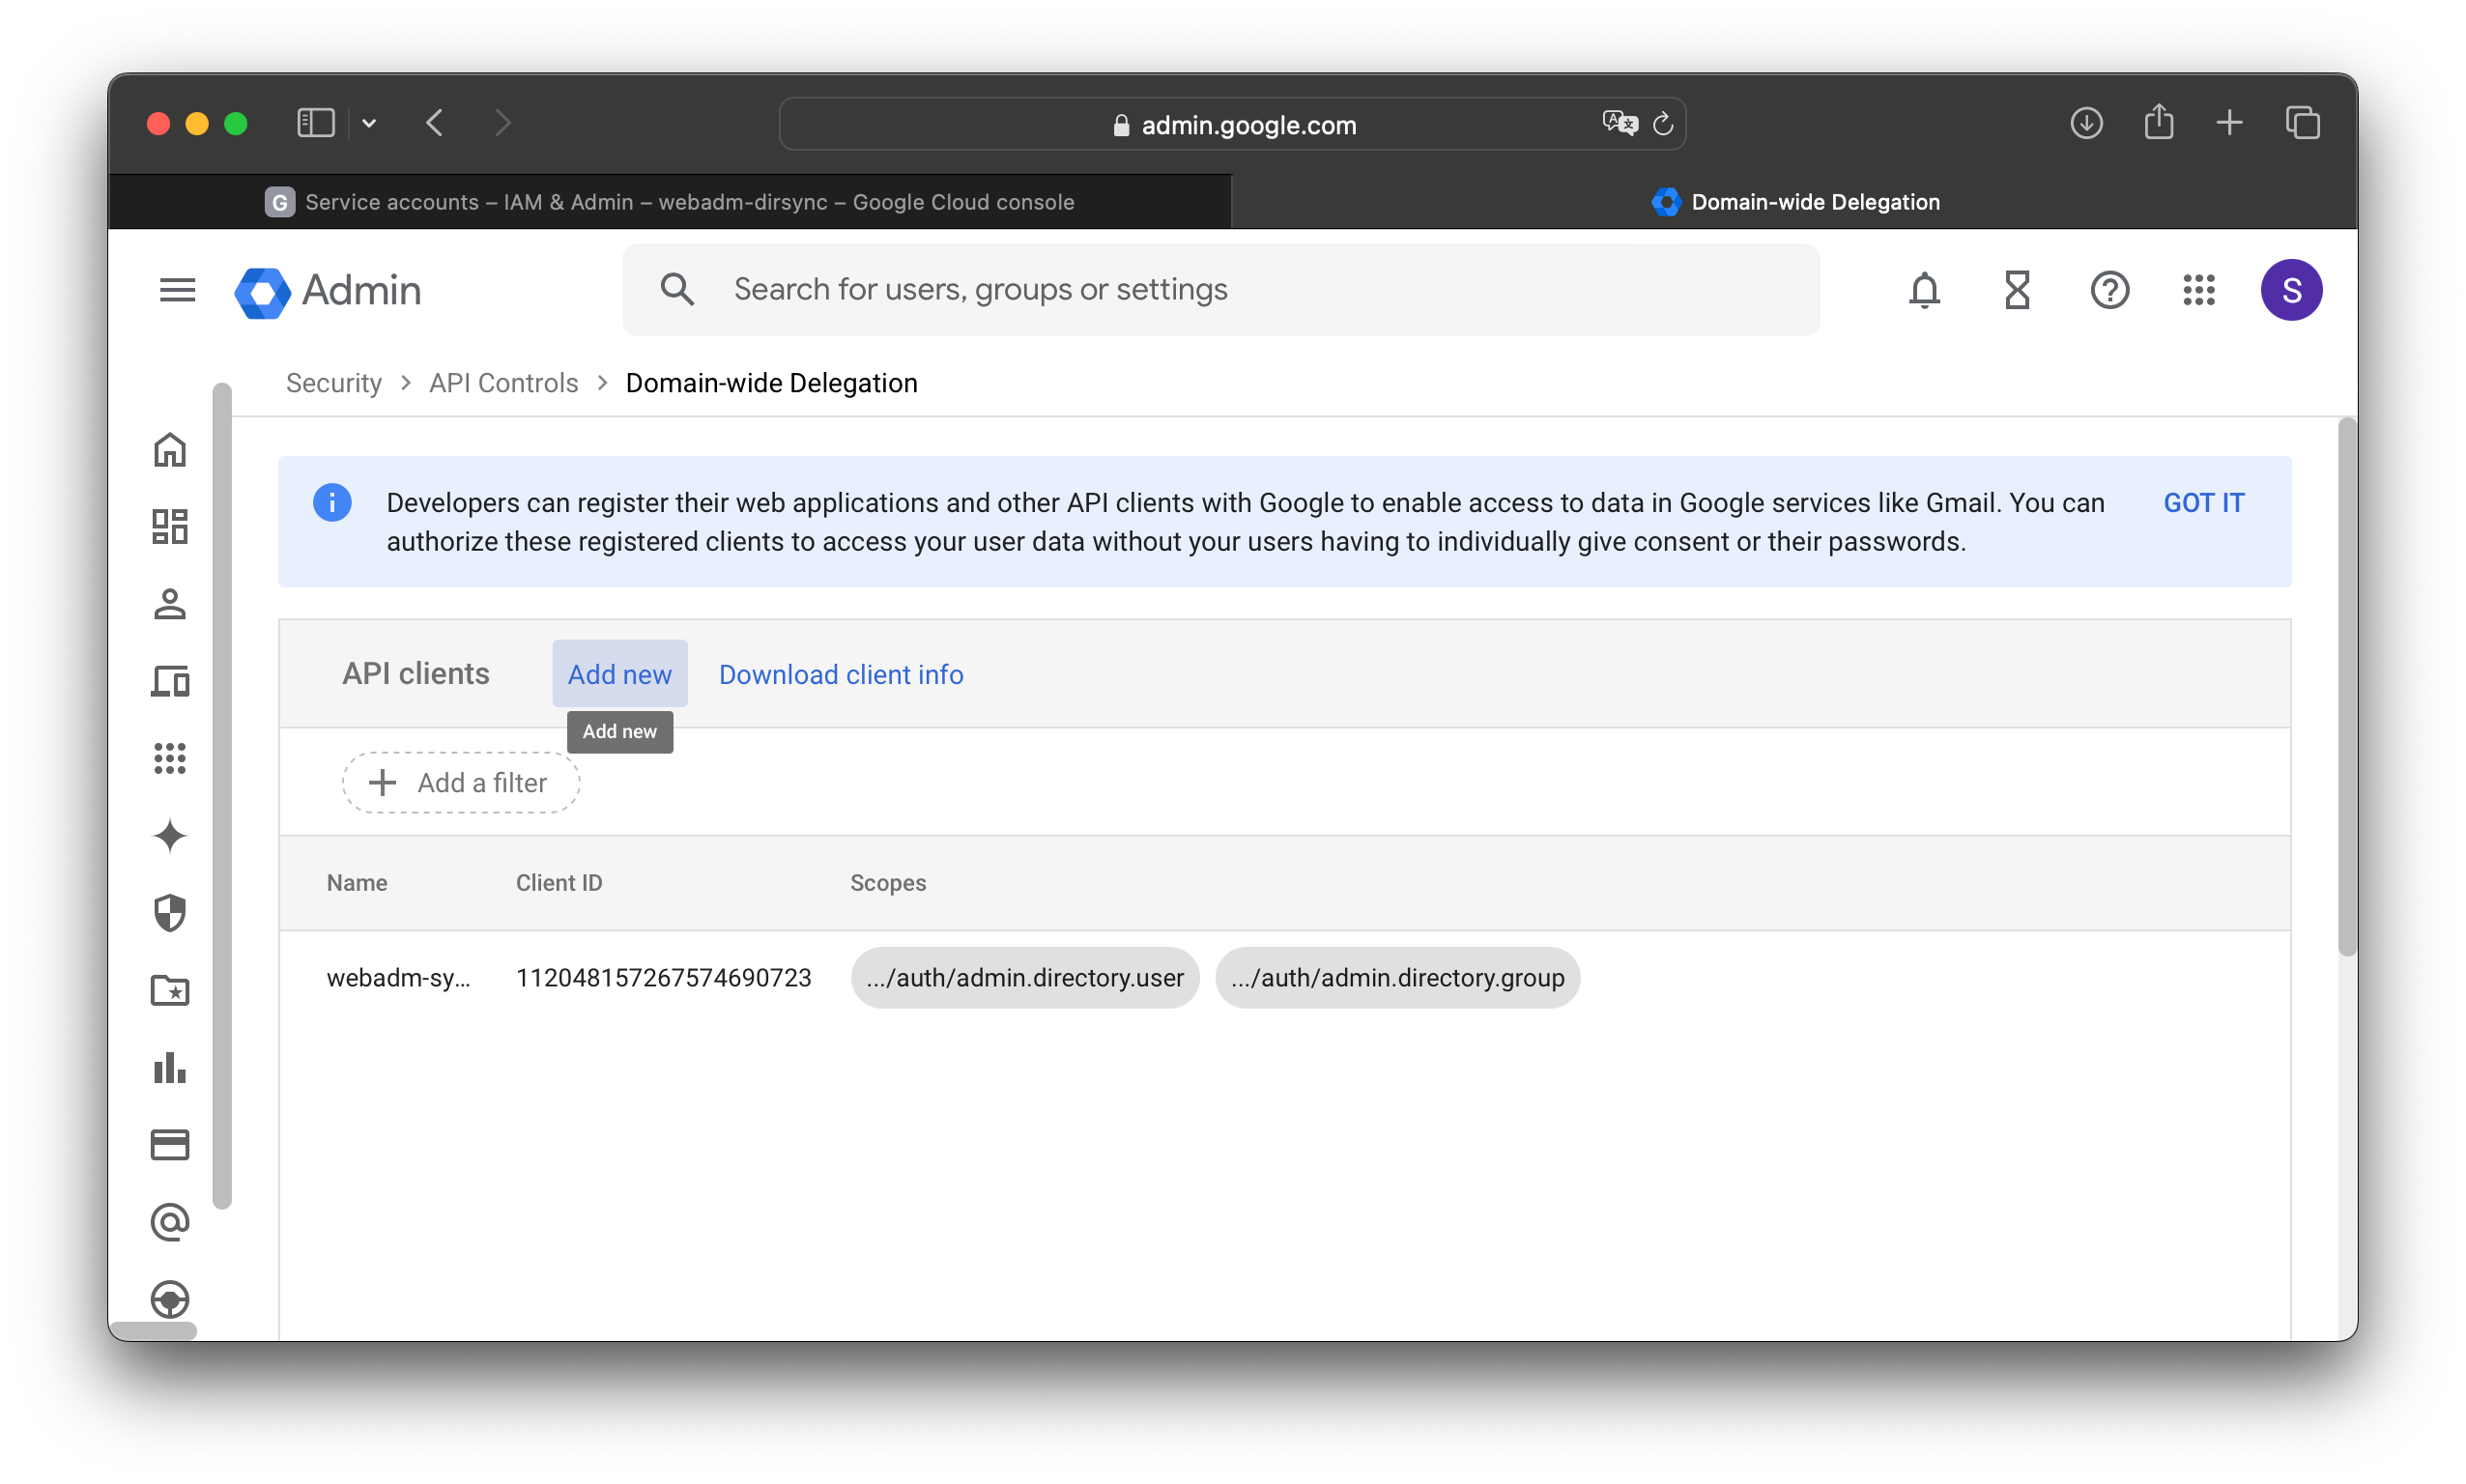
Domain-wide delegation
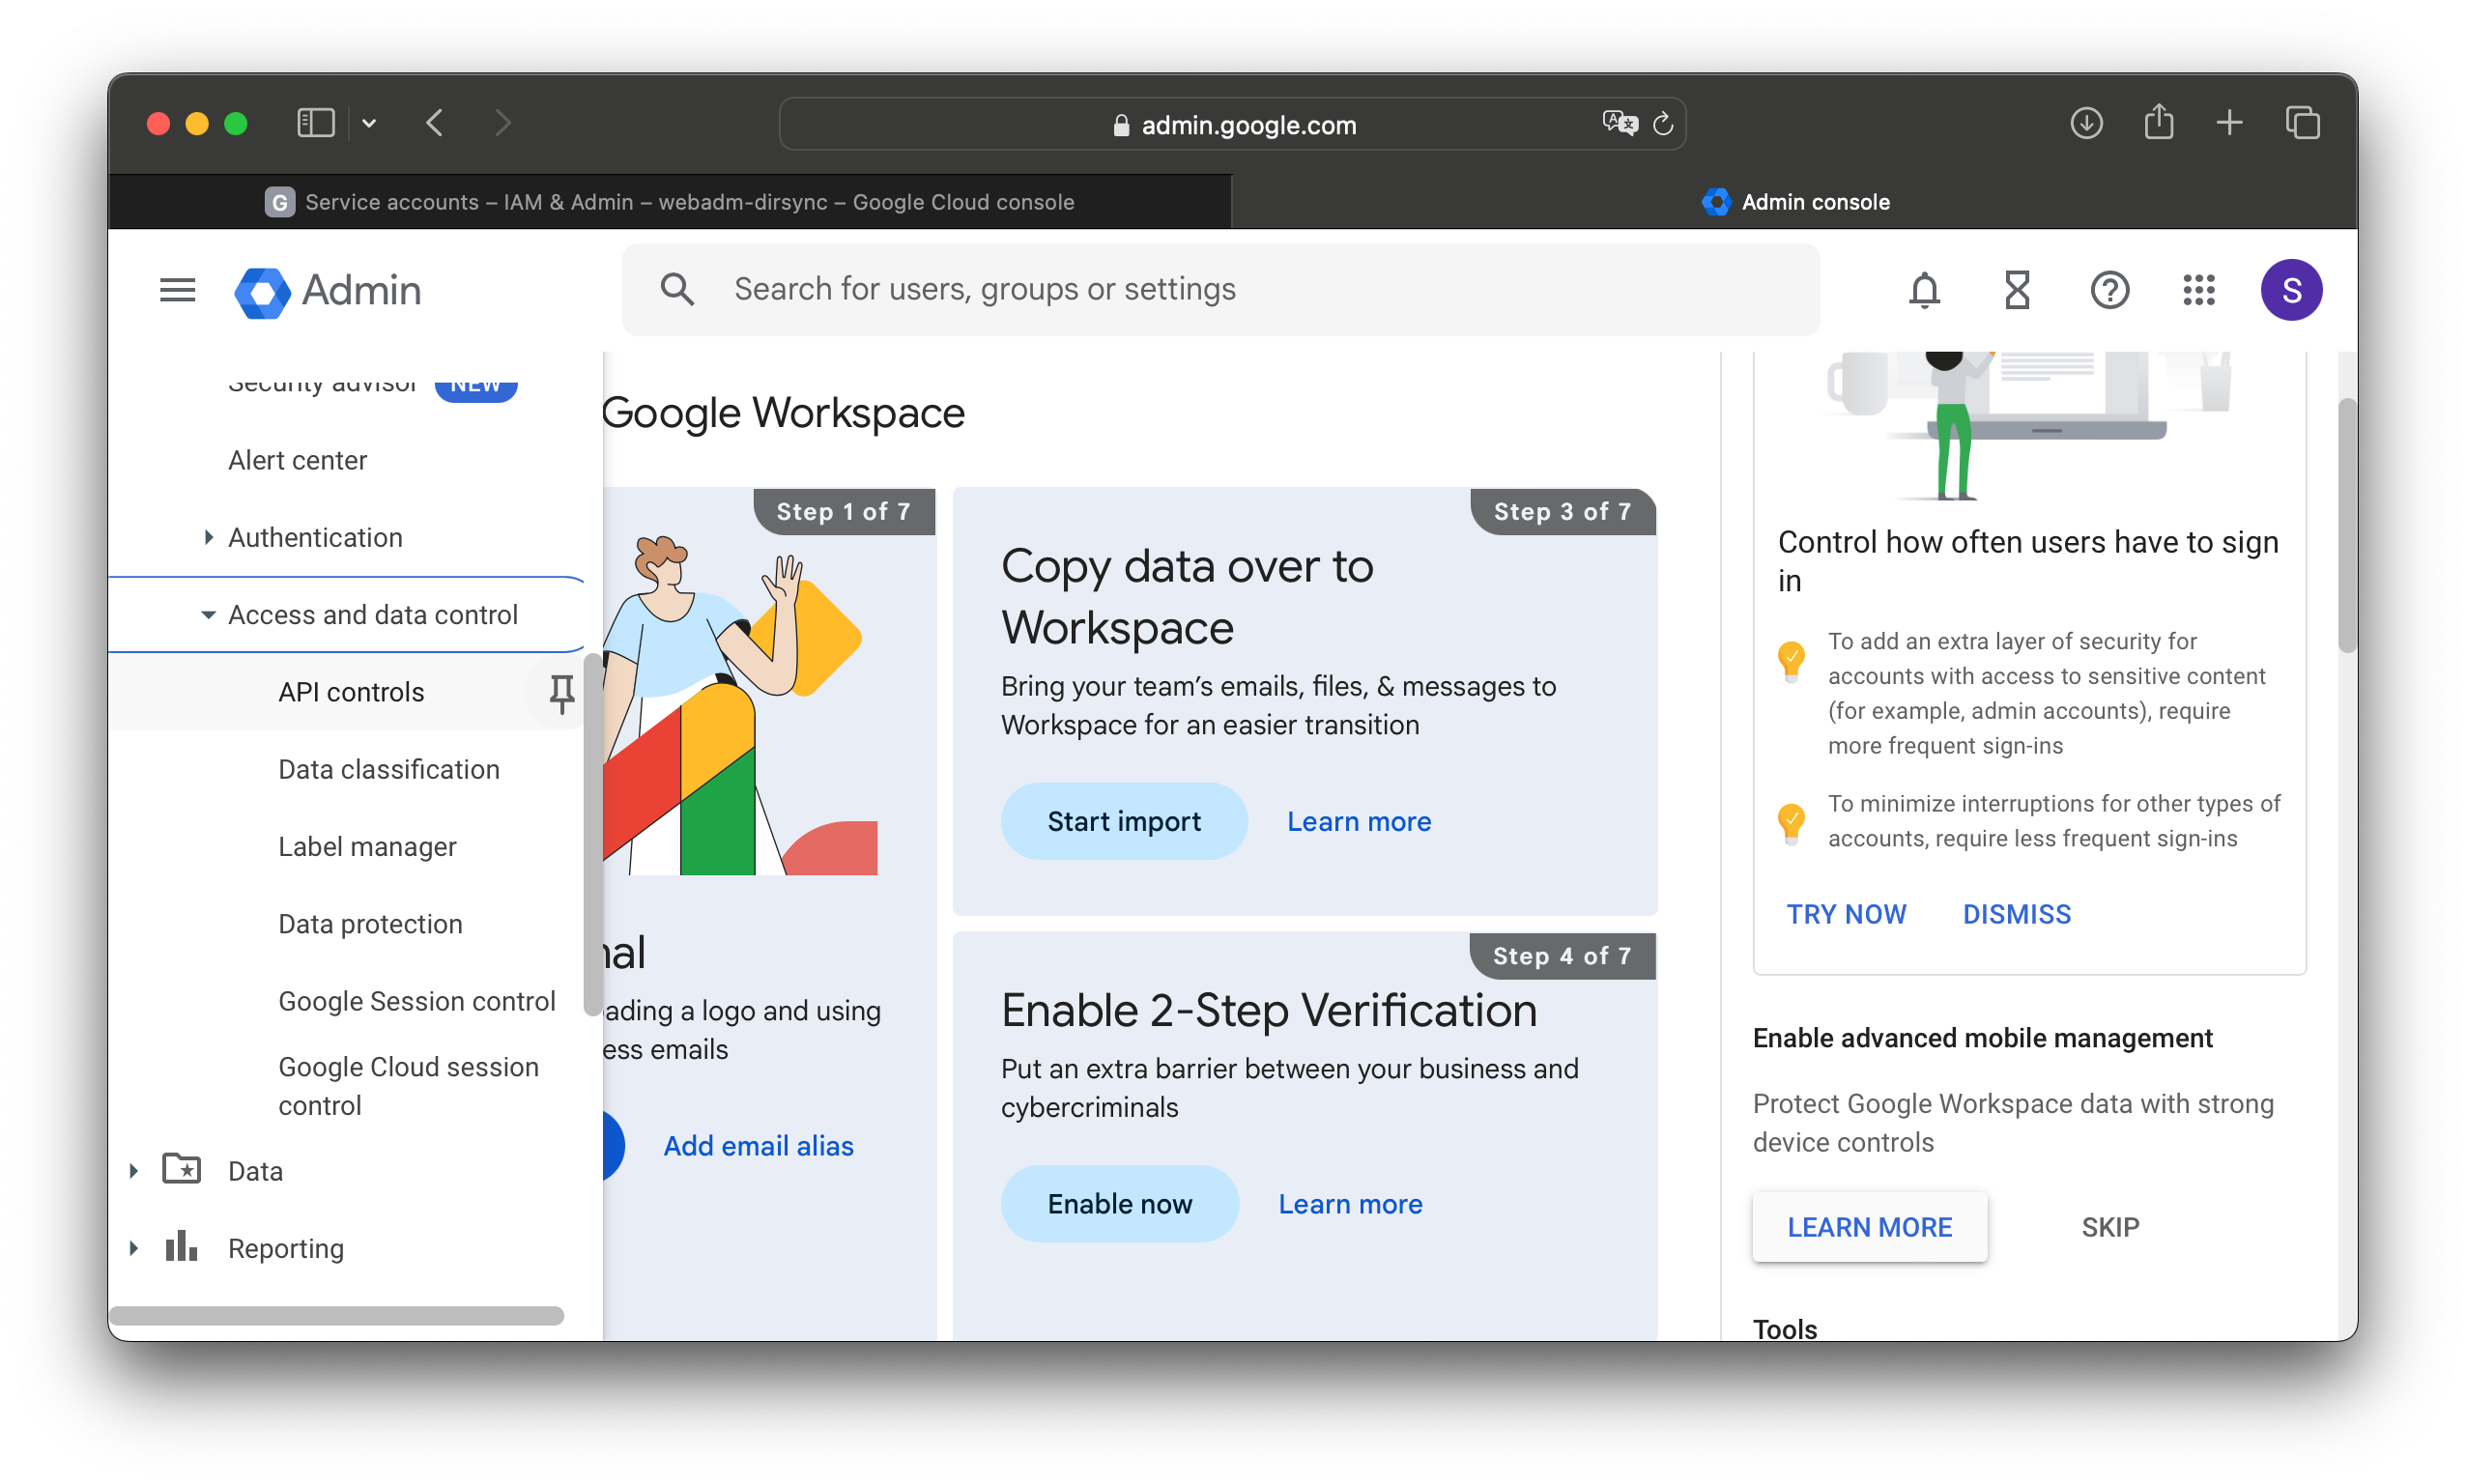
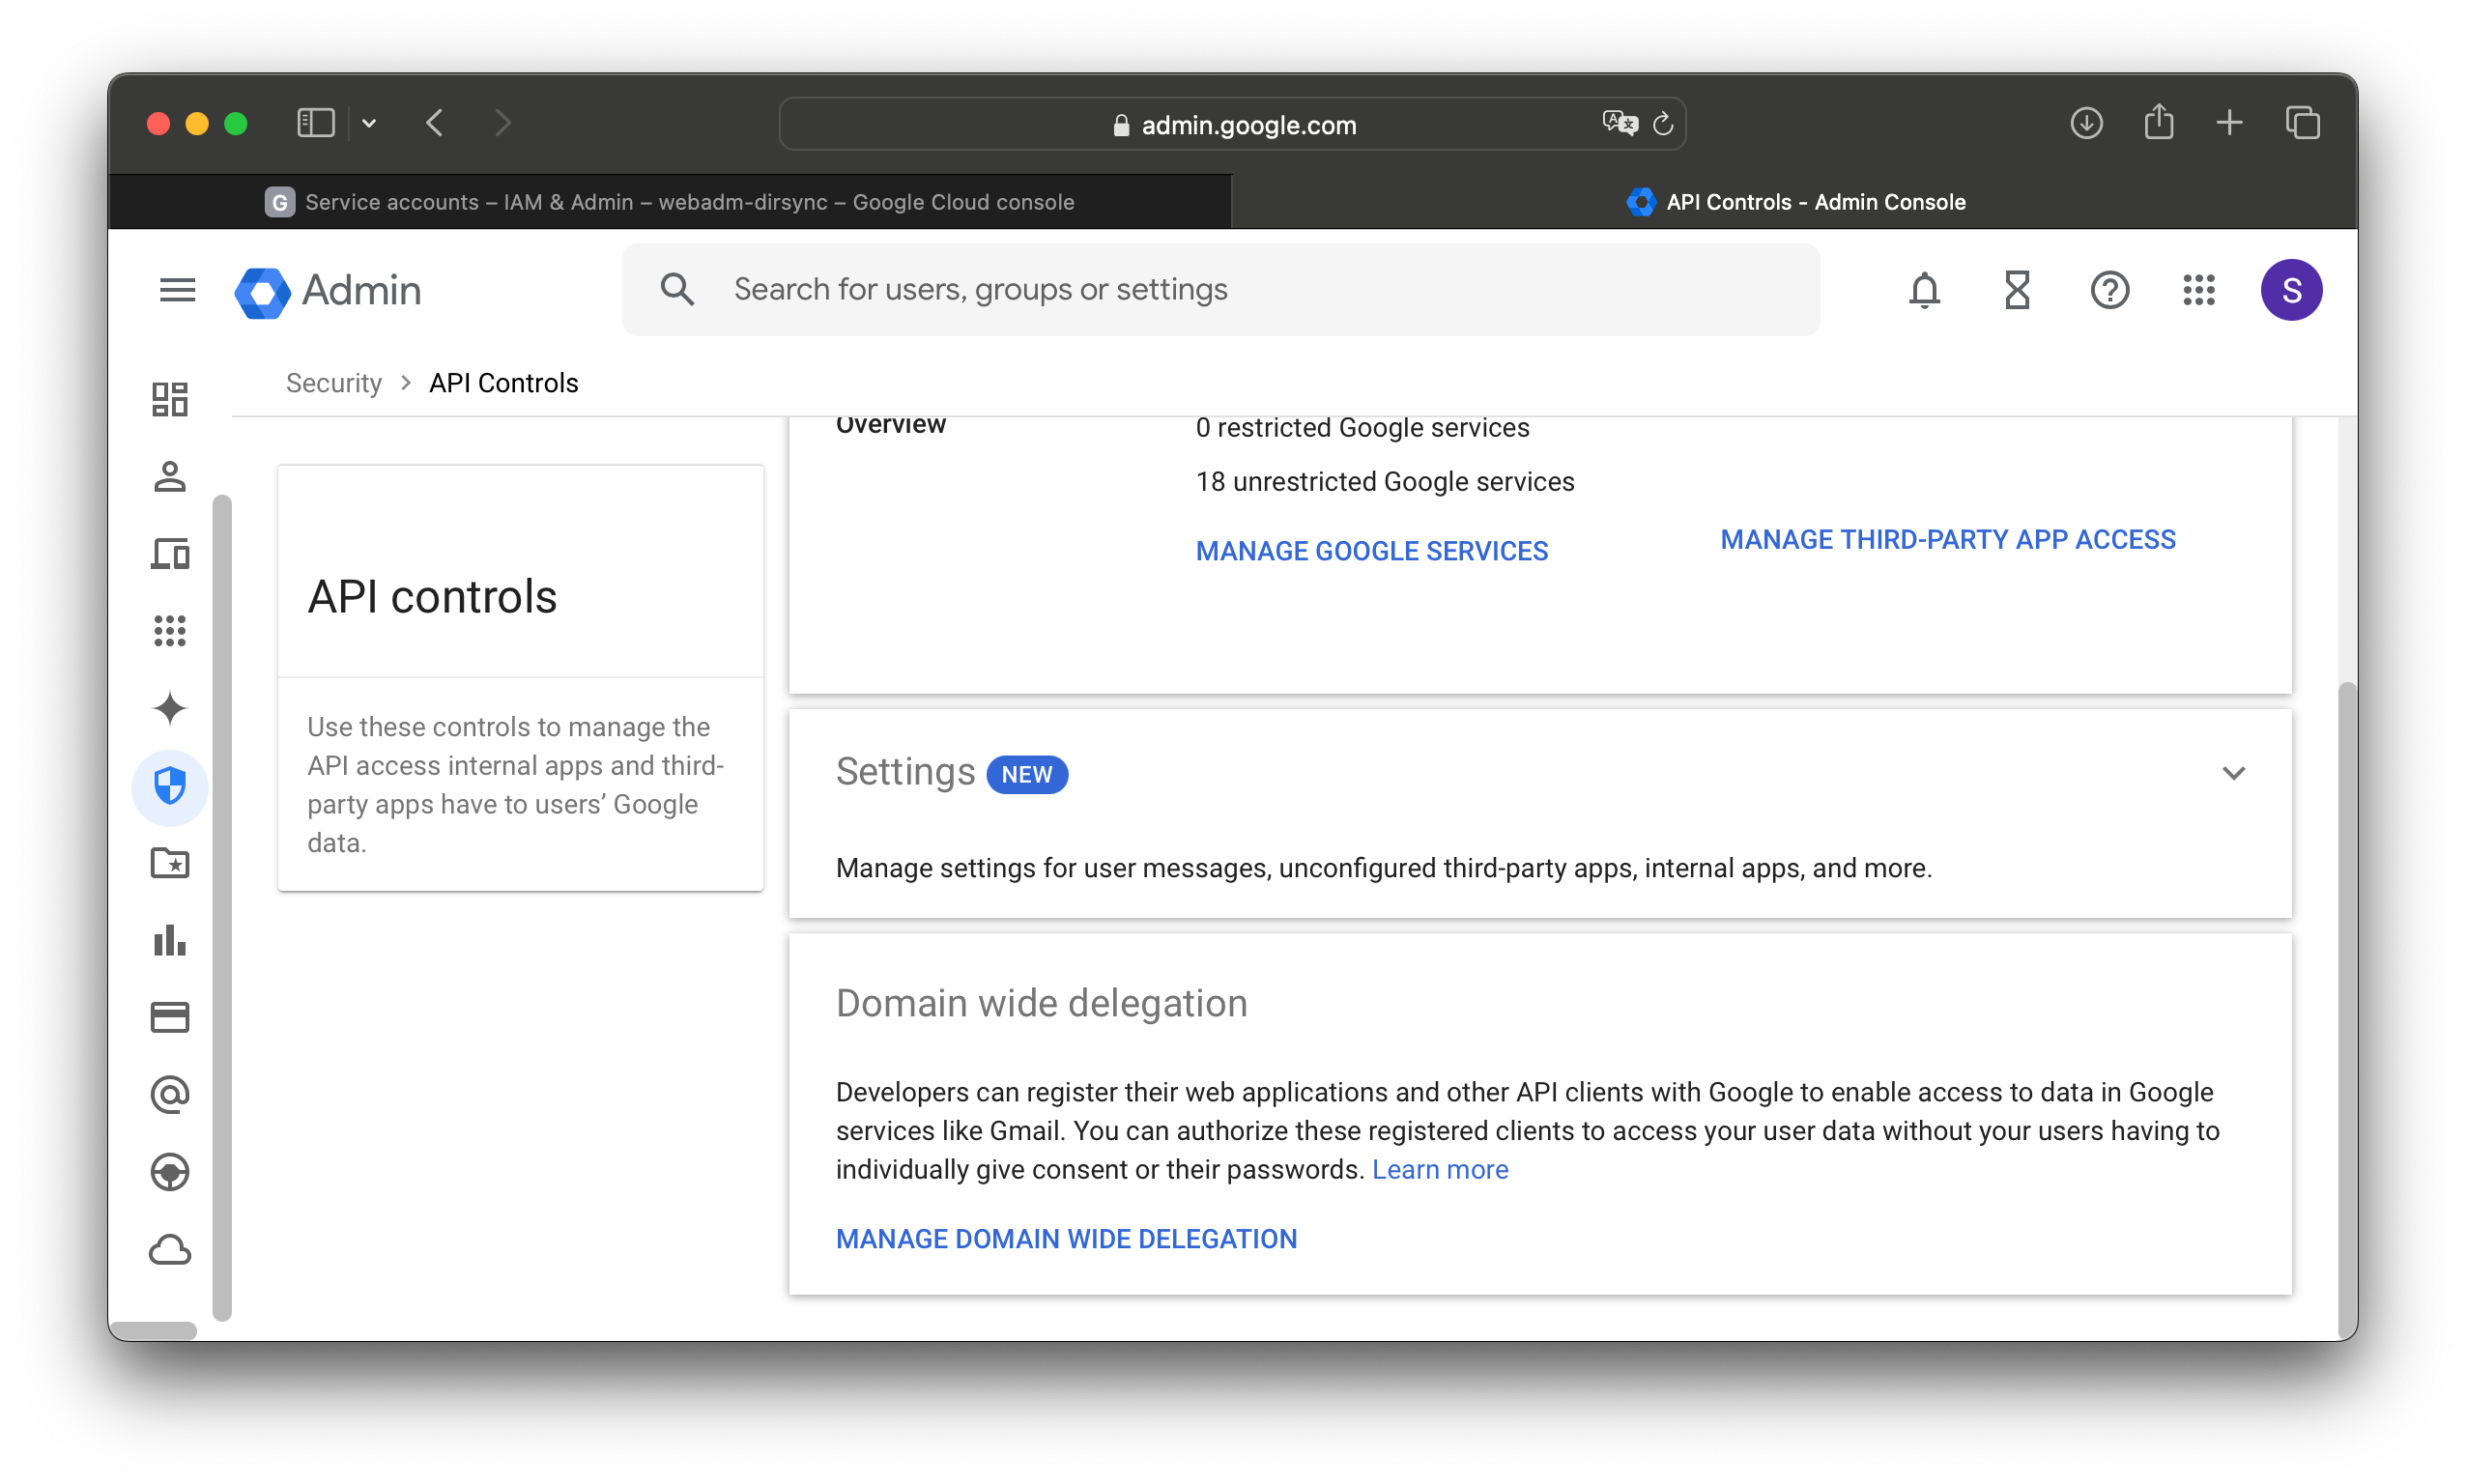
In a new browser tab, go to https://admin.google.com. Click the menu icon in the top left corner (the three horizontal bars), then click on Security, followed by Access and data control, and then API controls.
Scroll down and click on MANAGE DOMAIN-WIDE DELEGATION.
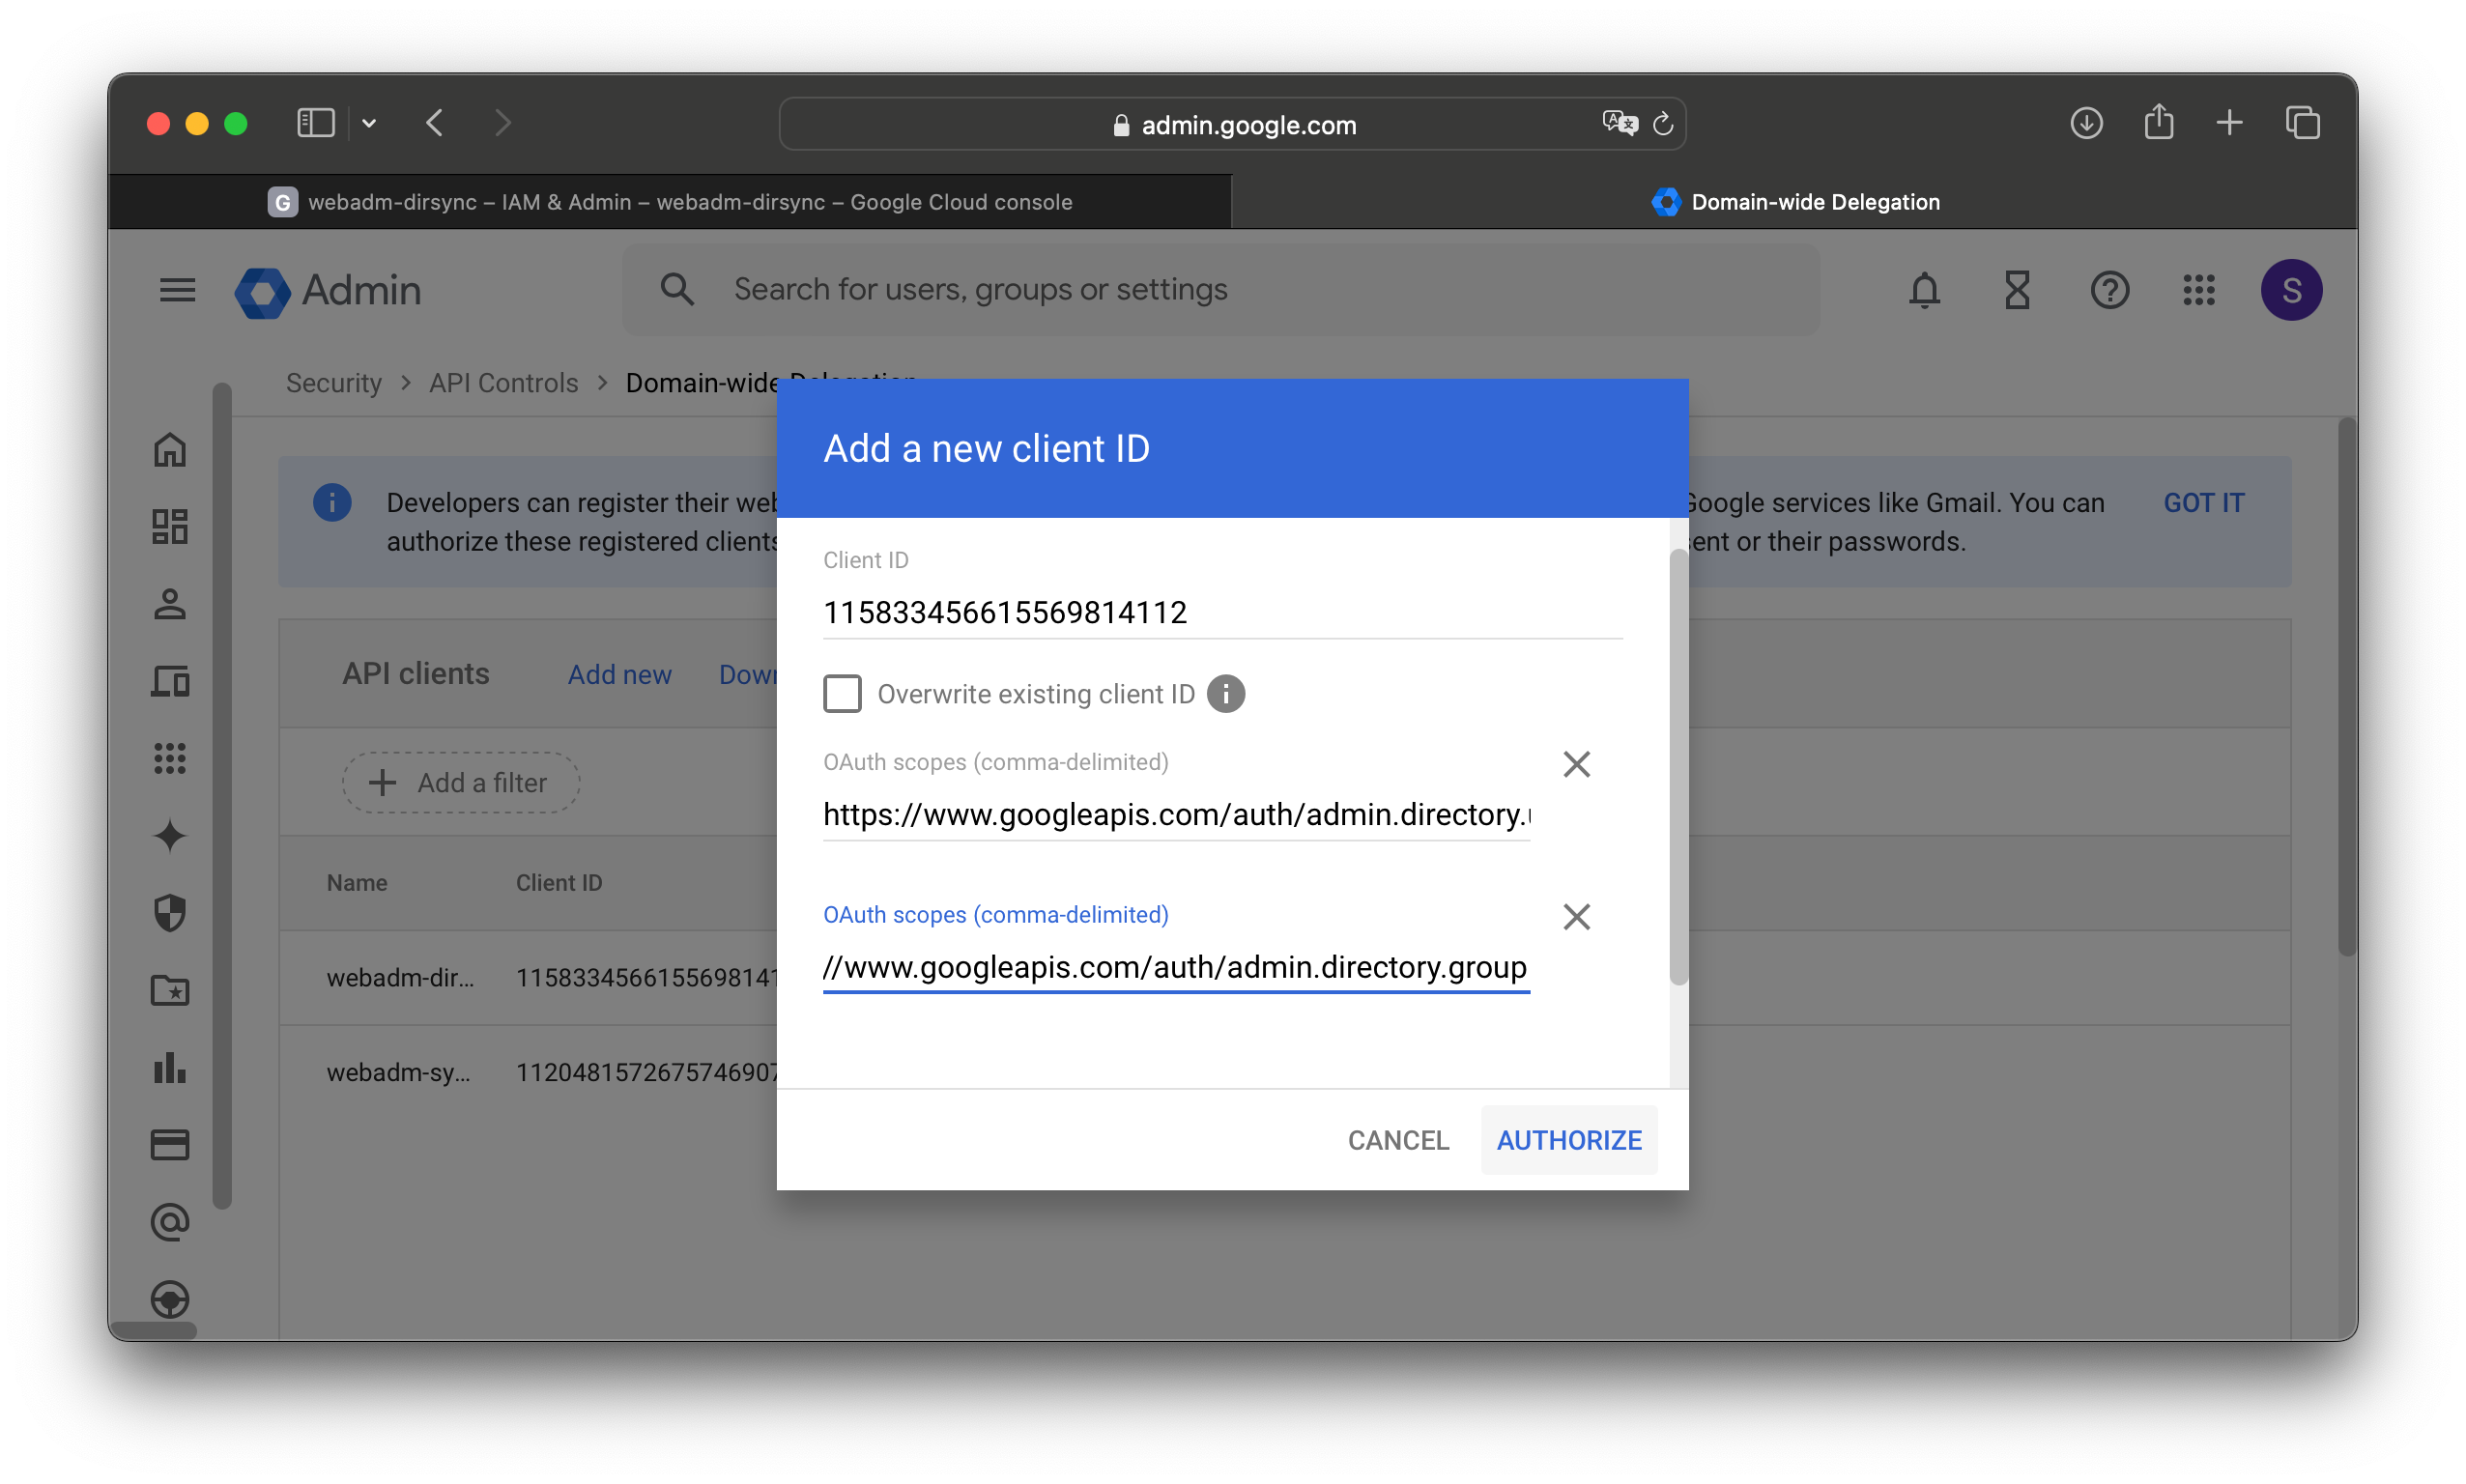
Click on Add New.
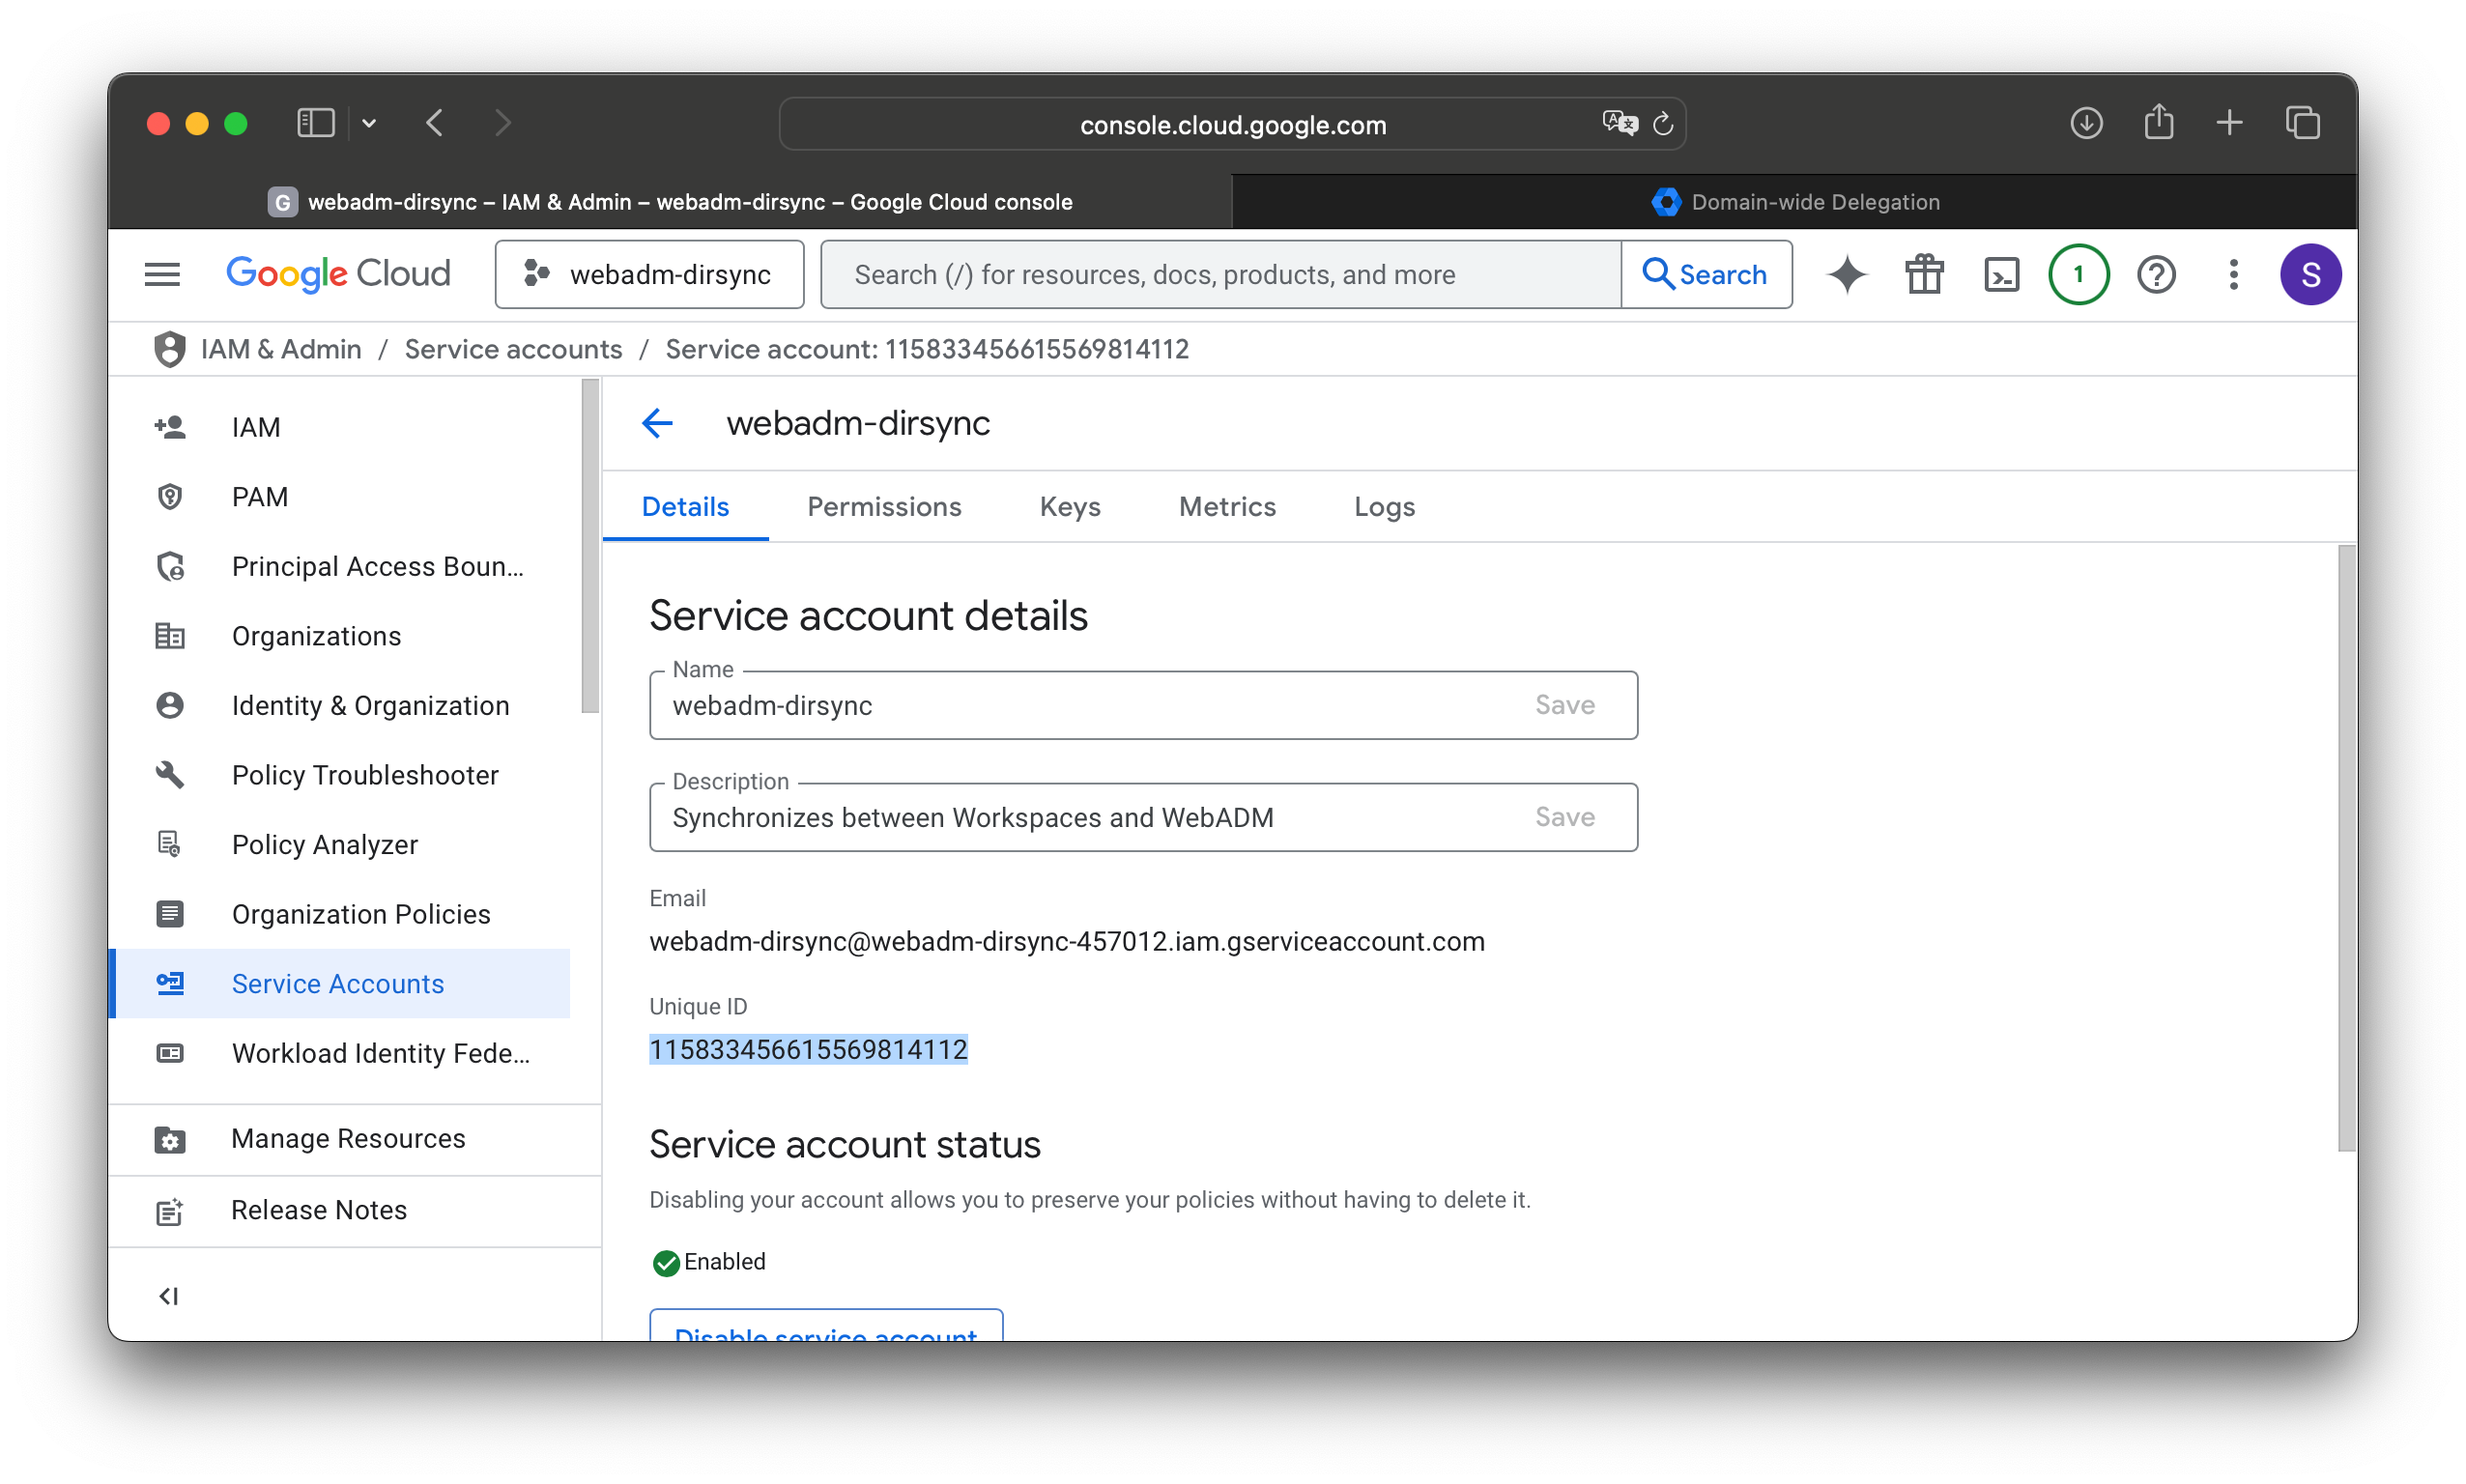
In your previous tab (the Cloud Console), go to IAM & Admin -> Service Accounts, click on the service account name (e.g., webadm-dirsync-457012), and copy its Unique ID to the clipboard.
Back in the Workspaces admin page, while still creating the domain-wide delegation, paste the Unique ID in the Client ID field. Then, add the following scopes:
- https://www.googleapis.com/auth/admin.directory.user
- https://www.googleapis.com/auth/admin.directory.group
A new scope field will appear after you paste the first one; click on it and paste the second. Finally, click AUTHORIZE.
Service account key creation & WebADM configuration
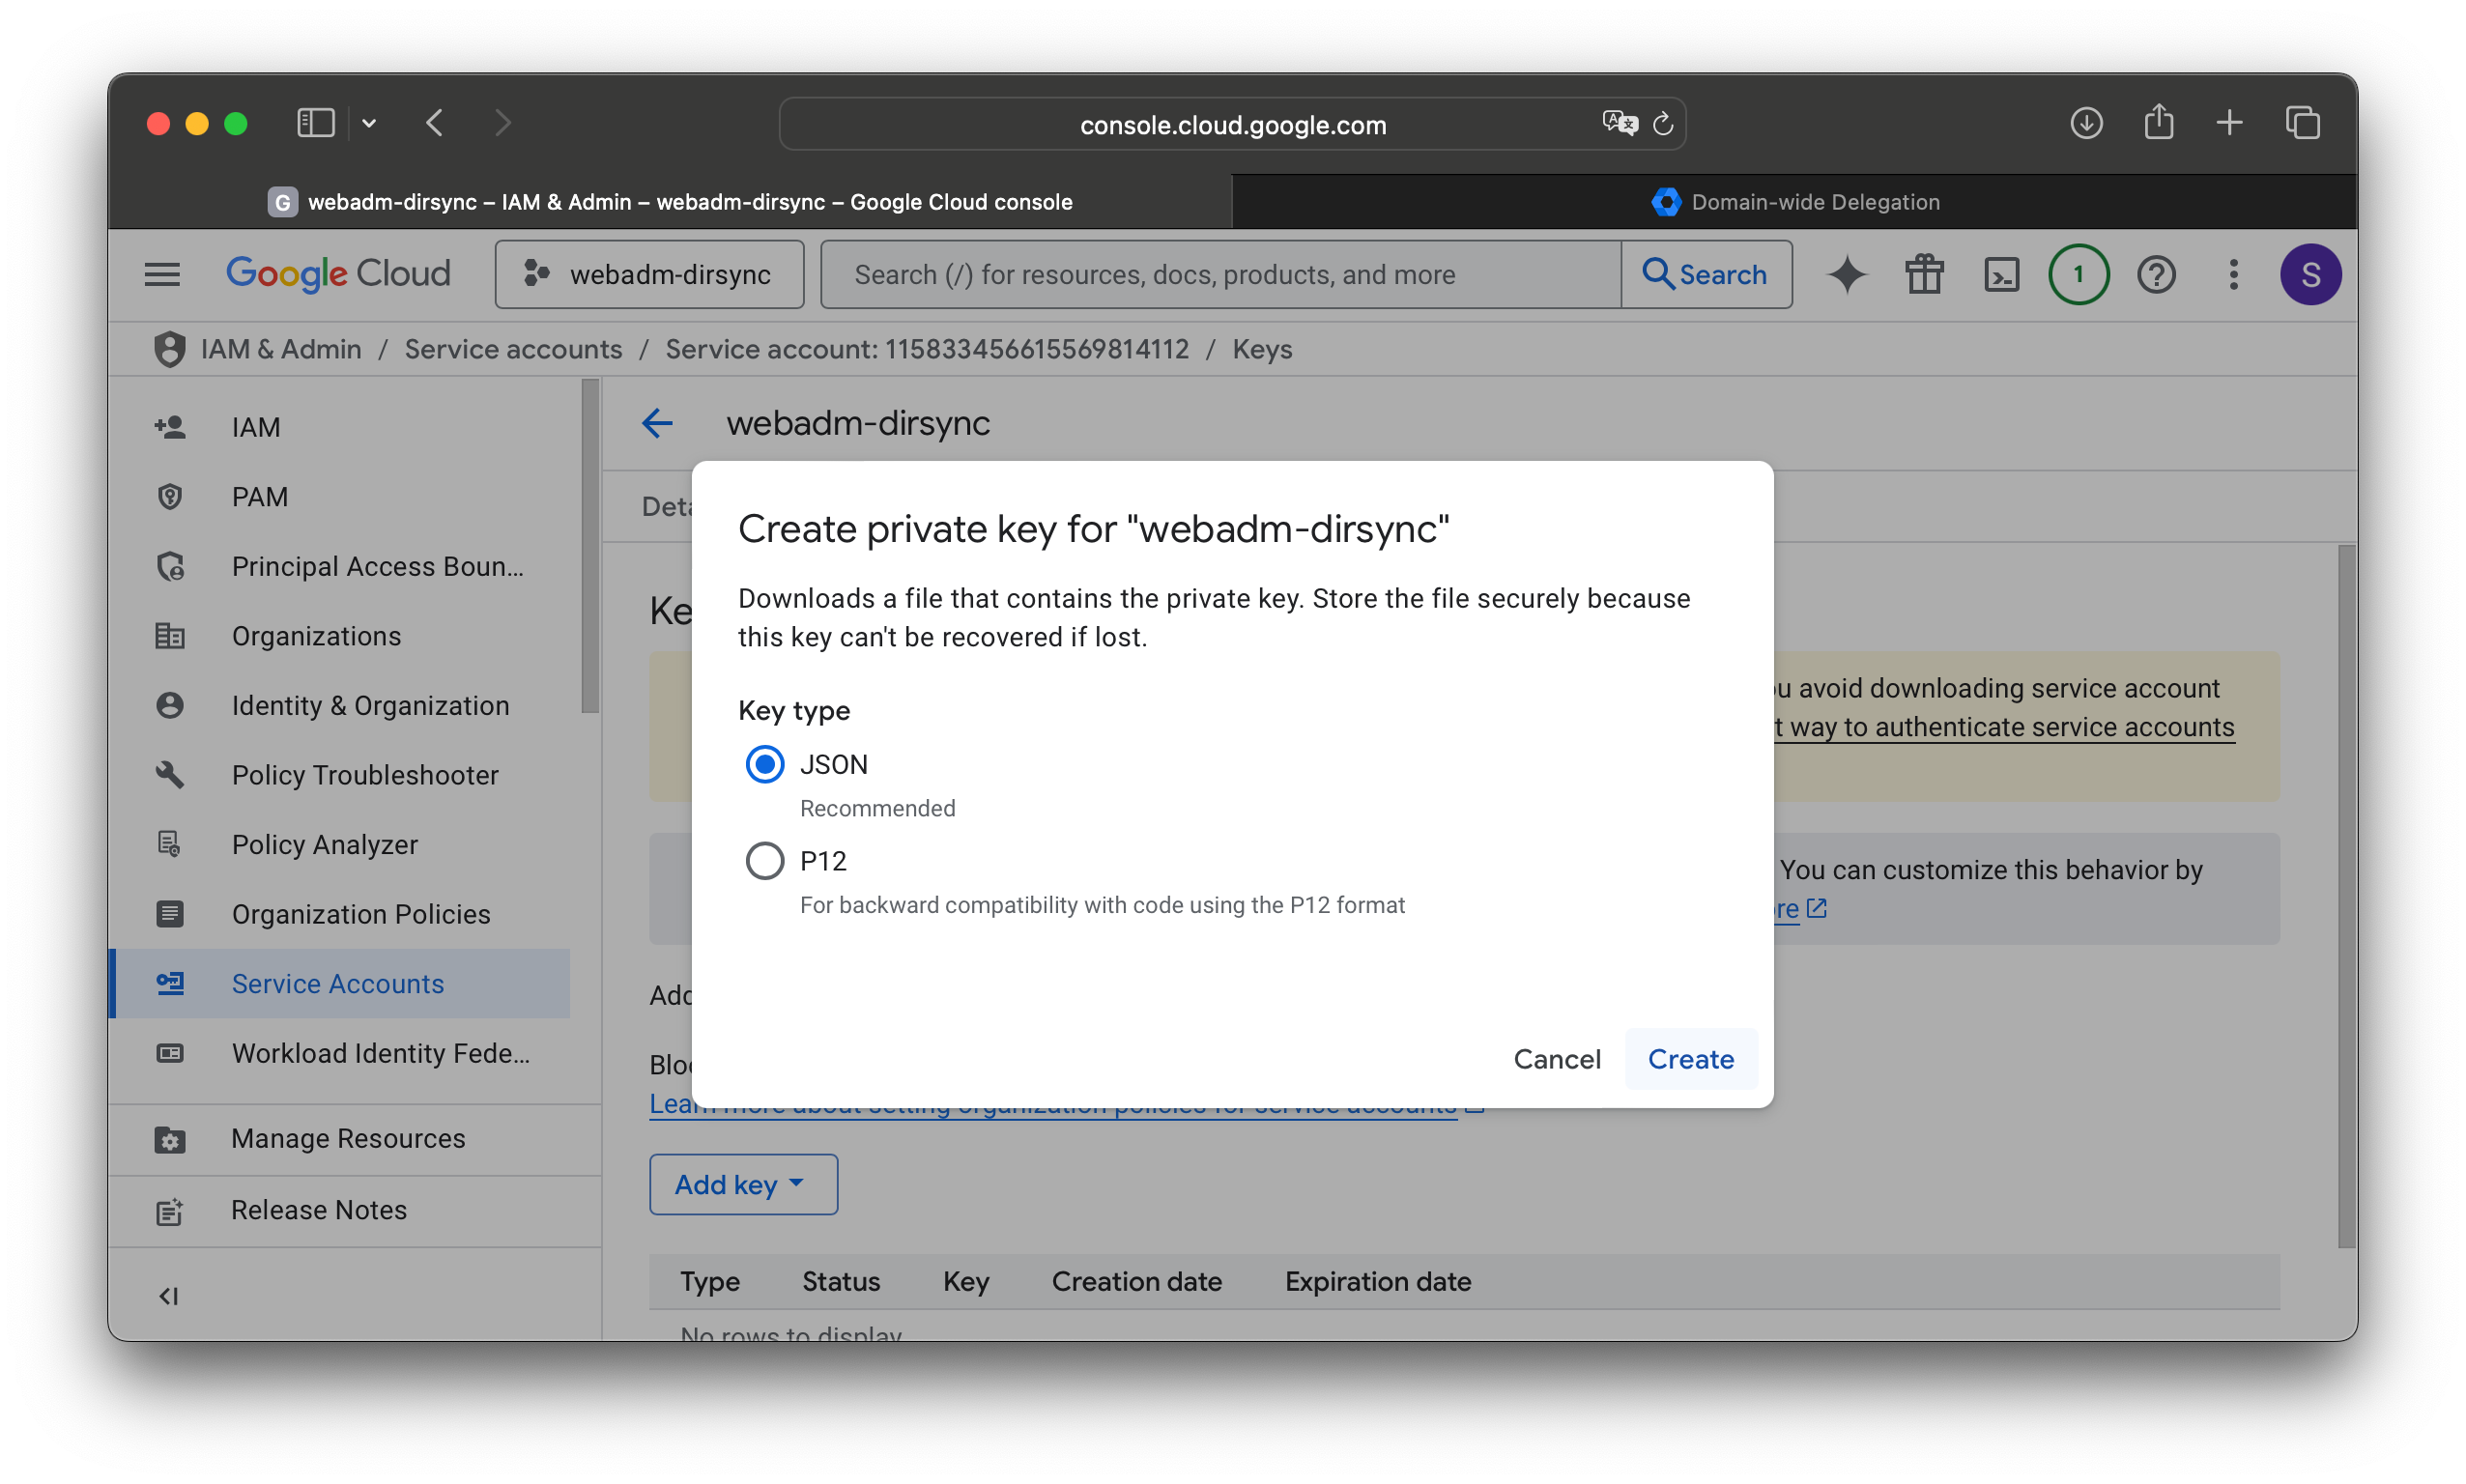
In the Cloud Console, while still viewing the service account, click on the Keys tab, then click Add Key, and select Create New Key.

Leave the selection set to JSON and click Create. Then, click Close on the dialog box that informs you the key has been downloaded to your computer.
At this point, if you encounter an error stating that you cannot create a key due to an organization policy restricting this action on service accounts, follow the instructions in the next section, Organization Policy Tuning. Once you've made the necessary adjustments, return here and attempt to create a new JSON key again.
Next, log in to the admin interface of one of your WebADM instances, select the Admin tab, click User Domains, and then click Add Domain.
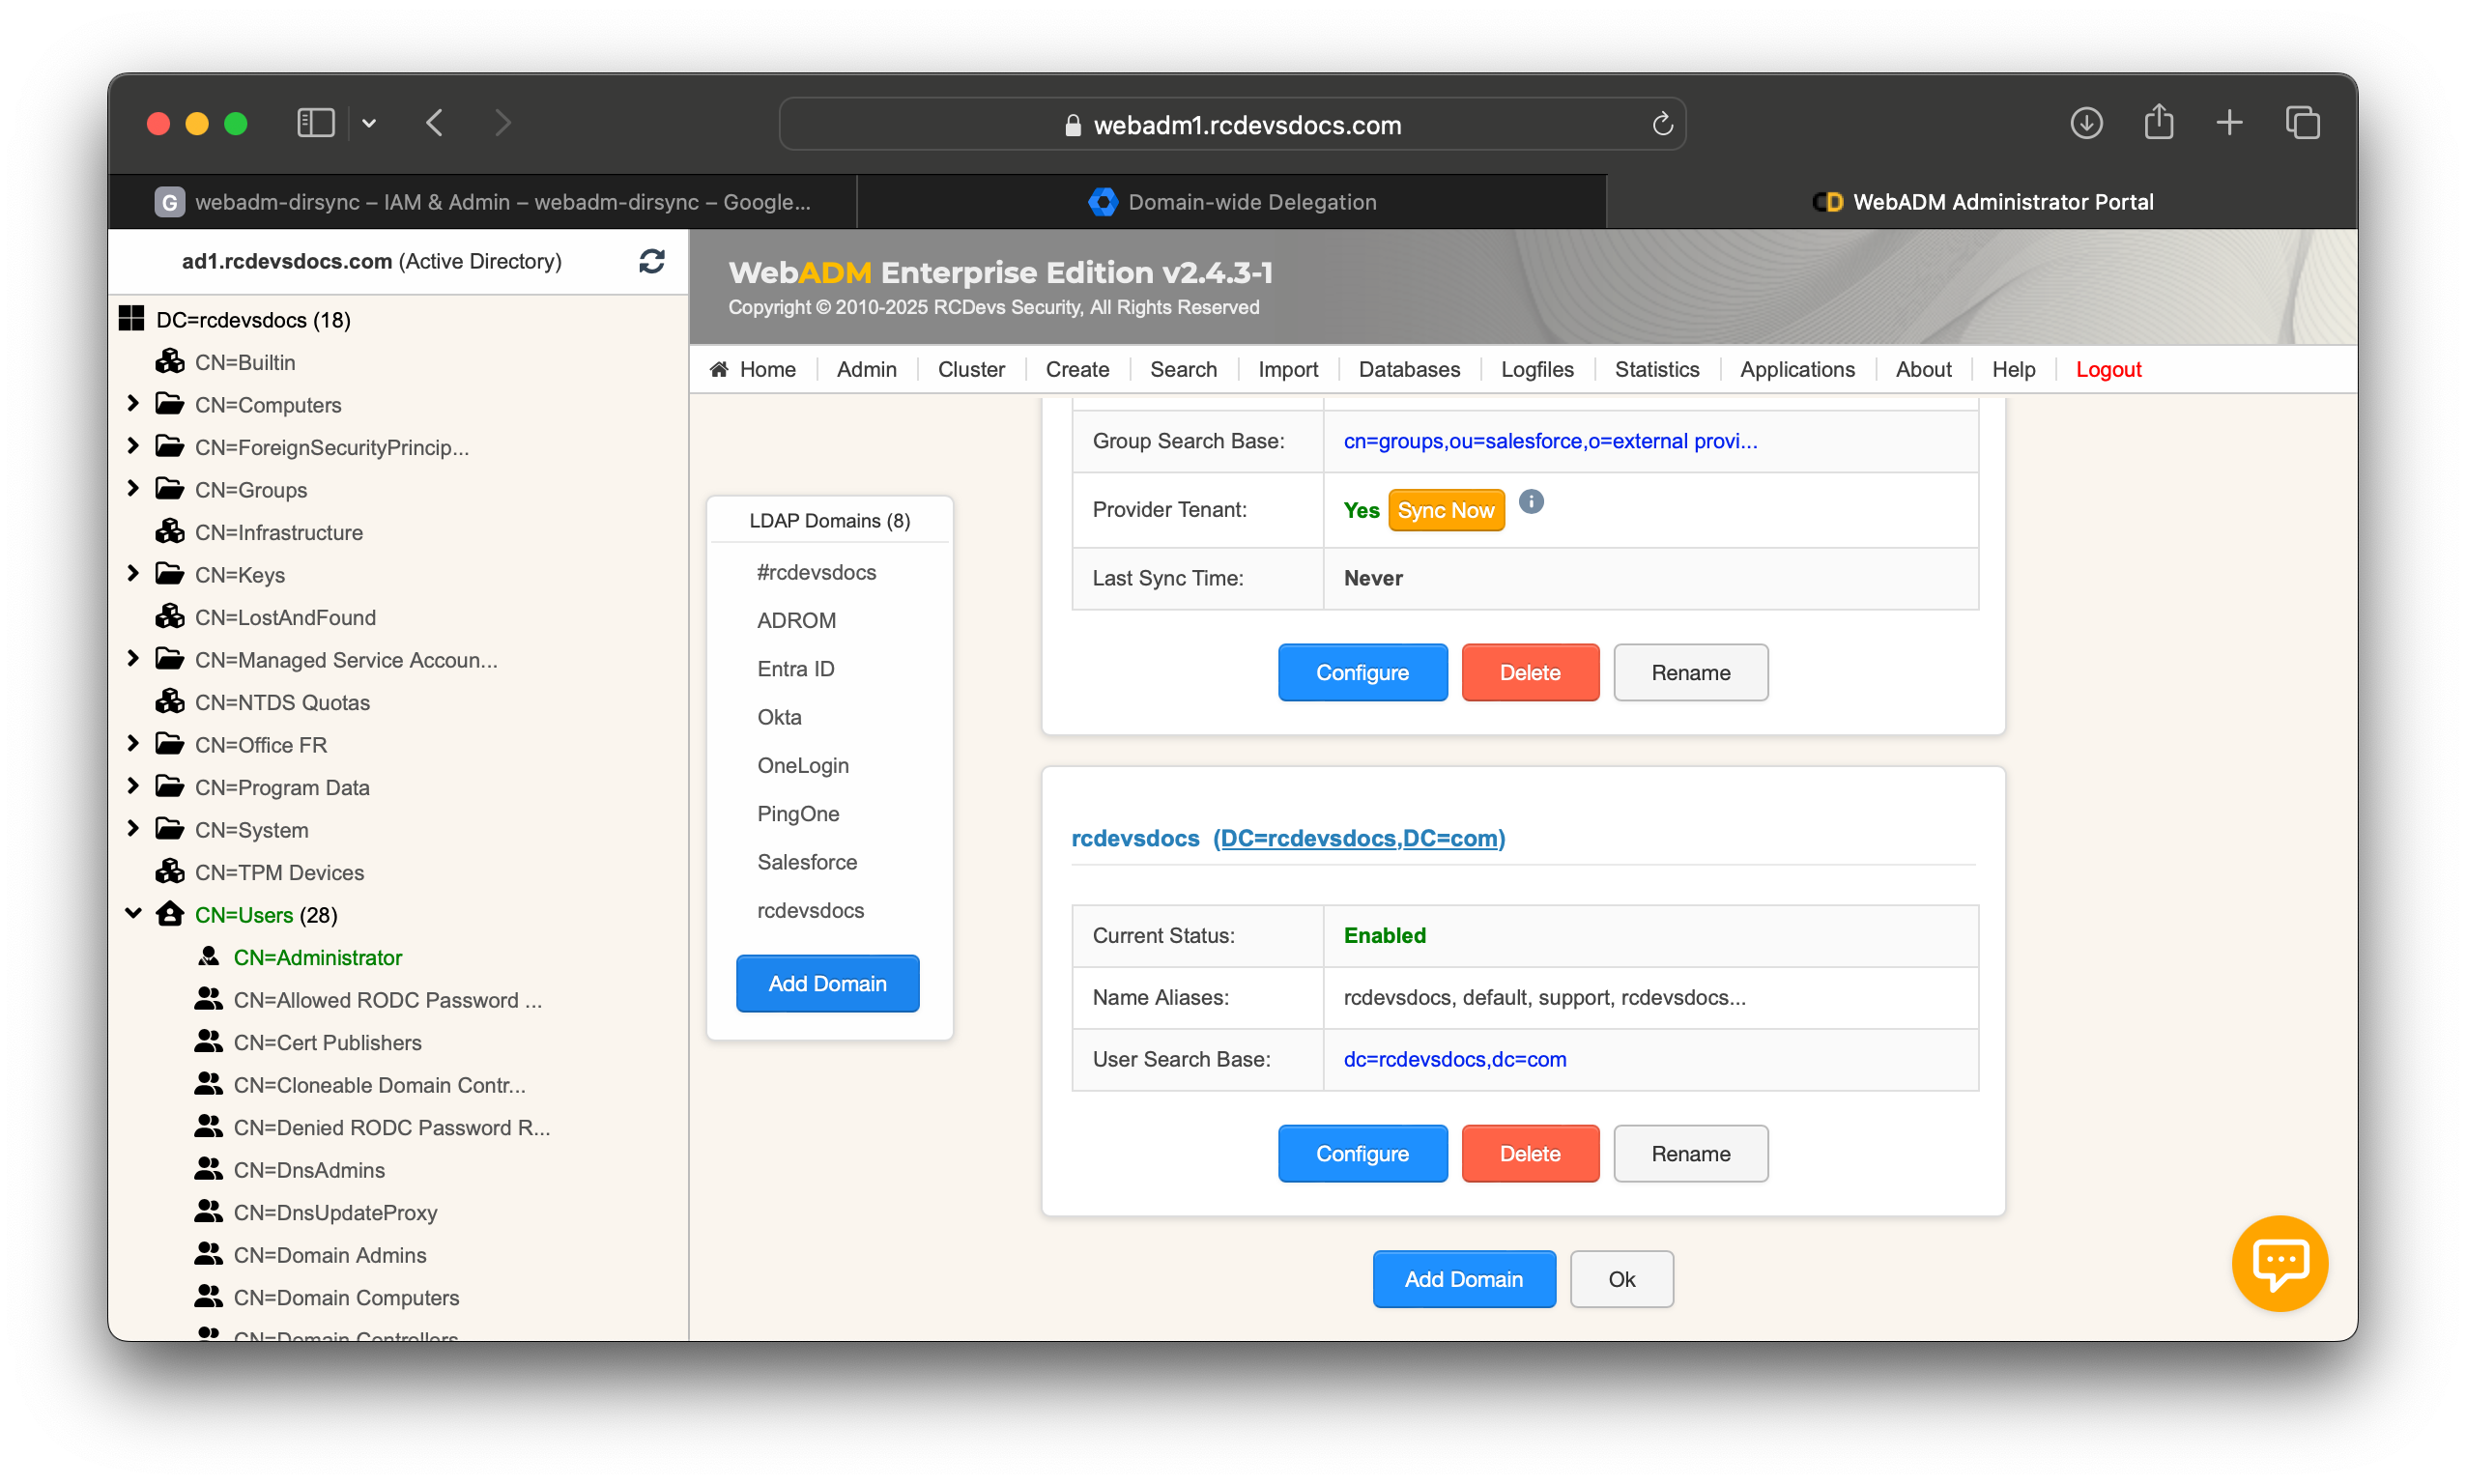
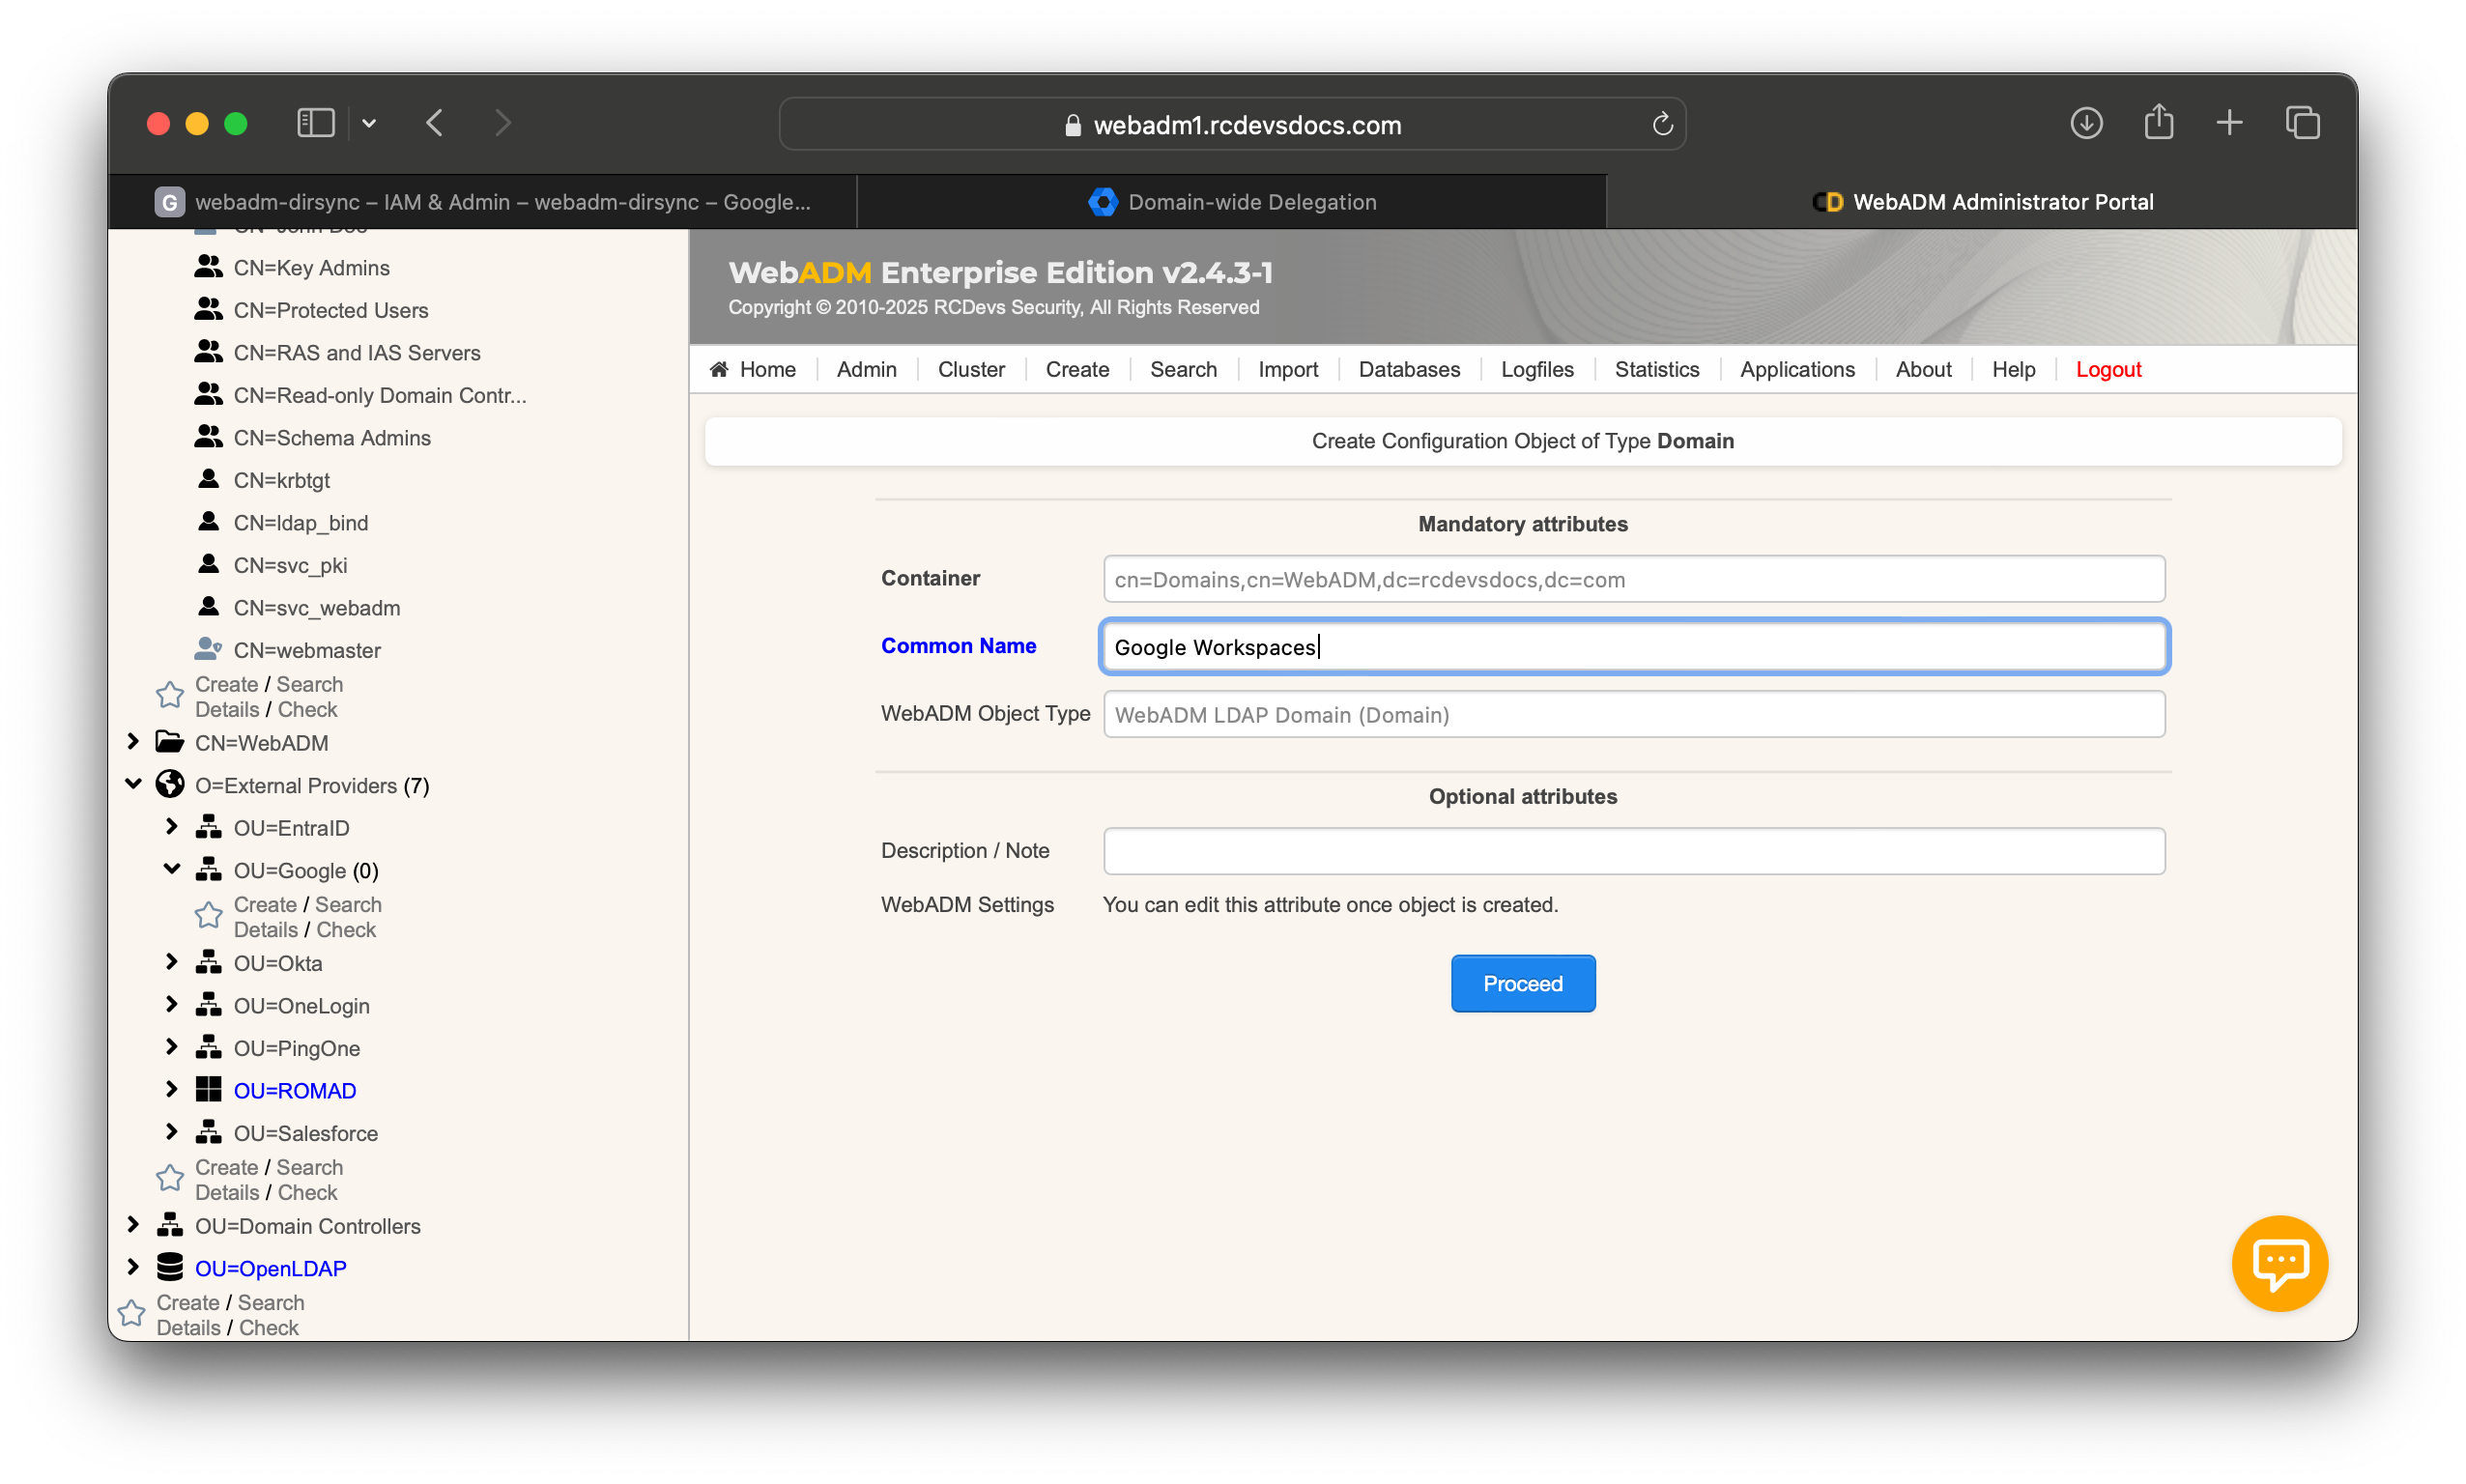
Give the new WebADM user domain a name, such as Google Workspaces, and click Proceed.
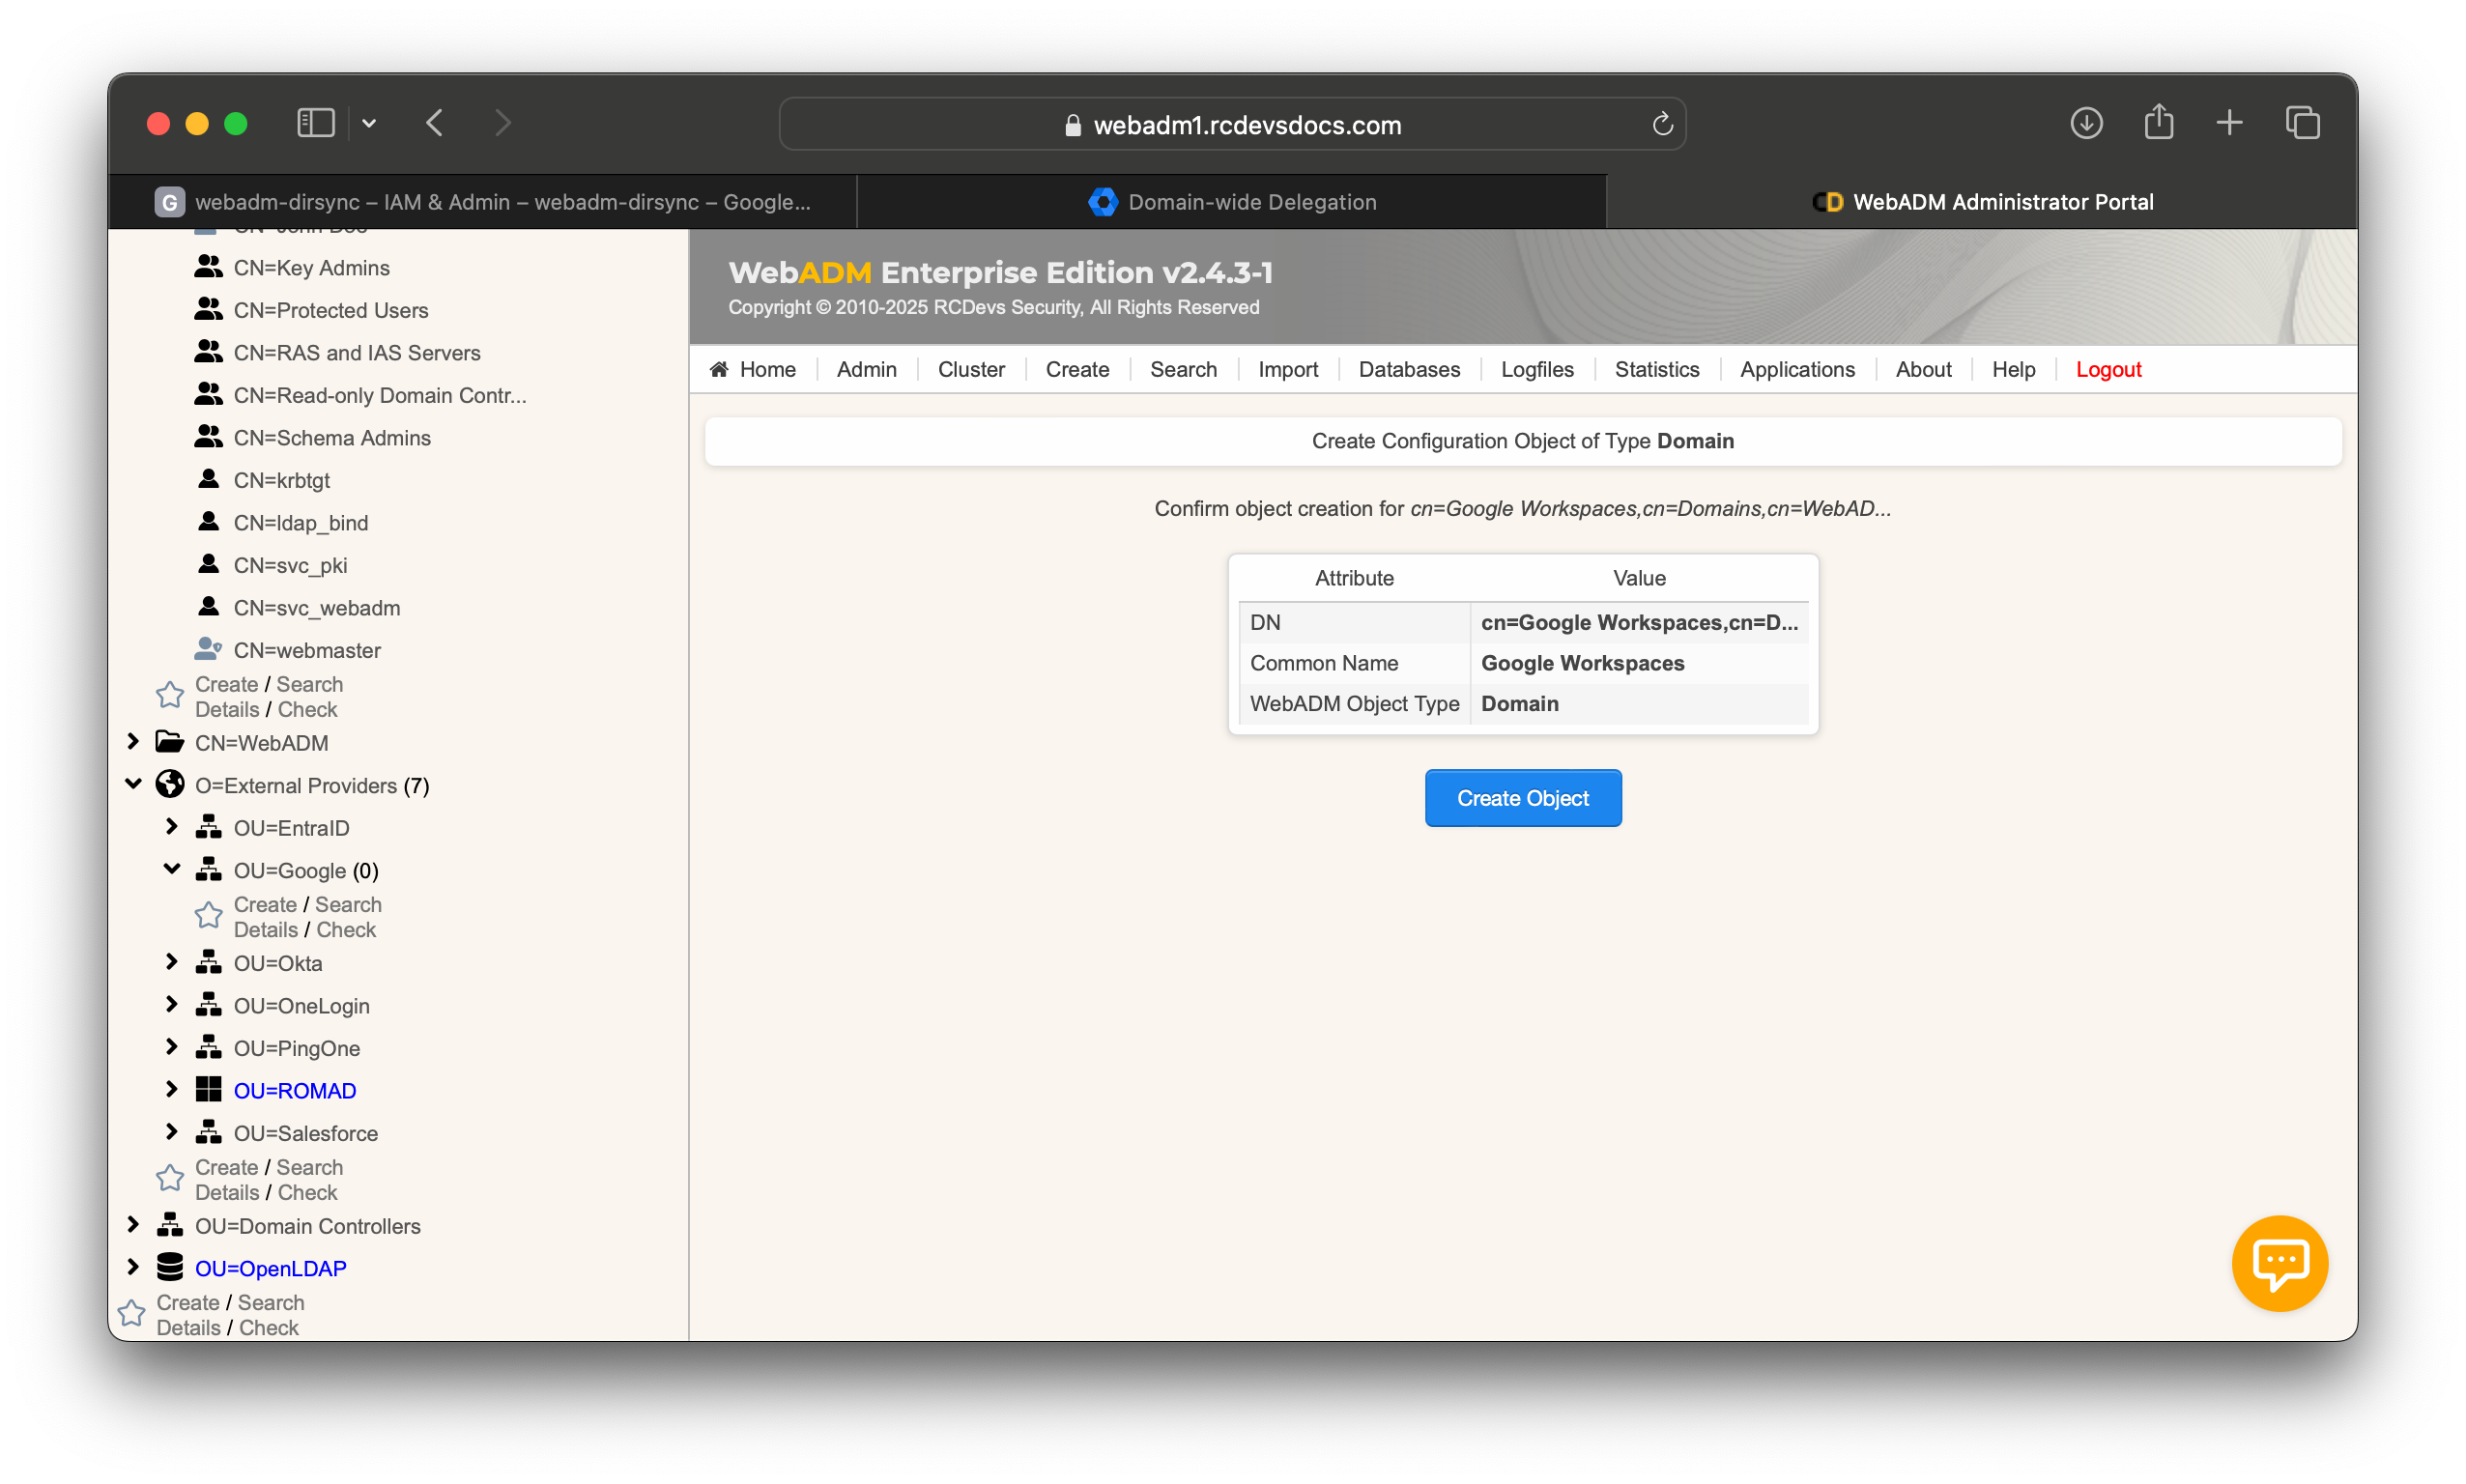
Then, click Create Object.
Click "Select" next to "User Search Base", then click on an empty container in the left pane (e.g., OU=Google, O=External Providers, DC=rcdevsdocs, DC=com).
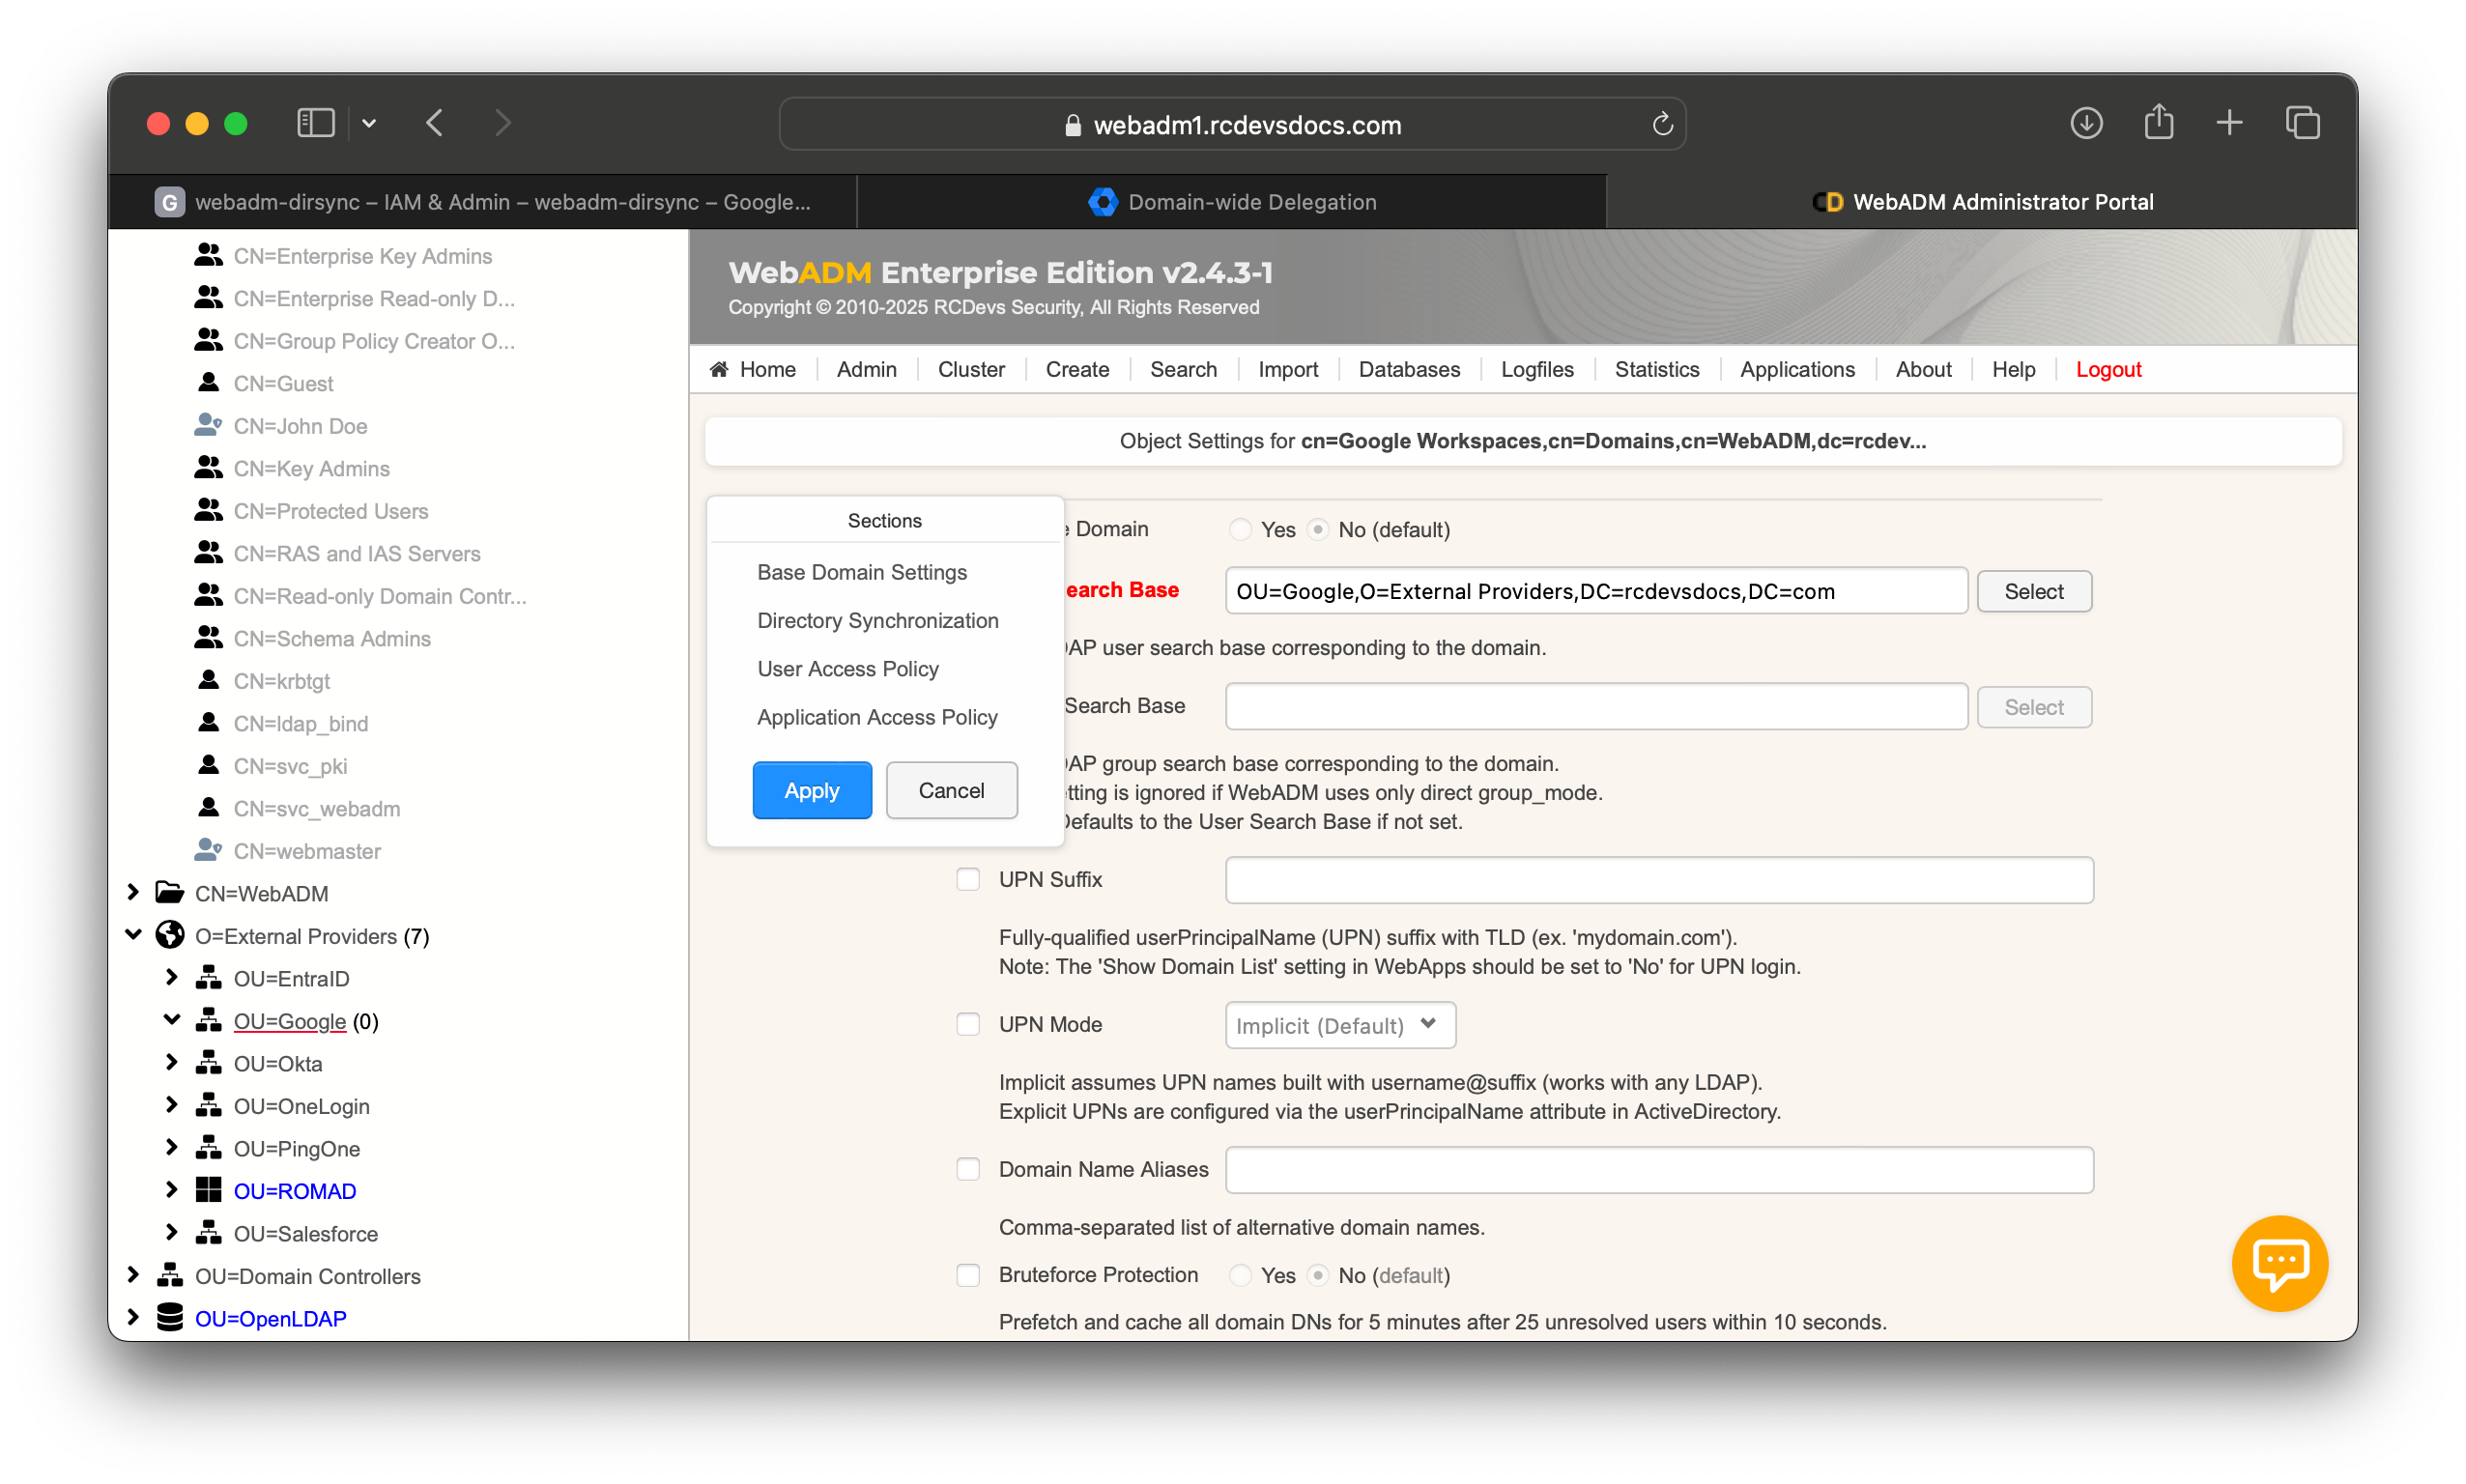
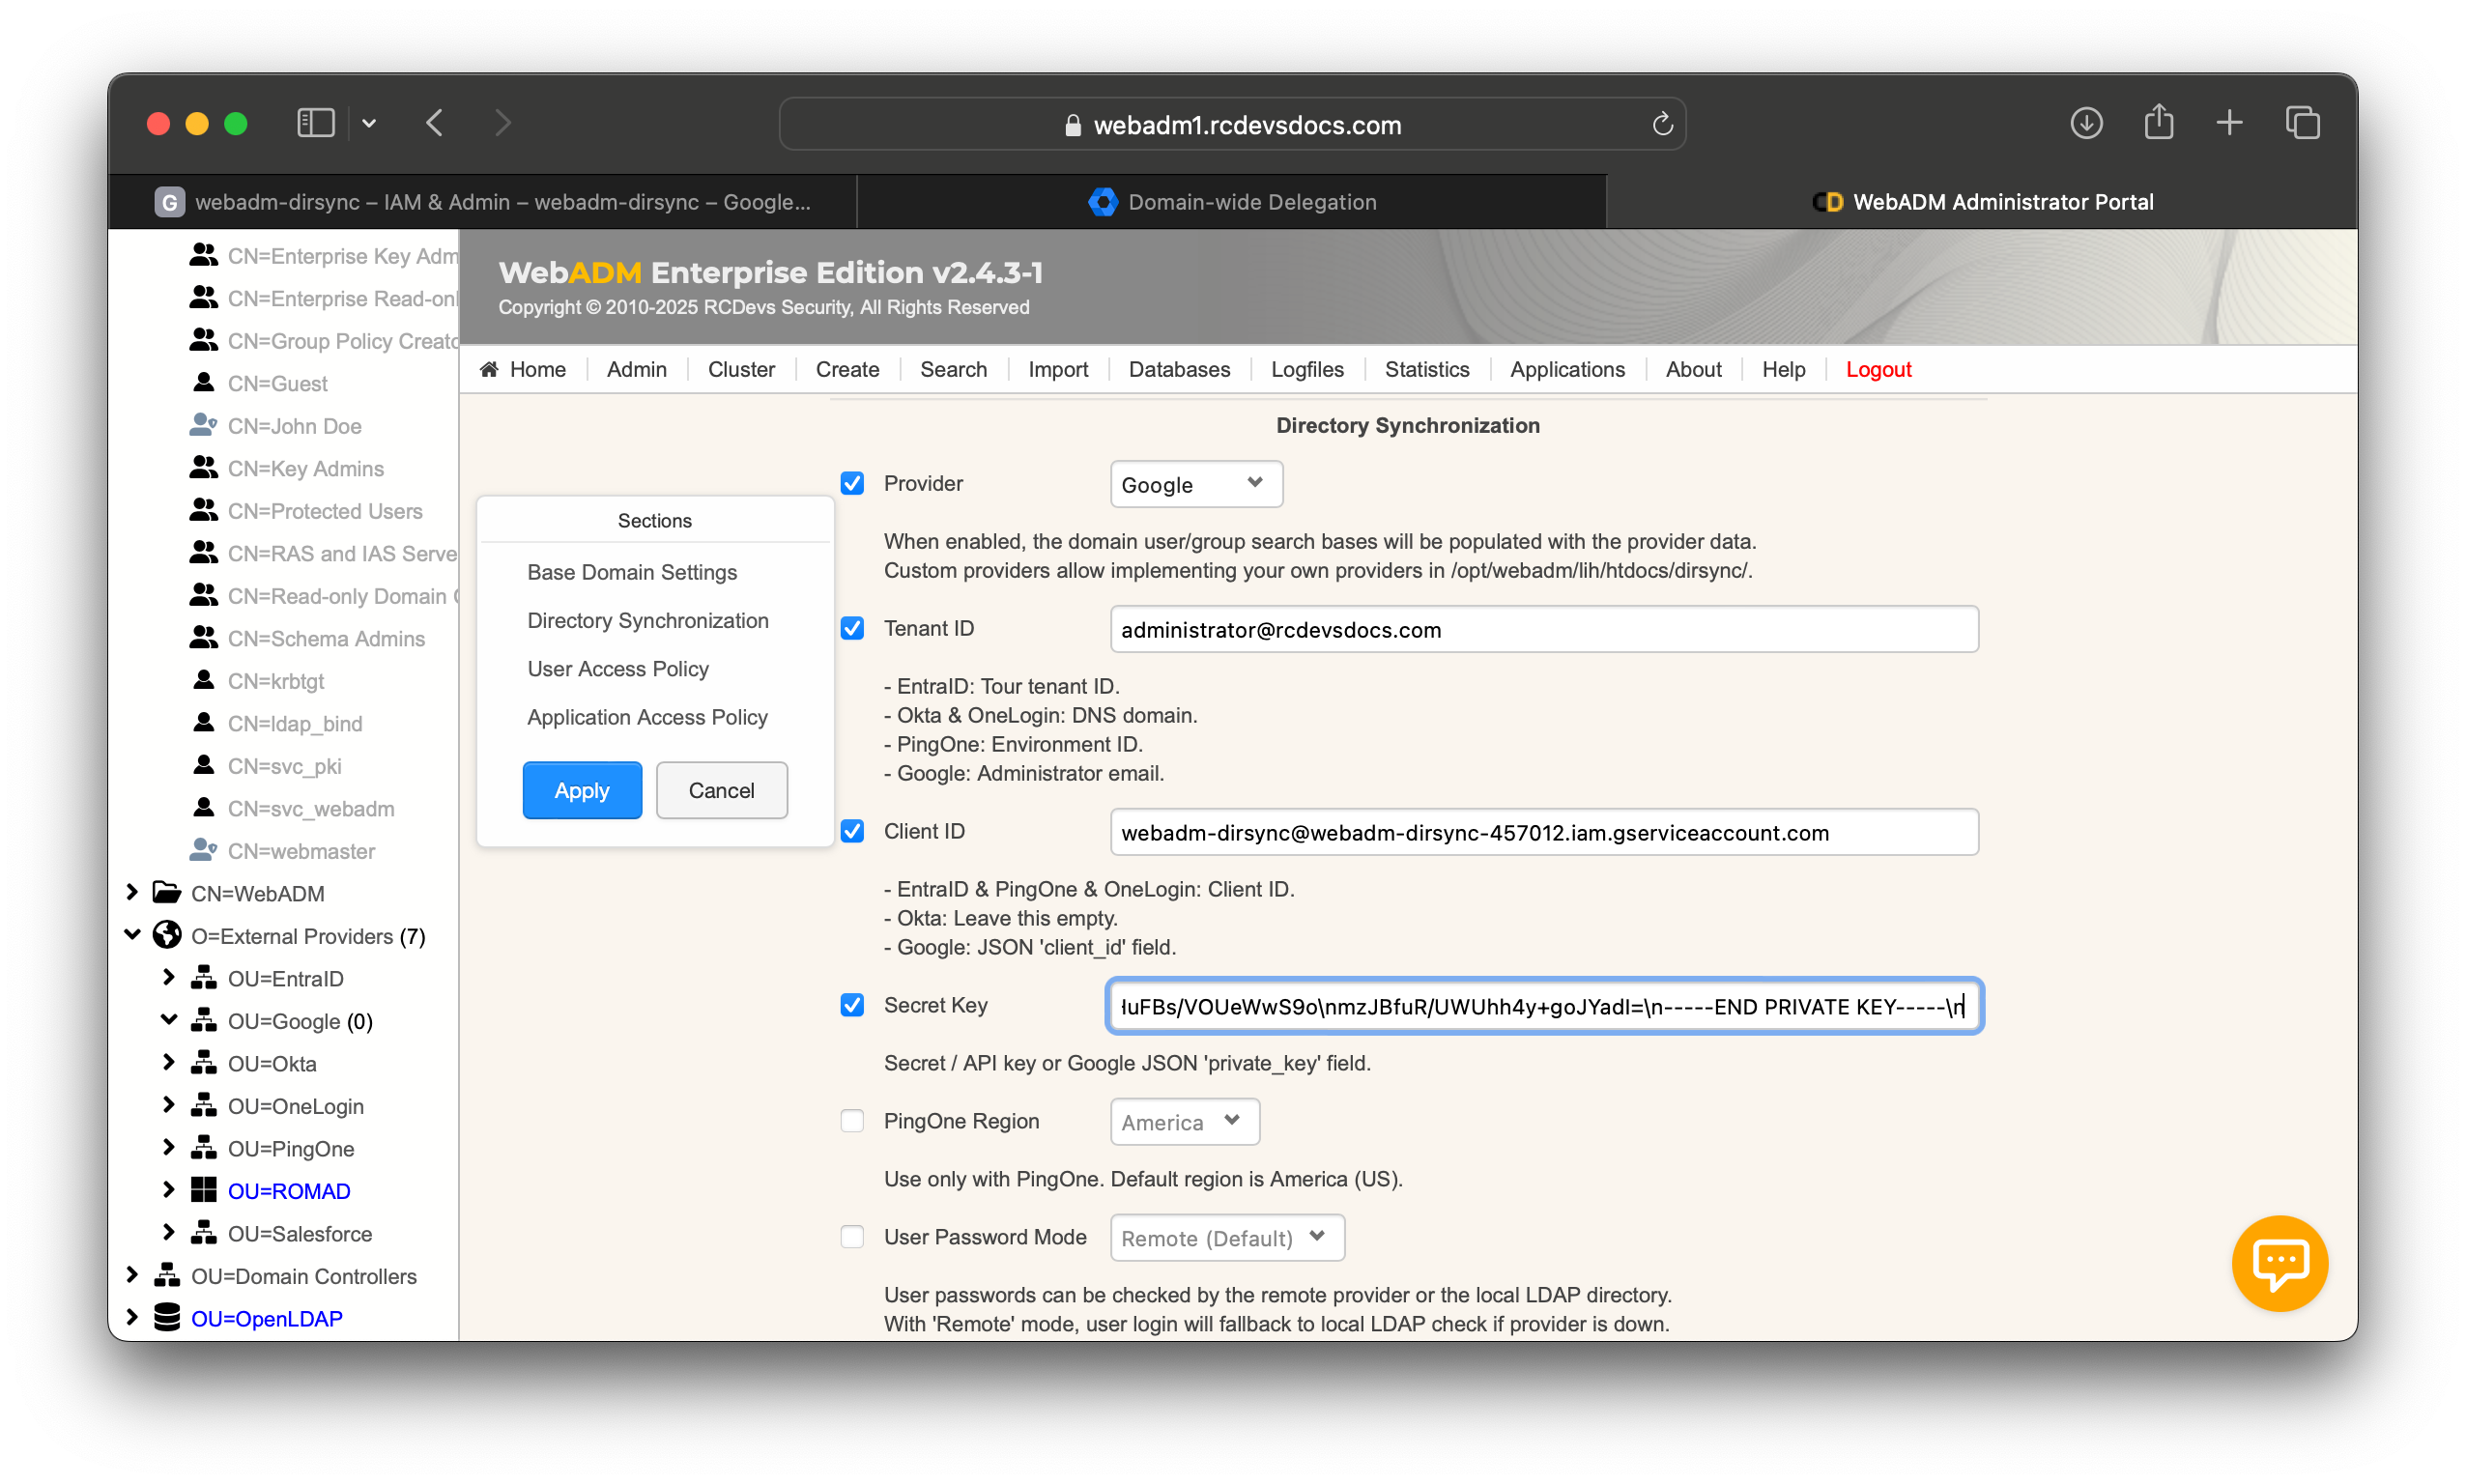
Scroll down to the "Directory Synchronization" section. Select the provider "Google", set the Tenant ID to your Workspaces administrator email (likely the account you used to follow the earlier instructions), and set the Client ID to your service account client ID or email (both can be found in the .json file you obtained when creating the service account key, under the client_id and client_email fields, respectively).
Set the Secret Key to the contents of the private_key field in the .json file.
Ensure that the values are entered without their surrounding double quotes, and the secret key should be without its header and footer ("-----BEGIN PRIVATE KEY-----" and "-----END PRIVATE KEY-----").
Click "Apply" on the small menu or at the bottom of the page.
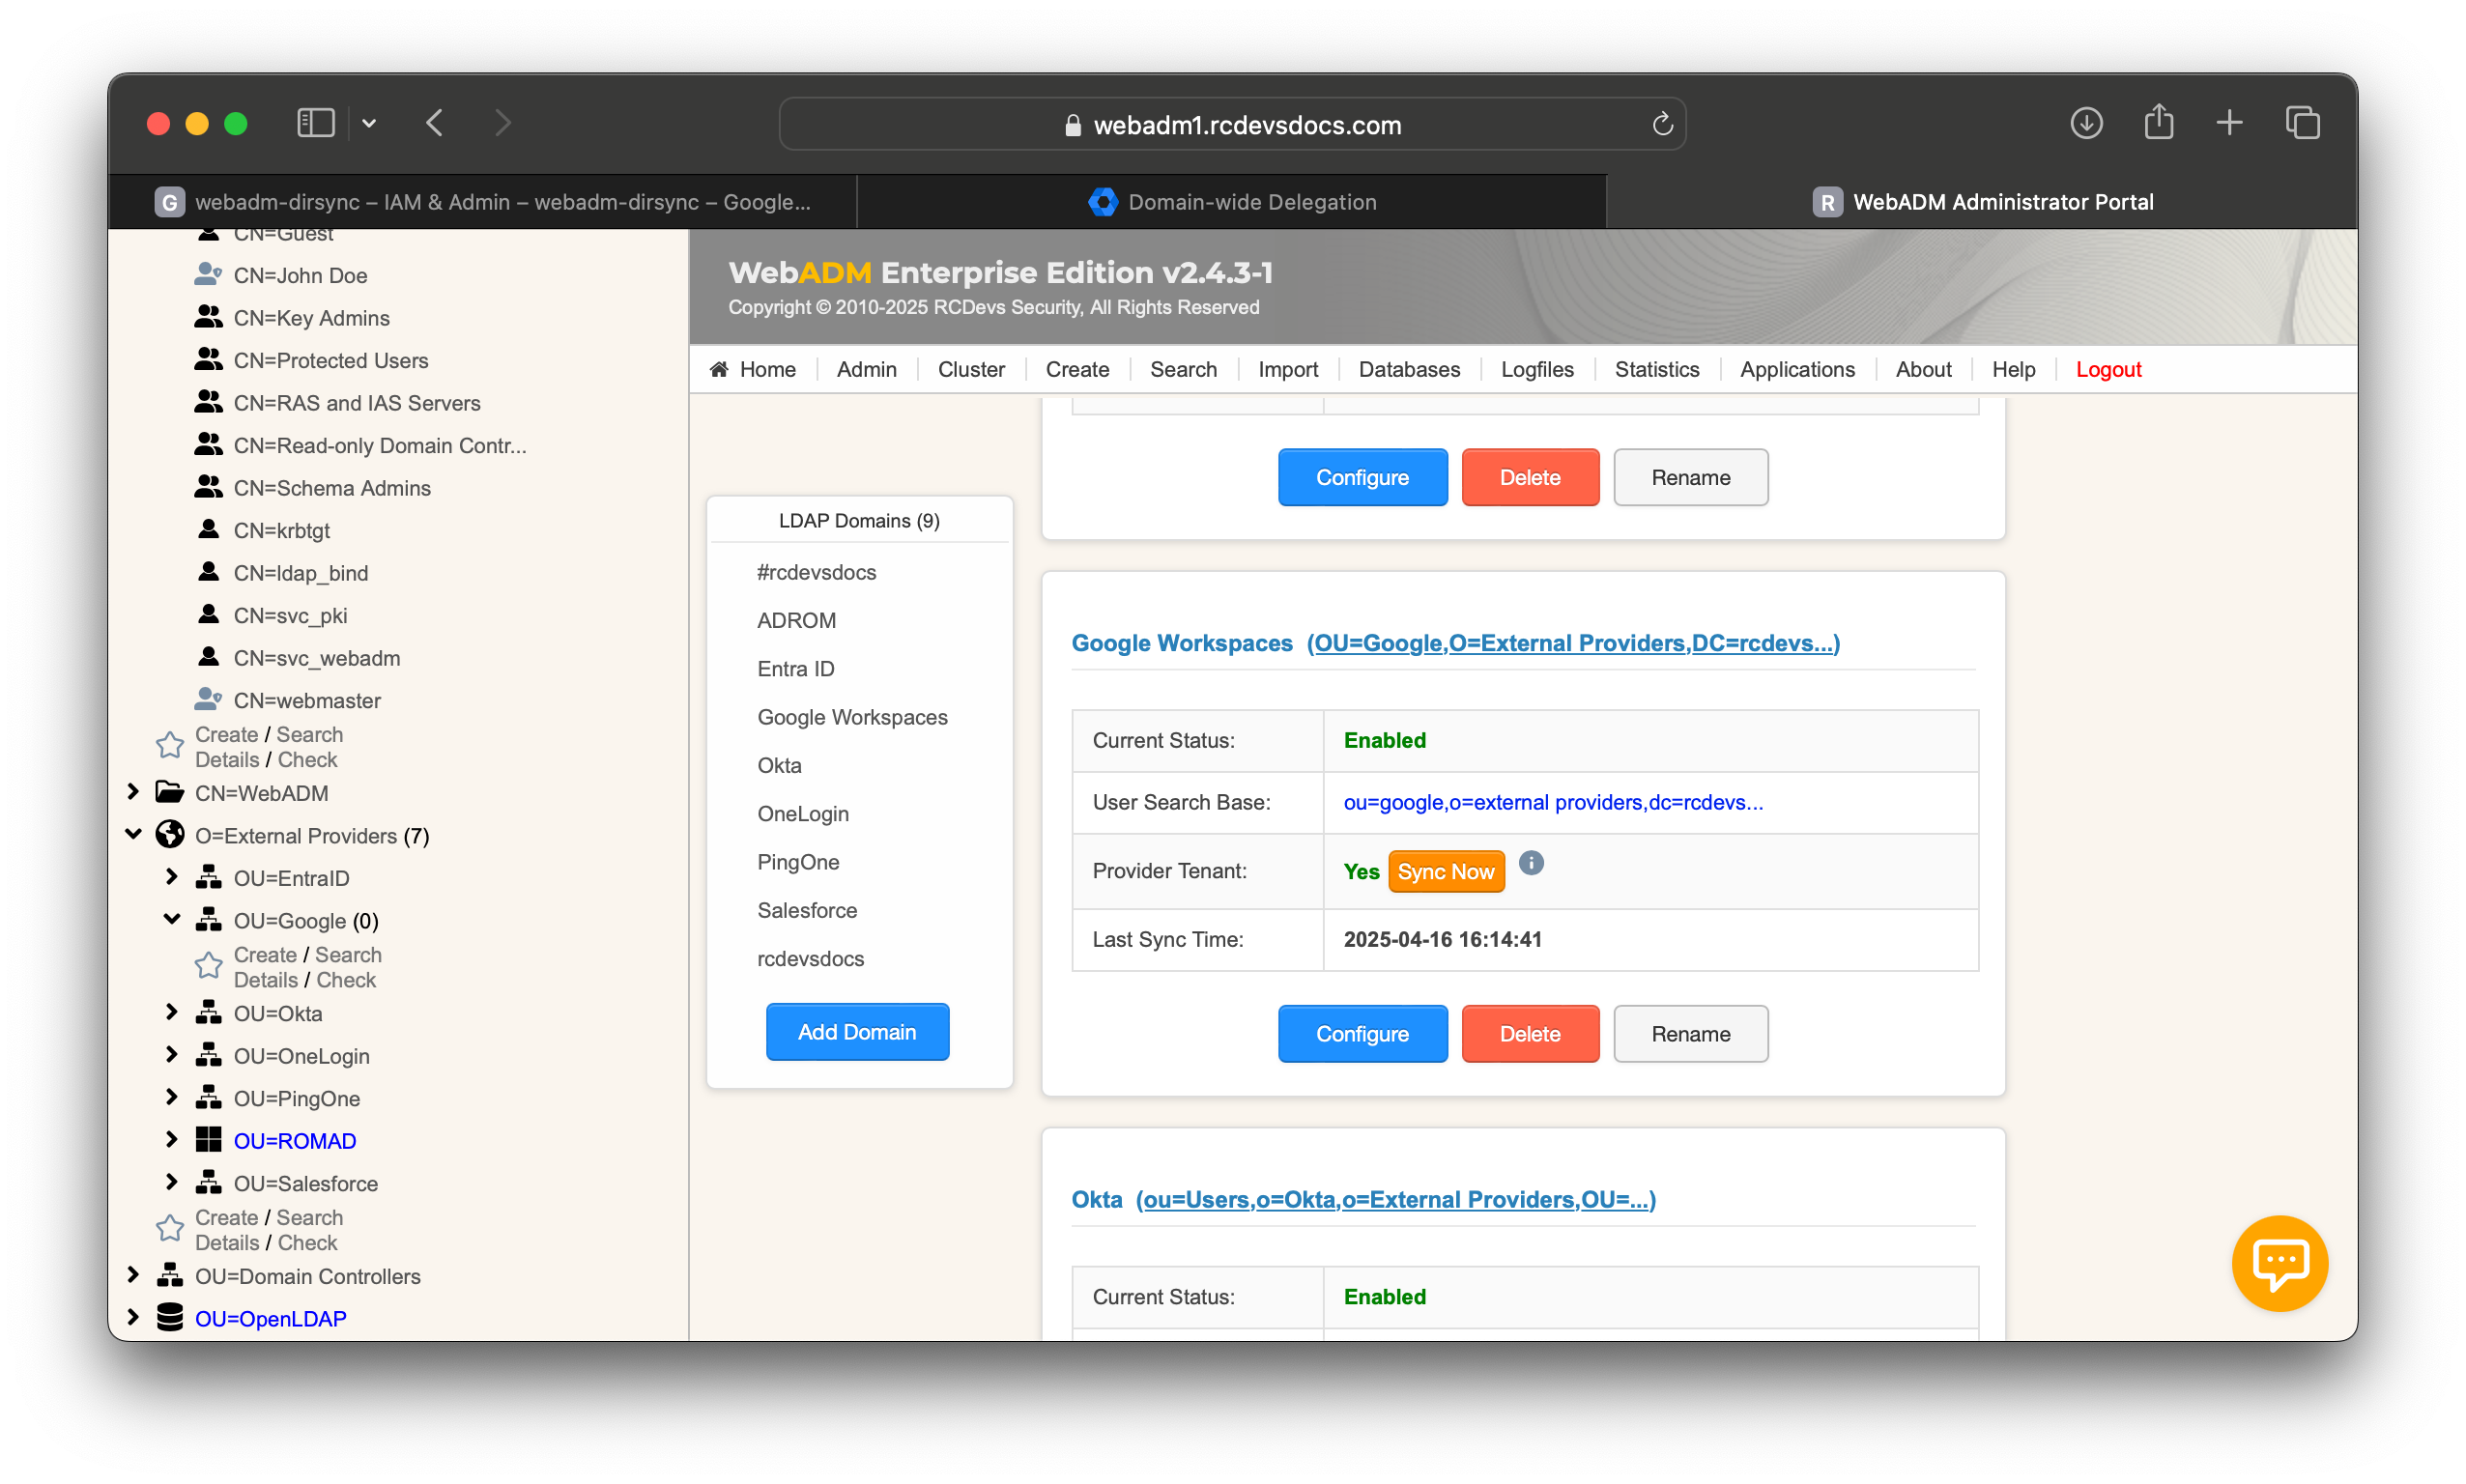
Back in the list of user domains, find your new domain and click "Sync Now". A list of synchronized users and groups should appear as they are created in your chosen LDAP container. From this point on, they will be updated according to the time interval specified in the user domain settings.
Organisation policy tuning
Even as a super administrator, you may need to grant yourself the rights to create keys for service accounts by disabling the iam.disableServiceAccountKeyCreation policy. Before doing this, you may also need to give yourself the rights to modify that policy. The following instructions outline how to do this through the graphical interface.
Note that disabling the policy might not take effect immediately. Although the policy shows as disabled, attempting to create a key may still result in the same error as before. If this doesn't change after a minute, we recommend focusing on other tasks for the day and returning to this later.
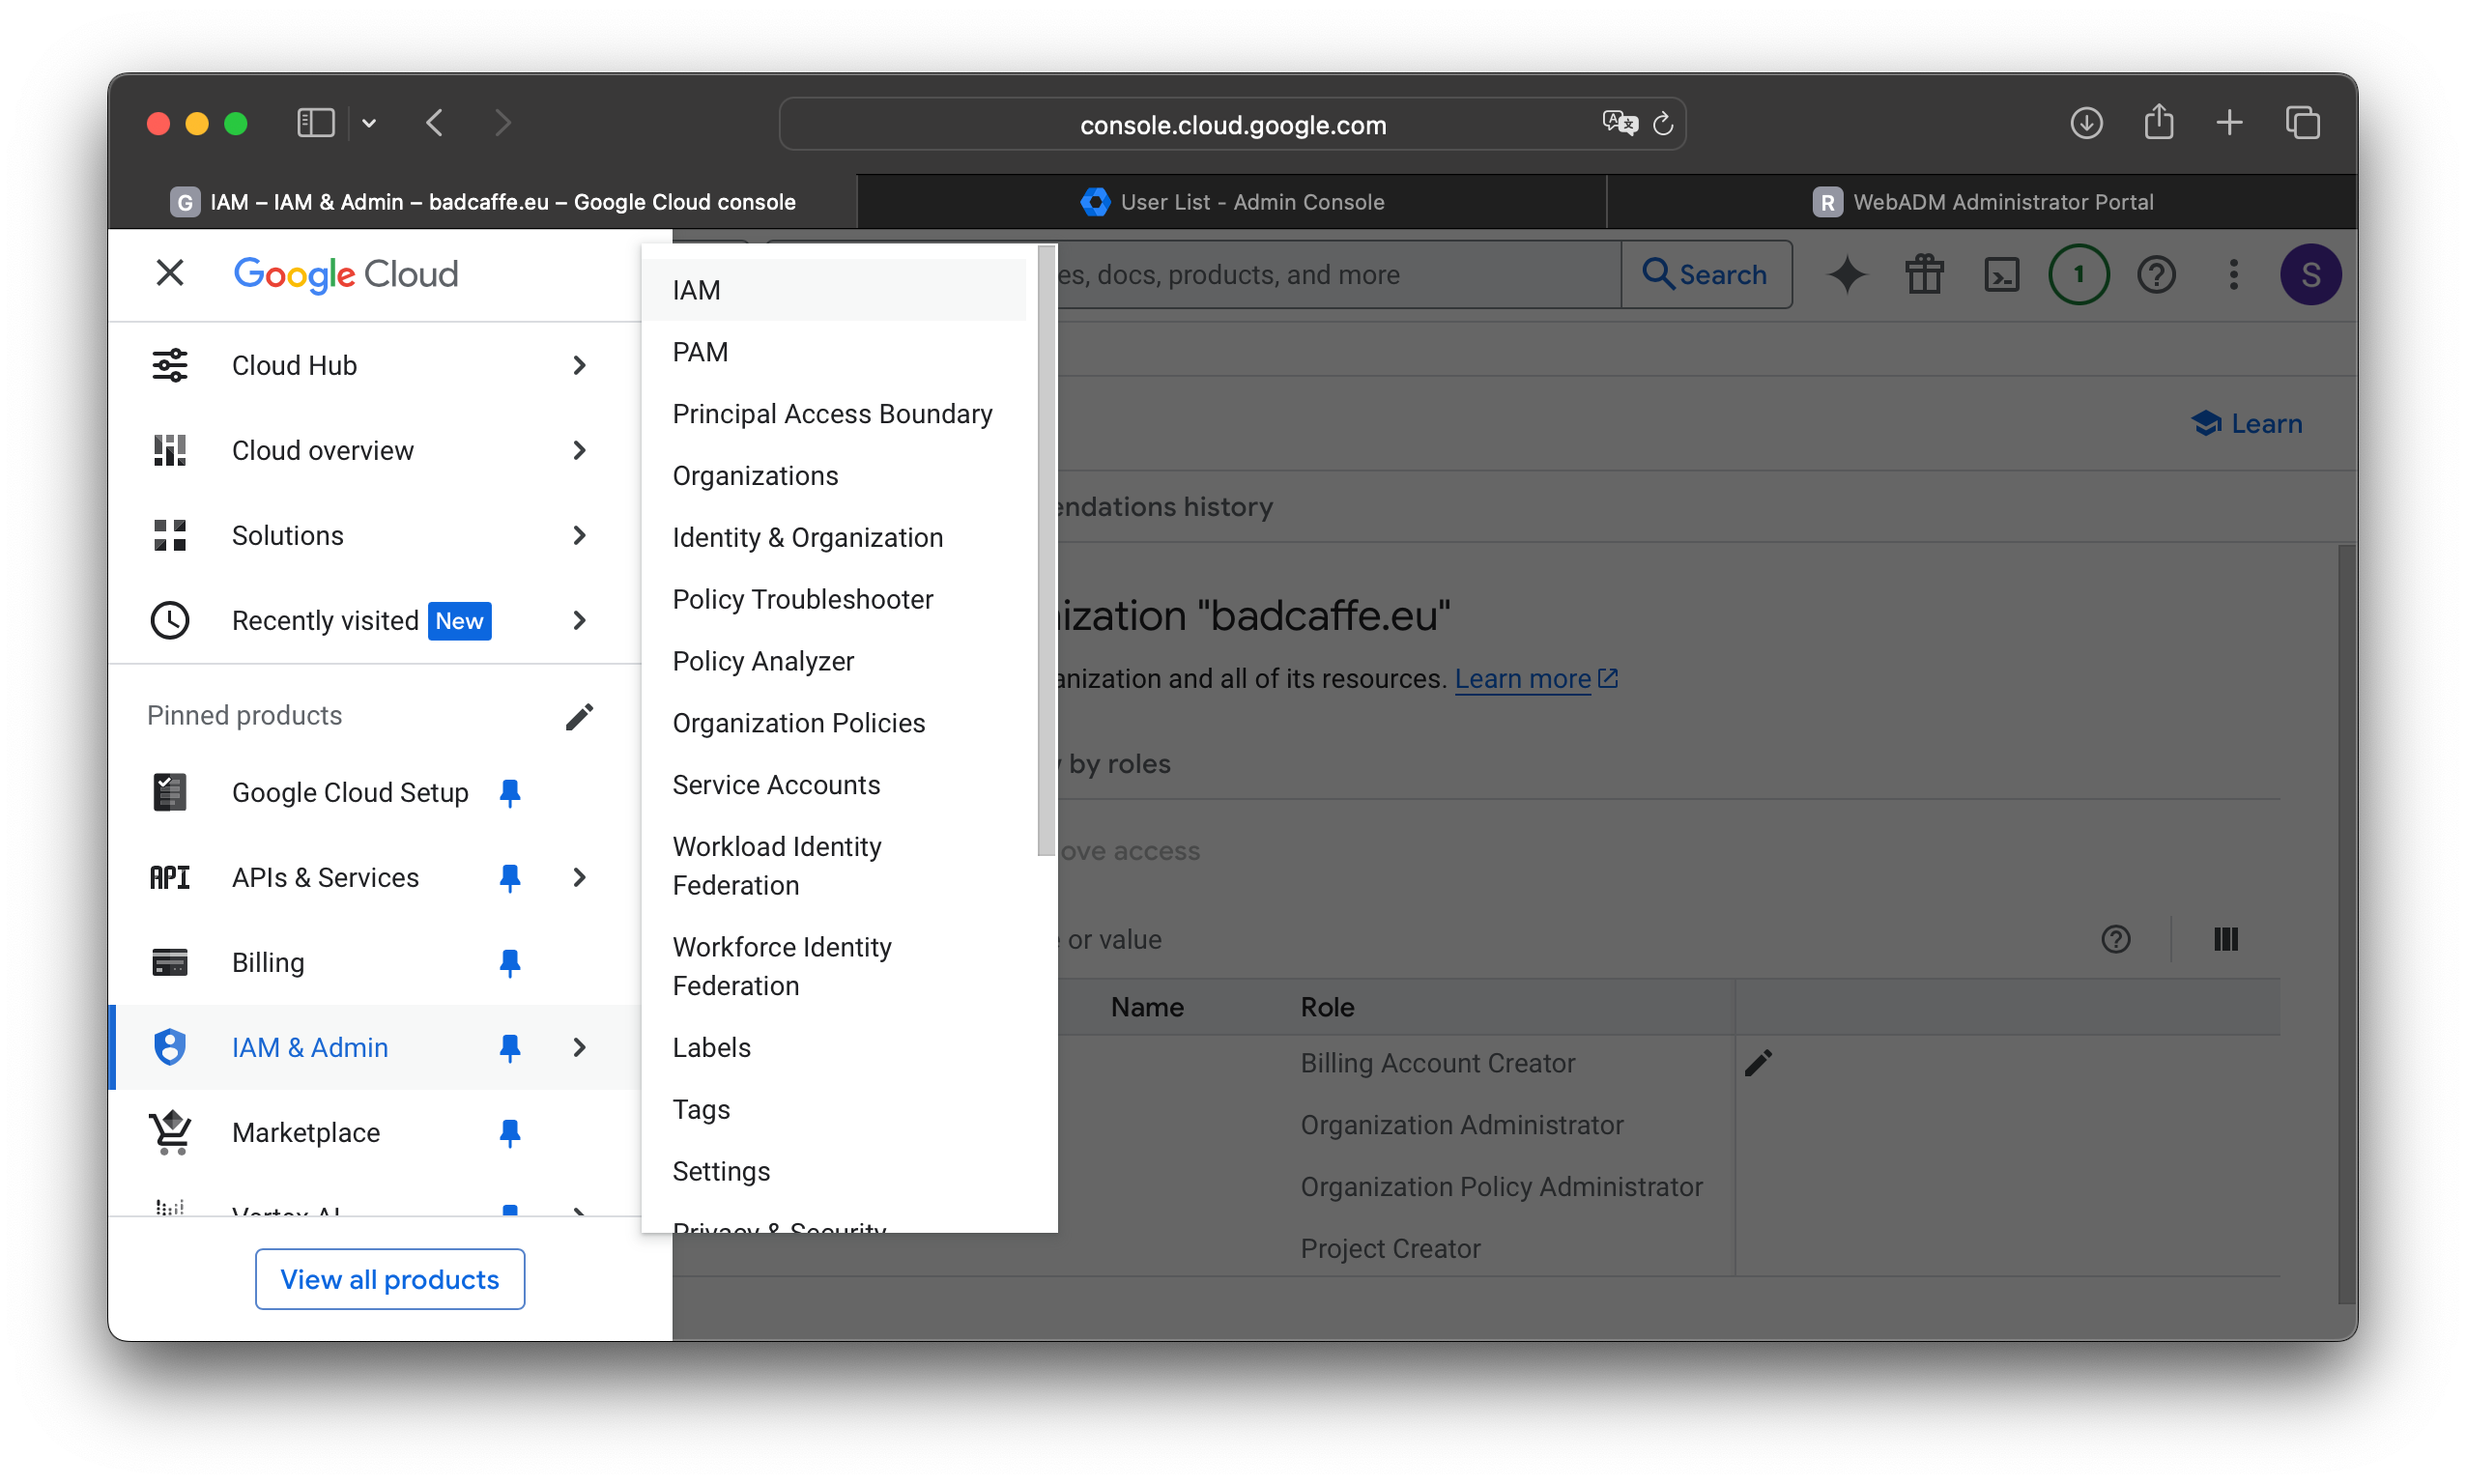
In the Cloud Console (https://console.cloud.google.com), after selecting your organization (not a project) near the top left, click the menu icon in the top left corner, then select "IAM & Admin", followed by "IAM".
Click the pen icon on the far right, in the same row as your organization name.

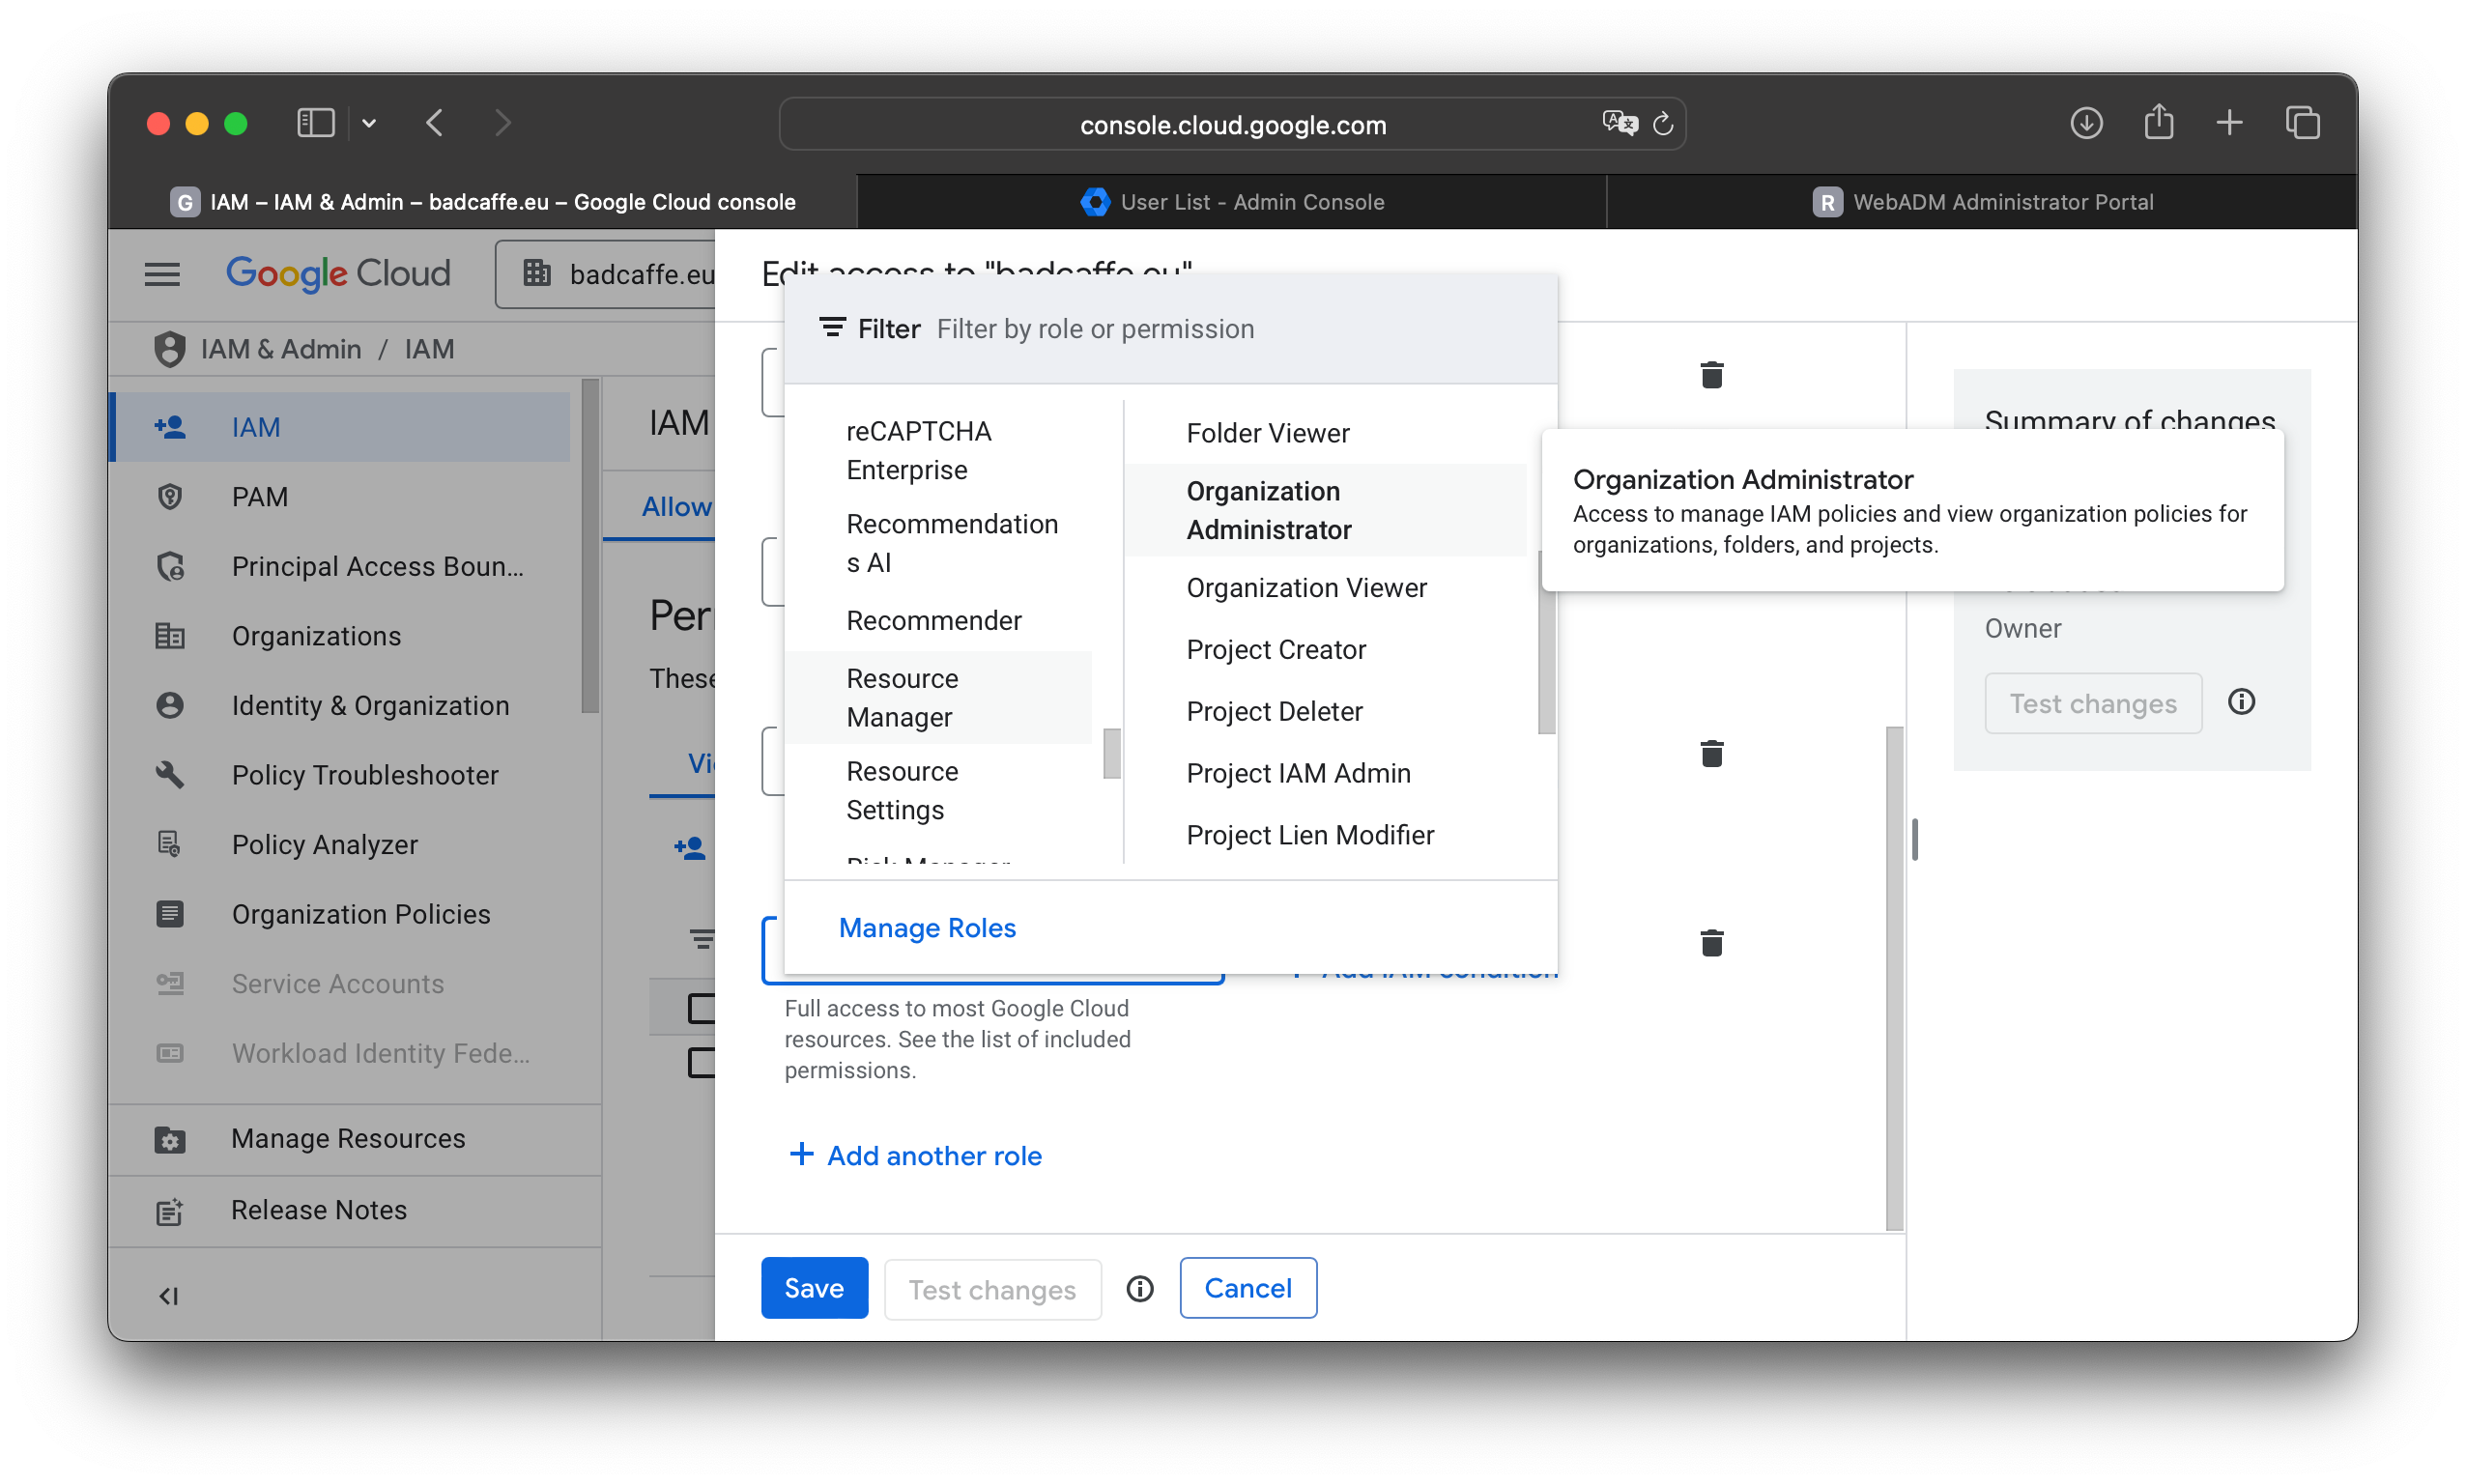
In the popup screen, click "+ Add another role", then click "Select a role" and choose "Organization Policy Administrator".
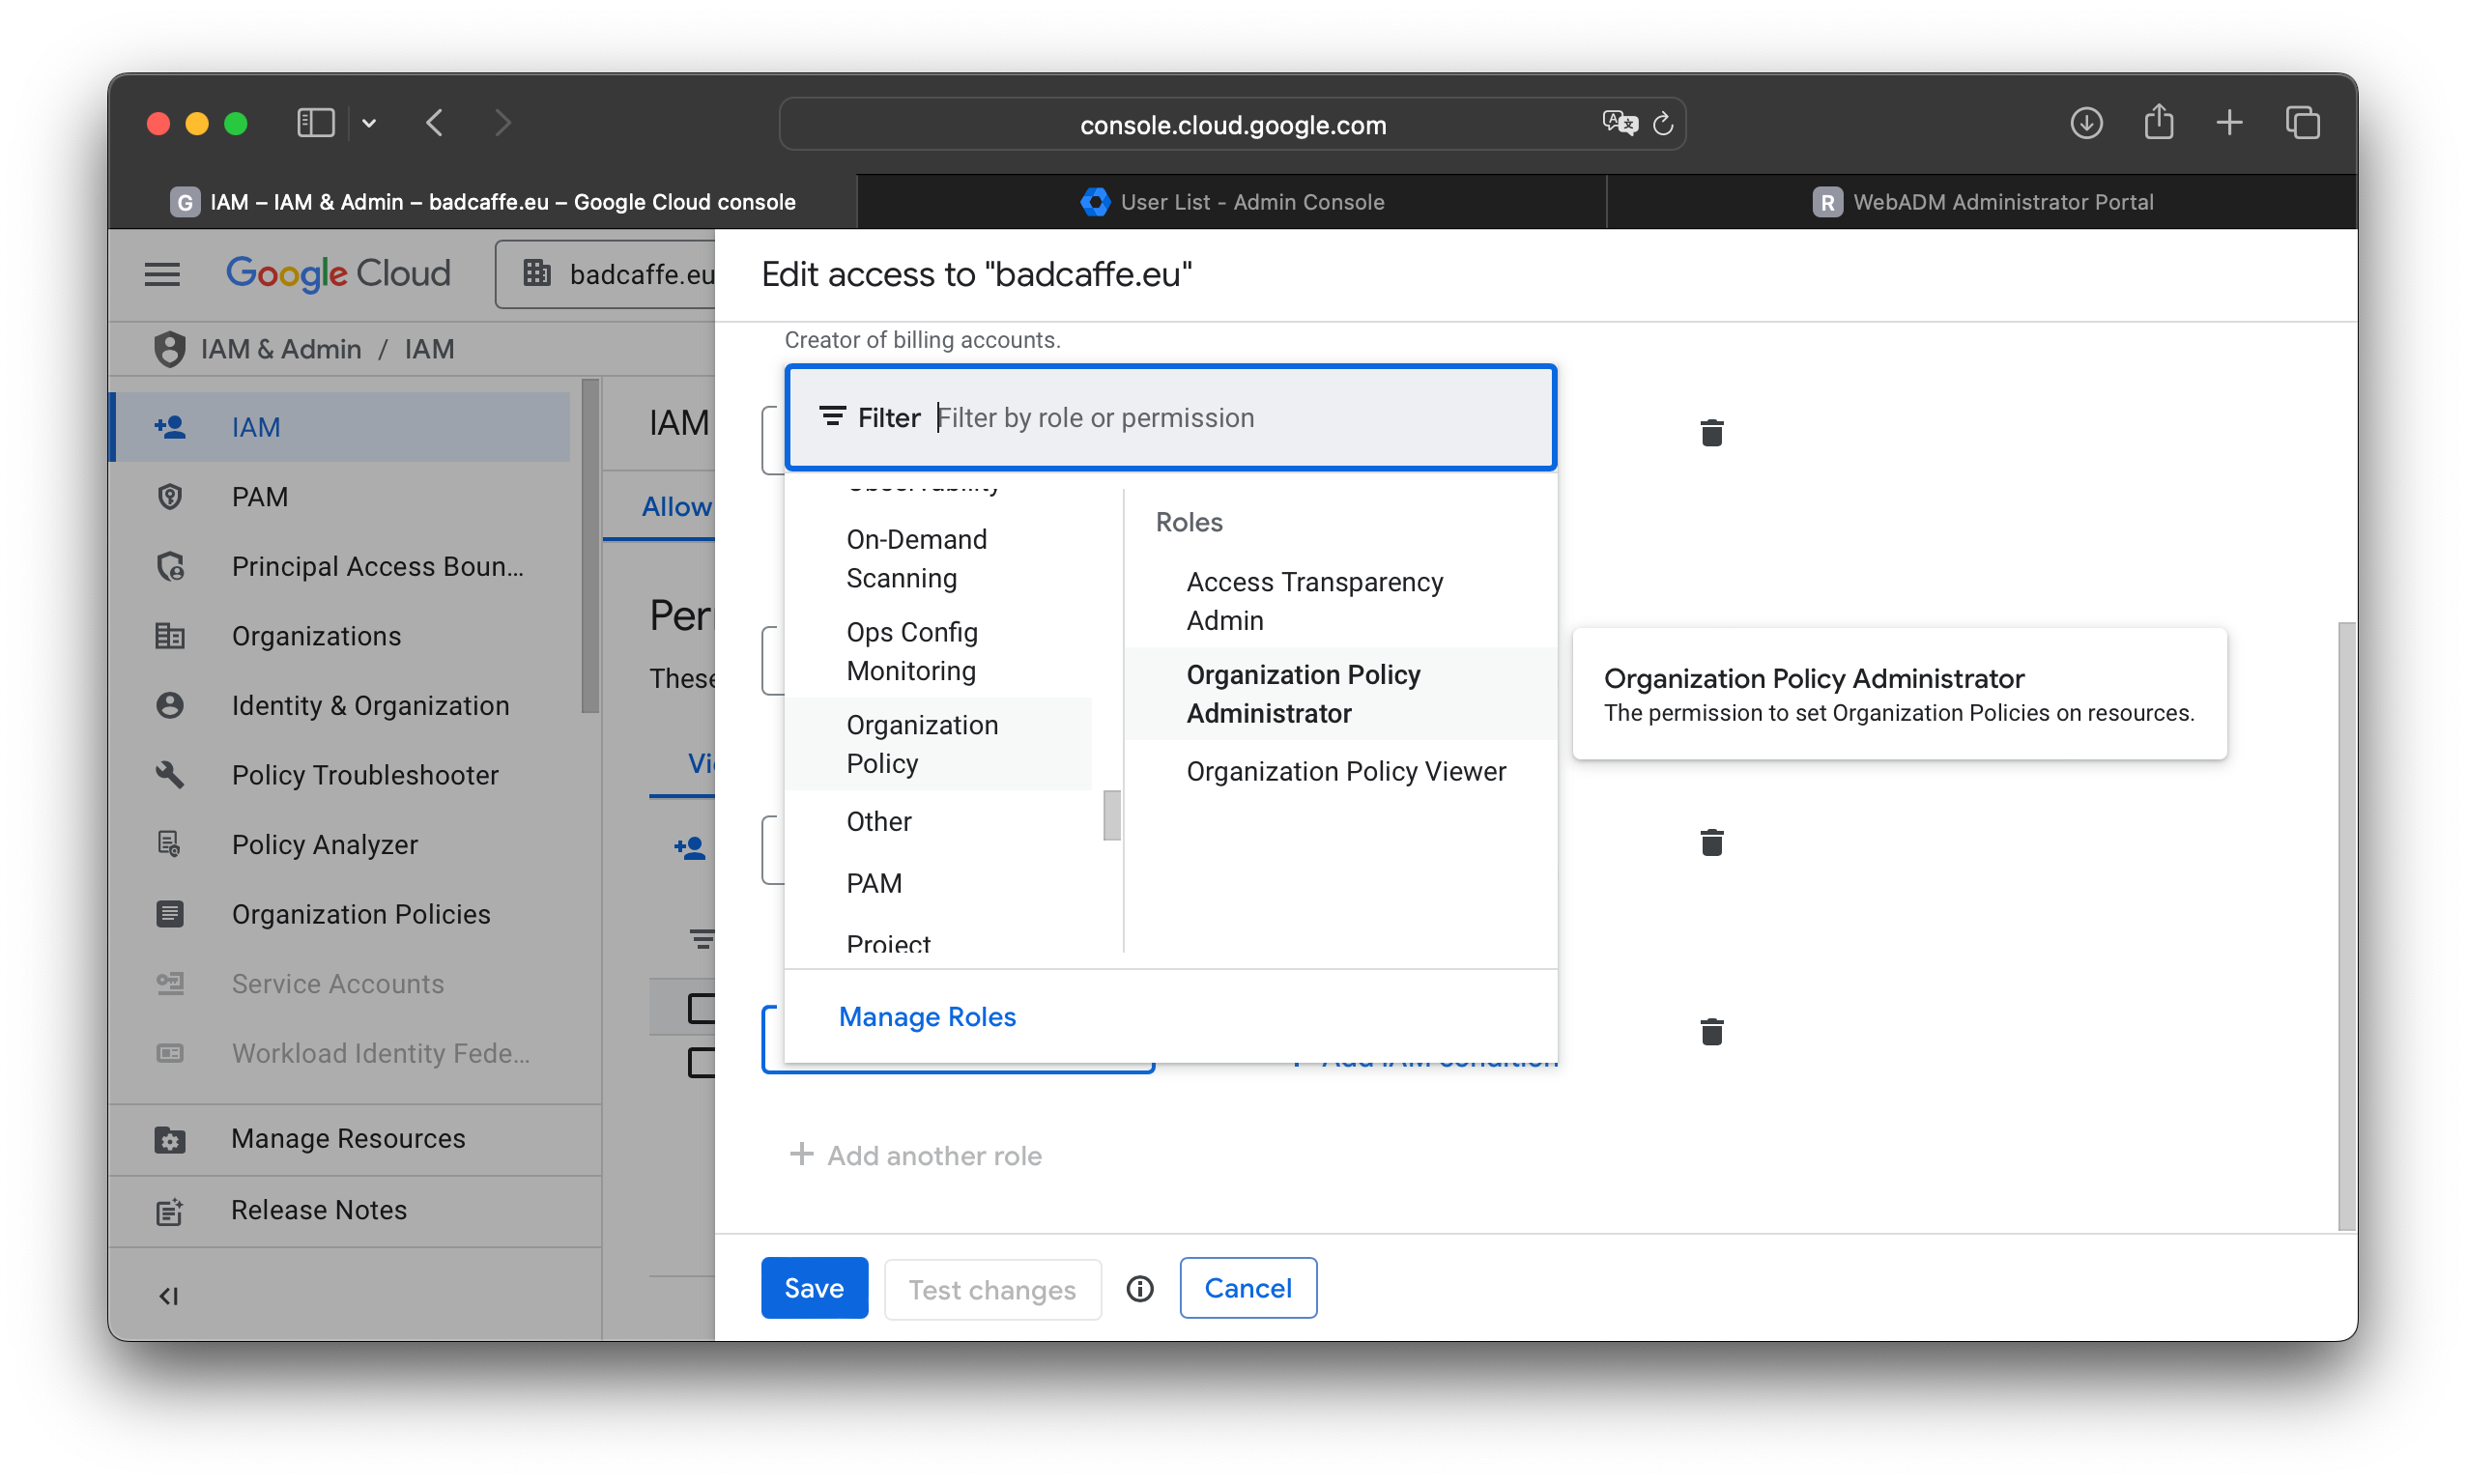
Do the same for "Resource Manager", then select "Organization Administrator".
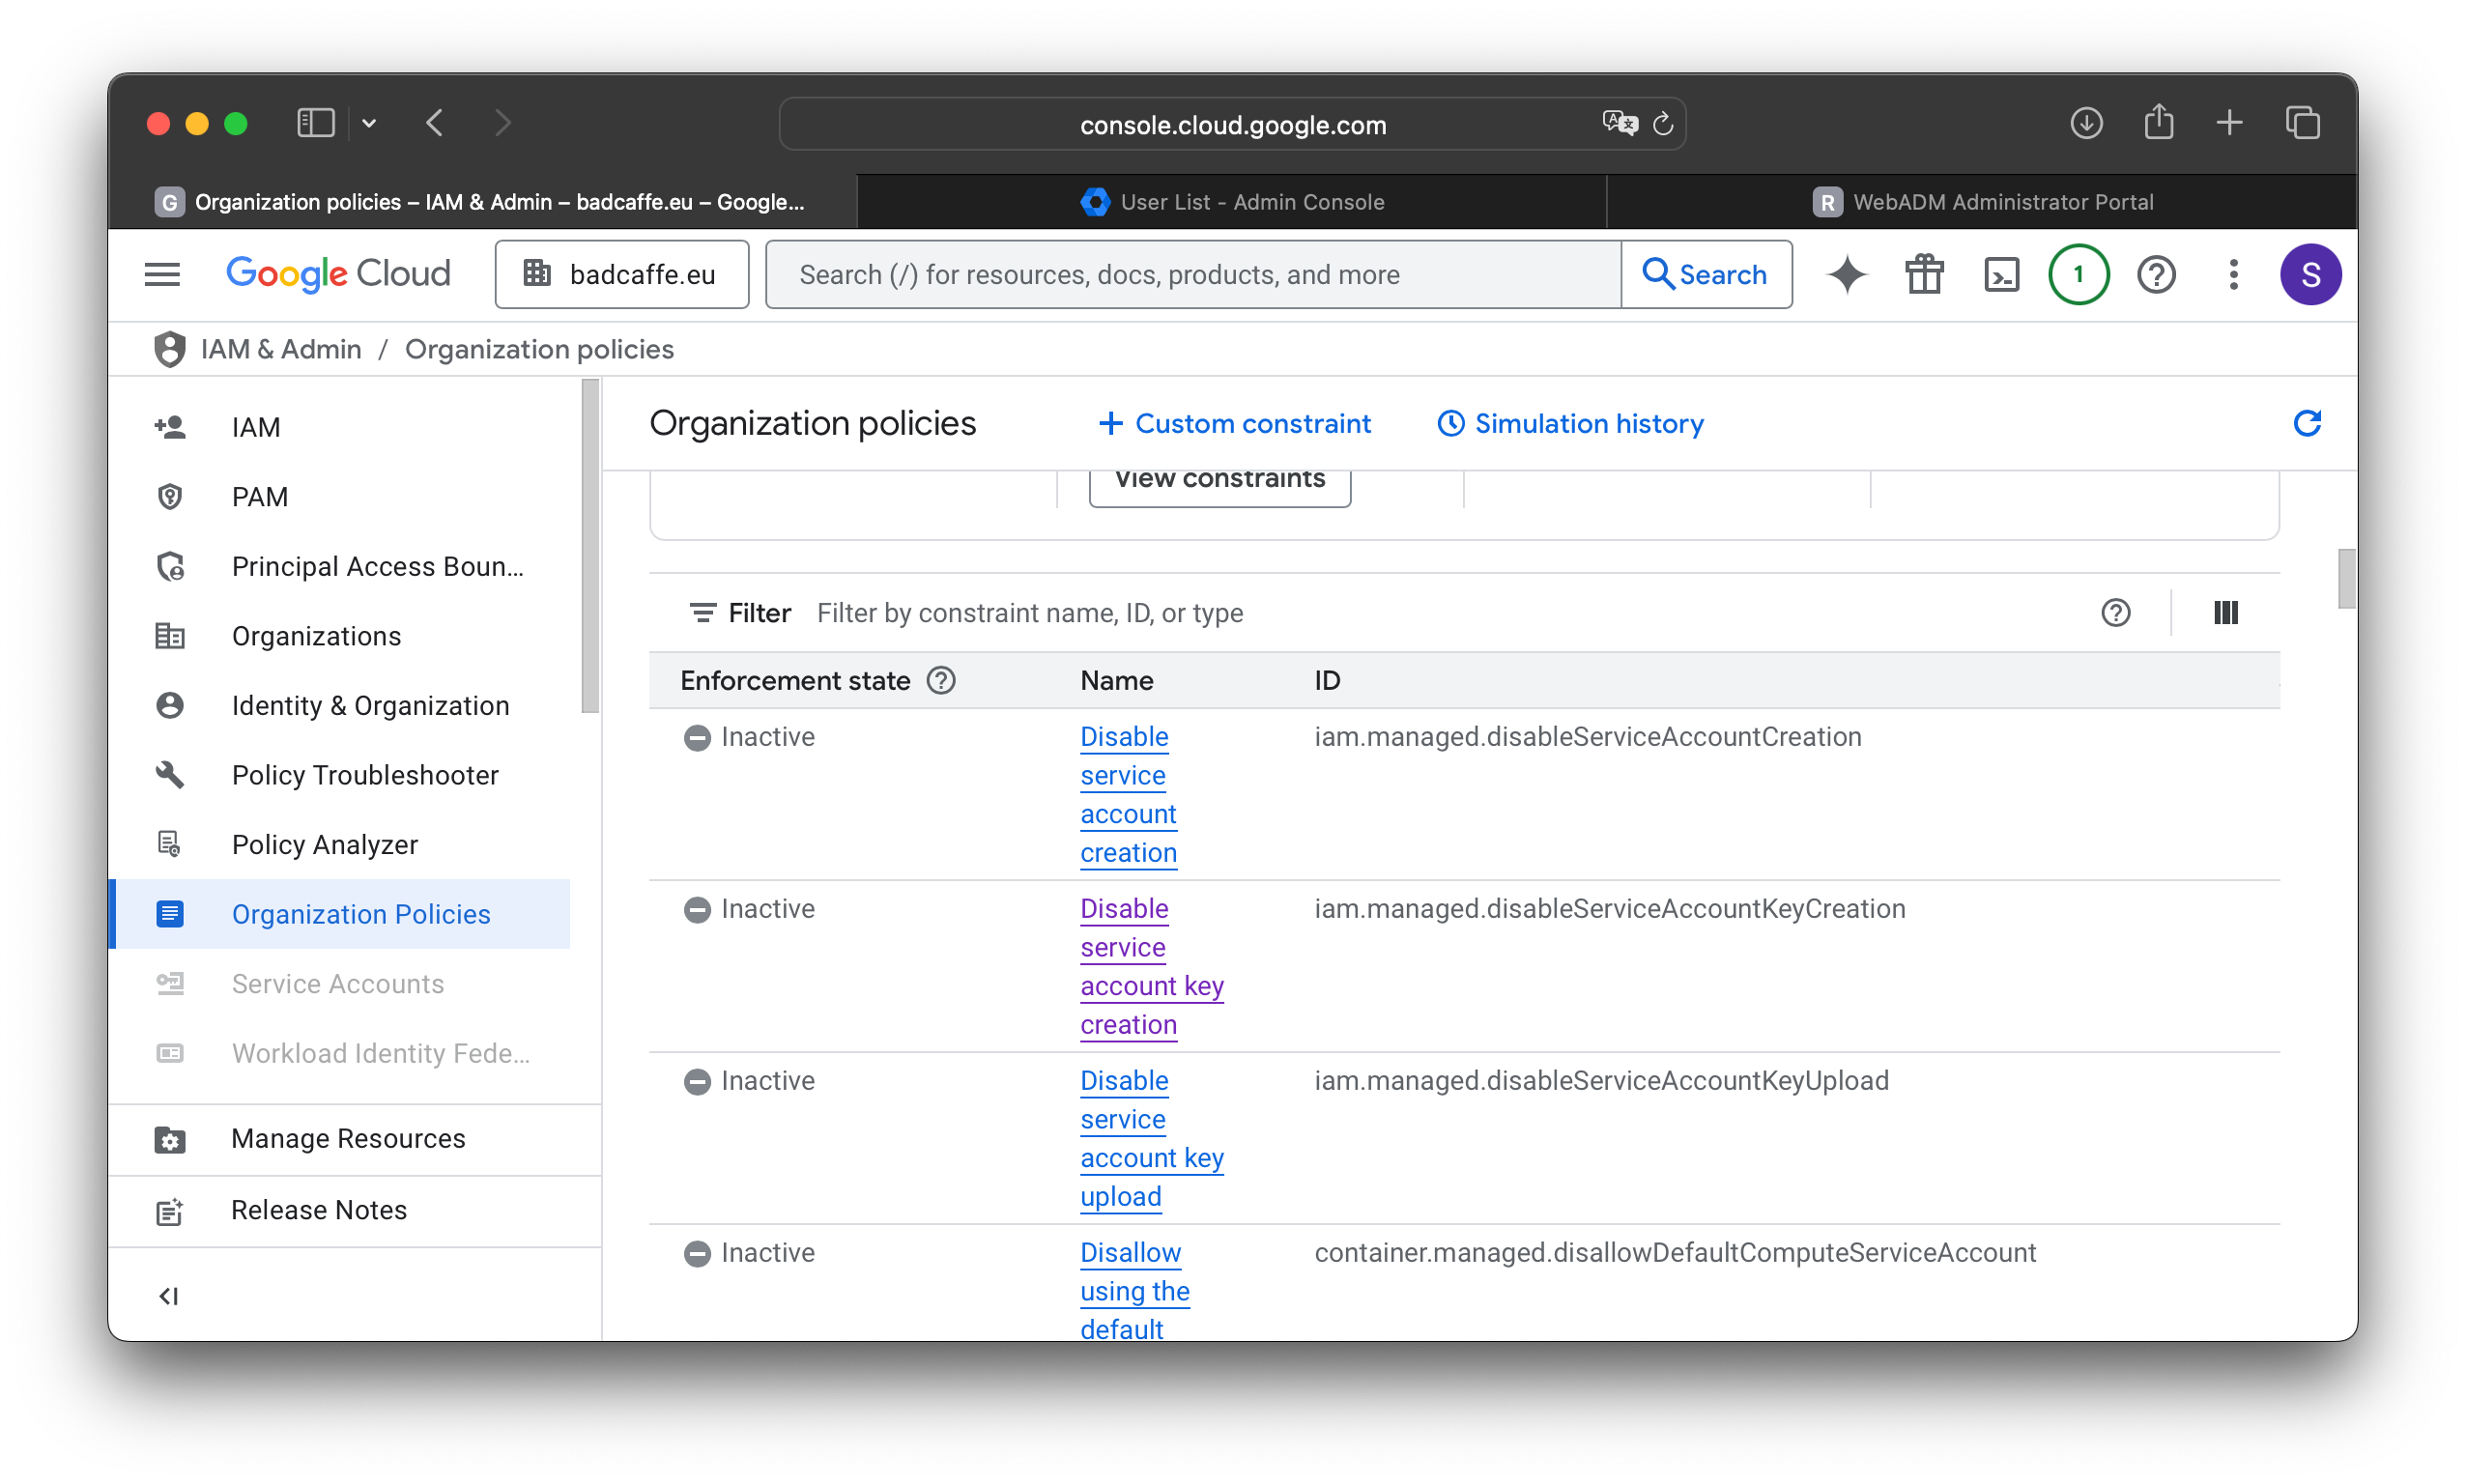
Click the menu icon in the top left corner, then select "IAM & Admin", followed by "Organization Policies".

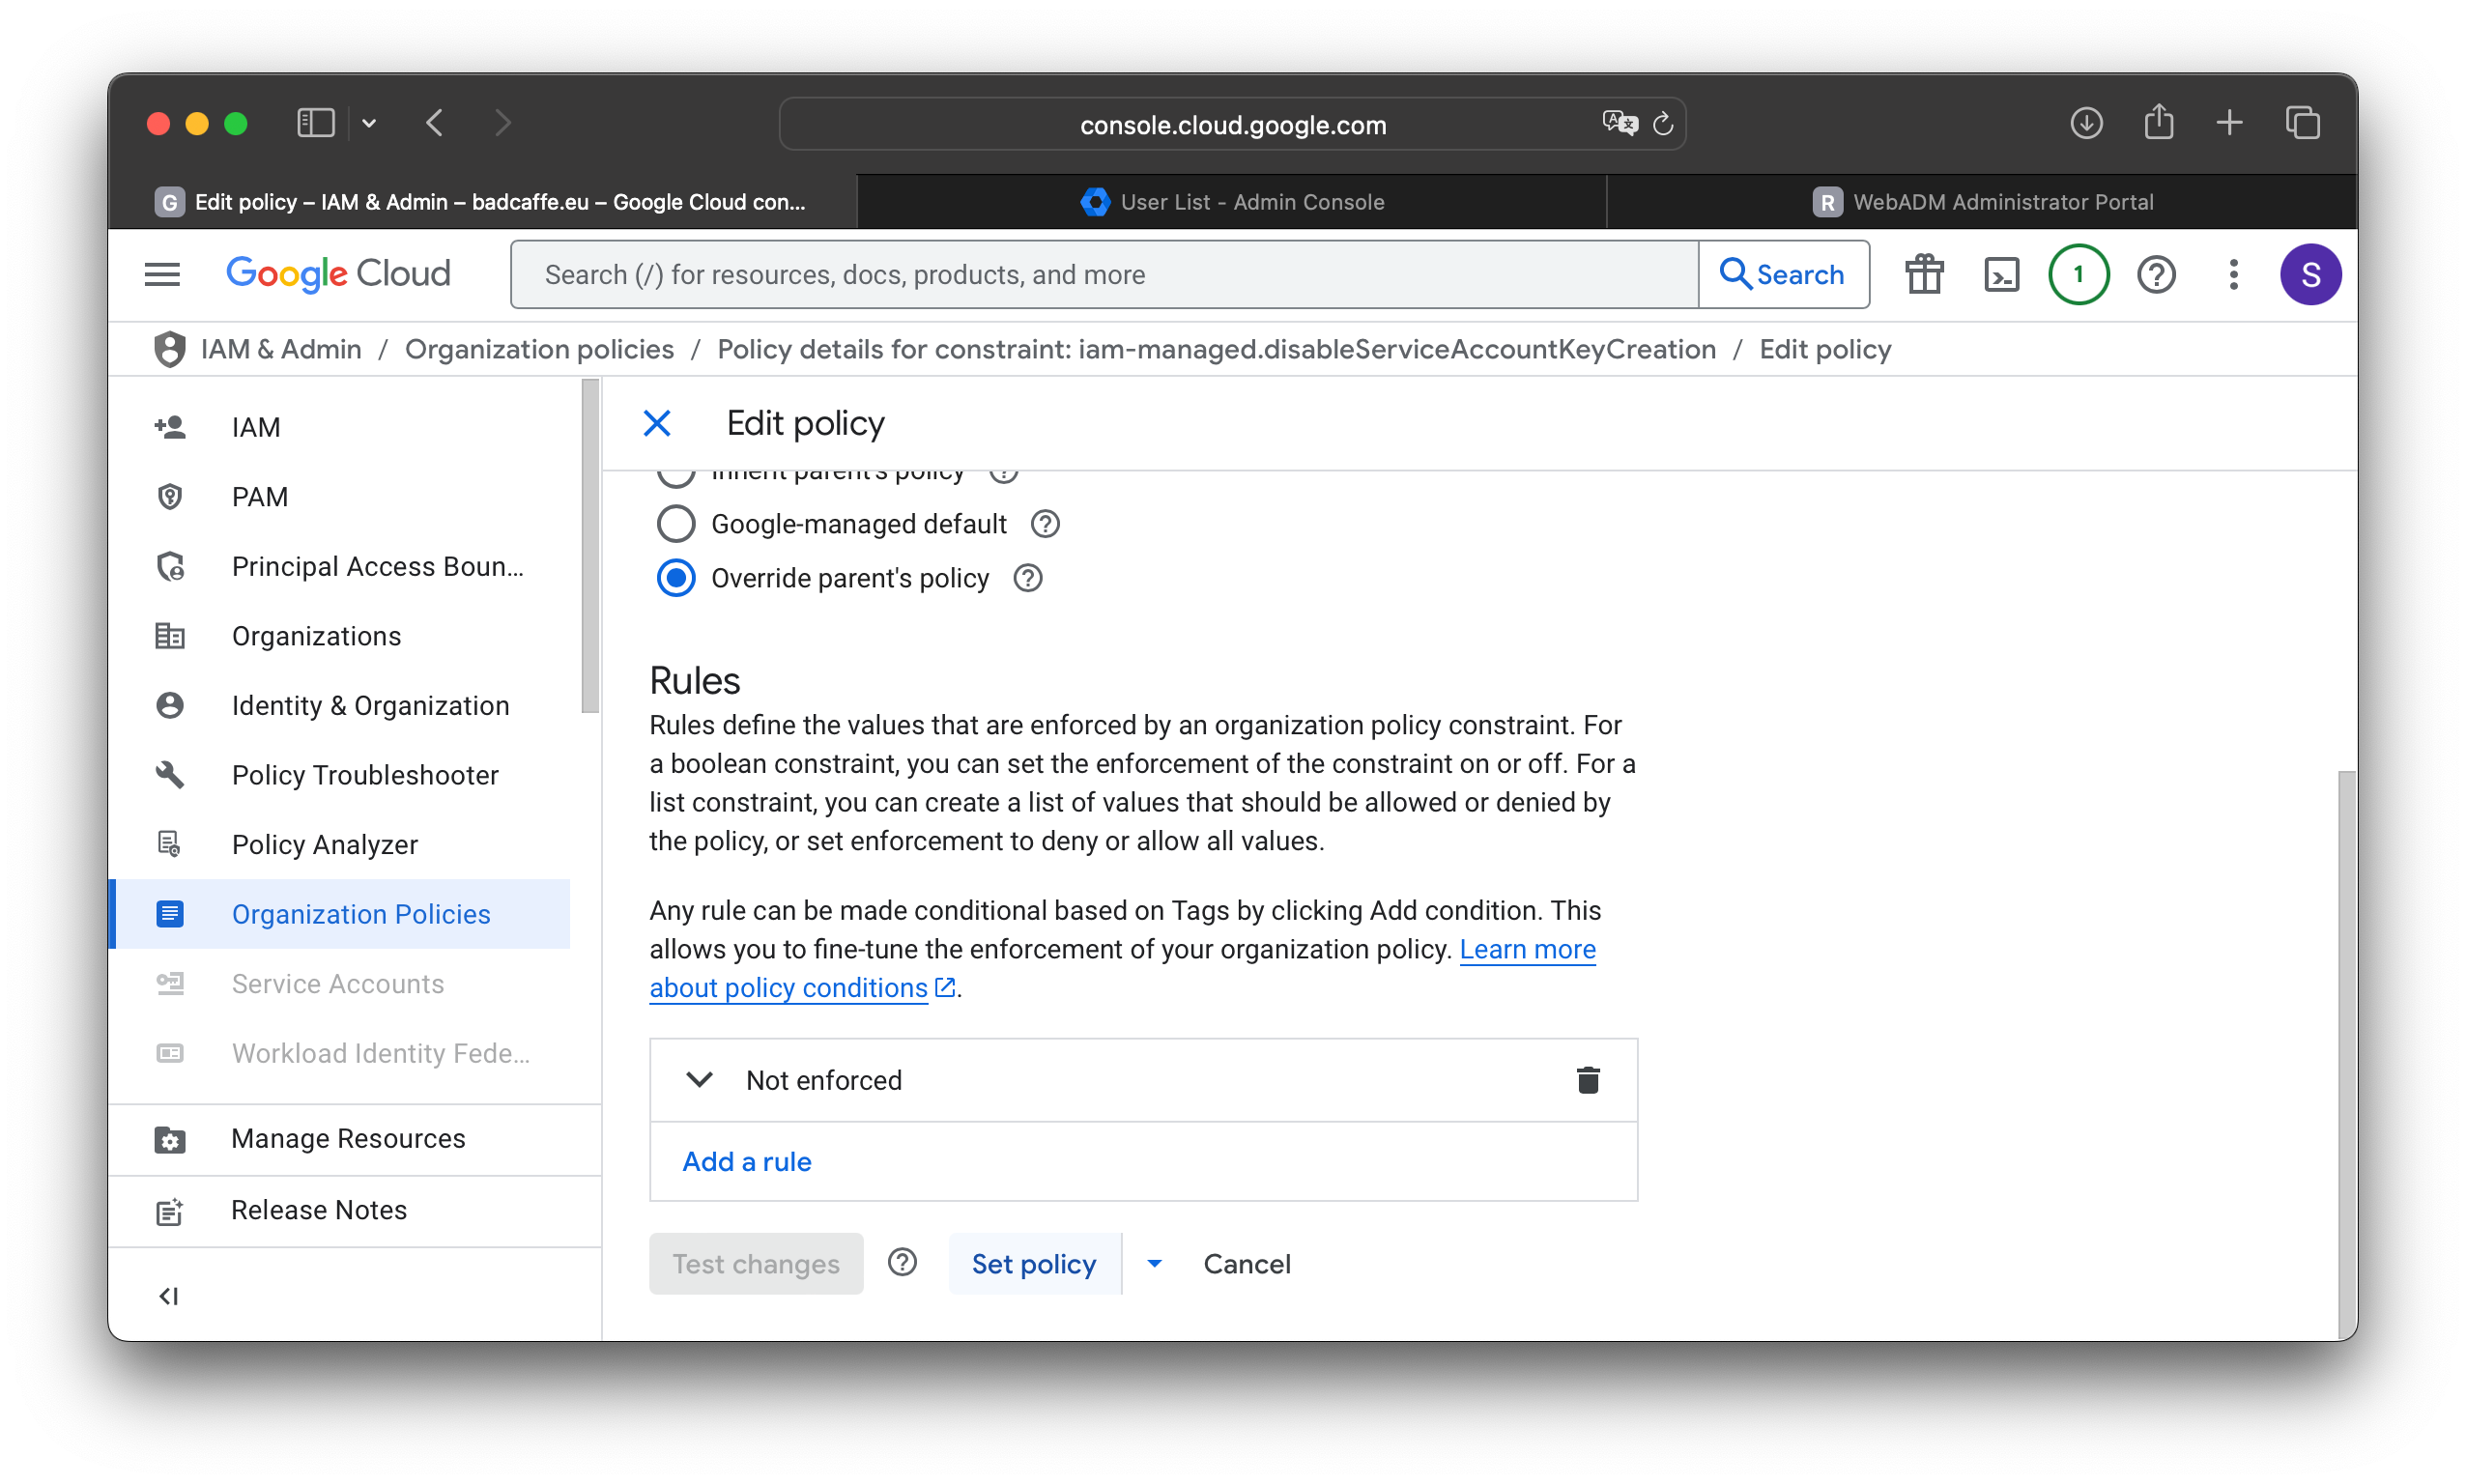
Find the policy called "Disable service account key creation" and click on its name.
Click on "Manage policy".
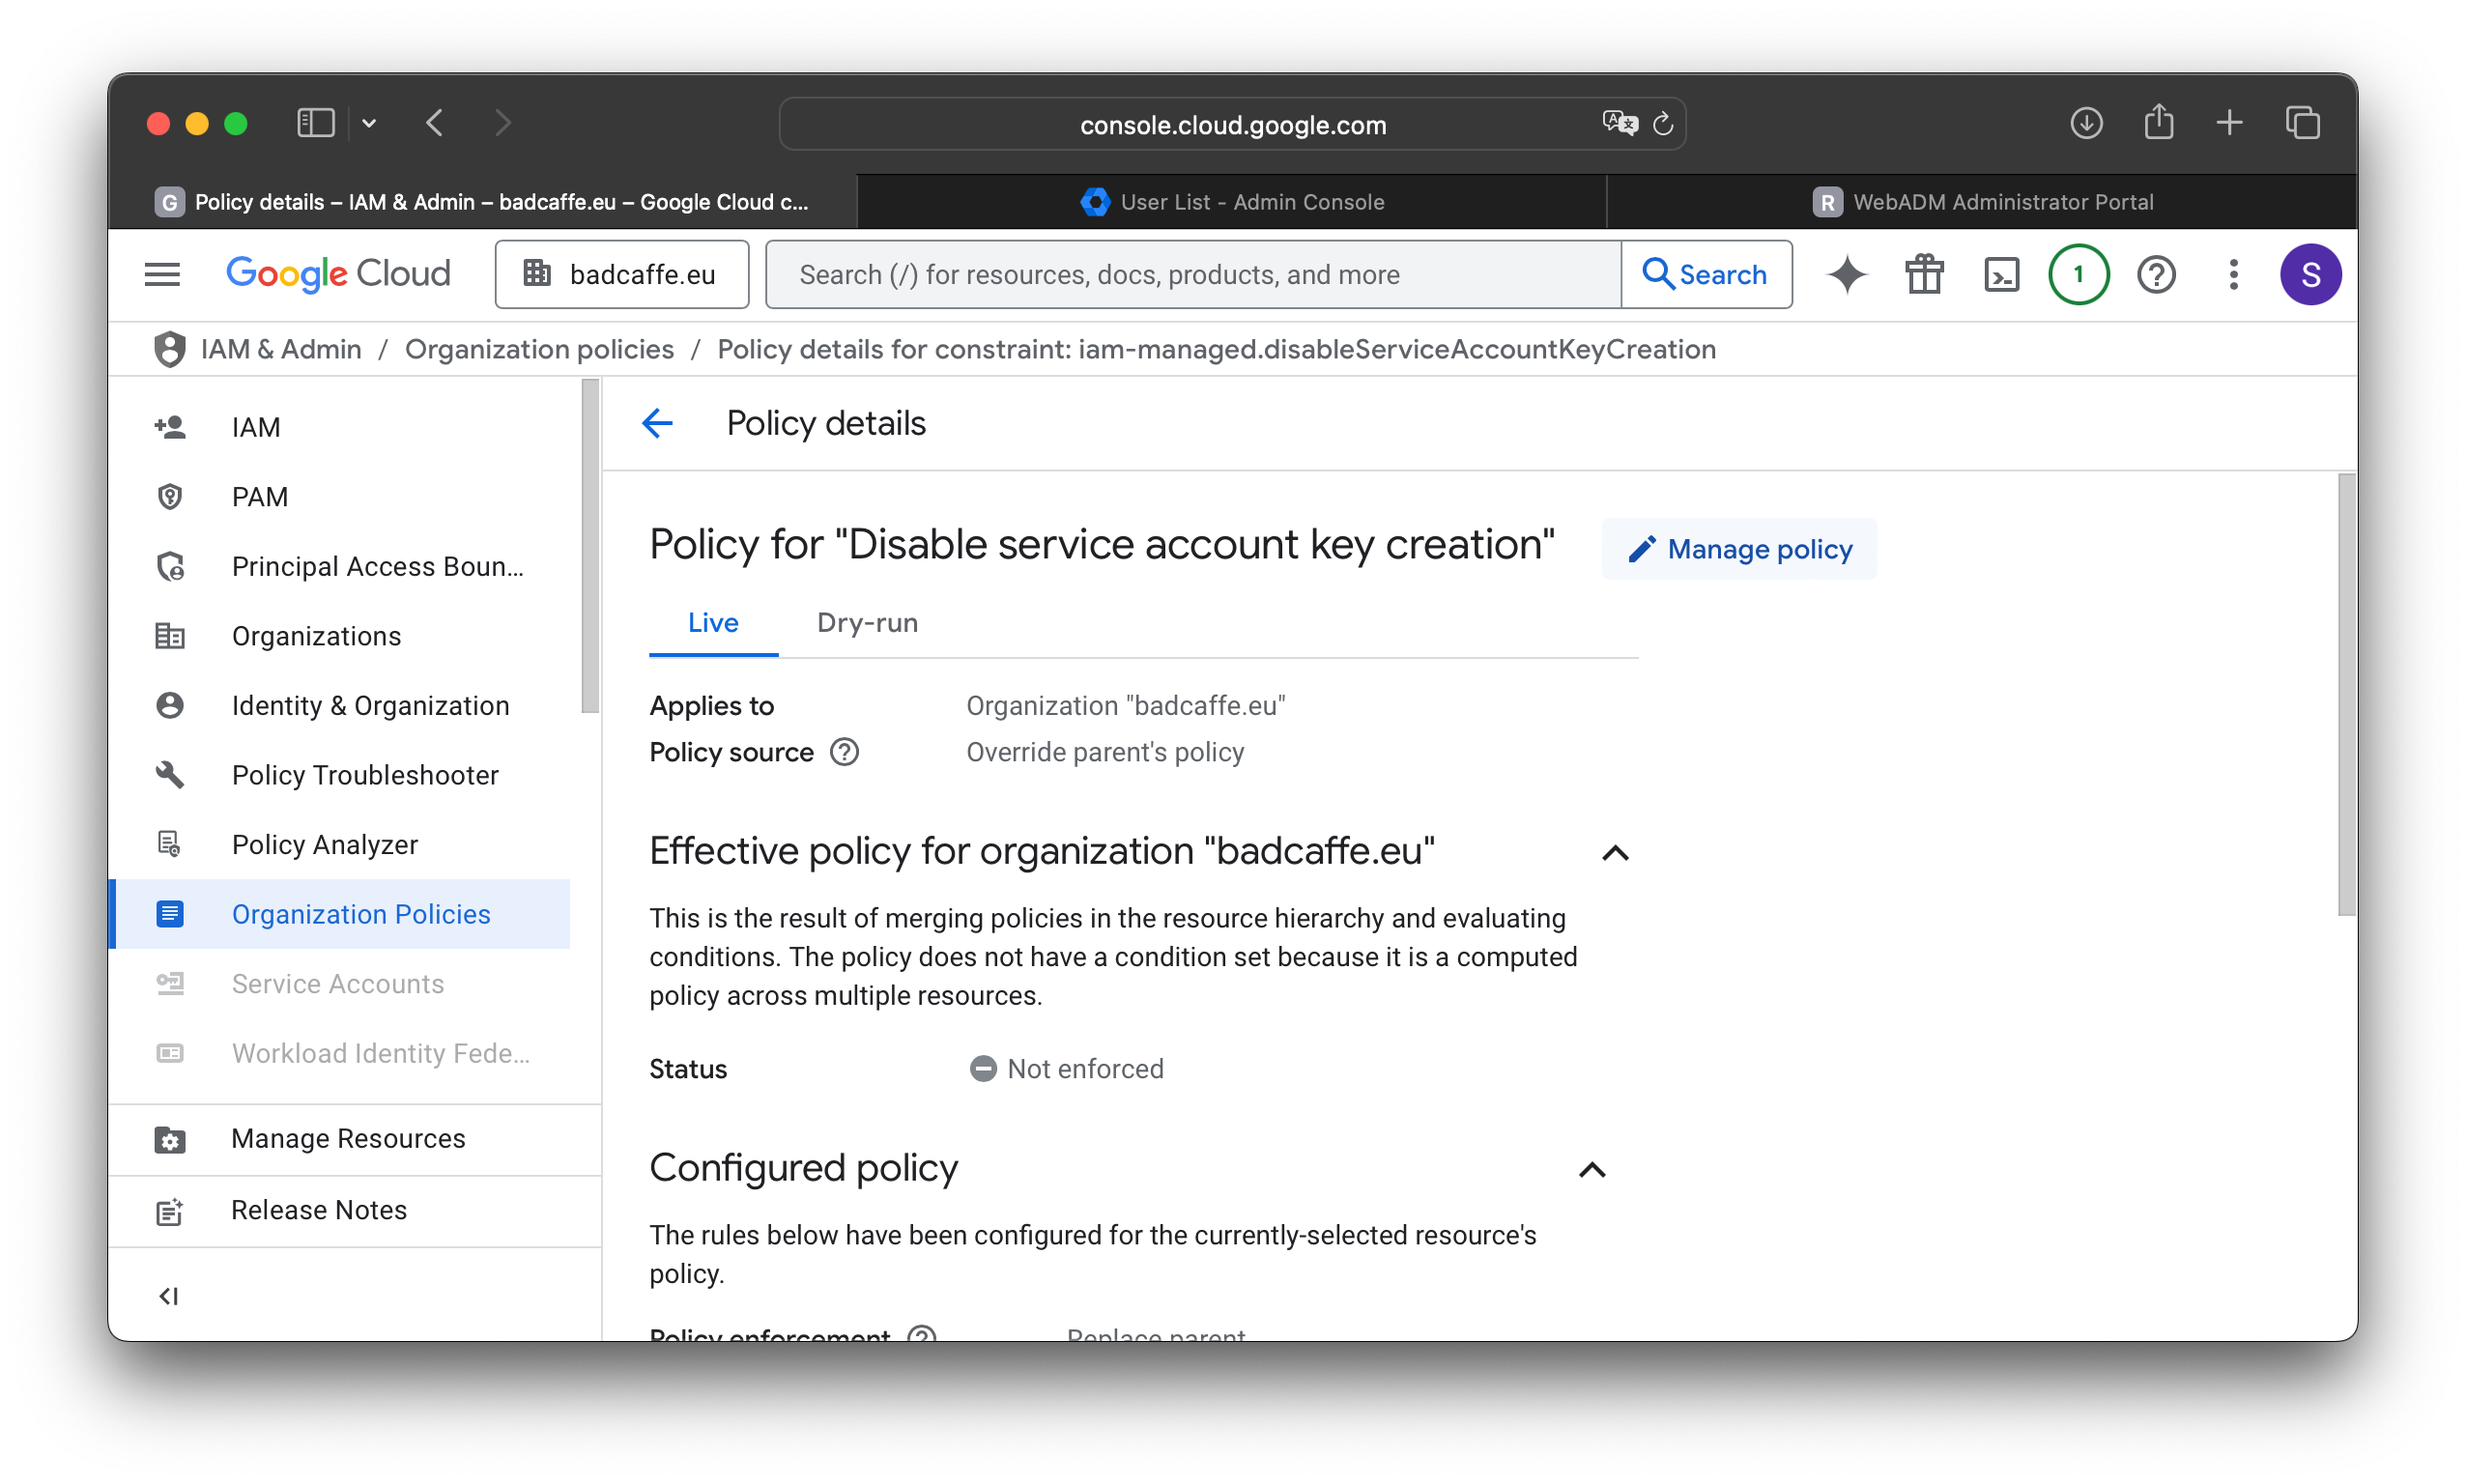
Scroll down, select "Override parent's policy", click "Add a rule", and select "Off" under "Enforcement". Then, click "Done" right below your selection.

Finally, click "Set Policy".