1. Overview
In this How-To, we will demonstrate how to reprogram your Yubikey with the Yubikey Personalization Tool, to generate an inventory file through Yubico tool to import the Yubikey in WebADM inventory and how to assign and use your Yubikey with OpenOTP. For this recipe, you will need to have WebADM and OpenOTP installed and configured. Please, refer to WebADM Installation Guide and WebADM Manual.
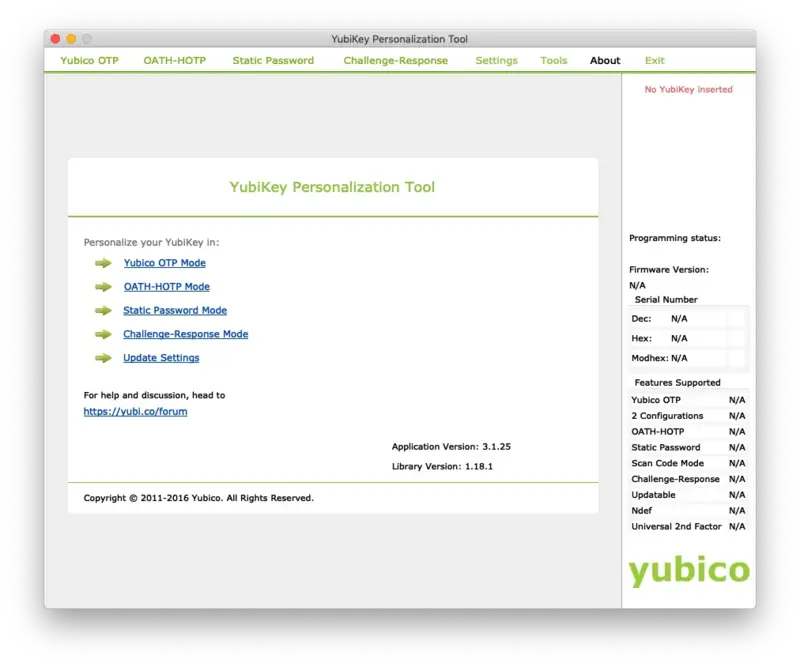
2. Yubico Personalization Tool
Once Yubico Personalization Tool is installed, open it.
Important Note
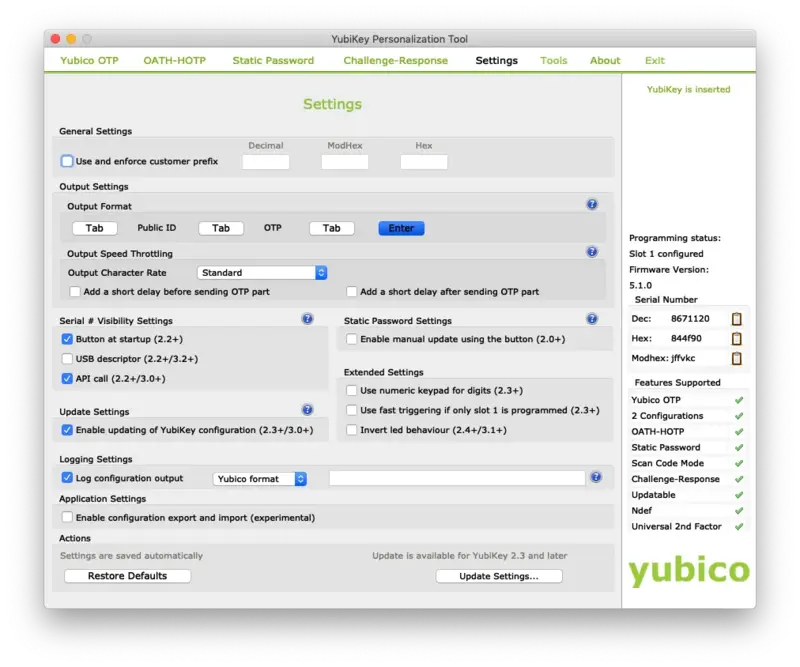
To be sure that you have the right settings from the beginning, you should click on Restore Defaults under Setting in the Yubico Personalization Tool before you continue.
When you are under the application, go on the Setting page and configure the Log configuration output setting to Yubico format.

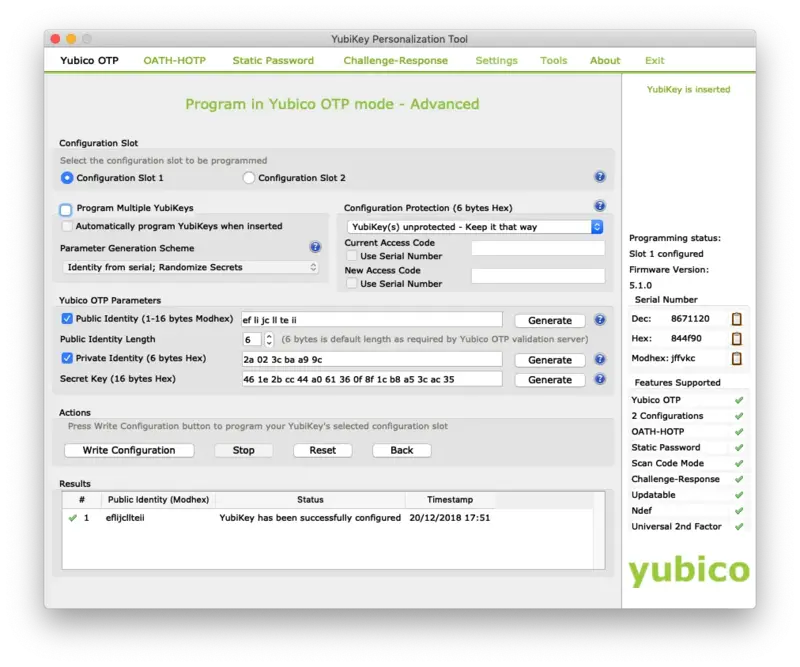
When you have configured this setting, plug in your Yubikey. Then switch to the Yubico OTP tab and click on Advanced. Select Configuration Slot 1.
Click on the 3 Generate buttons to generate a new Public/Private Identity and a new Secret Key.
After that, click on Write Configuration button, and you will be prompted to save the inventory file:
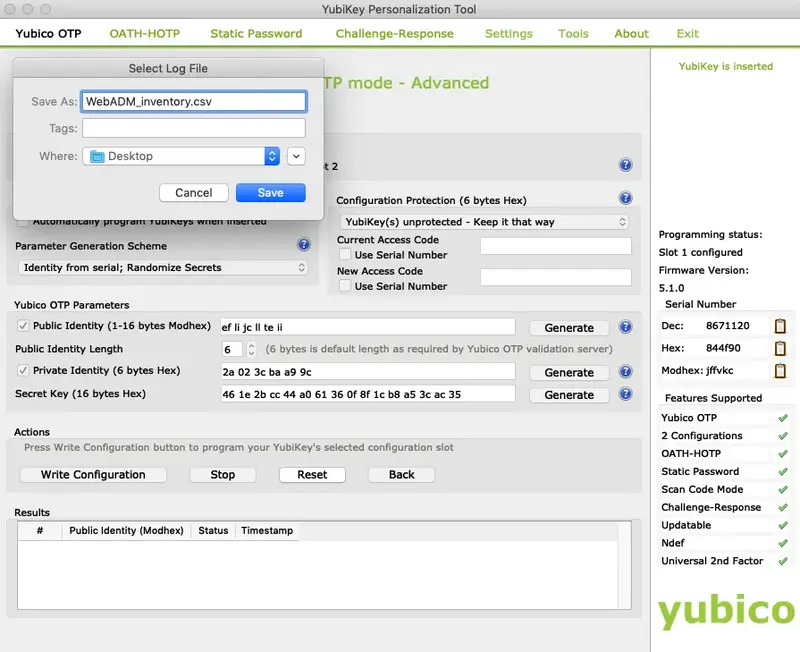
Save this file. We will import it in WebADM inventory in the next step.
3. Import Yubikey inventory file in WebADM
We have now reprogrammed our Yubikey and generate an inventory for it. We will now import the inventory file under WebADM to be able to use this Yubikey with OpenOTP, Spankey…
Now, go on the WebADM Admin GUI and click on the Import tab.
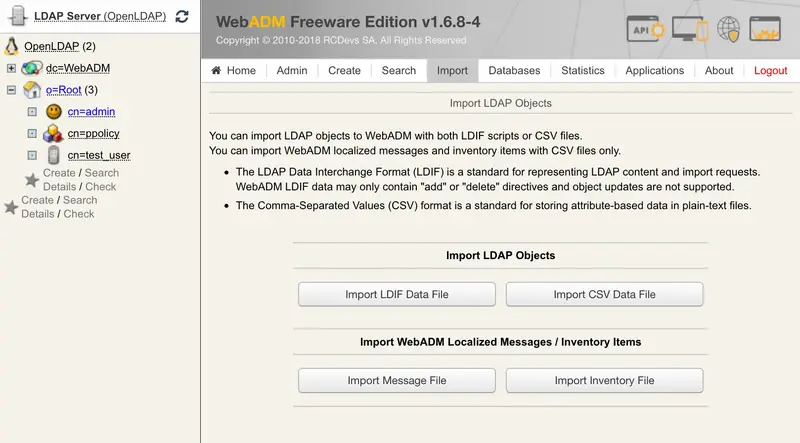
On that page, click on Import Inventory File button.
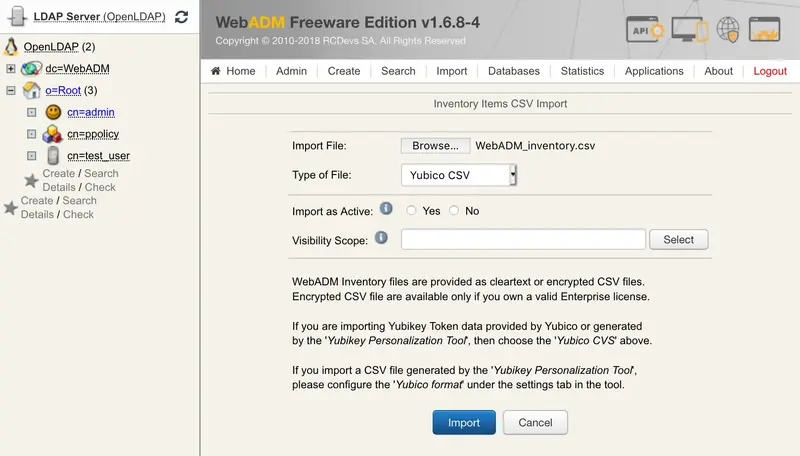
In Type of File select: Yubico CSV and browse your Inventory file previously created through the Yubikey Personalization Tool.
Click the Import button and the Yubikey should be successfully imported.

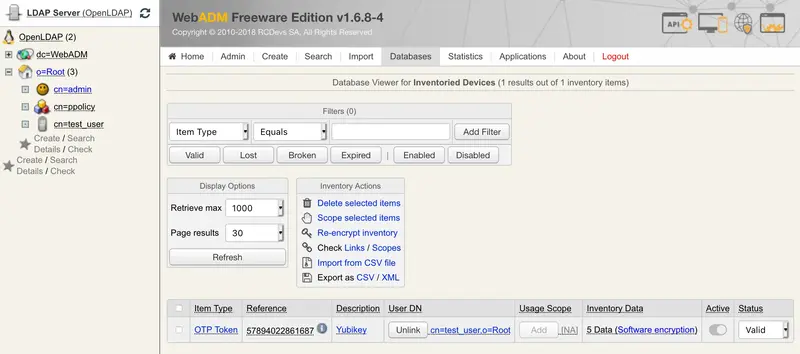
You can check the Inventory table to see the new entry. Click on Databases tab and Inventoried Devices. You can see my new entry below.
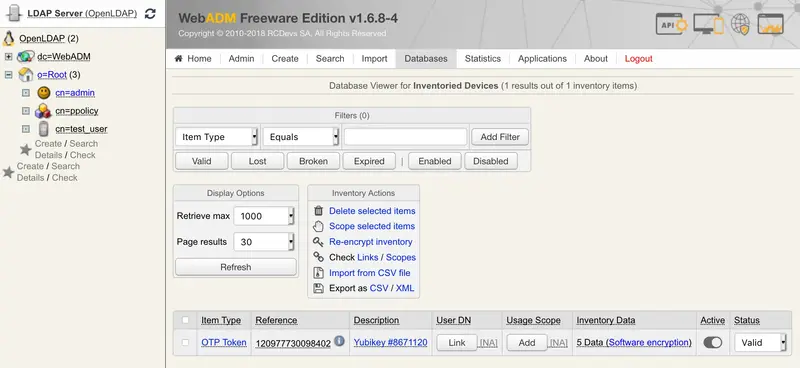
I’m now able to assign this Yubikey to a user account, that step will be the part of the next section.
4. Assign a Yubikey to a user account
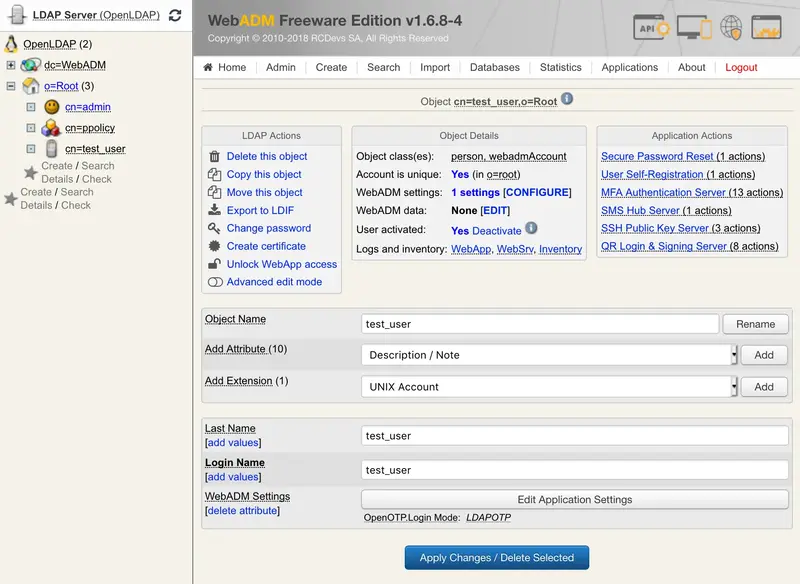
The Yubikey can be assigned to a user through the WebADM Admin GUI or through the User Self-Service Desk (SelfDesk) and User Self-Registration (SelfReg) applications. Here we will assign the Yubikey to the user through the Admin GUI. Click on an Activated User account in the left tree.
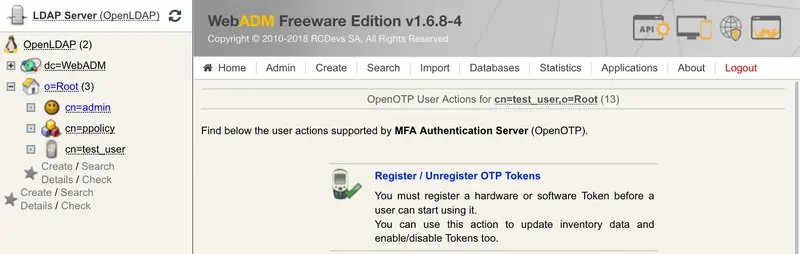
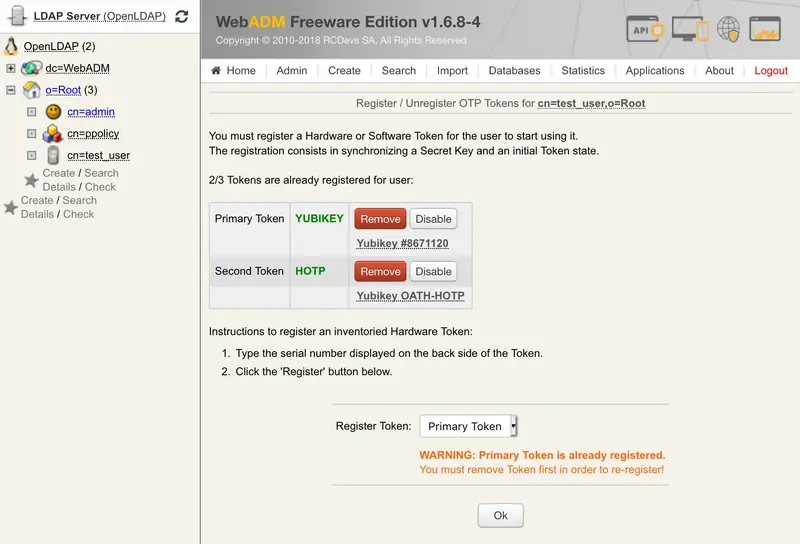
Click on MFA authentication Server under Application Actions Box and then Register/Unregister OTP Tokens.
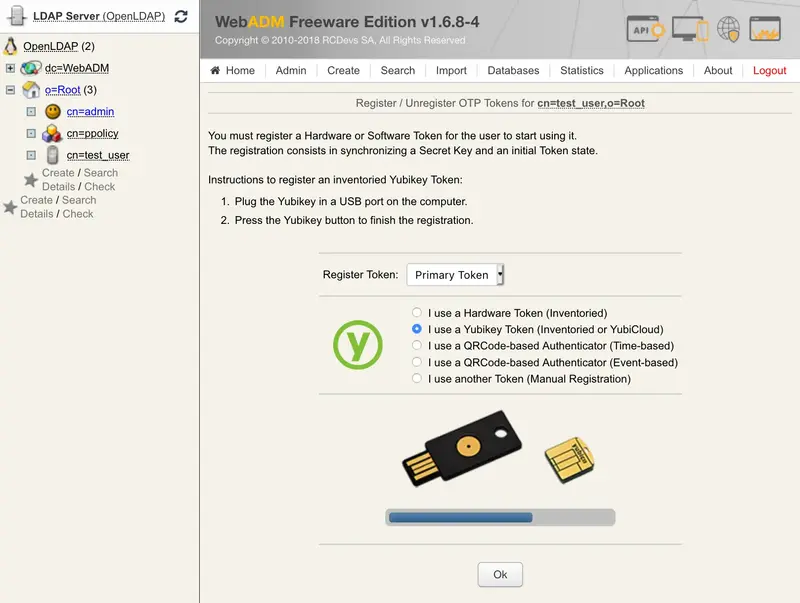
Register your Token and choose Primary Token and check the box I use a Yubikey Token.
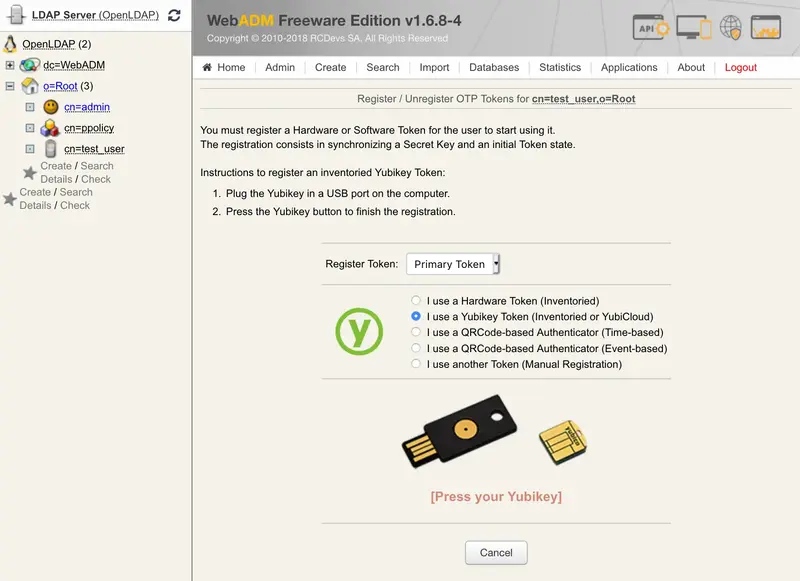
At this step, you just have to short touch your Yubikey for selection Slot 1 and to enroll it on the user account.
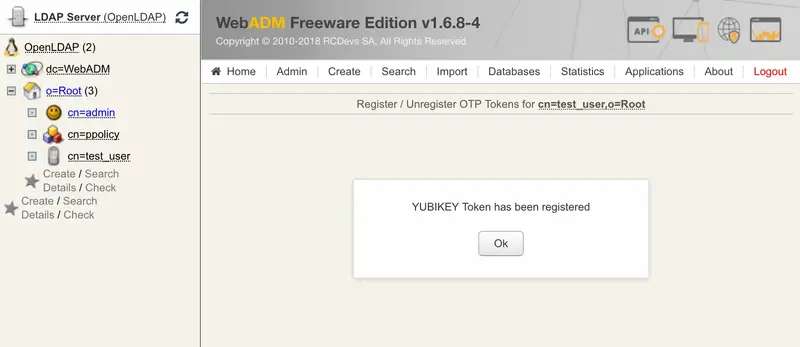
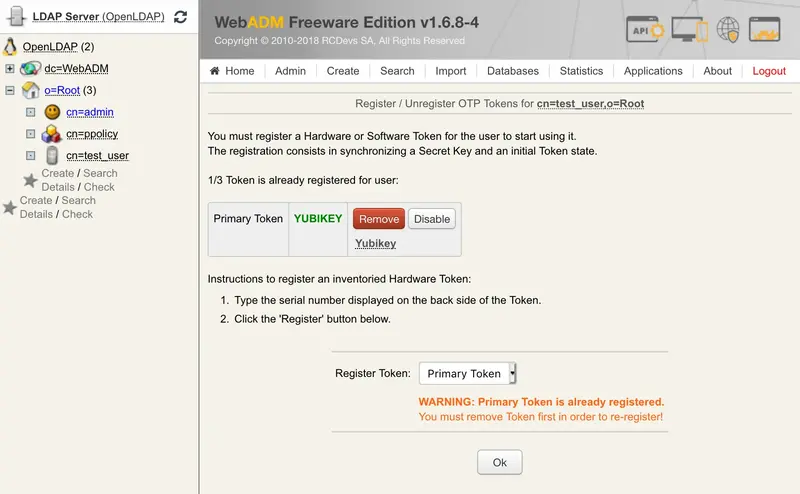
The Yubikey is correctly assigned to the User account. Now if you come back to Databases tab Inventoried Devices, you can see a link between Yubikey database entry and the LDAP user.
Important Note
A Yubikey can be assigned to many users but for this, you have to remove the User DN link in databases on the Yubikey entry. Remove the link between the Yubikey and the user didn’t remove the Yubikey on the User account. The first user who has enrolled the Yubikey will always be able to use the Yubikey to log in.
5. Test OTP Authentication
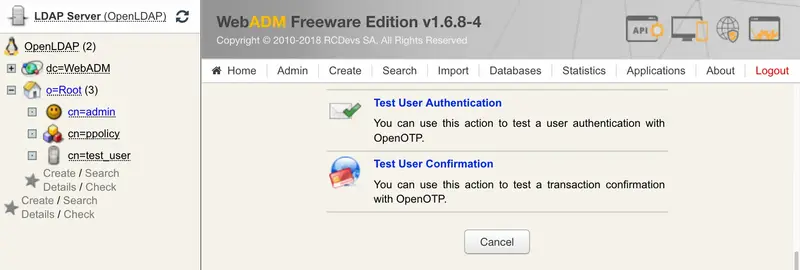
Let’s try a Test User Authentication. Return to the MFA Authentication Server in the Application Actions box for the user and click the Test User Authentication action.
Put the cursor in the OTP Password field and short touch your Yubikey for activating Slot 1.

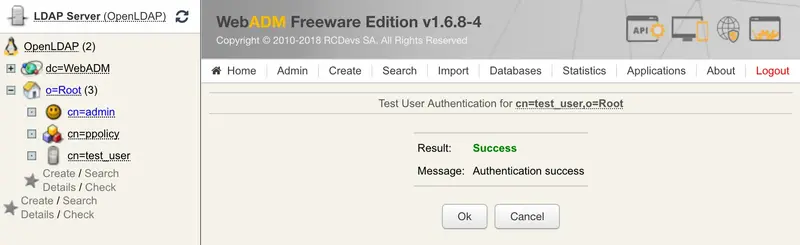
You can now perform a login through OpenOTP with your Yubikey.
Important Note
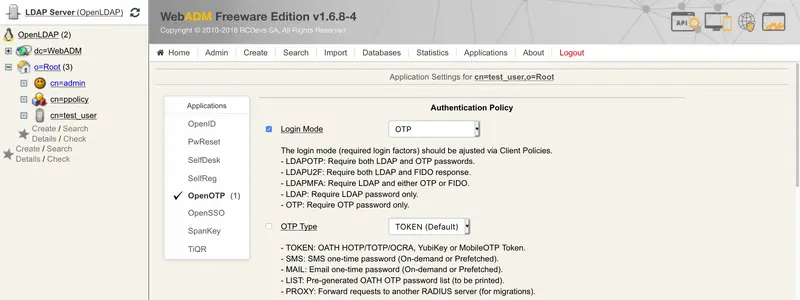
We didn’t type in any LDAP Password because the Login Mode is OTP only. Therefore, select your user and click on WebADM settings: CONFIGURE. Then select OpenOTP and choose Login Mode: OTP.
6. Reprogram a Yubikey to generate 6 or 8 digits OTP code
Instead of generating a key of 44 characters when you press the Yubikey, you can configure it to generate a 6 or 8 digits OTP code.
But first, you have to edit some settings in the Yubikey Personalization tool. Go on the Settings tab and select Log configuration output: Yubico format like below:
Now, we will reprogram the Yubikey. Switch to the OATH-HOTP tab and select Advanced configuration. Please, select Configuration Slot 2. Disable the option OATH Token Identifier (6 bytes) like below:
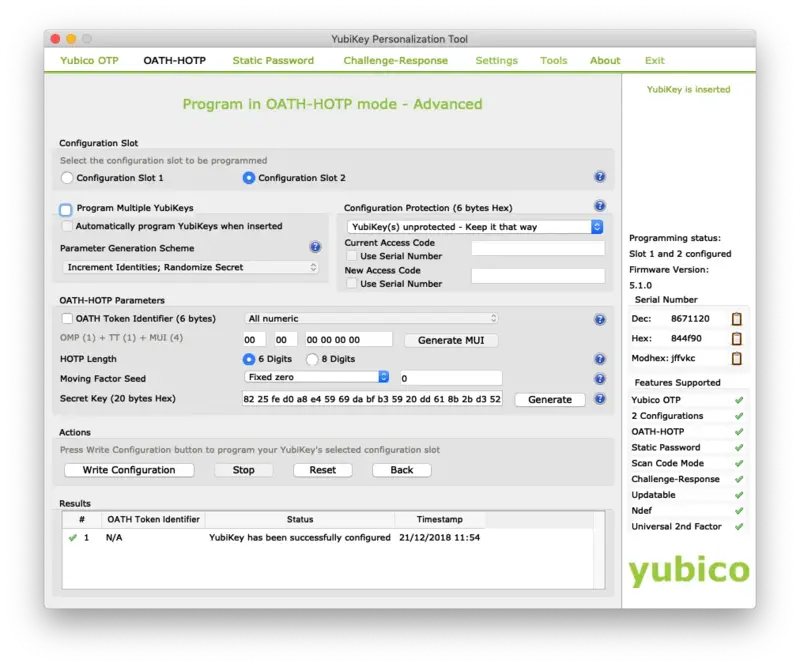
Plug in your Yubikey, click on the Generate buttons. Click now on the Write Configuration button, and you should be prompted to save the inventory file. Import this file in WebADM inventory like explained in section 3. Your Yubikey is now reprogrammed. At this step, your Yubikey must generate 6 or 8 digits OTP code when you touch it long. If it’s not the case, it’s useless to perform the next steps.
We will now assign this HOTP Yubikey to a User account through the WebADM Admin GUI. To assign this Yubikey, you will need its Reference registered in Databases tab Inventoried Devices.
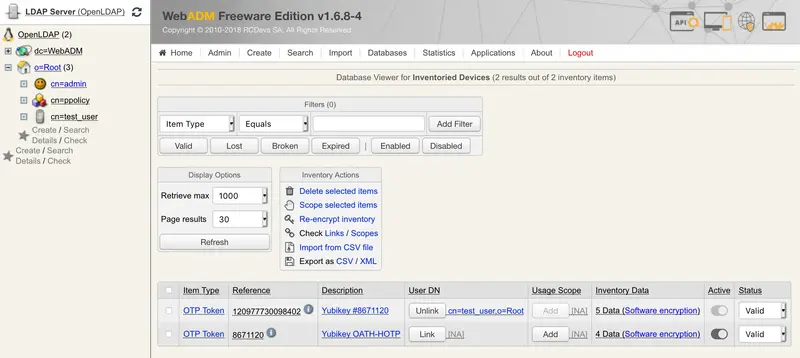
On my side, the reference is 8671120.
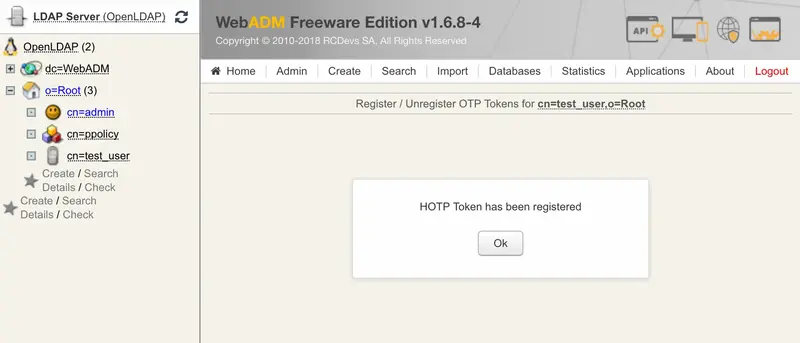
Click now on a user account in the left tree, MFA authentication Server, Register/Unregister OTP Tokens. Register your Token and choose Second Token. Select the option I use a Hardware Token (Inventoried). In the Token Serial field, put the reference previously copied.
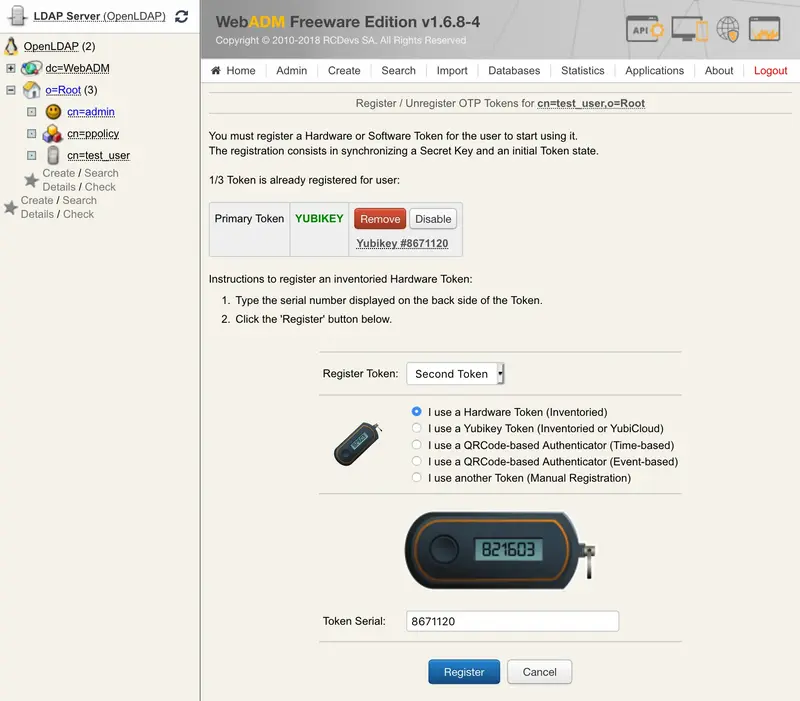
Click on Register and the Yubikey is now enrolled on your account.
Important Note
If you have chosen 8 digits OTP length, you will have to configure the OpenOTP to work with 8 digits OTP Token in the default configuration or through a client policy. Default OpenOTP configuration cannot work with 6 and 8 digits at the same time. This setting can be found under the graphical OpenOTP configuration: OTP Password Length.
7. Test OATH-HOTP Authentication
Let’s try a Test User Authentication. Return to the MFA Authentication Server in the Application Actions box for the user and click the Test User Authentication action.
Put the cursor in the OTP Password field and long touch your Yubikey for activating Slot 2.

You can now perform a login through OpenOTP with your Yubikey.
Important Note
We didn’t type in any LDAP Password because the Login Mode is OTP only. Therefore, select your user and click on WebADM settings: CONFIGURE. Then select OpenOTP and choose Login Mode: OTP.