Policies
1. Overview
This documentation will explain policies configurable for Web Services and Web Applications under WebADM admin GUI. WebADM provides different kinds of policies :
- default application configuration (weight 1),
- per-group (weight 2),
- per-user (weight 3),
- per-application (weight 4-6).
Settings with the highest weight override settings with the lowest weight.
(e.g. for OpenOTP: My default OpenOTP settings require a LoginMode=LDAP only but the user who is trying to log in has a policy configured on his account with the LoginMode=LDAP+OTP. To be able to log in, this user will have to provide LDAP password+OTP).
2. Default policy (weight 1)
The first level of setting is defined under the applications configuration itself. Login on WebADM Admin GUI > Applications tab > APPLICATION_NAME > CONFIGURE. All web services and web applications provided by RCDevs can be configured here for the first level of settings. If no other settings are configured on a user, a group or in a client policy, then the default configuration will be applied.
3. Per-group policy (weight 2)
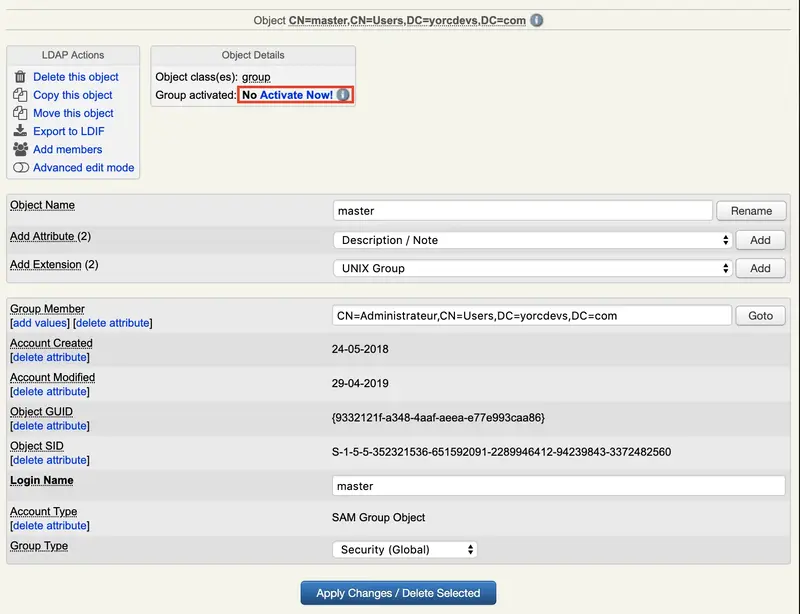
Applications can be configured per-group. Per-group policies override the default applications configuration. Login on WebADM Admin GUI, select a group on which you want to apply other settings than the default settings already configured on the application configuration itself. To be able to configure a policy on a group, the group must be activated under WebADM. When you are on the group object, click on Activate button > Proceed > Extend Object.
Your group is now Activated and ready for per-group policy. On the group object > Object Details > WebADM settings: NONE [CONFIGURE] click on CONFIGURE button.
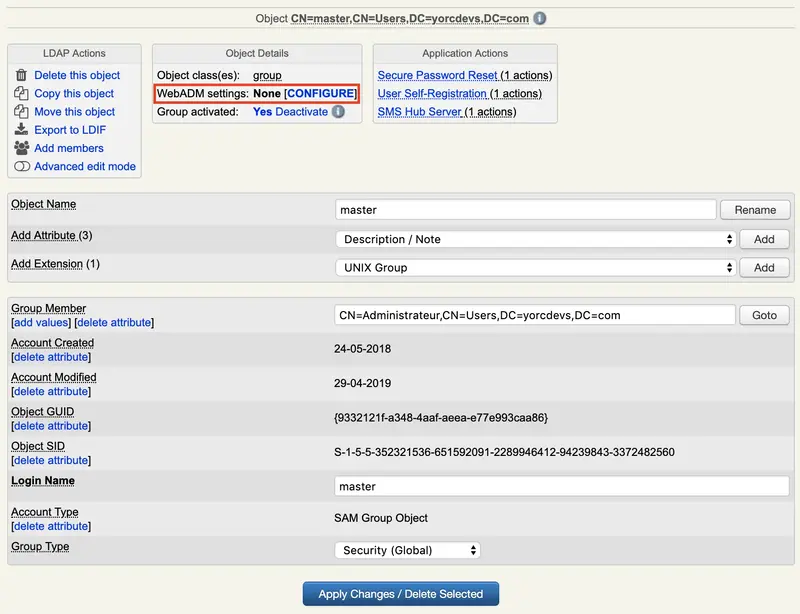
On the next page, you can select which application you want to reconfigure for the selected group.
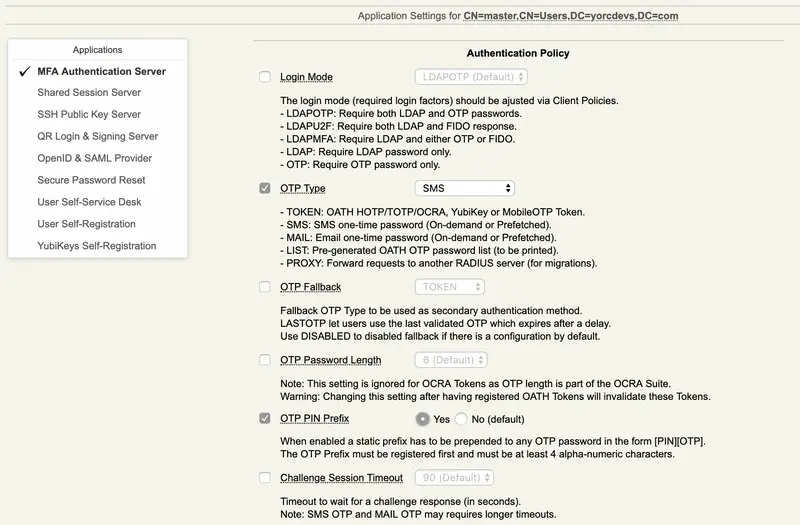
In this example, I reconfigure some settings for OpenOTP:
OTP Type and I enabled the OTP PIN Prefix for that group.
Note
With this extra-settings configured on the group, if a member of that group doesn’t have a phone number and a PIN Prefix already configured on his account, then the login will be a failure with an error message like: Account missing required data.
4. Per-user policy (weight 3)
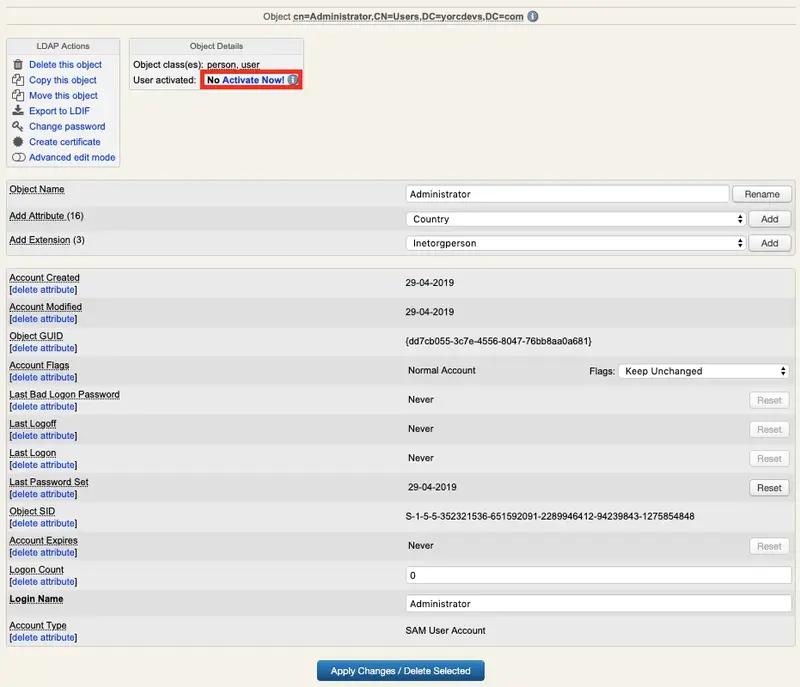
Applications can be configured per-user. Per-user policies override the default applications configuration and the per-group policies. Login on WebADM Admin GUI, select a user account on which you want to apply other settings than the default settings. To be able to configure a policy on a user account, the user must be activated under WebADM. When you are on the user object, click on Activate button > Proceed > Extend Object.
Your user is now Activated and ready for per-user policy. On the user object > Object Details > WebADM settings: NONE [CONFIGURE] click on CONFIGURE button.
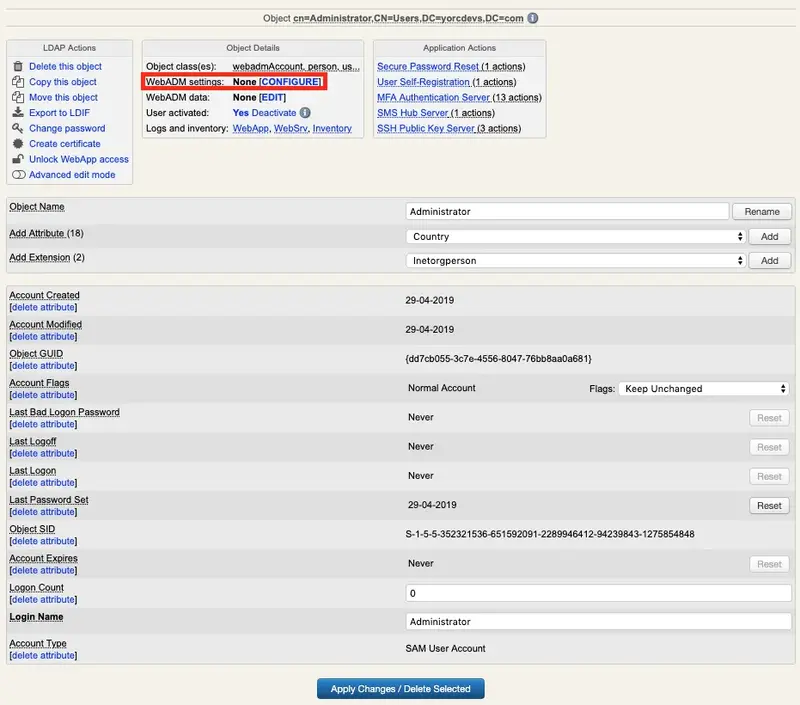
On the next page, you can select which application you want to reconfigure for the selected user.
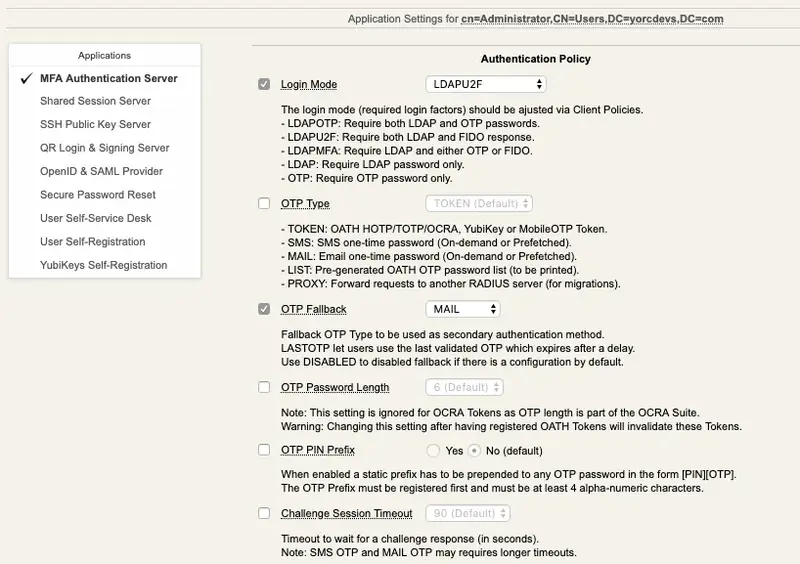
In this example, I changed the LoginMode to LDAPMFA and OTP Fallback to SMS for the user.
Note
With that extra-settings configured on the user account, if the user doesn’t have a FIDO key or phone number already configured on his account, then the login will be a failure with an error message like : Account missing required data.
5. Client policy
5.1 Default client policy (weight 4)
A policy can be configured per-application. Client policy overrides every other policy already configured on a group or on a user account. A client policy can also be defined per-group (weight 5) and per-network (weight 6) under the client policy configuration itself.
First, log in on the WebADM Graphical Unit Interface. Click on the Admin tab and you will find a box named Client Policies.
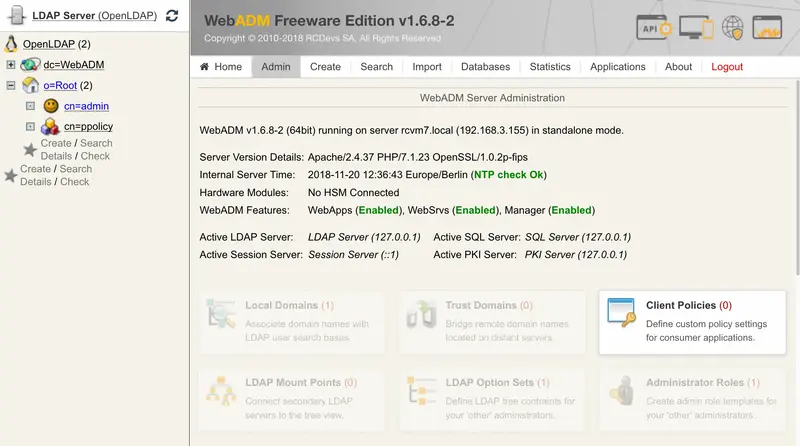
Click on it and on the next page, click on Add Client:
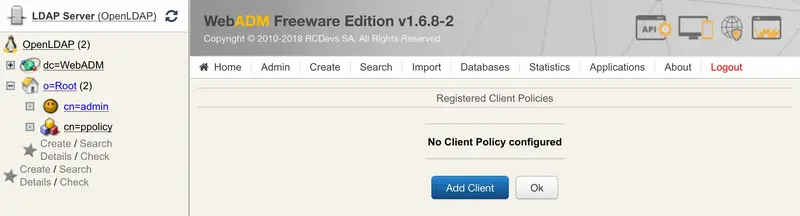
Enter a Common Name, if you want a description and click on Proceed:

On the next screen, click on the Create Object button.

A client Policy object has now been created. We are now able to configure this client policy.
Many settings can be applied here like which users/groups/networks the client policy will be applied, allowed/excluded hours, which domain…
If you scroll down a little bit, you will find the setting named Forced Application Policies.
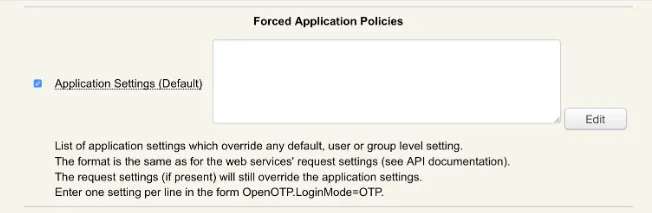
Check the box on left and click on the Edit button. On the next screen, you are able to completely reconfigure an application.
In our example, we will choose OpenOTP:
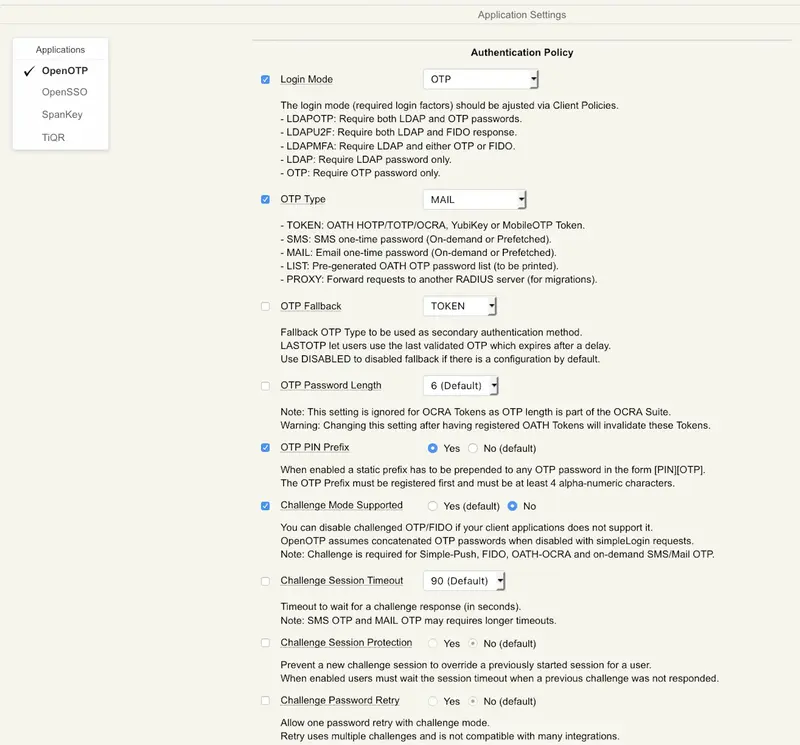
So, you can choose every setting you want and reconfigure the OpenOTP application for your client application. The client policy overrides the default application settings, user and group settings.
After editing the configuration, you can click on the Apply button to save the configuration.
5.2 Per-group extra policy (weight 5)
In the same way, a client policy can be overridden for a specific group.
In Per-Group Extra Policies menu, enable the group list setting and then click the Select button. You are now in the edition mode, and you can select the group you want in the left LDAP tree just by clicking on it.
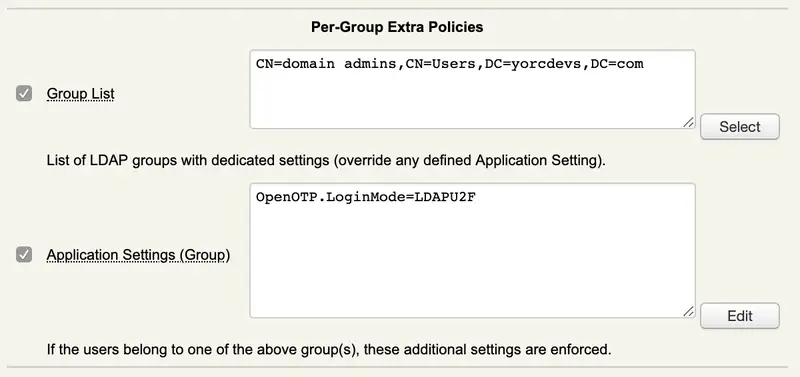
In this example, I reconfigure the setting LoginMode to LDAPMFA for the group CN=domain admins,CN=Users,DC=yorcdevs,DC=com.
Per-group policy overrides the default policy configuration.
5.3 Per-network extra policy (weight 6)
In the same way, a client policy can be overridden for login coming from a specific network.
In Per-Network Extra Policies section, check the box on the left of Internal Networks setting and put the network value for which network you want to reconfigure the policy. In Application Settings (Internal), click the Edit button, and you can now reconfigure the application you want for the specified network.
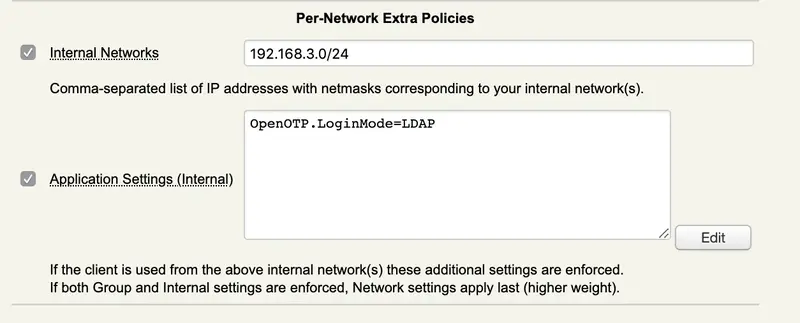
In this example, I reconfigure the setting LoginMode to LDAP for login requests coming from 192.168.3.0/24 network.
Per-Network policy overrides per-group policy.
Note
WebADM can match a policy with a client application through a client ID, NAS-Identifier or IP of the client application. A dedicated section for Client ID is described below.
Warning
To be able to use that setting, your client application should be configured to forward the user IP address to WebADM.
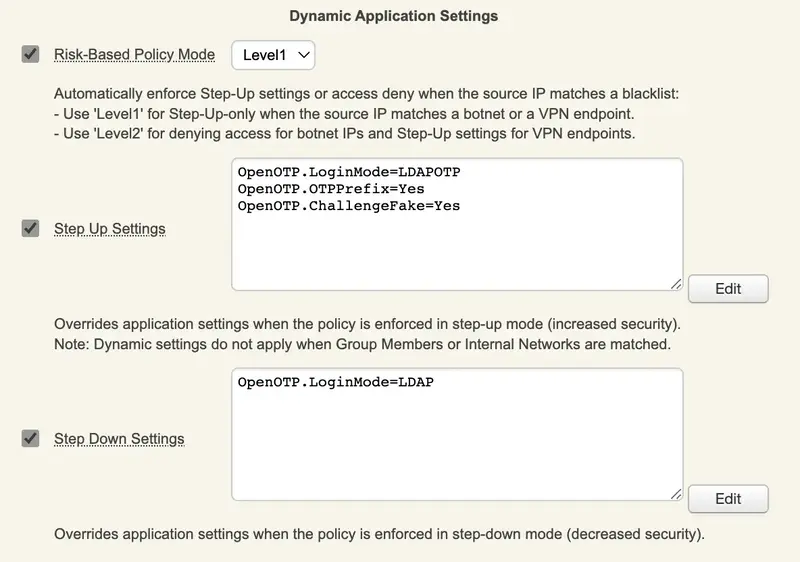
5.4 Dynamic Application Settings
The Dynamic application settings allow you to dynamically change setting of Web applications or Web Services when source IP is coming from a botnet or public VPN endpoints.
- Level 1: This policy mode will enter in the
Step-Upmode where Step-Up settings can be defined below. - Level 2: This policy mode completely deny the access to the system when IP source is considered as botnet IP and apply the
Step-Upsettings when IP source is considered as public VPN endpoints.
Botnet and public VPN endpoints are coming from a database hosted nad maintained on RCDevs cloud infrastructure and are fetched from …
In the following example, I configured the Step-Up mode for:
- LDAP + OTP authentication,
- A PIN Prefix must be provided,
- Send back a fake OTP challenge when a wrong LDAP password or OTP Prefix is entered
Once my setting are applied, you can see the following from the Policy menu:
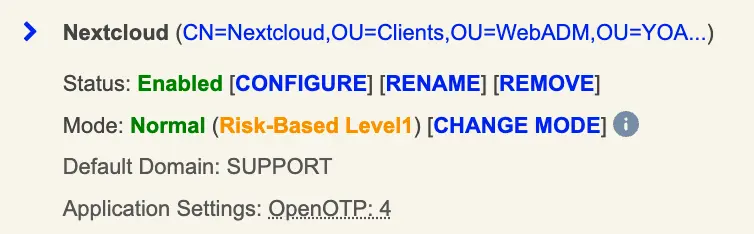
You can click on the CHANGE MODE button to manually change the applied mode. For example, you can manually Step-Down, Step-Up or Deny the access for a specific period.
This settings can also be enforced when it matches Per-Group and/or Per-Network policies. By default, it is applied to the default application setting policy (weight 4) if nothing else specified is specified.
5.5 Contract Signing Settings
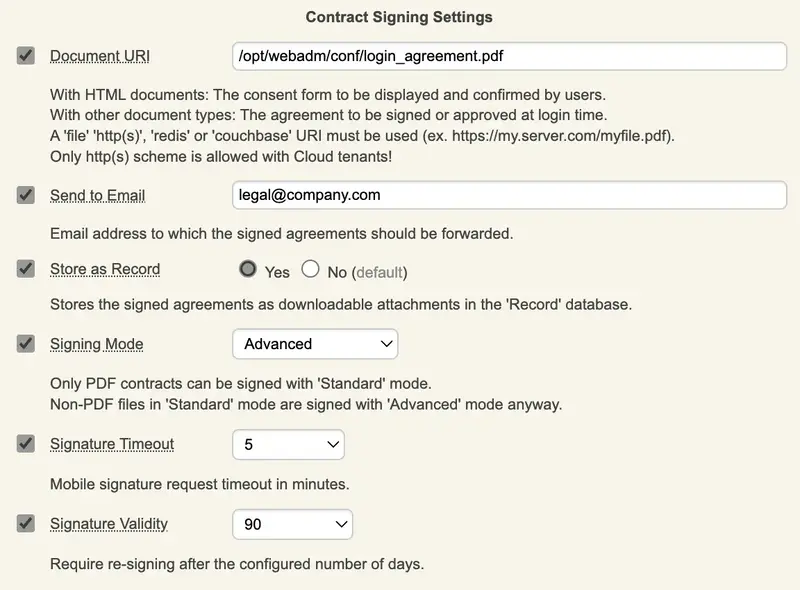
In client policies, you now have the possibility to request your users that want to log in on a system to sign a document before they can access it.
- The document can be an HTML form, a PDF located on the file system or accessible through a URL. In that example I used a document stored on the file system. For Cloud tenants, only HTTP(S) scheme is allowed.
- Once the document has been signed by your user(s), the signed version can be sent to a recipient. Only one recipient can be configured. If you want more than one person to receive the signed document, you have to create a mailing list on your mail server which include the desired recipients.
- Once the document is signed, you can also choose if you want to store it in the SQL database of WebADM server in the Record table or not.
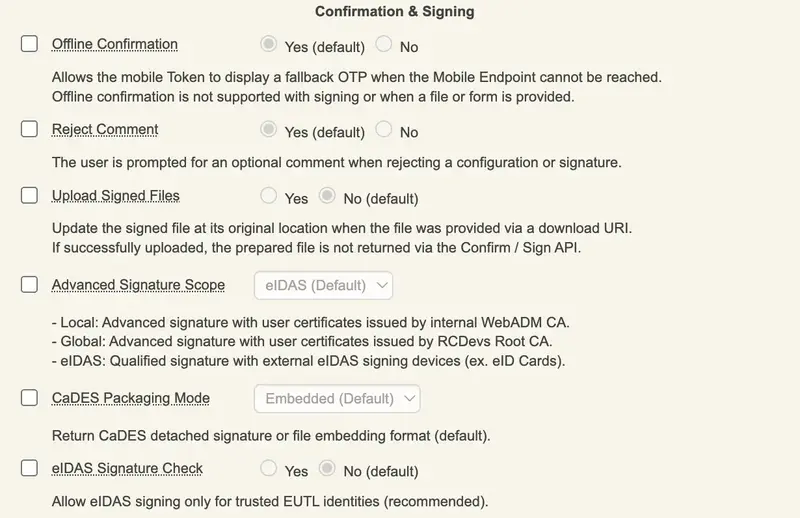
- The desired
Signing modecan be configured, you can choose betweenStandardandAdvanced. Please refer to OpenOTP Signature documentation to get details on the signature types. IfAdvancedmode is chosen, you can configure thescope(Local CA, Global CA or eIDAS) that you want to use. This can be configured underDefault Application Settings>MFA Authentication Server>Confirmation & Signingsection:
- The signature timeout is corresponding to the time that the signature request is available on the backends and the time the user has to sign the document. Once reached, the signature request is expired on the backends and user will have to restart the login from scratch to trigger a new signature request. Once the document is signed, the user will be able to log in.
- Signature validity correspond to the validity of the signed document. Once exceeded, the document will need to be signed again by the user.
If the document had any modification then the user will be automatically prompted to sign the new version before being able to authenticate on the system.
6. How to match my client policy with my client application
The matching between a client policy configured under WebADM and a client application can be done in different ways.
6.1 Client ID
With RCDevs products/plugins (e.g : OpenOTP Credential Provider, ADFS plugin, Spankey client…) a setting named Client ID can be configured during the plugin/application installation.
For OpenOTP Credential provider for Windows:
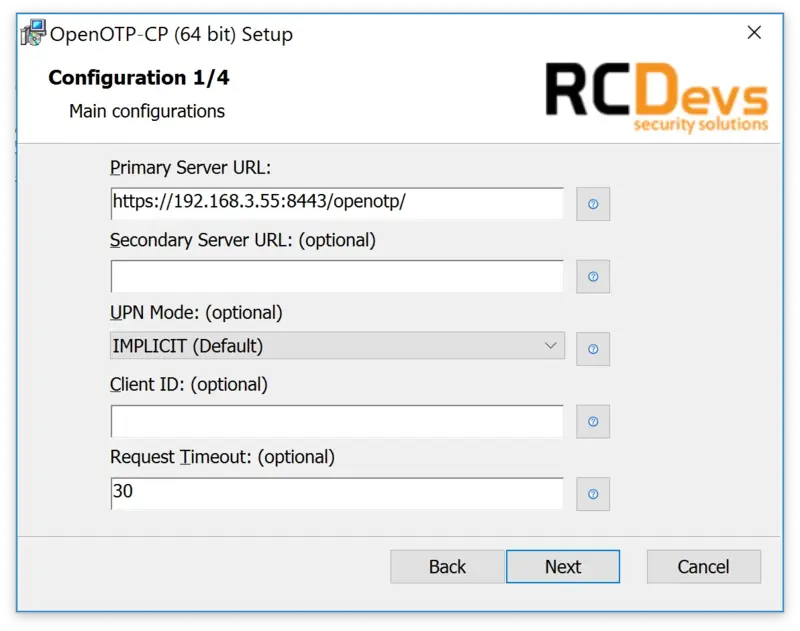
I can put WINDOWS in the Client ID field and create a client policy named WINDOWS on WebADM and then the matching will operate.
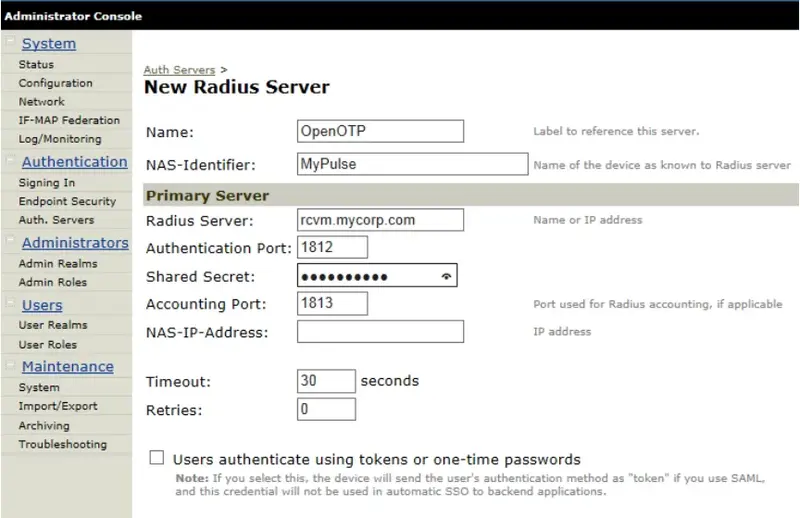
6.2 Nas-Identifier
In some third-party product, you can define a setting named NAS-Identifier. In this example with Pulse Secure, I configured a NAS-Identifier named MyPulse. So I will create a client policy named MyPulse in WebADM to match the policy with my Pulse VPN.
6.3 Client application IP(s)
If you are not able to configure a NAS-ID or Client ID on your application, you can match a client policy with the IP address of your client application. The IP address of your client should be configured in the client policy itself. When you edit the client policy, you can find a setting named Client Name Aliases. Put the IP address of your client here and policy will match during an authentication.
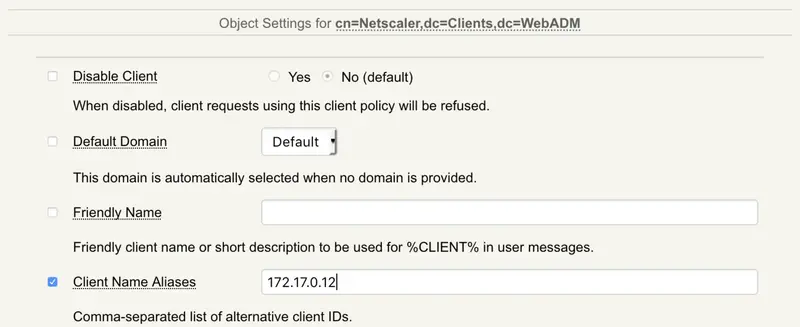
Note
With the Client Name Aliases setting, you are able to match many clients with only one client policy. You just have to put IPs comma-separated.
7. Web Application policy
You can define client policy for Self-User registration, Self-Service Desk and Password Reset applications. To do it, you just have to create a client policy with the short name of the application. Short names are:
- pwreset
- selfdesk
- selfreg
Create a client policy for the application you want and reconfigure the Application settings under the client policy configuration menu.
8. Check policy matching through WebADM logs
Try an authentication on your client application, log in on the WebADM GUI and click on Databases tab. In the System Log Files section, click on WebADM Server Log file.
[2017-12-06 14:21:01] [172.17.0.12] [OpenOTP:R8MFCYSQ] New openotpSimpleLogin SOAP request
[2017-12-06 14:21:01] [172.17.0.12] [OpenOTP:R8MFCYSQ] > Username: administrateur
[2017-12-06 14:21:01] [172.17.0.12] [OpenOTP:R8MFCYSQ] > Domain: yorcdevs.com
[2017-12-06 14:21:01] [172.17.0.12] [OpenOTP:R8MFCYSQ] > Password: xxxxxxxx
[2017-12-06 14:21:01] [172.17.0.12] [OpenOTP:R8MFCYSQ] > Client ID: NETSCALER
[2017-12-06 14:21:01] [172.17.0.12] [OpenOTP:R8MFCYSQ] > Source IP: 172.17.0.12
[2017-12-06 14:21:01] [172.17.0.12] [OpenOTP:R8MFCYSQ] Enforcing client policy: NETSCALER (matched client ID)
[2017-12-06 14:21:01] [172.17.0.12] [OpenOTP:R8MFCYSQ] Registered openotpSimpleLogin request
[2017-12-06 14:21:01] [172.17.0.12] [OpenOTP:R8MFCYSQ] Resolved LDAP user: CN=Administrateur,CN=Users,DC=yorcdevs,DC=com (cached)
[2017-12-06 14:21:01] [172.17.0.12] [OpenOTP:R8MFCYSQ] Resolved LDAP groups: propri\xc3\xa9taires cr\xc3\xa9ateurs de la strat\xc3\xa9gie de groupe,admins du domaine,administrateurs de l\xe2\x80\x99entreprise,administrateurs du sch\xc3\xa9ma,administrateurs,utilisateurs du bureau \xc3\xa0 distance,groupe de r\xc3\xa9plication dont le mot de passe rodc est refus\xc3\xa9
[2017-12-06 14:21:01] [172.17.0.12] [OpenOTP:R8MFCYSQ] Started transaction lock for user
[2017-12-06 14:21:01] [172.17.0.12] [OpenOTP:R8MFCYSQ] Found user language: EN
[2017-12-06 14:21:01] [172.17.0.12] [OpenOTP:R8MFCYSQ] Found 1 user mobiles: +3520000000
[2017-12-06 14:21:01] [172.17.0.12] [OpenOTP:R8MFCYSQ] Found 1 user emails: xxxxxx@rcdevs.com
[2017-12-06 14:21:01] [172.17.0.12] [OpenOTP:R8MFCYSQ] Found 3 user certificates
[2017-12-06 14:21:01] [172.17.0.12] [OpenOTP:R8MFCYSQ] Found 38 user settings: LoginMode=LDAPOTP,OTPType=TOKEN,OTPLength=6,ChallengeMode=Yes,ChallengeTimeout=90,MobileTimeout=30,PushLogin=Yes,EnableLogin=Yes,HOTPLookAheadWindow=25,TOTPTimeStep=30,TOTPTimeOffsetWindow=120,MOTPTimeOffsetWindow=120,OCRASuite=OCRA-1:HOTP-SHA1-6:QN06-T1M,SMSType=Normal,SMSMode=Ondemand,MailMode=Ondemand,LastOTPTime=300,ListChallengeMode=ShowID
[2017-12-06 14:21:01] [172.17.0.12] [OpenOTP:R8MFCYSQ] Found 10 user data: LoginCount,RejectCount,OTPPrefix,TokenType,TokenKey,TokenState,TokenID,Device1Name,Device1Data,Device1State
[2017-12-06 14:21:01] [172.17.0.12] [OpenOTP:R8MFCYSQ] Found 1 registered OTP token (TOTP)
[2017-12-06 14:21:01] [172.17.0.12] [OpenOTP:R8MFCYSQ] Requested login factors: LDAP & OTP
[2017-12-06 14:21:01] [172.17.0.12] [OpenOTP:R8MFCYSQ] LDAP password Ok
[2017-12-06 14:21:01] [172.17.0.12] [OpenOTP:R8MFCYSQ] Challenge required
[2017-12-06 14:21:01] [172.17.0.12] [OpenOTP:R8MFCYSQ] Sent push notification for token #1
[2017-12-06 14:21:01] [172.17.0.12] [OpenOTP:R8MFCYSQ] Waiting 28 seconds for mobile push response
[2017-12-06 14:21:05] [192.168.3.56]  [OpenOTP:LZ33NOWW] Received mobile request (authentication)
[2017-12-06 14:21:05] [192.168.3.56]  [OpenOTP:LZ33NOWW] > Session: kq7sxP3OabLXpygI
[2017-12-06 14:21:05] [192.168.3.56]  [OpenOTP:LZ33NOWW] > Encoded OTP Password: xxxxxx
[2017-12-06 14:21:05] [192.168.3.56]  [OpenOTP:R8MFCYSQ] Found challenge session started 2017-12-06 14:21:01
[2017-12-06 14:21:06] [172.17.0.12] [OpenOTP:R8MFCYSQ] PUSH password Ok (token #1)
[2017-12-06 14:21:06] [172.17.0.12] [OpenOTP:R8MFCYSQ] Updated user data
[2017-12-06 14:21:06] [172.17.0.12] [OpenOTP:R8MFCYSQ] Sent success response
You can show in the previous transaction logs, that the Nas-Identifier passed by the client application is NETSCALER and the client match with the corresponding policy.
[2017-12-06 14:21:01] [172.17.0.12] [OpenOTP:R8MFCYSQ] > Client ID: NETSCALER
...
[2017-12-06 14:21:01] [172.17.0.12] [OpenOTP:R8MFCYSQ] Enforcing client policy: NETSCALER
(matched client ID)
So my client policy is applied and settings defined in this policy will be required/available during an authentication coming from that client.
You can check in the same way if a Client ID or IP address match with your client policy.