Mountpoints
1. Overview
Generally, WebADM is configured to connect with a remote AD/LDAP domain for two reasons:
-
For an admin to be able to browse (and optionally modify) remote domain contents such as user objects via a web browser (and optionally delegate that work to sub-administrators).
-
To act as a gateway to allow the OpenOTP server to read and use remote user data for authentication purposes (i.e. fetch user mobile phone number from AD account).
Remote AD/LDAP connections are configured with a mechanism called MountPoints in WebADM, which as indicated is a method of creating virtual folders (containers) in the local WebADM directory to which the remote AD/LDAP contents are dynamically mounted to.
The steps are:
- Create a new OU or a new container on your WebADM server.
- Connect the additional LDAP and mount it in the OU/container previously created.
- Create a new WebADM domain object, this object is required to define the
User Search Basefor your additional LDAP server.
In this documentation, WebADM is natively connected with Active Directory and the secondary LDAP will be an Active Directory too.
Note
Note that you can connect any kind of LDAP like Novell, OpenLDAP… as a mount point. Conversely, you can also have a WebADM natively connected with an OpenLDAP or Novell directory and connect an Active Directory as mount point.
2. Create a New Container
We will start by creating a new Organizational Unit/Container. As I said before, this new OU/Container will contain the remote LDAP virtually mounted.
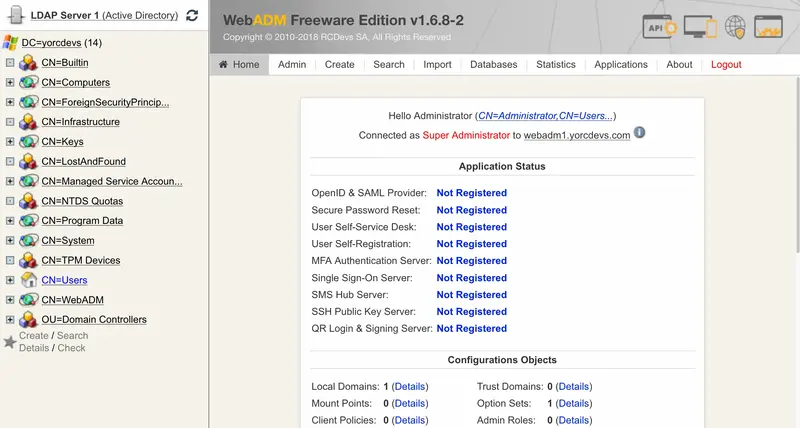
Log in to your WebADM server with your super_admin account:
And click on Create button below the left tree, and you are now in the creation menu:
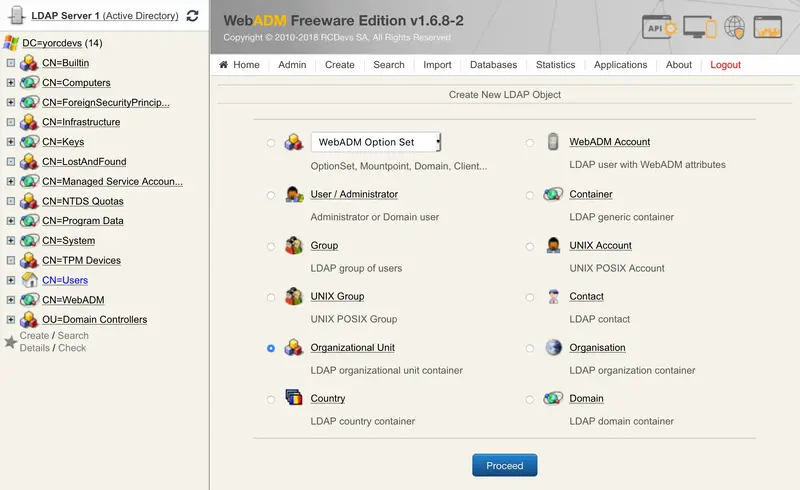
Select Organizational Unit or Container and click on Proceed:
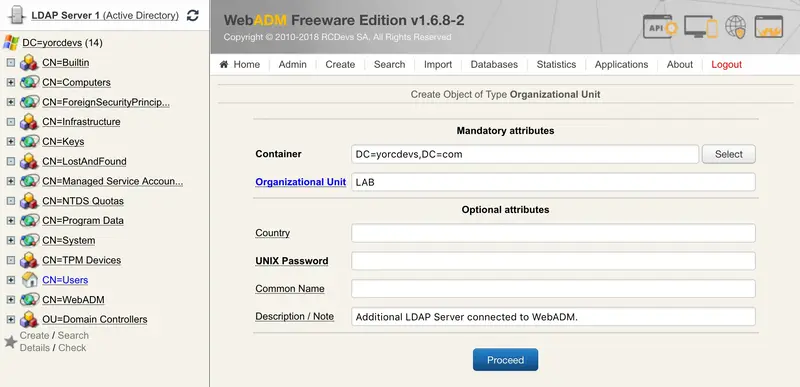
Name your object and click on Proceed again:

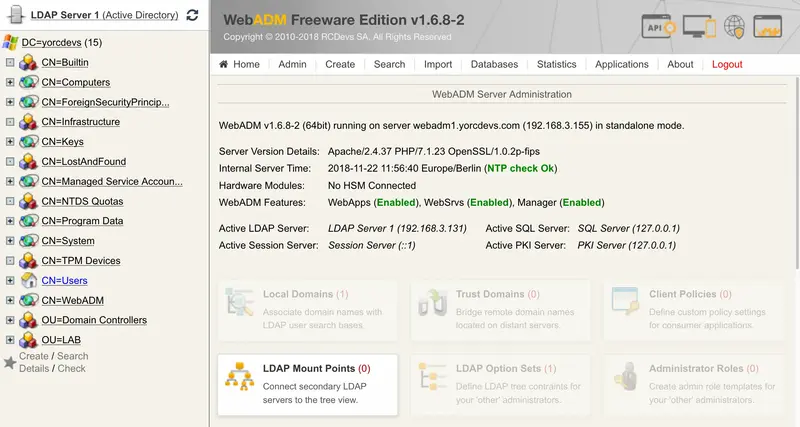
Click on Create Object and your OU/Container is created.
3. Connect the Additional LDAP to WebADM
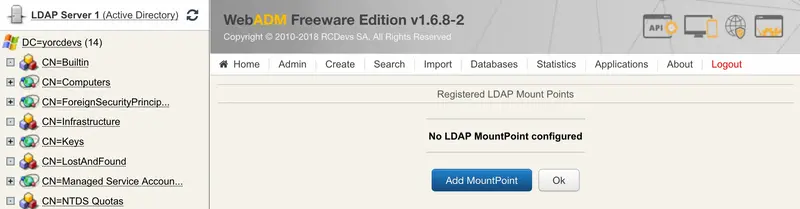
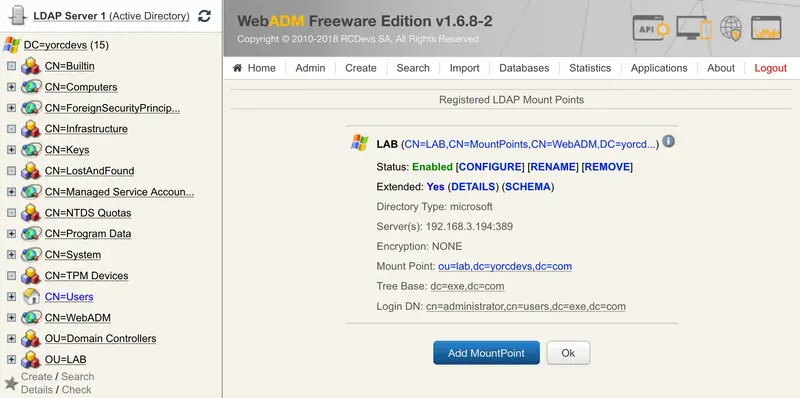
We will now connect the remote LDAP to WebADM. Always through the WebADM Admin GUI, click on Admin tab, LDAP Mount Points:
Now click on Add MountPoint button.
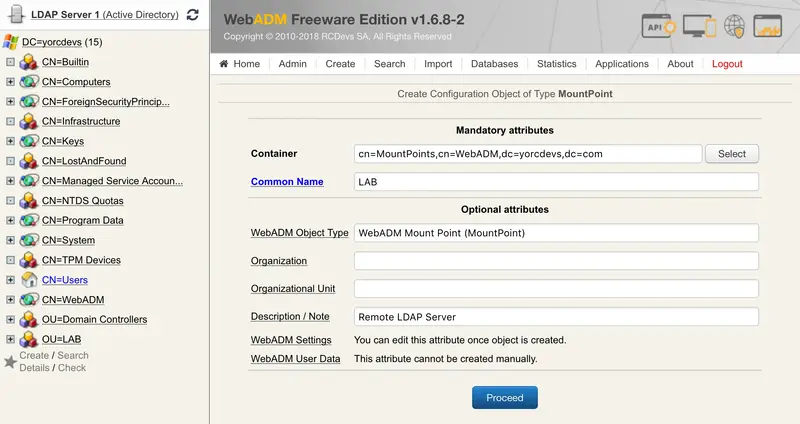
Name your MountPoint object and optionally enter a description. On my side, I keep LAB name. Click on Proceed button.
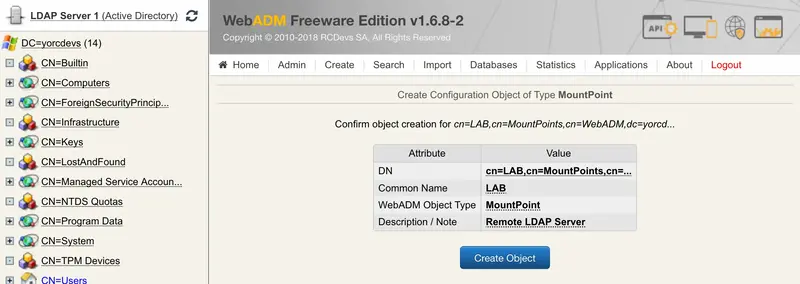
On the next screen, click on Create Object.
You are now in the MountPoint configuration. You have to configure:
Mount DN: This setting is the location where the remote LDAP will be mounted on your WebADM server. We previously created a blank OU for this. So select your OU or the container previously created.Host Name(s): You have to configure here, the name or IP address of the remote LDAP server(s).Port Number: Set by default to 389 port but can be changed to 636 for LDAP SSL.Encryption type: None, SSL or TLS encryption are available.Tree Base: Enter the tree base of the remote LDAP (e.g: for the domainrcdevs.com, the tree base isdc=rcdevs,dc=com).Login DN: The login DN will be used to write WebADM metadata on users account on the remote LDAP.Login password: Password of the login DN user.- The last 3 options are optional.
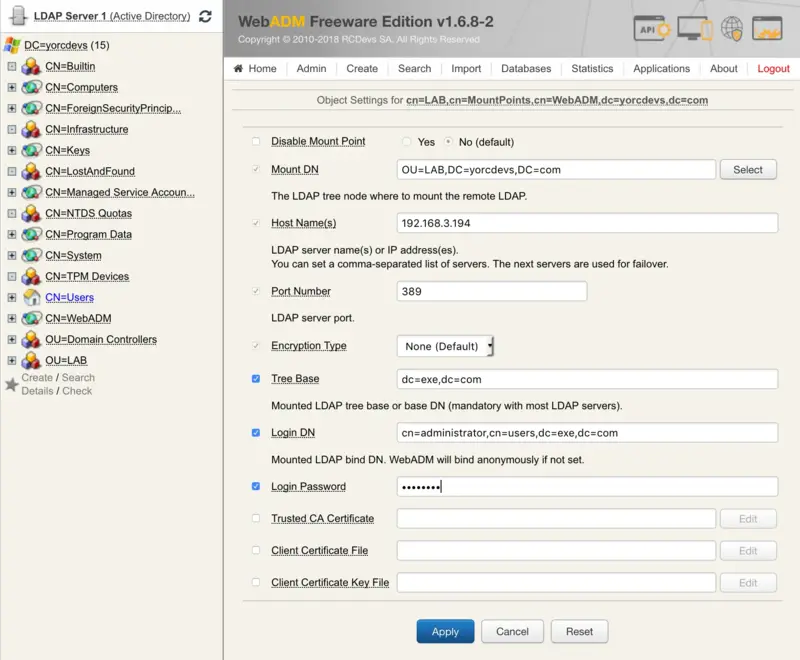
When your configuration is done, you can click on Apply.
Your MountPoint is now created. At this step, you should be able to see the remote LDAP tree in your container.
Note
If WebADM is mainly configured with an AD and the LDAP MountPoint is also an AD, the schema setup will be the same as the main AD is configured with WebADM. This means, if your schema is extended on the main LDAP configured with WebADM, the remote LDAP will have the schema extension too.
4. Create a new WebADM Domain Object
We will now create a WebADM domain for this remote LDAP.
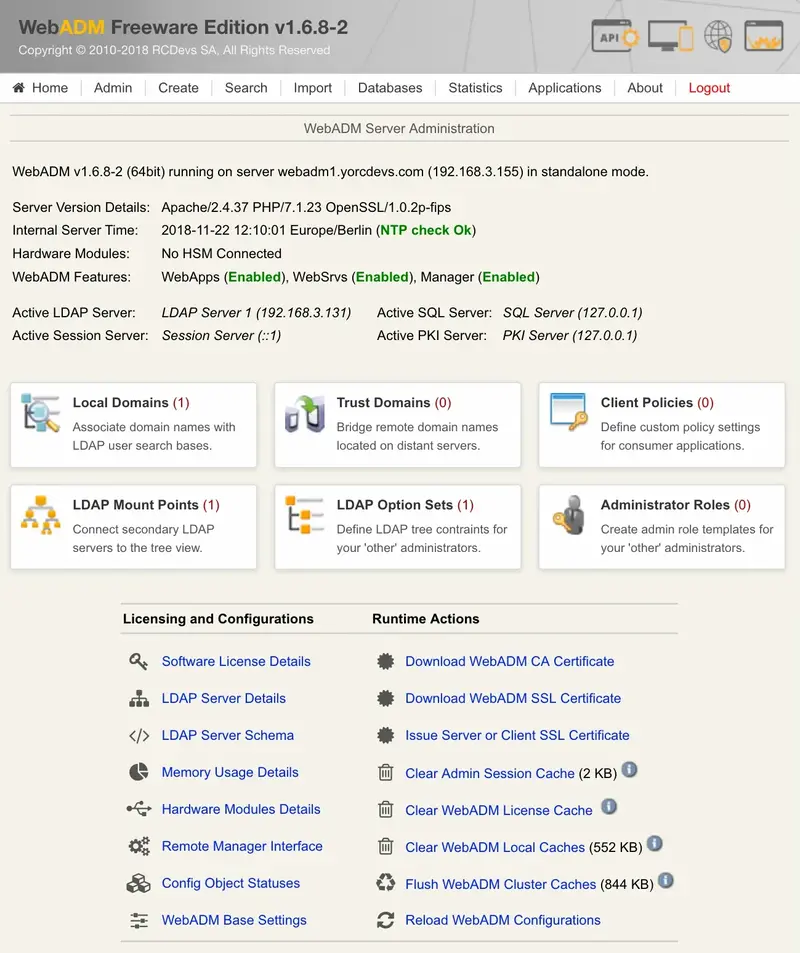
Always through the WebADM Admin GUI, click on the Admin tab, Local Domains.
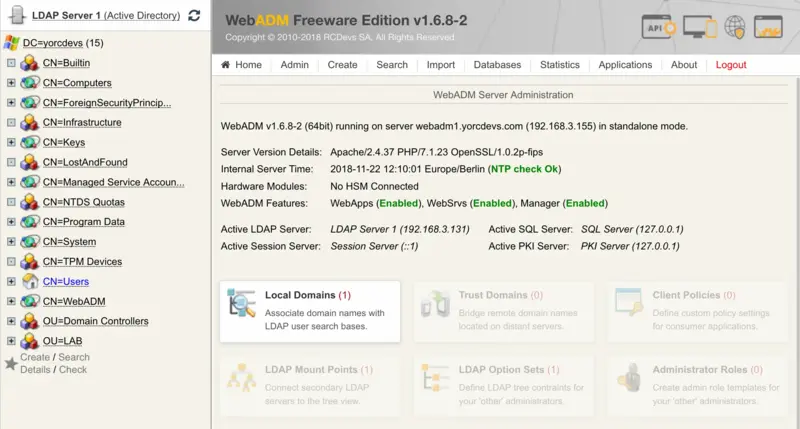
You should already have one domain created for the main LDAP server configured with WebADM.
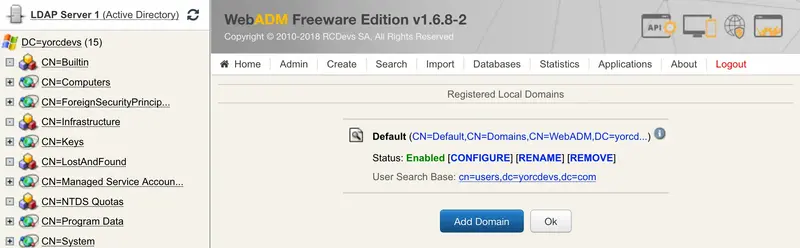
Click on Add Domain button and configure a name for this object. I keep LAB.
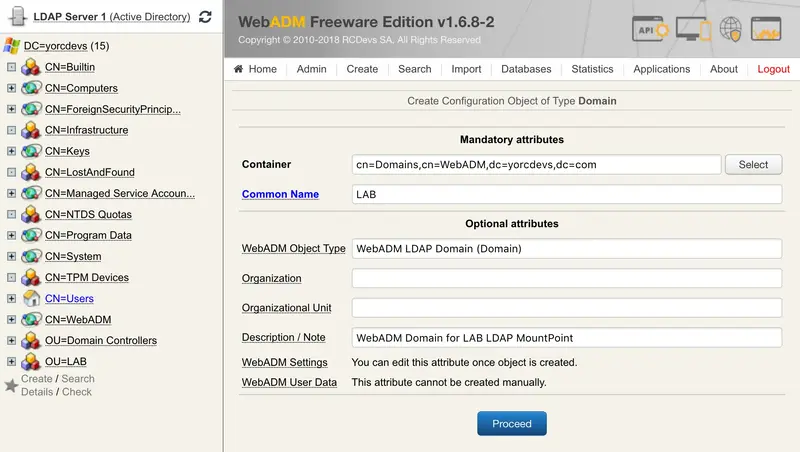
Click on Proceed.
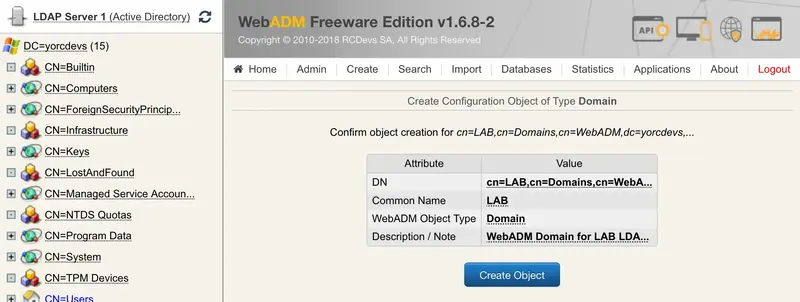
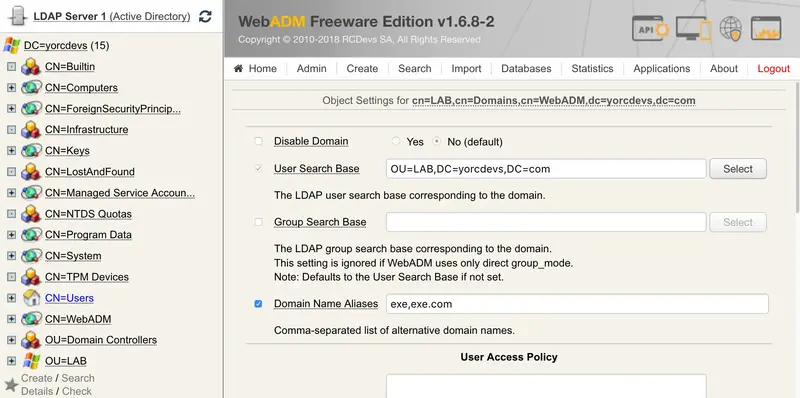
And click Create Object. You are now in the object configuration. The only mandatory setting that you need to configure here is the User Search Base.
Configure this setting to point to the OU/container where the remote LDAP is mounted. Another setting you may need to configure is the Domain Name Alias setting.
For example, during an authentication request, the domain or the workgroup is passed into the request. If the domain passed in the request doesn’t match exactly with the WebADM domain name previously configured, on my side LAB, WebADM will not be able to perform the authentication because, for WebADM, the domain doesn’t exist. So have a look at /opt/webadm/logs/webadm.log to see which domain is passed. If the authentication fails then add the domain passed in the request into the Domain Name Alias setting in your WebADM domain configuration.
Click on Apply, and you are now able to authenticate users from your both LDAP servers with only one WebADM/OpenOTP server. The number of MountPoint that you can configure is unlimited.