Mobile Badging
1. Overview
This document demonstrates how to set up and use the mobile badging feature of OpenOTP.
To enable that feature in your WebADM infrastructure you must meet the following requirements :
- Push mechanisms configured with your WebADM infrastructure,
- Minimal version of WebADM is 2.1.16,
- Minimal Version of OpenOTP is 2.1.6,
- Minimal version of OpenOTP Token application is 1.5.16,
- Mobile Badging and Remote Reporting option part of your freeware, enterprise or trial license.
- Optionally
Sign & Sealfeatures included in your license with signature credits in order to use an eiDas trusted certificate for the timestamping of each transaction.
2. Feature Set up
This chapter describes how to configure WebADM/OpenOTP with mobile badging.
2.1 Enabling Mobile Badging
To configure mobile badging, you need to go on WebADM Admin interface and select Applications tab, under which you should select the CONFIGURE link under MFA Authentication Server.
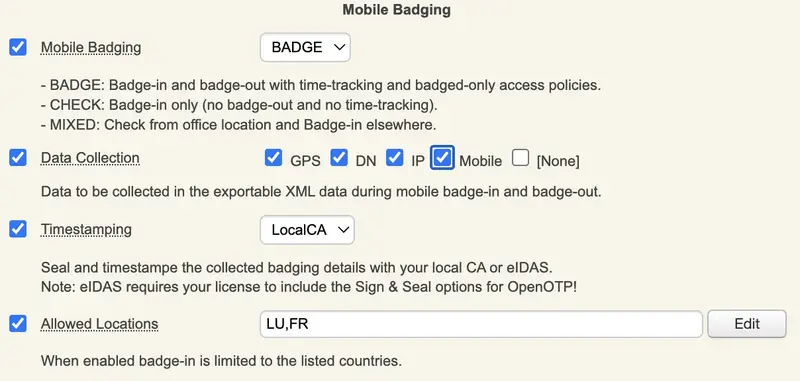
On the following page go to Mobile Badging section, where you can enable Mobile Badging feature and choose between 3 possible modes, BADGE, CHECK or MIXED. As explained underneath, the BADGE mode offers you the possibility to badge-in and badge-out with a time-tracking feature and badged-only access policies while the CHECK mode allows you only to check-in. Finally, the MIXED mode is a combination of the 2 previous modes relying on your geolocalisation.
Mixed to client policies, you can prevent a user to login on a system if he didn’t badge-in during the current day.
If you enabled the badging feature after push token registrations, users will be prompted to resynchronize their token during the next push request they will receive.
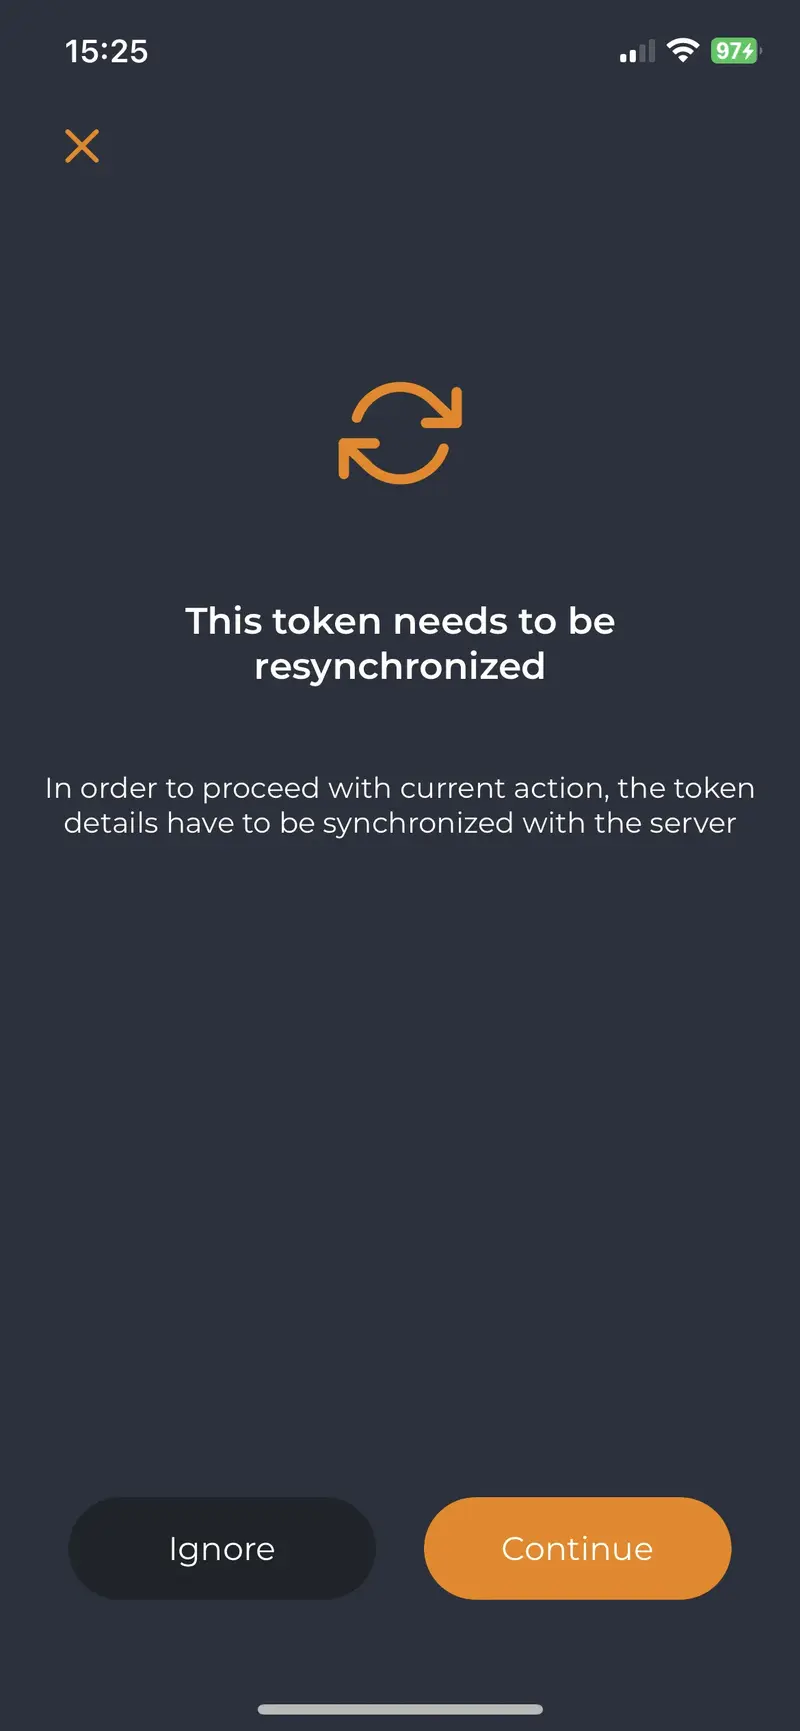
The user has to click on Continue button to perform the sync.

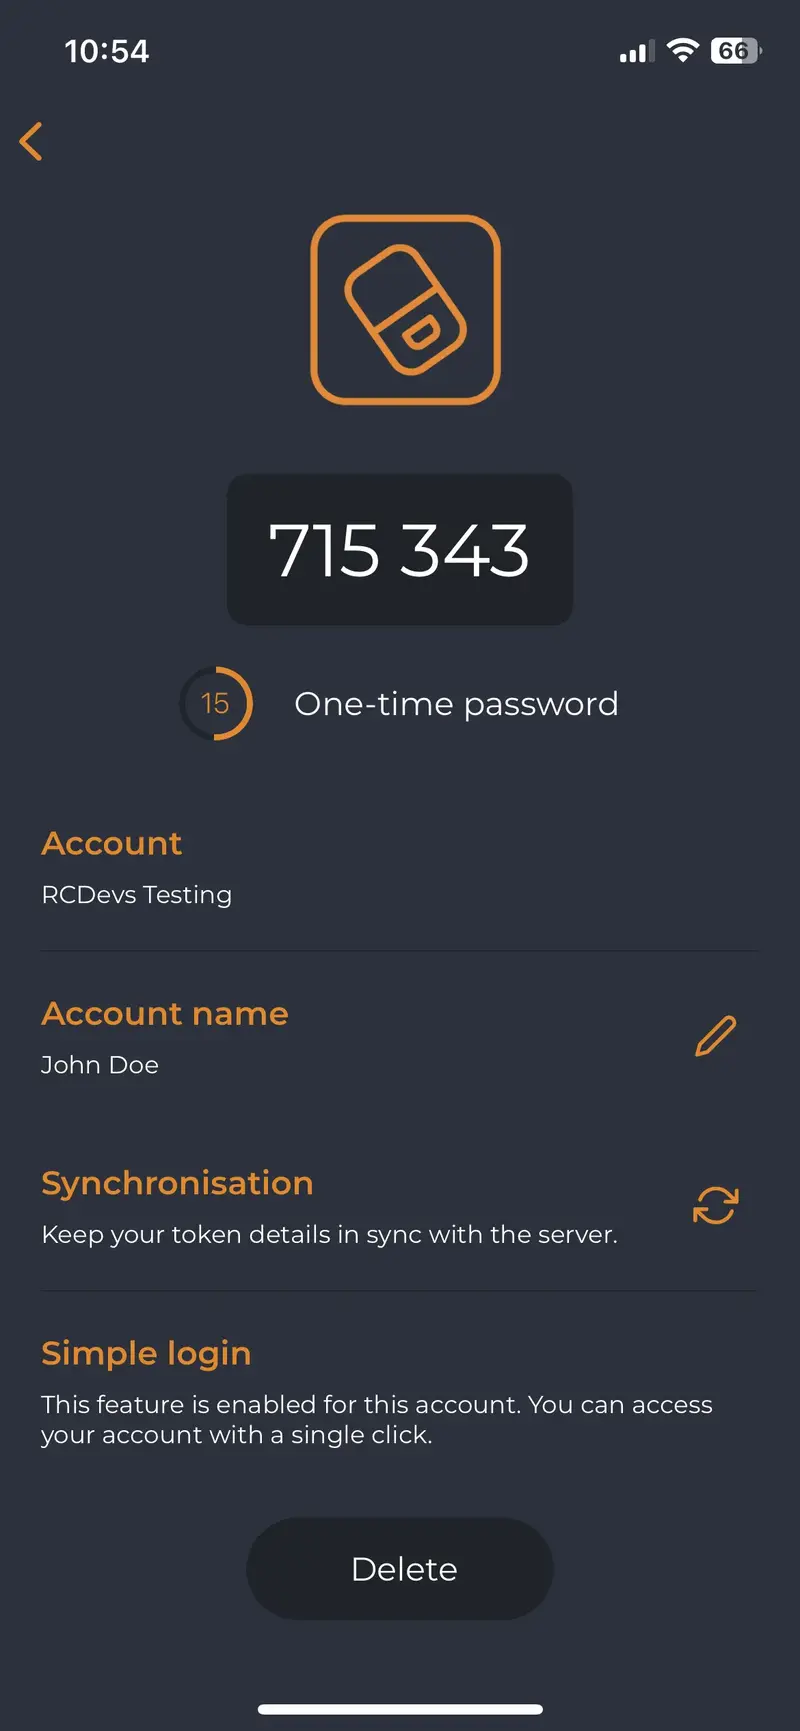
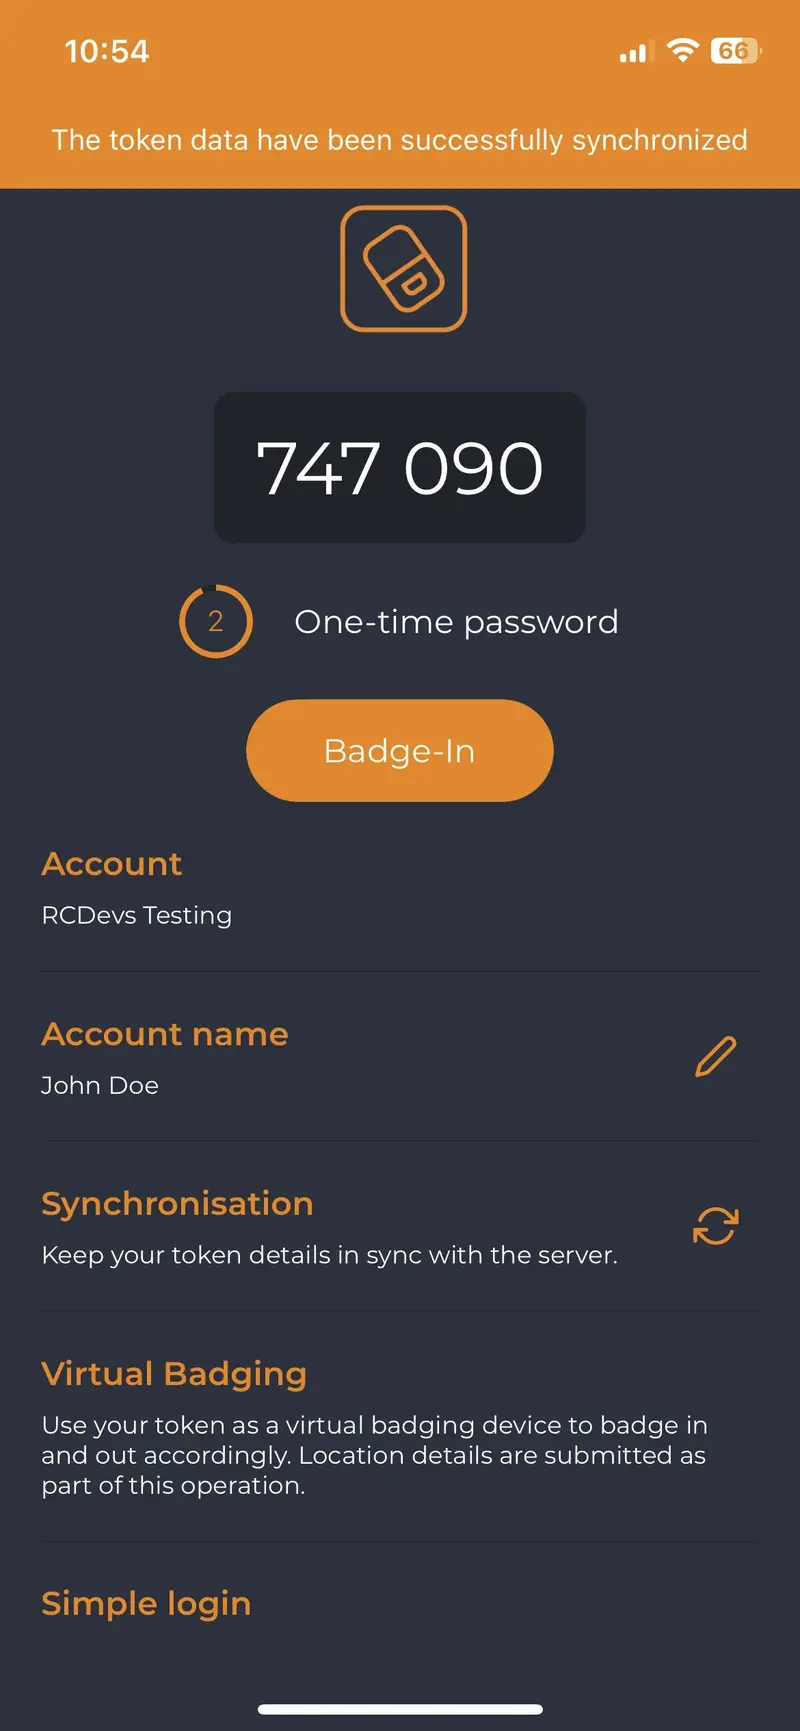
Afterward, the badging feature will appear on their Token. The Token can also be manually resynchronized by the user himself. In that case, he just had to access his token and click Synchronisation button:
After a successful resync, a message is prompted at the top of the screen:
2.2 Managing options
On the previous image, we can see that 3 other options are available in the Mobile Badging section.
Firstly, we can choose which are the information gathered by checking Data Collection and then checking every option that you want between GPS, DN, IP and Mobile. Those data will be stored in the SQL database configured with your WebADM and are submitted from the mobile to your OpenOTP mobile endpoint URL directly. They are never forwarded through RCDevs cloud infrastructure and RCDevs do not has any access to those data.
The following option concerns the certificate used for the timestamping of each operation. The first choice is the local CA and the second is eIDAS which requires Sign option part of your OpenOTP license with signature credits purchased and available with your license.
Regarding the last option, it is about the possibility to allow only certain location(s) from where the badging operation is allowed (users locations). By checking this option, you can choose the countries where the badging operation will work. If not enabled, then all locations are allowed.
3. OpenOTP Token Badging
3.1 Badge Mode
Once you have this token, you can click on it, and then you will see the option to badge-in.
Then, when you click on the buttons Badge In or Badge Out, a confirmation message will appear at the top of the screen.
![]()
![]()
The time between the use of the two buttons is held in WebADM to calculate the time that the user has been badged in.
3.2 Check Mode
On the same token, but this time with the check mode activated instead of the badge mode, we have the option Check In to use to proceed our check.
![]()
Check operations are not requiring a Check Out operation. There is no time tracking with that mode.
3.3 Mixed Mode
To enable this mode, a geolocation of the office is required in the settings, or it won’t be able to work. Indeed, this mode adapts to the user’s geolocalisation.
If the user is located in his office, then the badging will work as CHECK mode. However, if the user is in remote, works from his home or anywhere else, then the mobile badging will work as BADGE mode (with time tracking).
4. WebADM Configuration
4.1 LDAP Option Sets
4.1.1 Mobile Badging
Just like for the Client Policy, the mobile badging bring some options to configure part of the LDAP Option Sets feature of WebADM. Multiple LDAP option sets can be configured in order to apply different settings according to the branch of your LDAP tree where the Option Sets is applied.
Thus, in the Admin tab, select LDAP Option Sets box and click CONFIGURE button in the LDAP Option Sets that you want to edit.
If you do not have any LDAP Option Sets created, then please refer to WebADM Administrator guide in order to create and configure it.
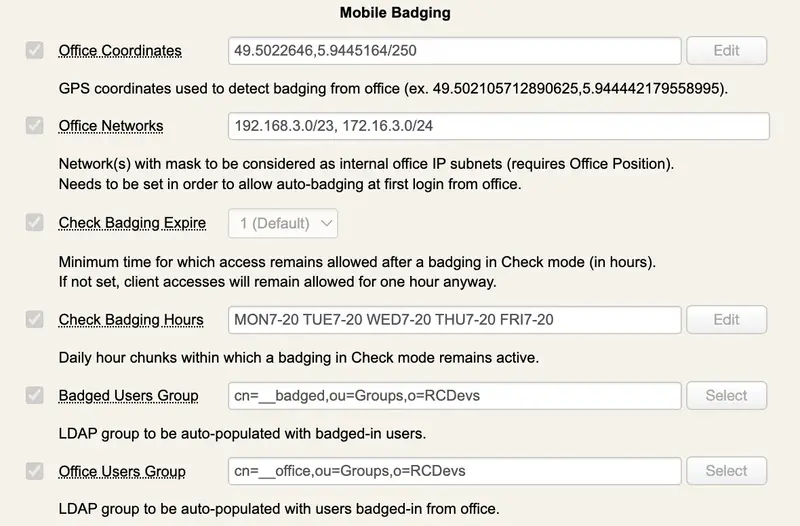
Reach now the Mobile Badging section in your LDAP Option Sets. You can configure the following settings:
-
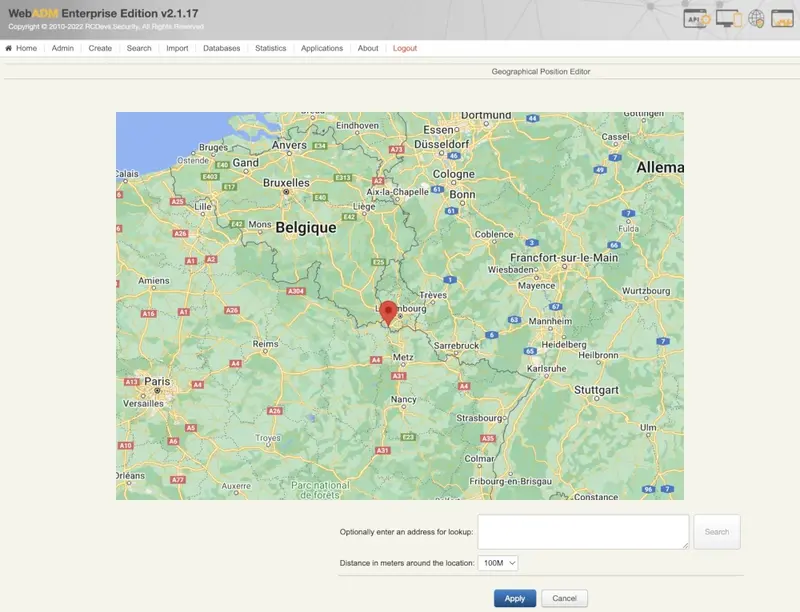
Office Coordinates: Configure your office(s) location(s) in order to detect badging/check operations from your office(s). You can define the country (or countries) where your office is located in order not to be considered working remotely when badging in this place as it gathers your GPS coordinates. To distinguish working in the office or just in the same country as the office, the GPS coordinates are configurable in that option. By clicking the edit button, it is possible to define the office position from Google Maps and the radius accepted around the coordinates. To define the office position, two ways are possible: entering the address desired or pinging it directly on the map.
-
Office Networks: Configure your different office(s) network subnets in order to detect badging/check operations from your office(s) networks. This feature require theOffice Coordinatessetting configured. -
Check Badging Expire: Minimum time for which access remains allowed after a badging in Check mode (in hours). If not set, client accesses will remain allowed for one hour anyway. -
Check Badging Hours: Daily hour chunks within which a badging in Check mode remains active. -
Badged Users Group: LDAP group to be auto populated with badged-in users. -
Office Users Group: LDAP group to be auto populated with users badged-in from office.
Multiple offices/countries
If you have multiple offices location, you may configure multiple LDAP Option Sets in order to apply different settings per office (office location, office networks, badging hours…). In that case, your LDAP database should be structured by country or by office for example, in order apply different configuration per country/office as the LDAP option Set is applied on a specific LDAP container, Organizational Unit or Organization and can not enter in conflict on the target subtree with another LDAP option Set.
4.1.2 Remote Work Accounting
There is a whole section dedicated to the Remote Work Accounting which is related to the mobile badging.
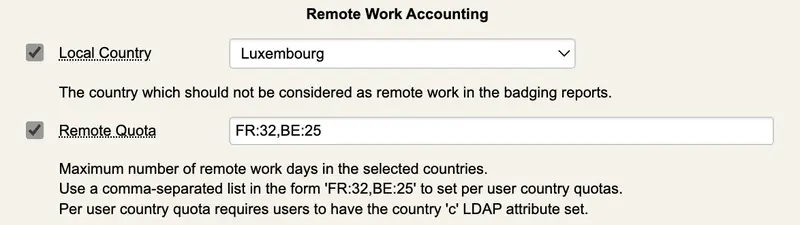
Depending on the country from which you work, the quota for remote work differs. That’s why the option remote quota offers you the opportunity to dedicate a specific number of remote work allowed per country.
4.2 Client Policy
Client policies defined for your systems can be configured to require a daily badging/check operation from your users in order to access that 3rd party system with their account. The advantage of that feature is to prevent access to a system when user is not badged-in or checked on the servers. Users’ authentication become automatically unusable on these third-party systems until the user who is trying to login perform the badge-in/check operation from his mobile.
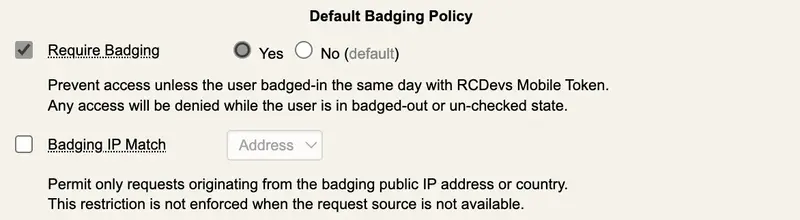
The first of these two options allow you to enforce the badging in this particular client policy. It means that the user won’t be able to authenticate without being badged-in or checked-in, depending on the mode of badging activated.
The second option is to enforce an IP address matching between the badging operation and the user IP retrieved during the authentication on a third party system.
- If you use
Address, then the user mustbadge-in/checkfrom the same network location than where he is establishing an authentication on that third party system. - If you use
Countrythen the user mustbadge-in/checkfrom the same country as where he is establishing an authentication on that third party system.
4.3 Database
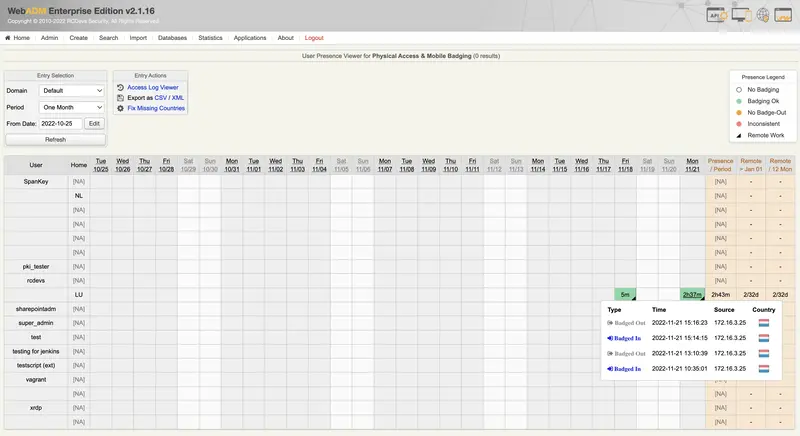
Go to the Databases tab where you will find the database Physical Access & Mobile Badging in the section SQL Data Tables. That’s where information about checks and badging of the users are stored.
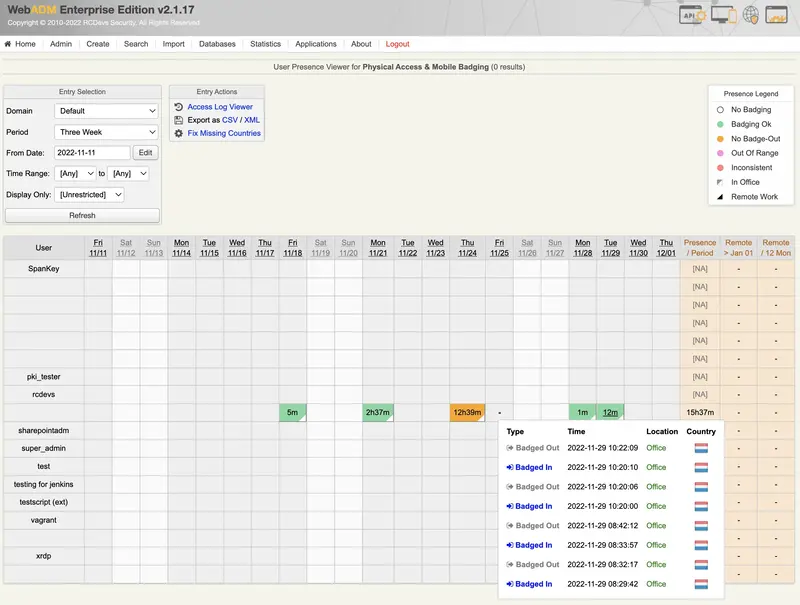
In this table, there is the time spent while being badged-in or checked-in by each user each day for the last month. While being badged-in, the case of the day remains orange until the user badge-out, then it runs into green.
A Time range is configurable to define the range the users are allowed to badge-in and badge-out. However, being out of this range won’t block the badging, but it will turn the cases in pink and the time spent outside the range won’t be counted in the column presence.
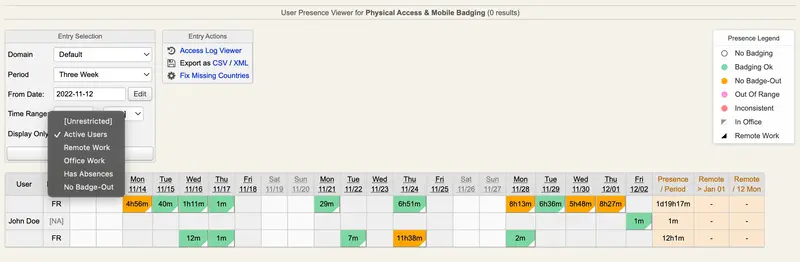
There is also the possibility to restrain the choice among the users you want to display on the database with filters such as: Active Users, Remote Work, Office Work, Has Absences, No Badge-out.
You can also create some filters to display only relevant information :
Note
To have the location In Office and the little white triangle in the cases, the Office Position must be configured in the LDAP Option Sets.
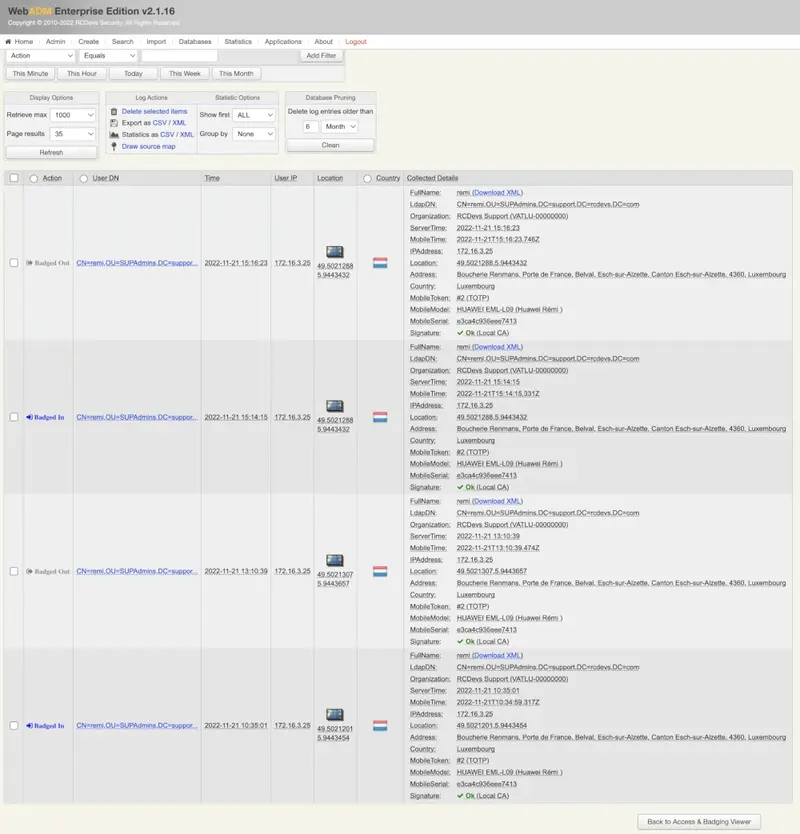
Every single check-in, badge-in or badge-out is stored and available to see all the details of these actions. To have a view on the information of these actions, just click on the time spent one day, and you will then find everything.
If you have configured the remote options in the LDAP option sets, two more columns are added at the right of the table. It will display the days worked remotely out of the days allowed by the quota defined in the options available during the configuration of the LDAP option sets.
5. Requiring a check from a User
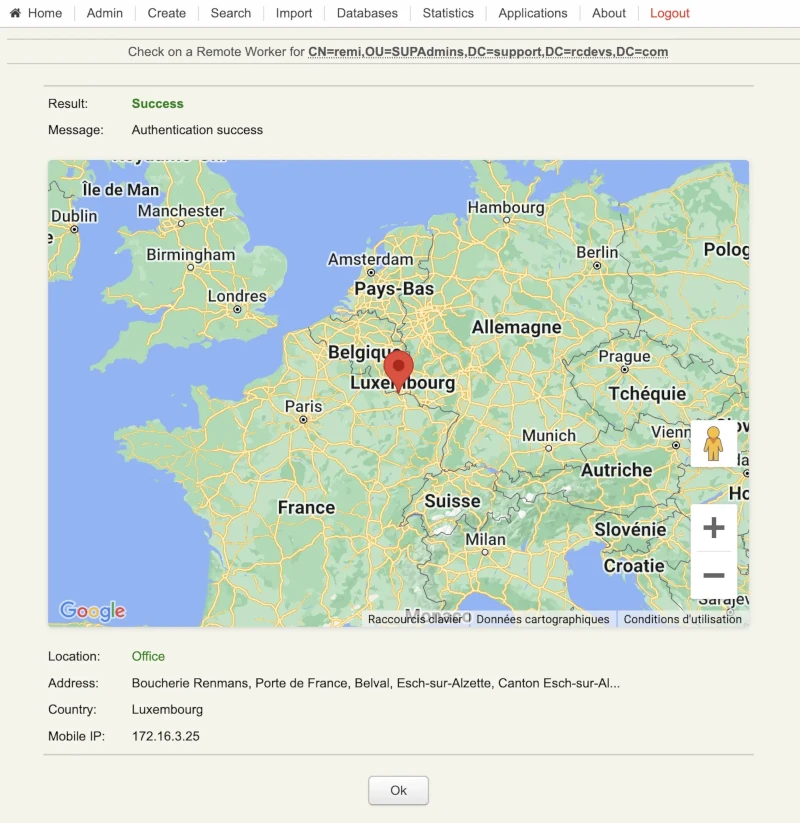
Mobile badging also brings the feature and the possibility to ask a check from a remote user. From the WebADM GUI, choose the user from whom you want to be asked a check on his mobile and click on MFA Authentication Server. Then go on the bottom of the page and click on the last option Check on a Remote Worker.
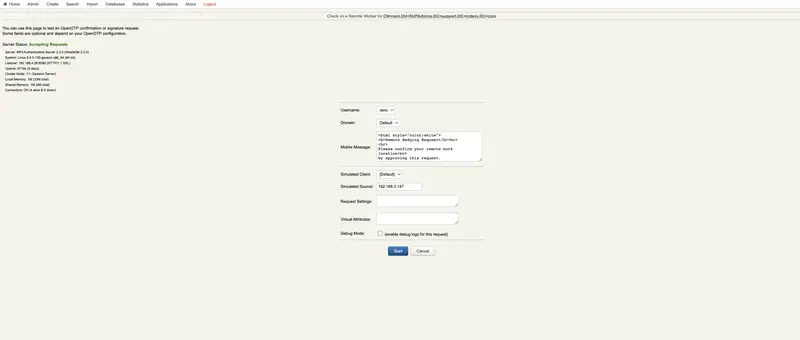
Once arrived at this page, you can change and set up the different settings and then just click on start to send the notification to the user’s mobile phone.
Finally, you have the confirmation of the check and the location of the user on the WebADM GUI after the actions on the mobile phone have been completed.