Cloud Integration examples
1. General overview
This documentation provides a brief overview of a few integrations after you have created and configured your OpenOTP cloud tenant on RCDevs Mutualized Cloud Infrastructure or subscribed to the Dedicated Cloud Infrastructure. Please note that the descriptions of each product in this documentation are not fully comprehensive. For more detailed information about a specific product, I recommend referring to the “Advanced Configuration” sections where you will find the relevant references and resources for further exploration.
The “Advanced Configuration” sections will provide you with more in-depth information on each product, including detailed explanations, configuration steps, and additional resources to help you better understand and configure the specific integration. Feel free to refer to those sections for a more comprehensive understanding of the products and their advanced configuration options.
2. User creation, activation and token enrollment
The following steps outline how to create a user account in WebADM, activate the account, enroll a software token using the Push mechanism, and conduct a test login via the WebADM Admin portal prior to commencing your integration.
2.1 Account Creation
Login on WebADM Admin portal with your Administrator account.
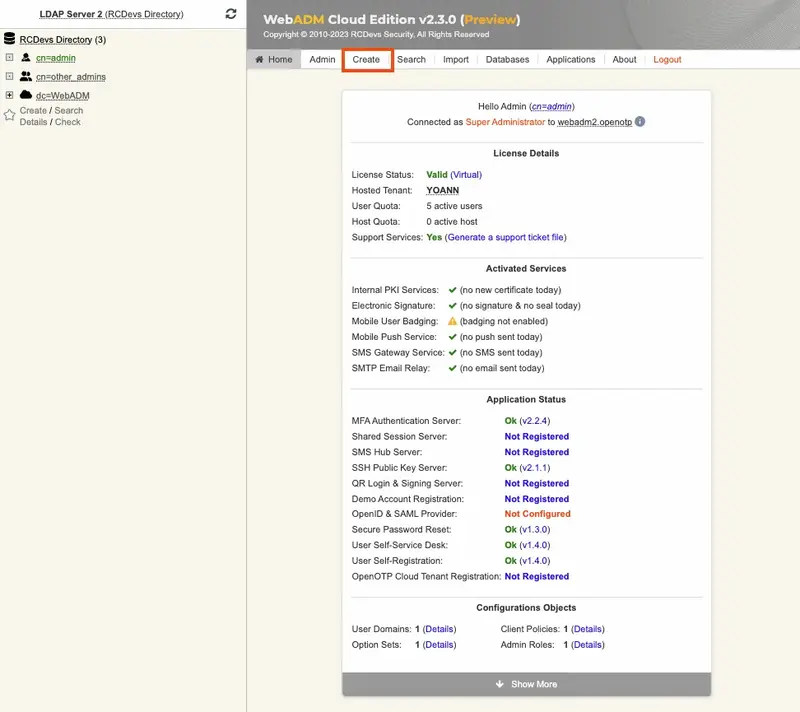
Click on the create button in order to create a test account.
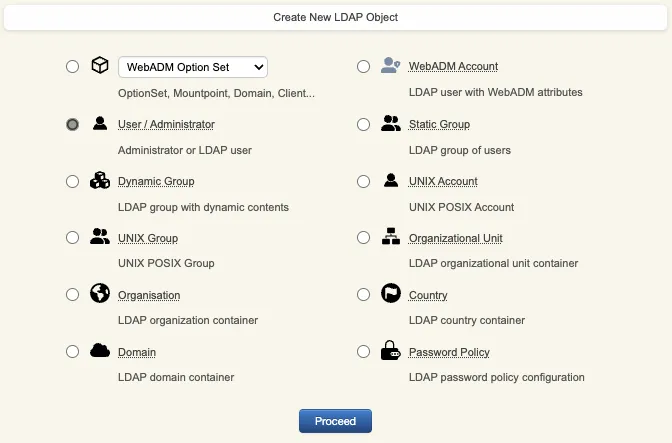
Select User/Administrator and then click Proceed.
On the next page, provide user’s information and then click Proceed.
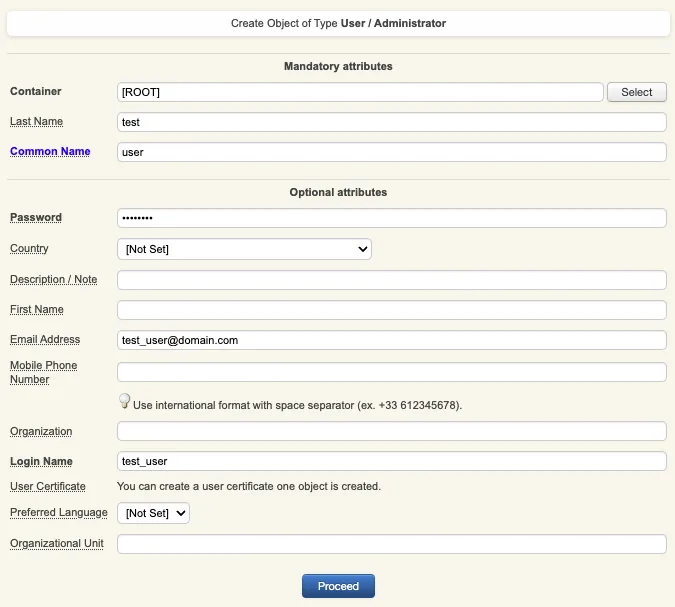
A recap is prompted, check your inputs and click create object.
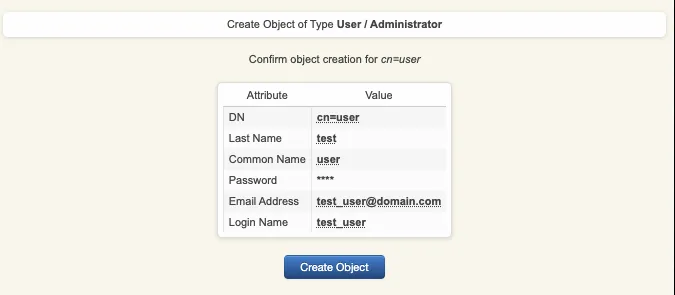
Your user account is now created.
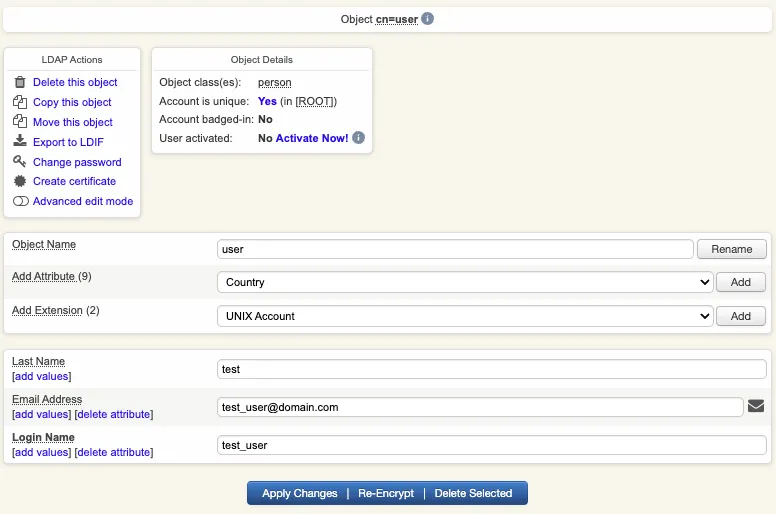
2.2 Account Activation
Now, we need to activate the account. On the user account, in object details, click Activate now button followed by Proceed button.
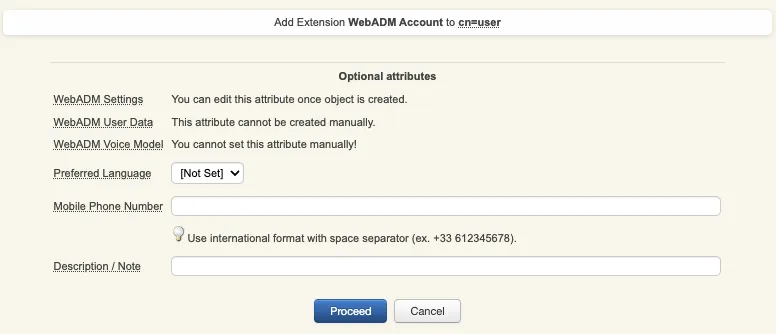
Finally click on Extend object:

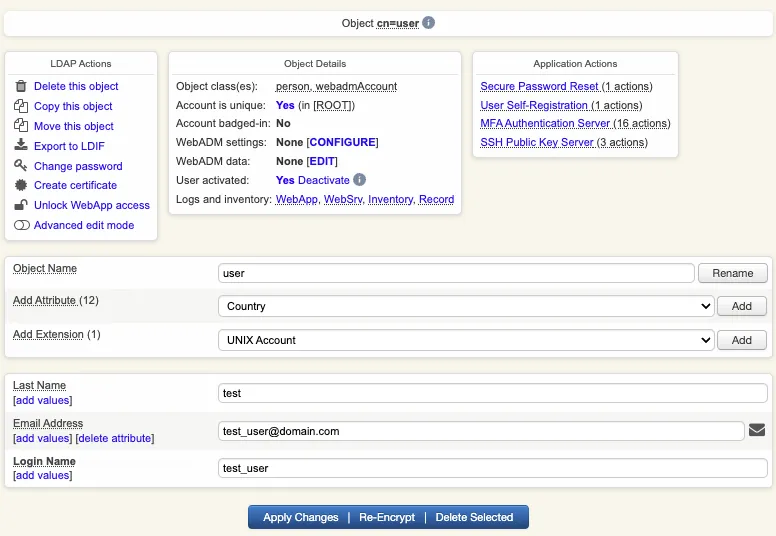
Account is now activated. You can now see the Application Actions menu.
2.3 Token Enrollment
We are going now to enroll a software token. We advise you to use OpenOTP Token application in order to take advantage of all features provided by OpenOTP.
In Application Actions menu, click on MFA Authentication Server > Register/Unregister OTP Tokens. Select I use a QRCode-based Authenticator (time-based or event-based), then the enrollment QRCode is prompted. Open the OpenOTP Token application (or another authenticator app), then click the camera button and scan the QRCode.
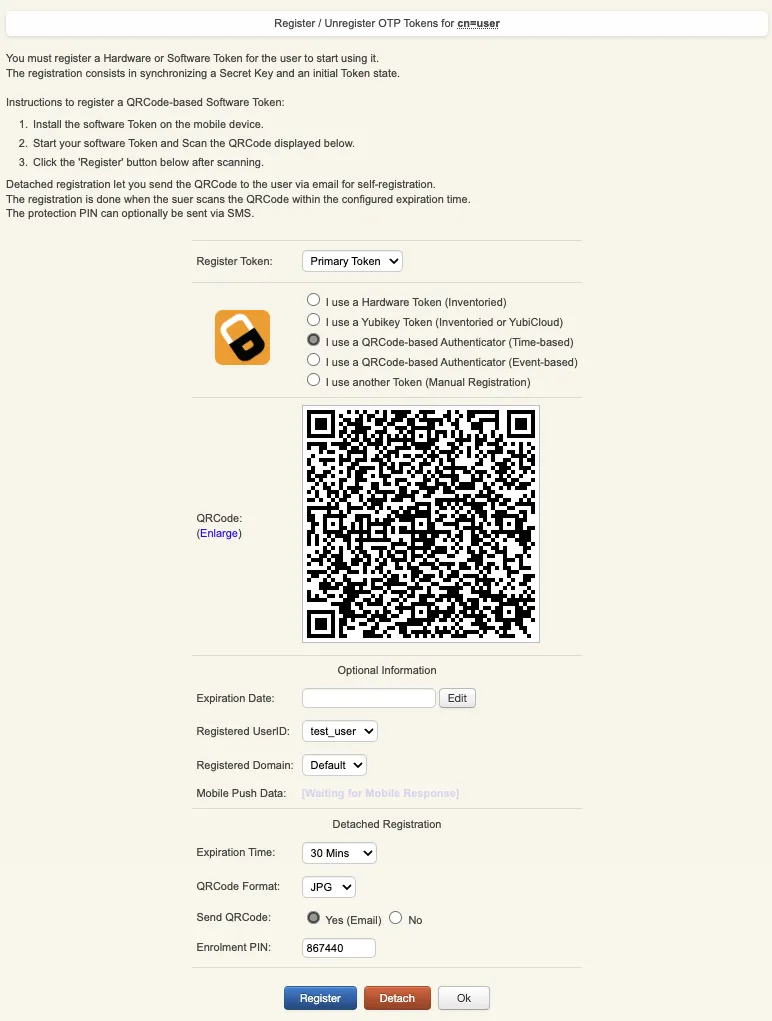
If the QRCode has been scanned with OpenOTP token, you don’t need to click Register button.
If the QRCode has been scanned with another token application, you need to click Register button once the token is registered on your device.

Your token has been registered successfully, we can now try to perform a login with it.
2.4 Test login
Come back on the user account, you will see now the token metadata registered on the account:
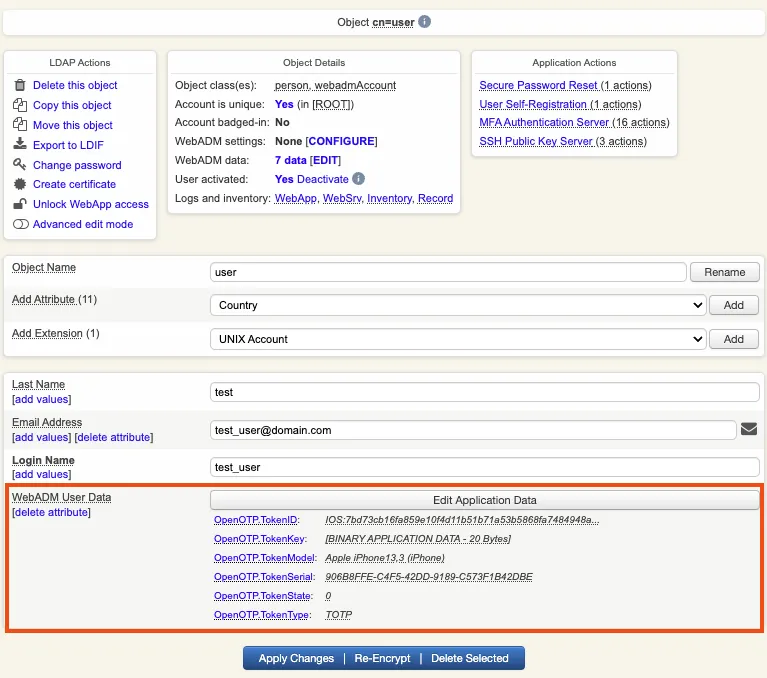
The enrollment here has been performed with OpenOTP Token and Push mecanism are by default enabled. We will now perform a test login with Push authentication.
In Application Actions menu, click on MFA Authentication Server > Test OTP & FIDO Authentication
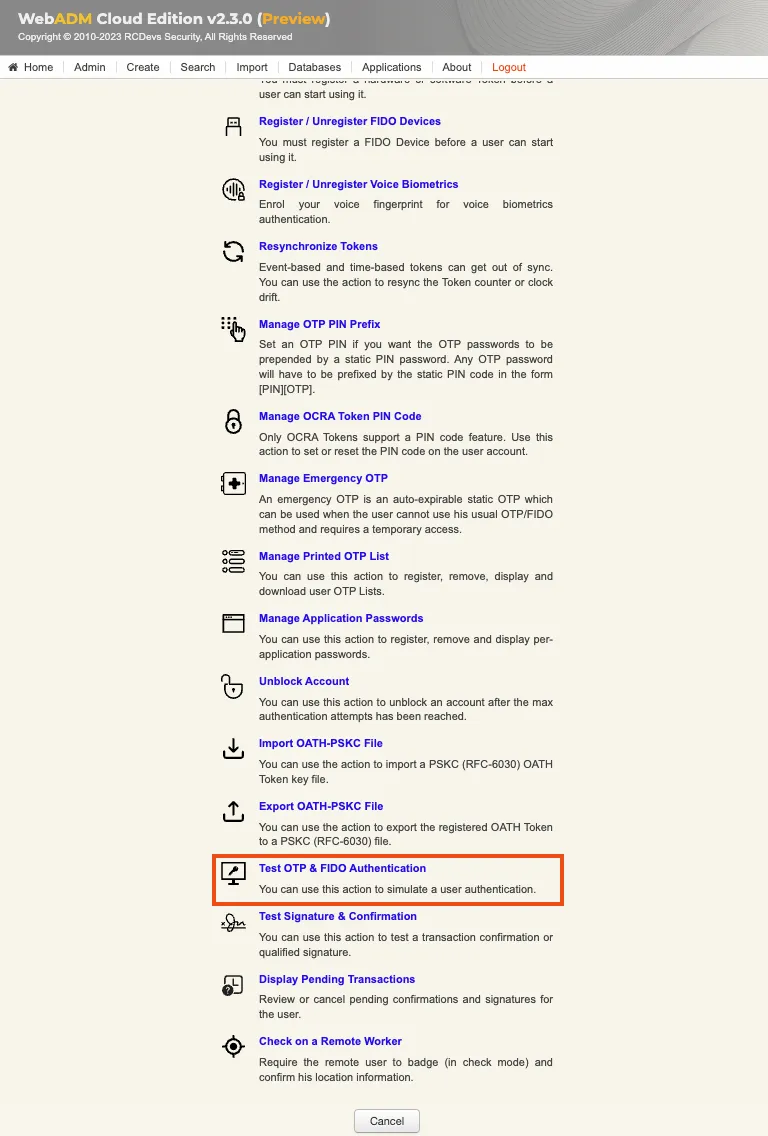
You arrive at the following page:
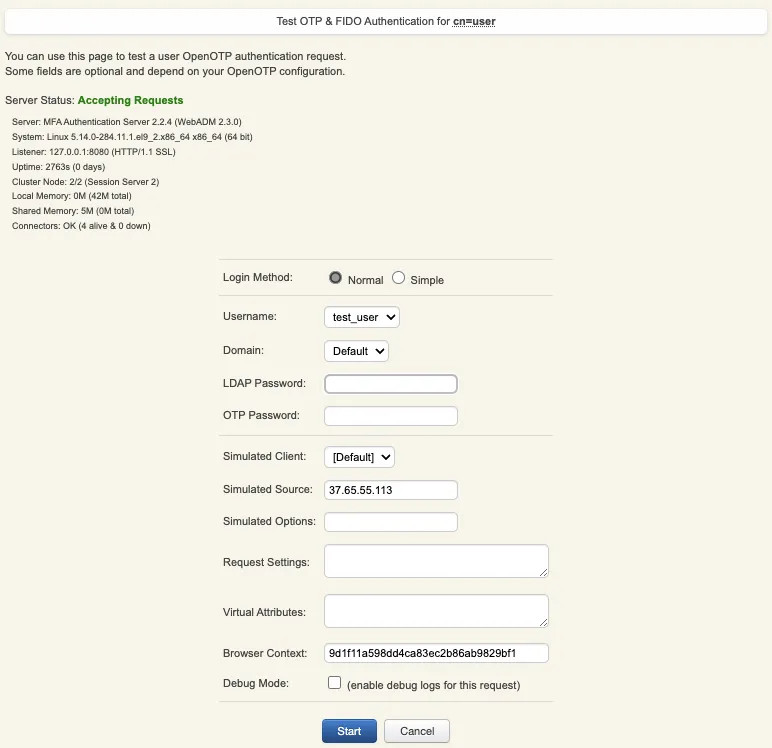
Provide the LDAP password that you previously configured during the user account creation, then click Start. A push notification should be prompted on your phone. Approve the request. The test login has been performed successfully.

If you didn’t regiter the token with OpenOTP token application, then an OTP challenge is sent if you only provided the LDAP password. In that case, provide the OTP code generated by your token application and click Continue.

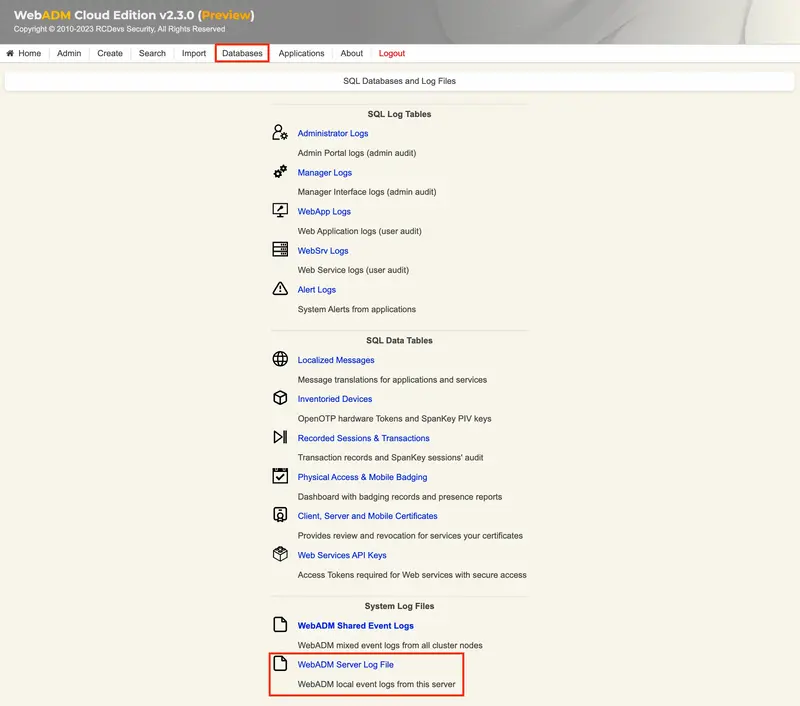
If the test login failed, you can browse the WebADM server logs to identify the problem. You can access the logs by accessing the Databases tab > WebADM Server Log File. The following troubleshooting documentation will provide help and resolution on common issues.
3. Credential Provider for Windows Login
3.1 Overview
All features of the plugin are fully supported with OpenOTP Cloud. To ensure smooth operation and avoid any password-related issues or mismatches between accounts created on your OpenOTP cloud solution and your domain accounts, we recommend disabling the “Remote LDAP Password Check” setting in the OpenOTP Credential Provider plugin. By doing so, only the second factor will be validated by OpenOTP, while LDAP password validation will remain within the Windows perimeter.
For the integration of local accounts, you have several options. LDAP passwords can be managed either by OpenOTP Cloud solutions or within the Windows perimeter. To configure local users and computers outside the domain, please refer to the documentation on Local users and computers out of domain. The provided link directs you to the specific documentation that outlines the configuration steps for integrating local users and computers outside the domain with OpenOTP. It will provide you with detailed instructions and guidance the different supported scenarios using local accounts.
3.2 WebADM Domain configuration
Please refer to that topic for the whole WebADM Domains configuration.
To be able to use UPNs and/or SAMAccountName attributs with Windows integrations and OpenOTP cloud solutions, you need to configure your WebADM domain and OpenOTP cloud accounts correctly.
When you create an account on OpenOTP cloud, the uid attribut of the cloud account must match the value of the SAMAccountName attribut of the corresponding account in your Active Directory (or local login name for local Windows accounts).
For the WebADM domain configuration, here is an example on how to configure it.
Windows Domain information used for that configuration example:
- NETBIOS Domain name: SUPRCDEVS
- Domain Name: support.rcdevs.com
- User account UPN: Administrator@support.rcdevs.com
- SAMAccountName: Administrator
Edit your WebADM Domain configuration from WebADM Admin GUI > Admin tab > User Domains > Default > CONFIGURE
User Search BaseandGroup Search Base: [ROOT] or [Respectively pointing to your Users and Groups OUs]UPN Suffix: support.rcdevs.comUPN Mode: Implicit (Default)Domain Name Aliases: SUPRCDEVS
Your WebADM domain configuration is ready for Windows integrations.
3.3 Client SSL Certificate or API key Creation
3.3.1 SSL Certificate generation
To utilize OpenOTP in the cloud with OpenOTP Credential Provider for Windows, there are two solutions available to secure communications between your Windows machine and the cloud infrastructure. The first option is to obtain a client SSL certificate for the Windows client machine. To acquire an SSL certificate, you can refer to the following documentation. It is important to note that when the client certificate expires, it must be manually renewed. If the certificate expires, the Windows client will be unable to authenticate with OpenOTP. Please consider that the provided link is a placeholder and should be replaced with the actual documentation or instructions specific to obtaining a client SSL certificate for Windows machines. The documentation will outline the necessary steps to acquire and manage the SSL certificate to ensure secure communication between the Windows client and OpenOTP Servers in the cloud.
By following the documentation, you will have the necessary guidance to obtain and renew the client SSL certificate, enabling uninterrupted authentication with OpenOTP for your Windows client machine.
- The Certificate type must be set to
Client. - The Restricted Application setting can be set to
OpenOTPif you want to restrict the usage of that certificate to OpenOTP only (optional).
After obtaining the certificate and key from the WebADM internal PKI, you can download them separately. To use them with the OpenOTP Credential Provider plugin, you need to merge the two files into a single file with the .crt extension. When merging, ensure that you add the key first, followed by the certificate.
During the installation of the OpenOTP Credential Provider, you will be prompted to provide the merged certificate file. This step ensures that the plugin can establish a secure connection between the Windows machine and the OpenOTP cloud infrastructure.
Please note that the exact steps and prompts during the installation process may vary based on the specific version and configuration of the OpenOTP Credential Provider. Follow the installation instructions carefully and provide the merged certificate file when prompted to ensure a successful setup.
Found below, an example of a client certificate in the format accepted by OpenOTP Credential Provider for Windows plugin:
-----BEGIN PRIVATE KEY-----
MIIEvQIBADANBgkqhkiG9w0BAQEFAASCBKcwggSjAgEAAoIBAQD3fGHtbz2LB7TH
2oq8McFgNmd5f3s23fMzNB6Y1SHMxHJ6jSqCFXJA6Ek7OaYVJaW4vP1XaCAjioUW
O53HiKtHfJw9GcwVeV91/cNXefBKadgBjHstfX/msNjfKJBfNvc1EDlTkk/tIAvx
S3DSZIA4KeSIqiGwD19lNT6G/x8LZzo+f0F+cp7rzKHGAIki81P3N9P6rVhsh+z+
adam2t0RsJ2msXNLe4S+pUAcT+ES1LfmRAbEeFlOYYzMZgCi12IOkLy9TA+h+/eC
kM/BC6XGDWD4Mjnhcw8Mz+cEtRIyS3BiEL/XTacsm68bGvWQkKAsBy4oR3VQgGQf
dFOOvNUvAgMBAAECggEAUtvsFYim/ENqPXdn97ZY3hOY9U6/PBF3eW87x0Oke2BS
S8Gzt7XieOTMj+2vM2lVYNK1p2wPRpb8FAOFweZ6IgcQcEyQzafDVEfP/RuwXdmu
HmagXwyjo+MV2TFFlPtcLQHvj5Fu/R87oF/3uBk57JPqFe+QM9gRwlrfQmdsR25x
vJaMOTi6+BpszuAsWgmVFAOq362Ix+G8GmulvOawwcd+zIZ3jFKZofwwRsOJa/xd
zs4rNSMgVQgFuj/ApS8jRqWHYpS0ok91kVrbMBXk8HzvHRWPri0z4M2Ojk8UWvxT
TbtB80LsTuyl6a6vZDeveK2y9jJgJN/xJu00e5t8QQKBgQD+t9/IcwV1G50LDuP7
27OxJq4RrrXU6HidUDfisINt809bvXbyUYfppvw3tq5u6X6pdQaLCkHpajXyyZI8
skTez2OLwj2SZpOoaNxho+8Hx6WldHKAnX1l4uIkrHkdYLzUYC4MyJ322QKXc+G/
FDks084JZBXswaK5r1qNPec6/wKBgQD4uzERrTcGkZxK1ylNJ0IStP65Ik96fgiX
Vo37PHS491DA31fnc394yMTwAGir61bsFKZwyq7HKNa/2yRIDBv4J2O5HIRQHXfx
wQGjBlkoVopFlUnUhd5ZaELX4jy39kzxhtZn8DmTas3vR/dT5lAshVx/y2NfFBp5
ePap3KFV0QKBgE62S3UJ9jnGGrV8GH+P2Ot5ZHkaYB426G7UhzCKE1M6yN80oTko
cLOHYpFk5mpnxThgbXEx7kRPCfTIzWPsQtQHil952sUO5bo5DUEvA4KH82w5m9ia
0lFV10Q1+AdYCYInZpOUuxu429Apgy0k9rYfjZ/hSdUr0TlIMtdKtdXJAoGAX58/
ZwdLbzgNeOws0Z91FFIG10+sdG/9h4jb/qkoSm+x2OREHBPX/qxYodfWZbmM6ieq
MRSKisBVht6NnTEik405FlIzP8WEdil4Ip9vKUXT1JpnDtAEQiUGBY7RPvvuarAm
v0CoMddOol3tZJDXY7ZFcE/VvRiycN6jHXxXffECgYEA0g9Fz9RBNp121wPoKl63
1/pxHuItKucK1lbLdFGKyGDk75UpYeawSqjnEnIf/eWjmNgmDIoM1+RWAb+LNYZN
phs7w1kALVx7aVClv75jpl99e2W6XfqnglJ3r/5uAV9IldFXpwE1CsQvR9m5YYOd
N+gHq64AniJ2Bxk5+OGJzYc=
-----END PRIVATE KEY-----
-----BEGIN CERTIFICATE-----
MIIDhzCCAm+gAwIBAgIBAzANBgkqhkiG9w0BAQsFADAeMRwwGgYDVQQDDBNXZWJB
RE0gQ0EgIzExZTI2OTRjMB4XDTIzMDIyODExMjIwOFoXDTI0MDIyODExMjIwOFow
ODElMCMGA1UEAwwcd2luZG93cy5ob3N0aW5nLm9wZW5vdHAuY29tIDEPMA0GA1UE
DQwGQ0xJRU5UMIIBIjANBgkqhkiG9w0BAQEFAAOCAQ8AMIIBCgKCAQEA93xh7W89
iwe0x9qKvDHBYDZneX97Nt3zMzQemNUhzMRyeo0qghVyQOhJOzmmFSWluLz9V2gg
I4qFFjudx4irR3ycPRnMFXlfdf3DV3nwSmnYAYx7LX1/5rDY3yiQXzb3NRA5U5JP
7SAL8Utw0mSAOCnkiKohsA9fZTU+hv8fC2c6Pn9BfnKe68yhxgCJIvNT9zfT+q1Y
bIfs/mnWptrdEbCdprFzS3uEvqVAHE/hEtS35kQGxHhZTmGMzGYAotdiDpC8vUwP
ofv3gpDPwQulxg1g+DI54XMPDM/nBLUSMktwYhC/102nLJuvGxr1kJCgLAcuKEd1
UIBkH3RTjrzVLwIDAQABo4G1MIGyMAsGA1UdDwQEAwIF4DATBgNVHSUEDDAKBggr
BgEFBQcDAjBlBggrBgEFBQcBAQRZMFcwIwYIKwYBBQUHMAGGF2h0dHA6Ly8xMC4x
MC4xLjIyL29jc3AvMDAGCCsGAQUFBzAChiRodHRwOi8vMTAuMTAuMS4yMi9jYWNl
cnQvP2Zvcm1hdD1kZXIwJwYDVR0fBCAwHjAcoBqgGIYWaHR0cDovLzEwLjEwLjEu
MjIvY3JsLzANBgkqhkiG9w0BAQsFAAOCAQEAhgXuX1RZoJ0fmySF4aRQ9ngNLlIy
GU+mgsHJw1BCGlWt5a893yZlMrPS/mN5DTU1jeN4gtqiZDTf3fDTmI79a5S+ZcO2
hfH55JmMDvp4UKXqOl8Ye2VpBubUVs/ZJdCTRiUYPAIlzU38WP7OZOvKC6QvuBHY
F+XWFD5GslIVKNDds4gFkUDphcY2AgOKYGO9y8m+WTsJfQlaYiQBWnEHacuC1Mzy
FS/l9nFBmUVVyxiwy2Ch4BETgbGUfsSublPDCbyuX7uofuqKExjaknNQM26/Lx6W
av+mYfvwENvywokel8f57b90UZ9/ZWDlMQvuAqe4Kdj/kNif/p7uXYV+ZQ==
-----END CERTIFICATE-----
3.3.2 API Key generation
Instead of using an SSL certificate, you have the option to utilize an API key, which can serve as an alternative for secure communication between your Windows machine and the OpenOTP cloud infrastructure. One advantage of using an API key is that it potentially does not have an expiration date if you choose not to set one when issuing it.
By opting for an API key, you can establish a secure connection without the need to manage certificate expirations. However, it’s important to note that the API key should be treated with the same level of security as a certificate, as it grants access to the OpenOTP cloud infrastructure.
When using an API key, ensure that it is securely stored and only accessible to authorized individuals. Follow the necessary procedures to generate and configure the API key within the OpenOTP Credential Provider, adhering to the security guidelines provided by RCDevs.
Please refer to the relevant documentation for the specific steps to generate and utilize an API key as an alternative to SSL certificates in the OpenOTP Credential Provider configuration.
3.4 OpenOTP Credential Provider for Windows configuration
When installing the OpenOTP-CP plugin for Windows with OpenOTP Cloud, we recommend following the instructions below to ensure a successful configuration:
- Avoid setting the OpenOTP-CP plugin as the default plugin on your Windows machine until you have confirmed that your configuration is working correctly. Otherwise, you may encounter login process issues, preventing access to your Windows machine. This is the first step of the installer where you choose the components that you want to install. Keep default values will not enforce OpenOTP-CP as default provider. Enable Credential Provider Filter will enforce the OpenOTP-CP as default authentication provider. Be careful!
- Enable the “Offline mode” setting to allow login when the Windows computer cannot establish a connection with the OpenOTP service.
- Disable the “Remote LDAP password check” setting to ensure that password validation occurs solely on the Windows side. Otherwise, you will need to synchronize passwords between your LDAP infrastructure and OpenOTP Cloud.
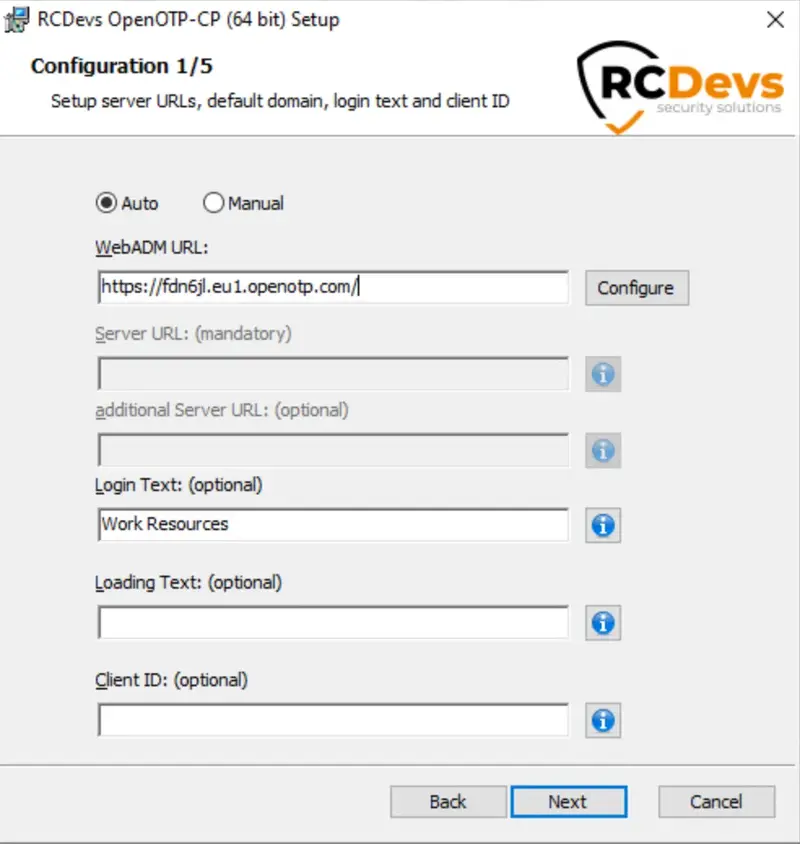
You can find detailed instructions for the entire configuration in the OpenOTP Credential Provider for Windows documentation. The primary difference lies in the inclusion of either a “client certificate” or an “API key” as new requirements. On the initial page, you will need to provide the minimum information, which is the WebADM server URL. Typically, this URL points to your WebADM tenant URL. If you have selected the Auto mode (recommended), enter your tenant URL and click the Configure button. The Server URL setting must be afterward auto-completed with the whole OpenOTP URLThe Server URL setting will automatically be populated with the complete OpenOTP URL. Provide any additional information if needed and click Next to proceed.
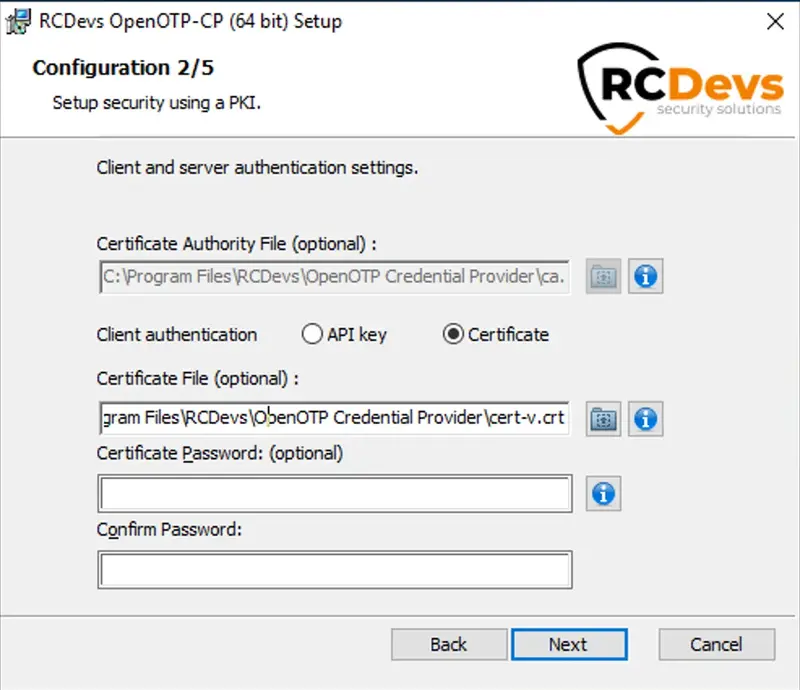
At this step, the Certificate Authority file must be auto-completed, and you need to generate a client certificate or issue an API key from WebADM and place it here. Here is an example with a client certificate.
On the page 3/5, enable the offline mode setting and configure other settings that you want to enable, then click Next button.
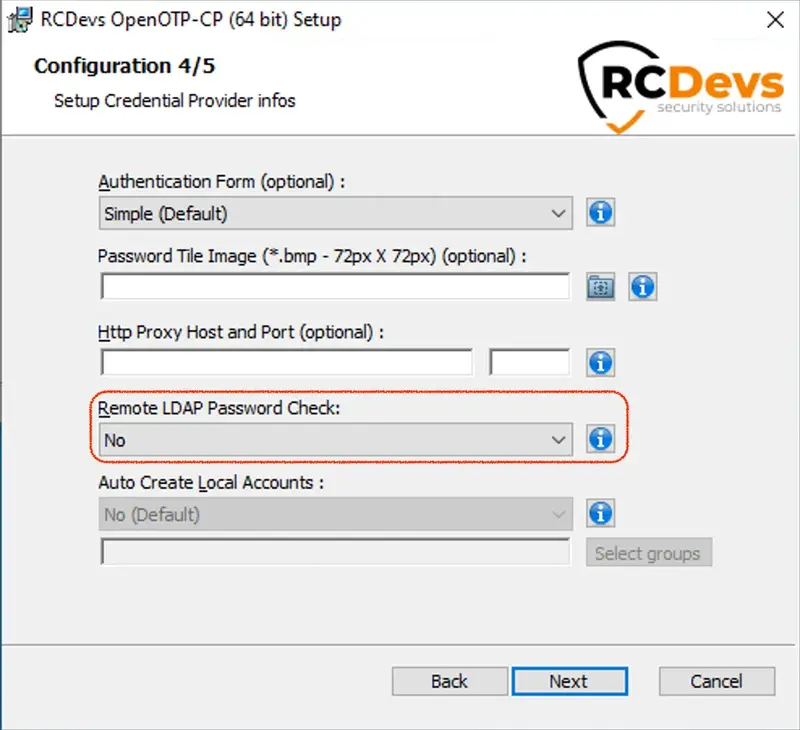
On the next page, set Remote LDAP password check to No. If you are using local accounts on Windows side, then please refer to the following documentation to achieve a working setup.
Once the configuration is finished click Next then Install. Once the installation is performed successfully, you can try to perform a login.
RDP logins
Note that the RDP login with MFA to the machine where the plugin has been installed and configured will not be prompted until the Credential Provider is enforced as default provider on that machine. Test first the local login, if the local login is working fine, then you can enforce the CP as default provider and try the RDP login with MFA.
Once the login has been performed, you can check the logs from WebADM GUI > Databases > WebADM Shared Event Logs:
[2023-05-19 15:31:54] [10.10.2.2:45662] [OpenOTP:G22GEZ08] New openotpNormalLogin SOAP request
[2023-05-19 15:31:54] [10.10.2.2:45662] [OpenOTP:G22GEZ08] > Username: administrator
[2023-05-19 15:31:54] [10.10.2.2:45662] [OpenOTP:G22GEZ08] > Domain: SUPRCDEVS
[2023-05-19 15:31:54] [10.10.2.2:45662] [OpenOTP:G22GEZ08] > LDAP Password: xxxxxxxxxxxx
[2023-05-19 15:31:54] [10.10.2.2:45662] [OpenOTP:G22GEZ08] > Context ID: kCjLzPTD3FBJNg0N4XHoTfYUIV3I1qQc
[2023-05-19 15:31:54] [10.10.2.2:45662] [OpenOTP:G22GEZ08] > Options: NOVOICE, -LDAP
[2023-05-19 15:31:54] [10.10.2.2:45662] [OpenOTP:G22GEZ08] > Virtual: preferredLanguage=EN
[2023-05-19 15:31:54] [10.10.2.2:45662] [OpenOTP:G22GEZ08] Registered openotpNormalLogin request
[2023-05-19 15:31:54] [10.10.2.2:45662] [OpenOTP:G22GEZ08] Resolved LDAP user: cn=administrator,ou=TARIK,ou=WebADMs (cached)
[2023-05-19 15:31:54] [10.10.2.2:45662] [OpenOTP:G22GEZ08] Started transaction lock for user
[2023-05-19 15:31:54] [10.10.2.2:45662] [OpenOTP:G22GEZ08] Found user language: EN
[2023-05-19 15:31:54] [10.10.2.2:45662] [OpenOTP:G22GEZ08] Found 47 user settings: LoginMode=OTP,OTPType=TOKEN,PushLogin=Yes,ChallengeMode=Yes,ChallengeTimeout=90,OTPLength=6,OfflineExpire=30,MobileTimeout=30,EnableLogin=Yes,HOTPLookAheadWindow=25,TOTPTimeStep=30,TOTPTimeOffsetWindow=120,OCRASuite=OCRA-1:HOTP-SHA1-6:QN06-T1M,U2FPINMode=Discouraged,SMSType=Normal,SMSMode=Ondemand,MailMode=Ondemand,PrefetchExpire=10,LastOTPTime=300,ListChallengeMode=ShowID
[2023-05-19 15:31:54] [10.10.2.2:45662] [OpenOTP:G22GEZ08] Found 5 user data: TokenType,TokenKey,TokenState,TokenID,TokenSerial
[2023-05-19 15:31:54] [10.10.2.2:45662] [OpenOTP:G22GEZ08] Found 1 registered OTP token (TOTP)
[2023-05-19 15:31:54] [10.10.2.2:45662] [OpenOTP:G22GEZ08] Requested login factors: OTP
[2023-05-19 15:31:54] [10.10.2.2:45662] [OpenOTP:G22GEZ08] Authentication challenge required
[2023-05-19 15:31:54] [10.10.2.2:45662] [OpenOTP:G22GEZ08] Sent push notification for token #1 (session qiAWhyZppV722coQ)
[2023-05-19 15:31:54] [10.10.2.2:45662] [OpenOTP:G22GEZ08] Waiting 28 seconds for mobile response
[2023-05-19 15:32:07] [10.10.2.1:8950] [OpenOTP:G22GEZ08] Received mobile login response from 213.135.242.3
[2023-05-19 15:32:07] [10.10.2.1:8950] [OpenOTP:G22GEZ08] > Session: qiAWhyZppV722coQ
[2023-05-19 15:32:07] [10.10.2.1:8950] [OpenOTP:G22GEZ08] > Password: 16 Bytes
[2023-05-19 15:32:07] [10.10.2.1:8950] [OpenOTP:G22GEZ08] Found authentication session started 2023-05-19 15:31:54
[2023-05-19 15:32:07] [10.10.2.1:8950] [OpenOTP:G22GEZ08] PUSH password Ok (token #1)
[2023-05-19 15:32:07] [10.10.2.2:45662] [OpenOTP:G22GEZ08] Updated user data
[2023-05-19 15:32:07] [10.10.2.2:45662] [OpenOTP:G22GEZ08] Sent login success response
3.5 Advanced configuration
For advanced configuration of OpenOTP Credential Provider for Windows and detailed explanations, have a look on the product documentation.
3.6 Troubleshooting
If you encounter any issues with the integration, we recommend following these steps to troubleshoot and resolve the problem:
-
Check the WebADM server logs: To identify the root cause of the issue, examine the logs generated by the WebADM server. The logs may provide valuable information about the specific error or misconfiguration that is causing the problem.
-
Refer to the troubleshooting documentation: For step-by-step instructions on resolving common integration issues, consult the troubleshooting documentation. This resource is designed to assist you in diagnosing and resolving problems that may arise during the integration process.
By reviewing the WebADM server logs and utilizing the troubleshooting documentation, you can effectively identify and address any issues that may be impacting the integration of OpenOTP-CP for Windows with OpenOTP Cloud.
4. SAML/OpenID
There is no significant change for OpenID/SAML integrations with RCDevs cloud edition software. Please refer to the RCDevs Identity Provider documentation to setup your service provider with RCDevs cloud solutions.