Remote Desktop Web portal and Gateway
How To Configure MS Remote Desktop Services and RDWeb portal with OpenOTP
Note
OpenOTP plugin for Remote Desktop Web portal works on Windows Server 2012, 2016, 2019 & 2022.
1. Prerequisites
1.1 Remote Desktop Services Infrastructure
Note
OpenOTP plugin for Remote Desktop Web portal works on Windows Server 2012, 2016, 2019 & 2022.
In this post, we will assume an existing Remote Desktop Services infrastructure installed and available. This post will not cover how to set up RDS. Please refer to the Microsoft documentation and/or the TechNet blog for details about how to install and configured Microsoft documentation.
1.2 WebADM/OpenOTP/Radius Bridge
For this recipe, you will need to have WebADM/OpenOTP installed and configured. If you would like to have Push Login Mode then Radius Bridge needs to be configured. Please, refer to WebADM Installation Guide, WebADM Manual and Radius Bridge to do it.
2. How to Secure RDWeb Access with OpenOTP
2.1 RDWeb Authentication Workflow (Challenge Mode)
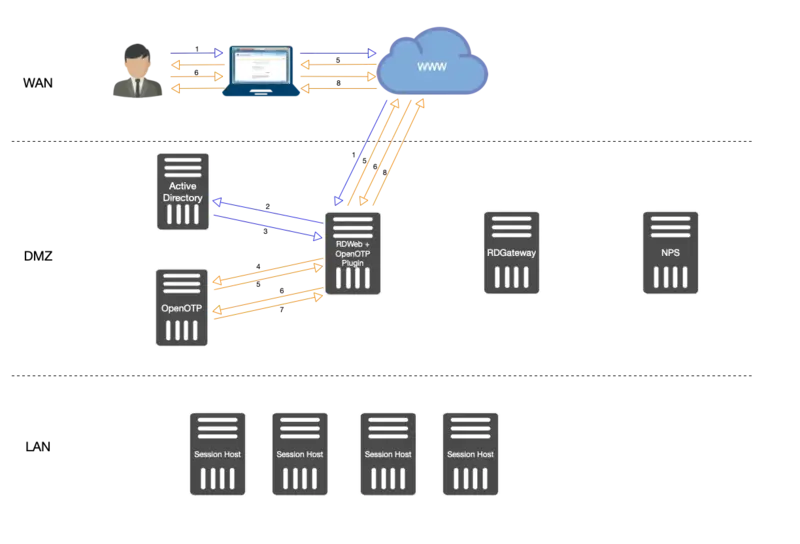
- User Access to RDWeb login page, provide Username/Password. Credentials are sent to Kerberos.
- Credentials are validated between RDWeb and Kerberos services.
- If credentials are correct then a Kerberos ticket is provided to RDWeb for this user.
- Once the first validation with Kerberos is ok, an OpenOTP login request is sent from the OpenOTP RDWeb Plugin installed on RDWeb server to OpenOTP server.
- If LDAP Credentials are validated by OpenOTP server, then a challenge request is sent by OpenOTP to the RDWeb and will allow the user to provide the OTP.
- The user is prompted to enter his OTP. The OTP is sent back to the OpenOTP server through the OpenOTP RDWeb plugin.
- OpenOTP validates the OTP provided by the User.
- If the OTP is validated by OpenOTP server then the authentication is a success.
- The user has logged on the RDWeb interface and is able to download RDP files.
2.2 RDWeb Authentication Workflow (Push Login Mode)
-
The user initiates an RDP session with an RDP file previously downloaded from the RDWeb server.
-
The RDP connection start through the RDP client. The RDP client contacts the RDGateway. The RDGateway communicate with NPS to check users policies and resources allowed for this user.
-
At this step, the first validation with Kerberos is in progress.
-
A Kerberos ticket is created for this user and send back to NPS.
-
NPS act as a PROXY RADIUS too. Once NPS has received the Kerberos validation, a RADIUS Access-Request is sent to Radius Bridge by NPS.
-
The Radius Access-Request is translated into a SOAP Login request by Radius Bridge product to be managed by OpenOTP server. OpenOTP will validate LDAP credentials and send a push login request to the user’ mobile.
-
If LDAP Credentials are validated by OpenOTP server, then a push login request is sent RCDevs Push servers.
-
RCDevs Push Servers communicate with Google/Apple Push services.
-
Google/Apple services. send the push notification on the user’s mobile OpenOTP.
-
The user receives the push login request on his phone and has to Accept or Reject the login attempt.
-
The response from the mobile is sent to WAProxy server and WAProxy forward the mobile response to OpenOTP server.
-
OpenOTP manages the response and accept or reject the login attempt according to the mobile response.
-
OpenOTP sends a SOAP access accept request to Radius Bridge.
-
Radius Bridge translates the SOAP request into a RADIUS request. The response is sent to NPS. NPS receives the authorization from the RADIUS server to allow the connection for this user. The user is successfully authenticated in 2FA.
-
RDGateway allows the user to access to Session Hosts according to policies configured on NPS for this user and resources allowed.
3. OpenOTP Plugin for RDWeb Installation
OpenOTP plugin for Microsoft RDS has to be installed on every RDWeb servers you have. You have to download the plugin on RCDevs Website at the following links OpenOTP Plugin for RDWeb Gateway.
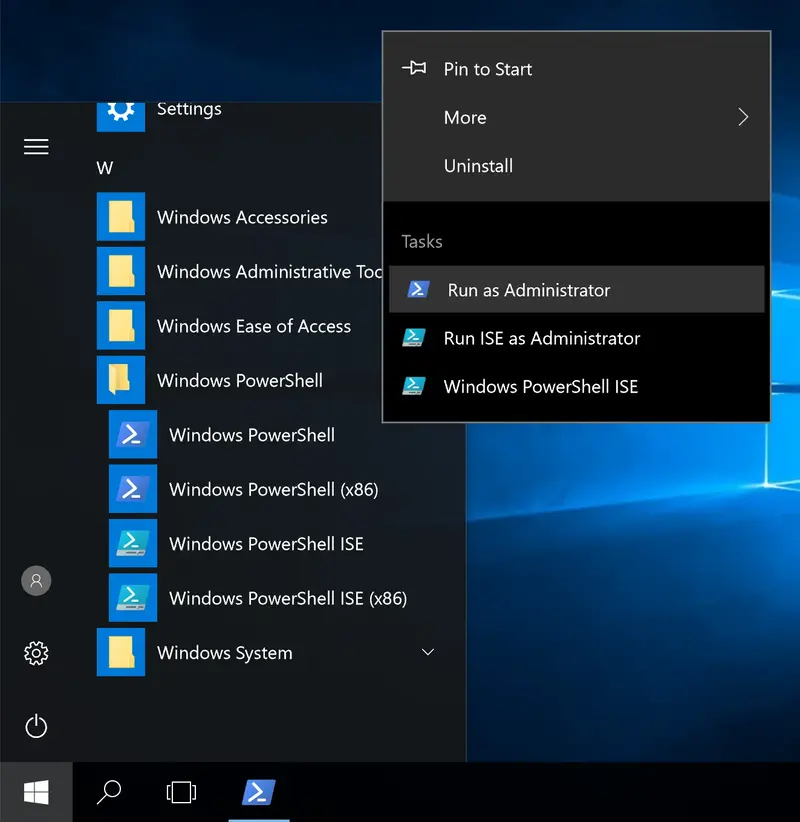
Note
Administrative/elevated permissions are necessary on any workstation to correctly set up and/or change the OpenOTP Plugin for RDWeb’s configuration. Please, run the Windows PowerShell as Administrator. Right click on the Windows PowerShell then select Run as Administrator.
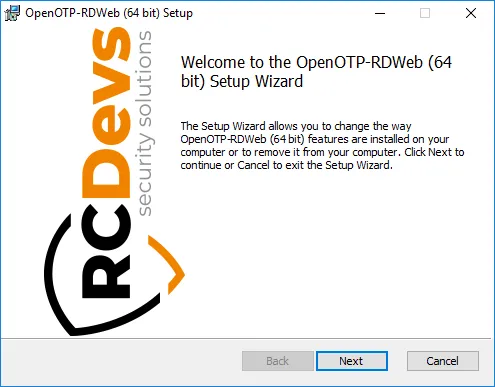
Extract files from the archive on your RDS server(s), run the MSI file in the Windows PowerShell as Administrator and click on Next.
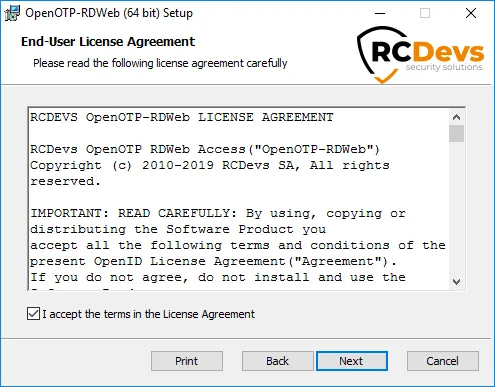
Accept the End-User License Agreement and click on Next.
On the next page, choose your default folder location and click on Next.
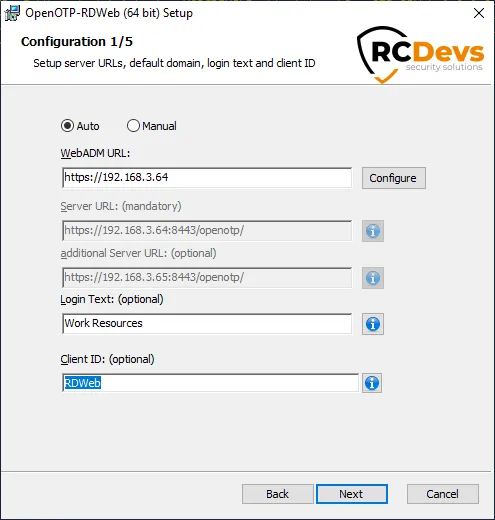
On this page, you have to configure one of your WebADM servers URL. If you are running a WebADM cluster, then both OpenOTP URLs should be automatically retrieve in the Auto mode. If your OpenOTP URL(s) can not be automatically retrieve, then configure URL(s) manually like below :
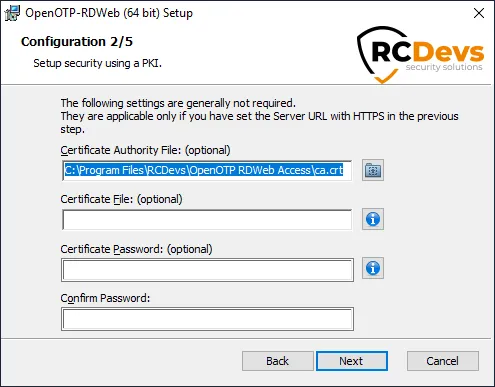
On the next page, the WebADM CA certificate is automatically retrieved and configured if you have chosen the Auto mode to return OpenOTP URL(s). Every other settings are optional. If you’d like to use a client certificate for enhanced security, please use this next screen to provide the detail.
Clicking on the question marks (?) will provide additional help during the installation procedure.
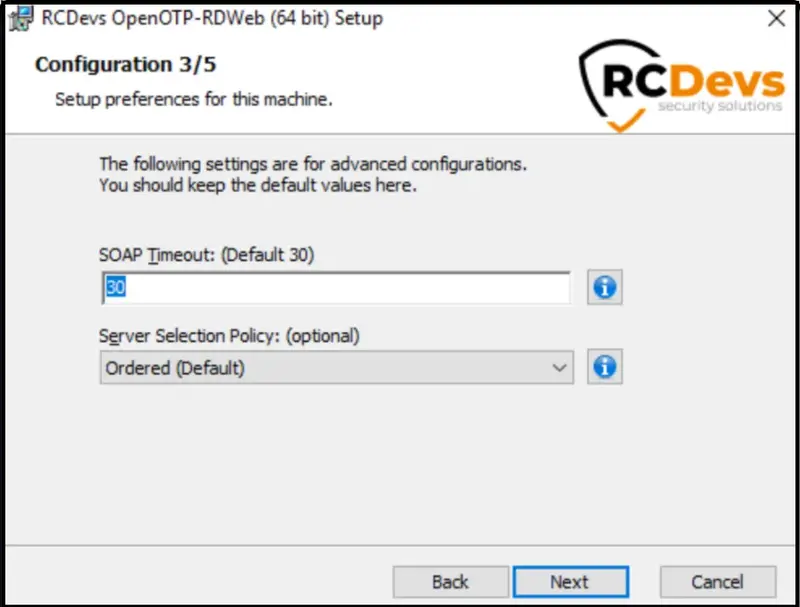
Click Next and the next page allows you to configure failover with OpenOTP, SOAP request timeout and UPN Mode. Keep the default configuration if you are not sure of what you need. Click on Next.
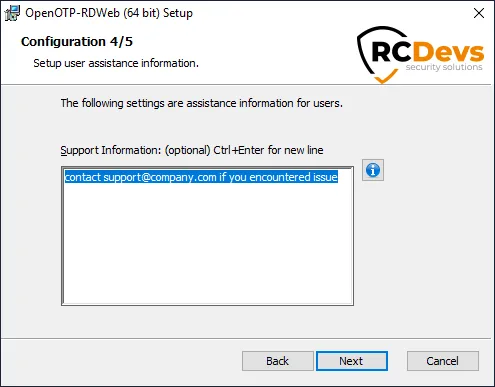
On the next page, you can configure a custom message when users need assistance.
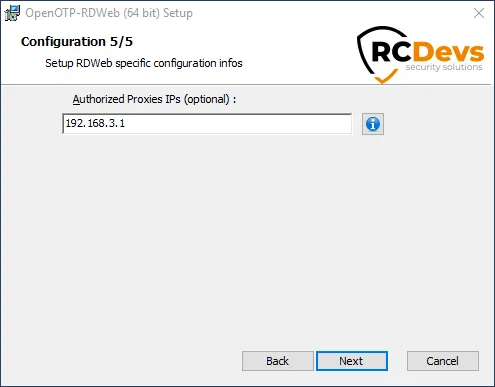
Click on Next. On that page, you can configure the reverse-proxy address(es) of your reverse-proxy if you are accessing RDWeb portal through a reverse-proxy. This is usefull for WebADM in order to know the real end-user IP in WebADM logs instead of the reverse-proxy IP(s). It is also usefull for WebADM if you want to use the Per-Network Extra Policies feature in your RDWeb client policy.
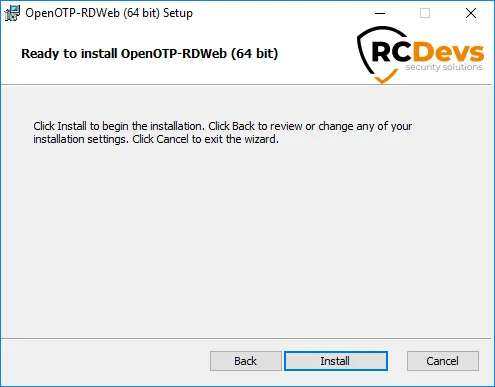
Click on Next and Install.
Installation is complete. Click on Finish.
Plugin Installation
Repeat this procedure on every RDWeb servers!
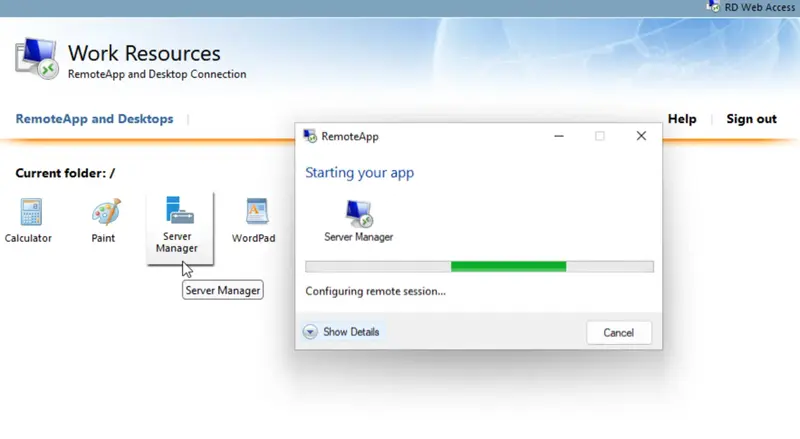
You are now able to log in on your RDWeb server with OpenOTP. Go to your RDWeb page and please enter your credentials:
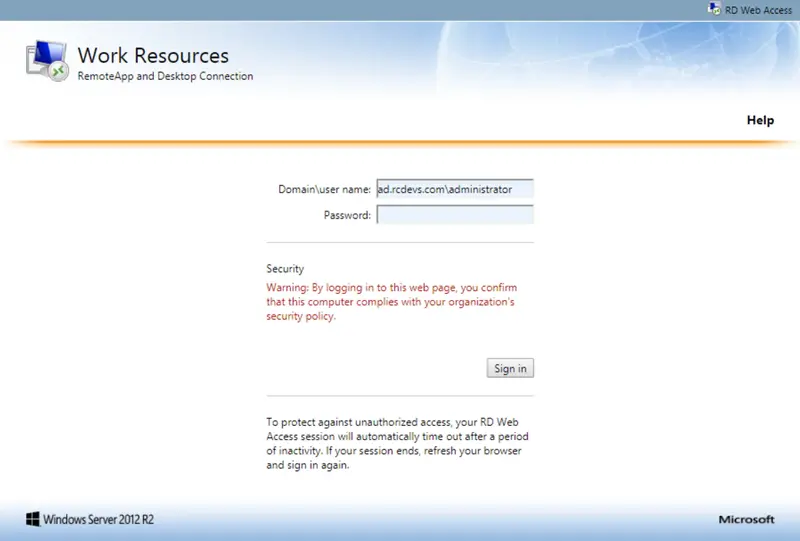
WebADM Authentication Policy
Here, WebADM is configured with the authentication policy LDAP + OTP but, LDAP credentials are not checked by WebADM/OpenOTP but by Windows. In any case, OpenOTP will only check the OTP password.
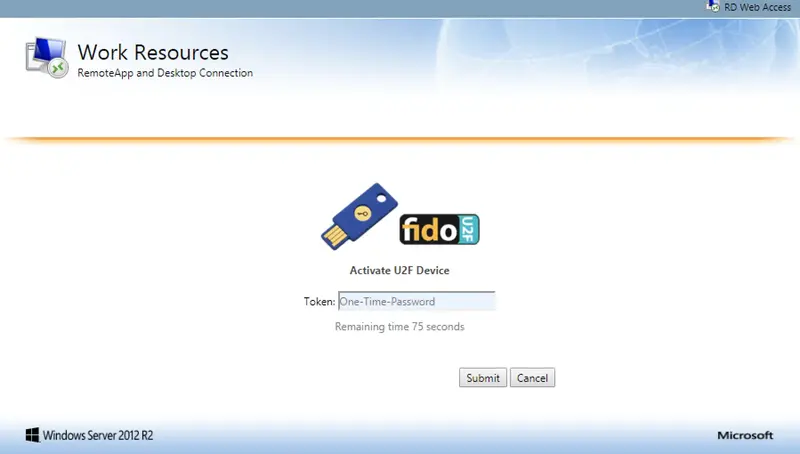
Enter your OTP password on the next screen and click on Submit.
And you are logged on:
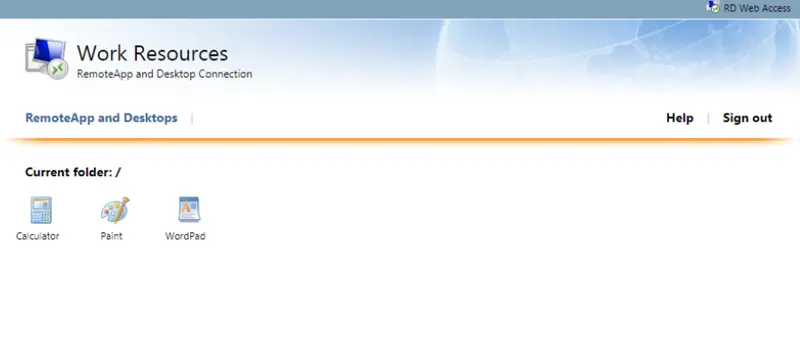
It’s done for the RDWeb.
3.1 Enable MFA for the RDWeb Apps.
If you have Remote applications accessible through RDWeb portal, and you want to secure these applications access with OpenOTP, you have to install OpenOTP Plugin for Windows Login.

To enable Multi-Factor Authentication (MFA) for every connection, even if you close the published app, follow these steps:
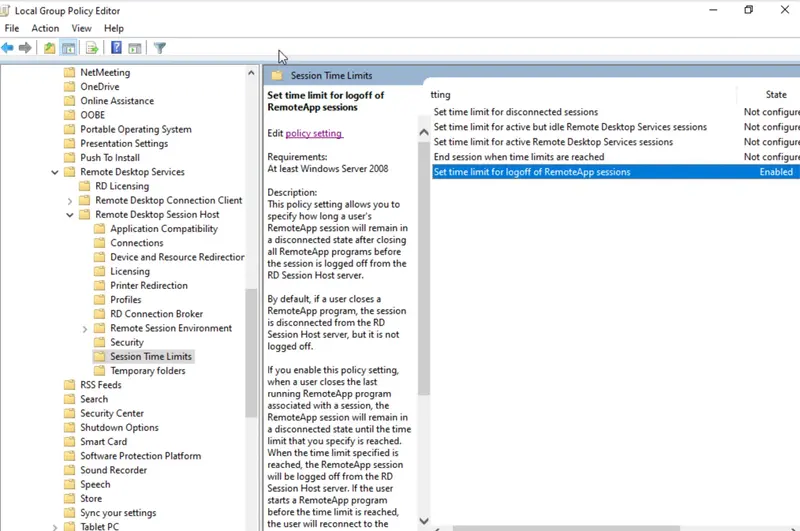
To ensure MFA is required for every connection, you need to activate the set time limit for logoff of remoteapp sessions option.
This can be done under the host machine (Windows server).
Configuration Steps :
- Login with an administrator account, press “Window” + “R” to launch the “Run” window.
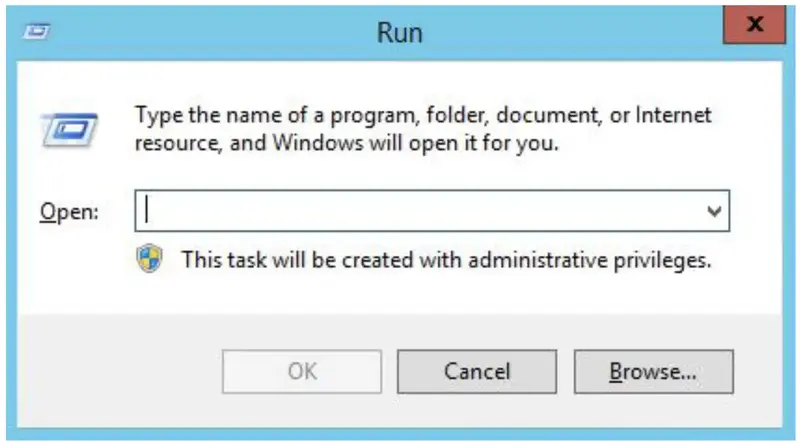
- Enter “gpedit.msc” and press “Enter” to enter the local group policy editor.
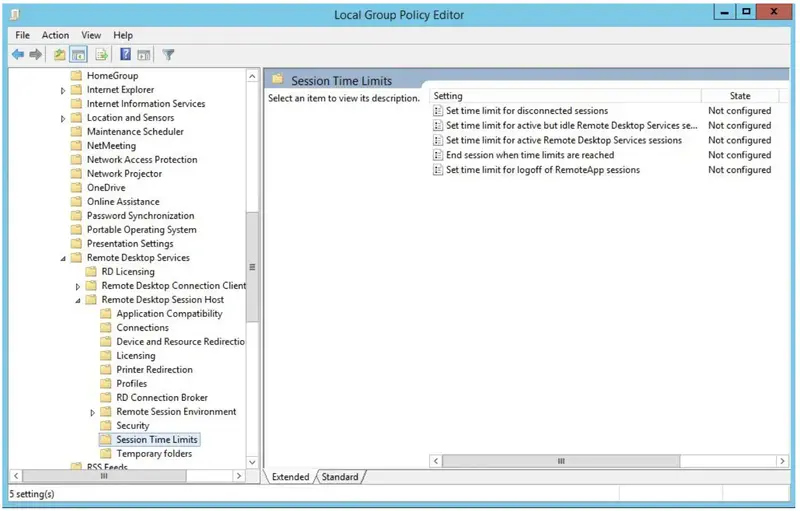
- Find : Computer Configurations-> Administrative Templates-> Windows Components-> Remote Desktop Services-> Remote Desktop Connection Host-> Session Time Limits.
- Select “Set Time Limit for Logoff of RemoteApp Sessions”, right click to select “Edit”.
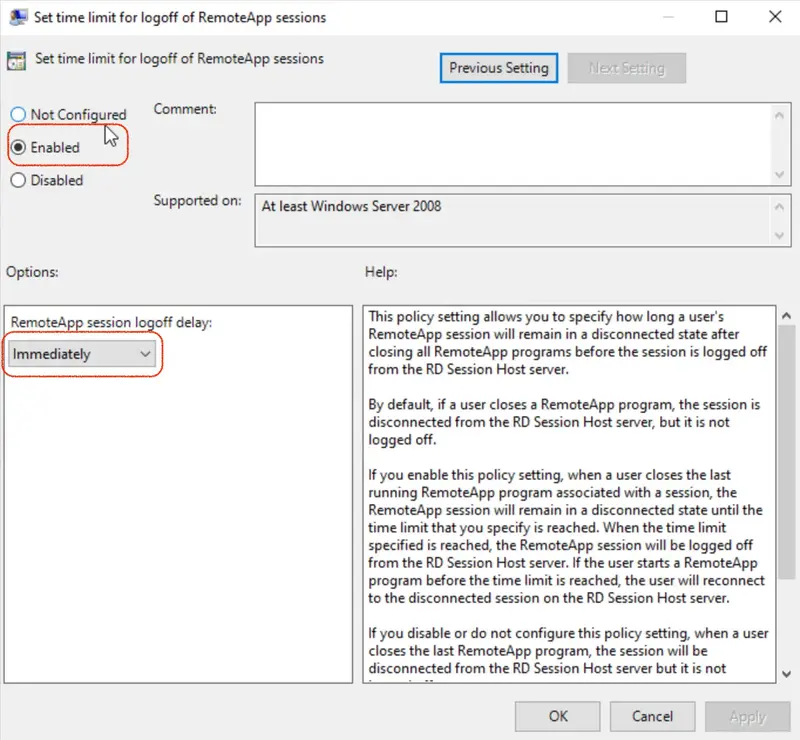
- Select “Enabled”, and select a time at the options for “End a disconnected session”, and then click “OK” to apply the configurations.
Now you can use the gpupdate /force command in PowerShell to forcibly update Group Policy.
4. How to configure RDGateway with NPS and OpenOTP over RADIUS
Push Login is mandatory in that scenario
The RDS scenario with NPS, OpenOTP and Radius Bridge can only work with the push login infrastructure. NPS didn’t manage the RADIUS challenge, that’s why it’s mandatory to use the Push login.
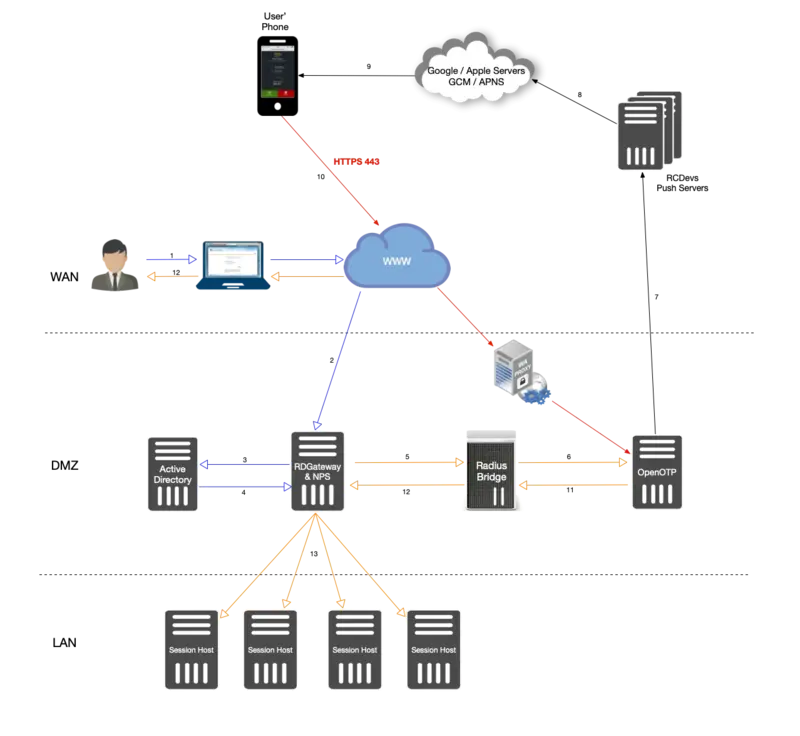
4.1 Workflow
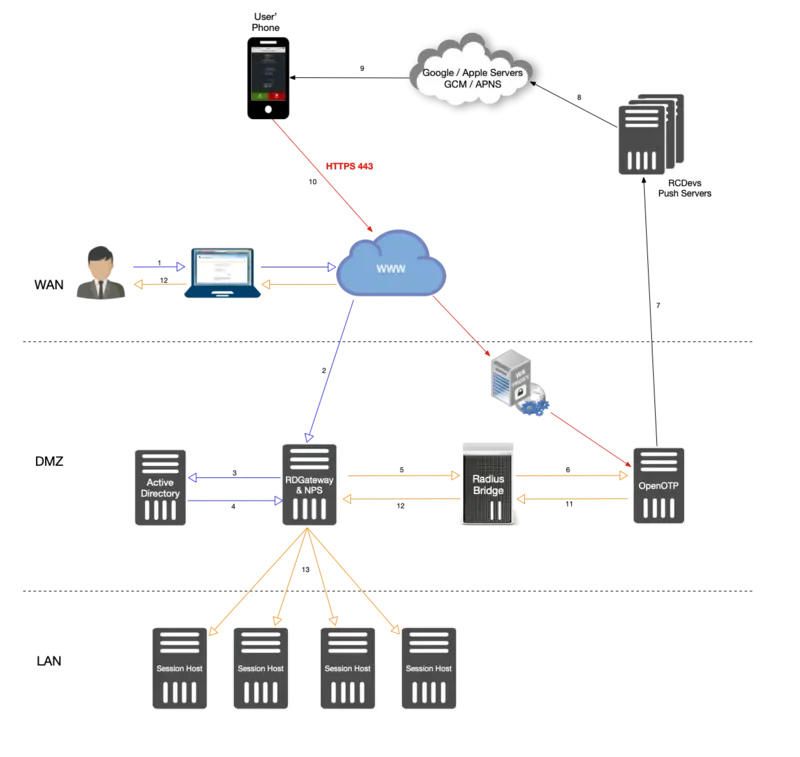
-
The user initiates an RDP session with an RDP file previously downloaded from the RDWeb server.
-
The RDP connection starts through the RDP client. The RDP client contacts the RDGateway. The RDGateway communicate with NPS to check users policies and resources allowed for this user.
-
At this step, the first validation with Kerberos is in progress.
-
A Kerberos ticket is created for this user and send back to NPS.
-
NPS act as a PROXY RADIUS too. Once NPS has received the Kerberos validation, a RADIUS Access-Request is sent to Radius Bridge by NPS.
-
The Radius Access-Request is translated into a SOAP Access request by Radius Bridge product to be managed by OpenOTP server. OpenOTP will validate LDAP credentials and send a push login request to the user’s mobile.
-
If LDAP Credentials are validated by OpenOTP server, then a push login request is sent RCDevs Push servers.
-
RCDevs Push Servers communicate with Google/Apple Push services.
-
The user receives the push login request on his phone and has to Accept or Reject the login attempt.
-
The response from the mobile is sent to WAProxy server and WAProxy forward the mobile response to OpenOTP server.
-
OpenOTP manages the response and accept or reject the login attempt according to the mobile response.
-
OpenOTP sends a « SOAP access accept » request to Radius Bridge.
-
Radius Bridge translates the SOAP request into a RADIUS request. The response is sent to NPS. NPS receives the authorization from the RADIUS server to allow the connection for this user. The user is successfully authenticated in 2FA.
-
RDGateway allows the user to access to Session Hosts according to policies configured on NPS for this user and resources allowed.
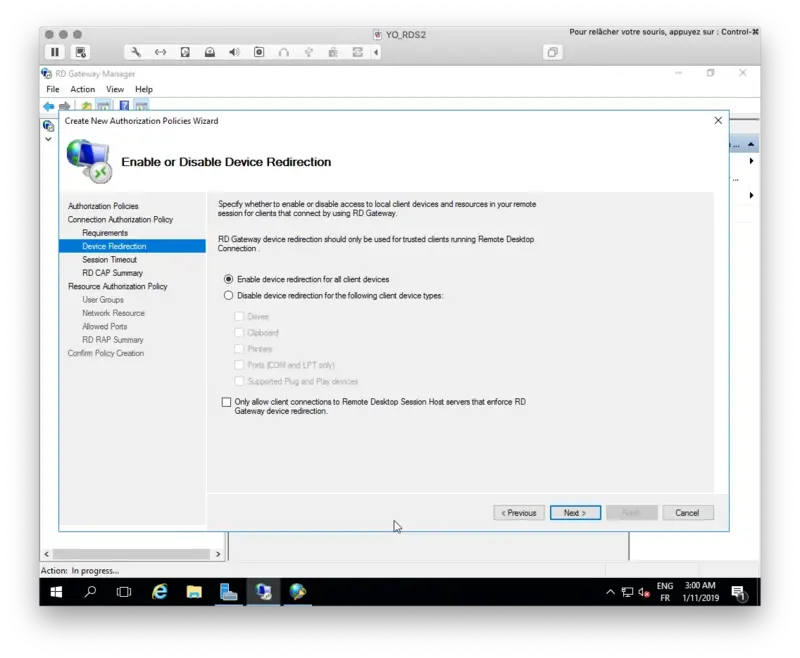
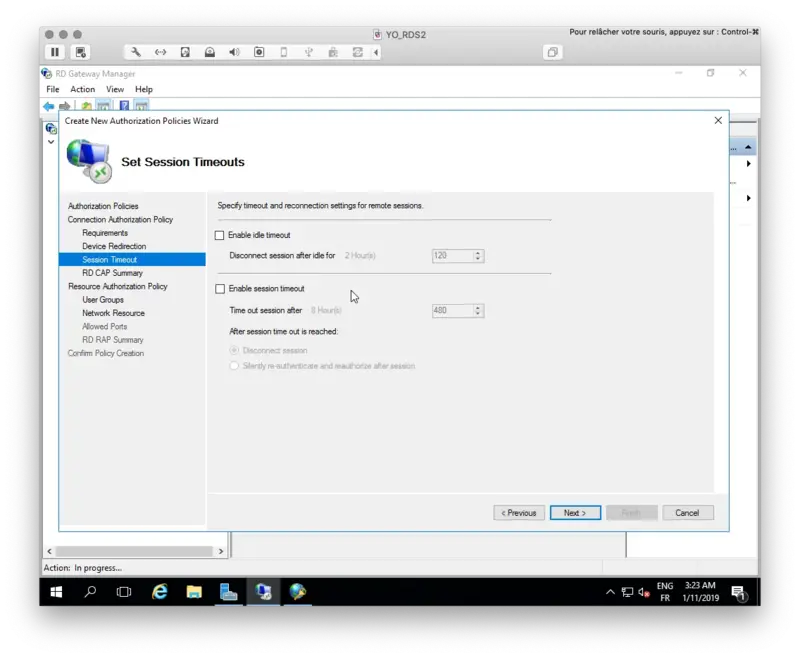
4.2 RDGateway Configuration
We will start by configuring the RDGateway component. Open the RD Gateway manager console.
Right click on Connection Authorization Policies > Create New Policy > Wizard.

You will be prompted to the following screen:
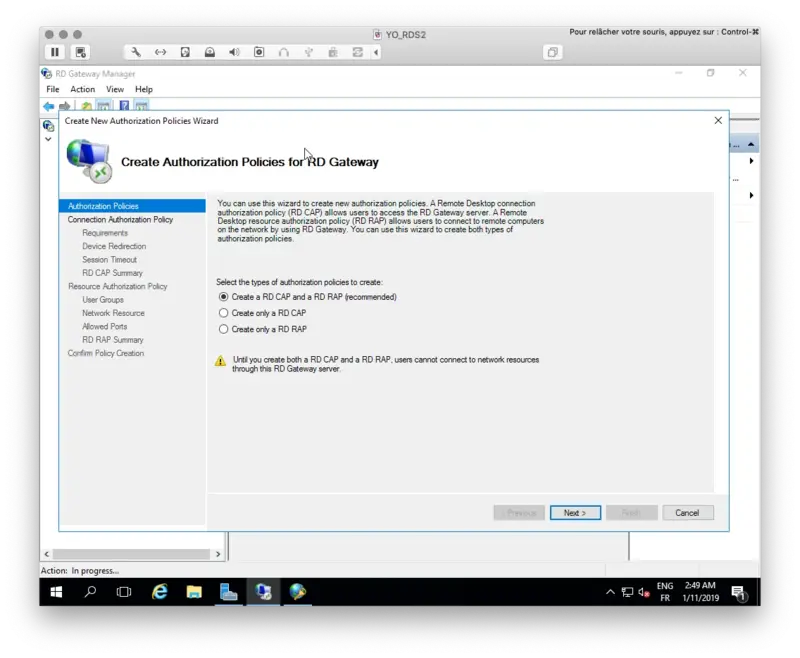
Select Create an RD CAP and an RD RAP option and click Next.
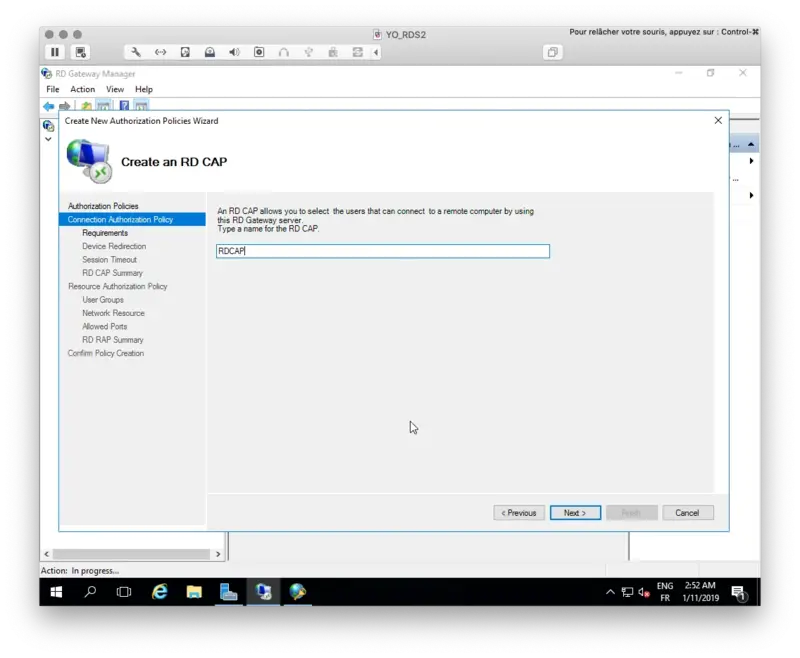
Provide a name for your RD CAP.
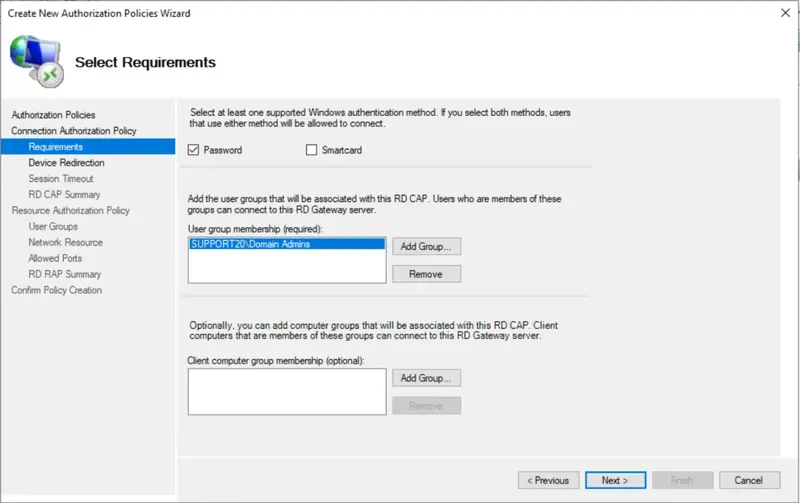
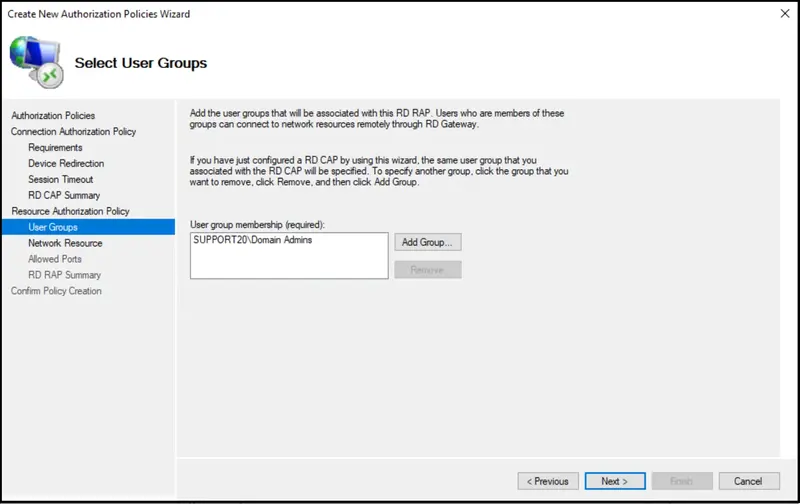
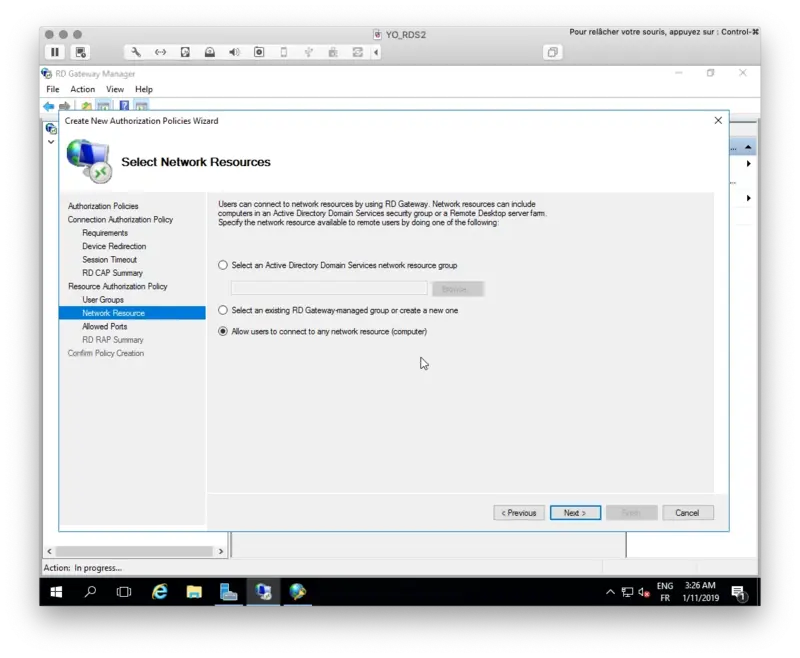
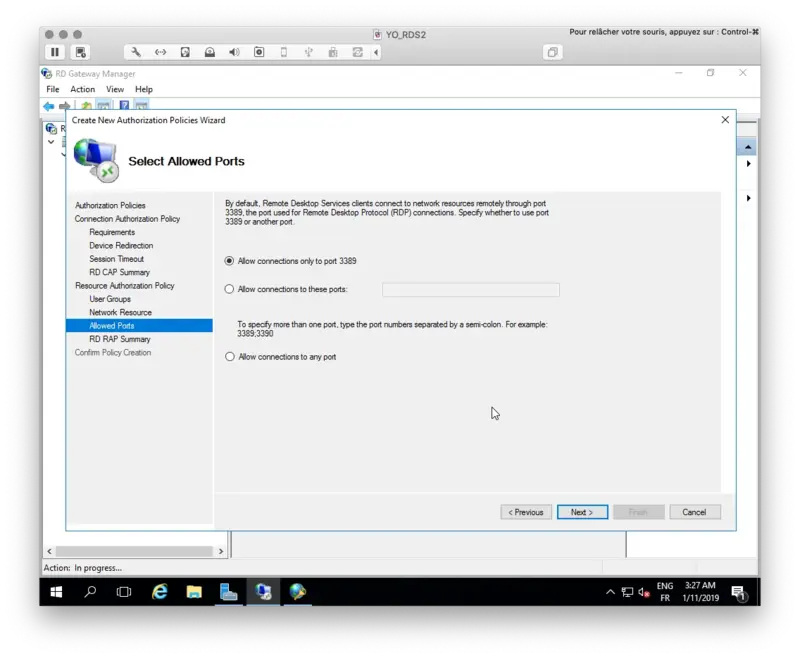
Select your user group and a computer group membership.
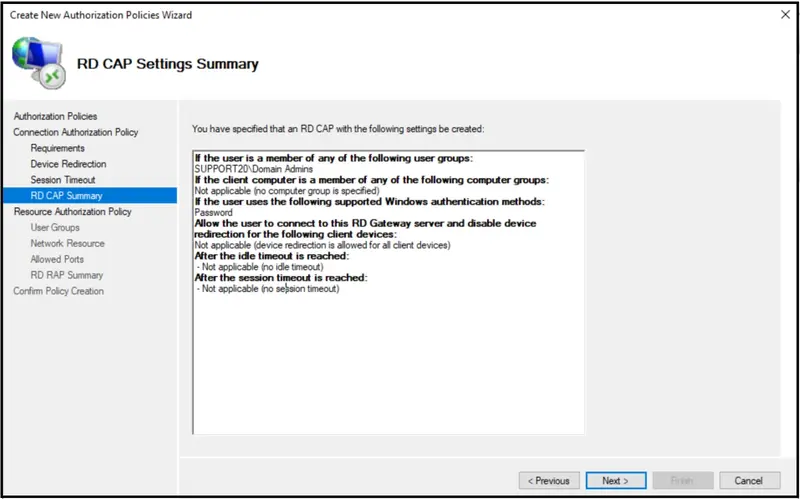
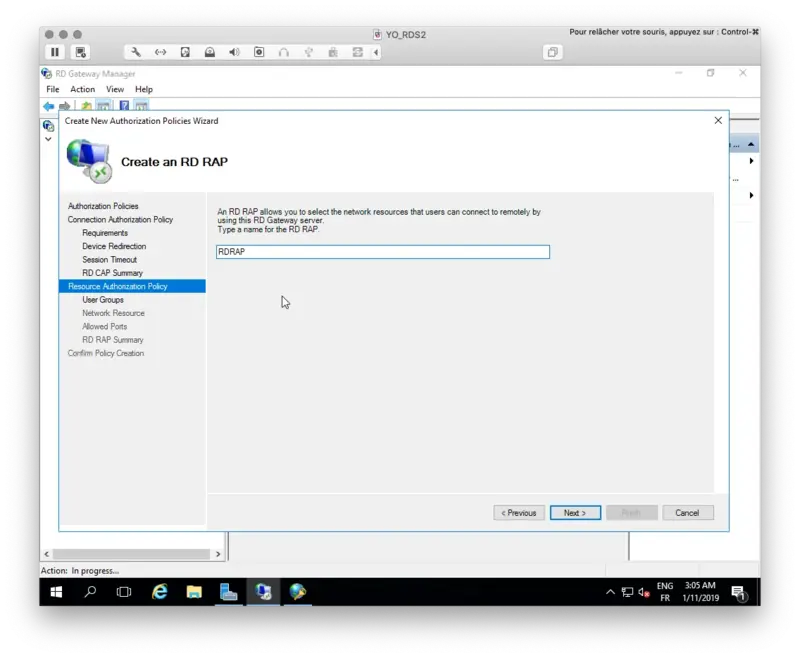
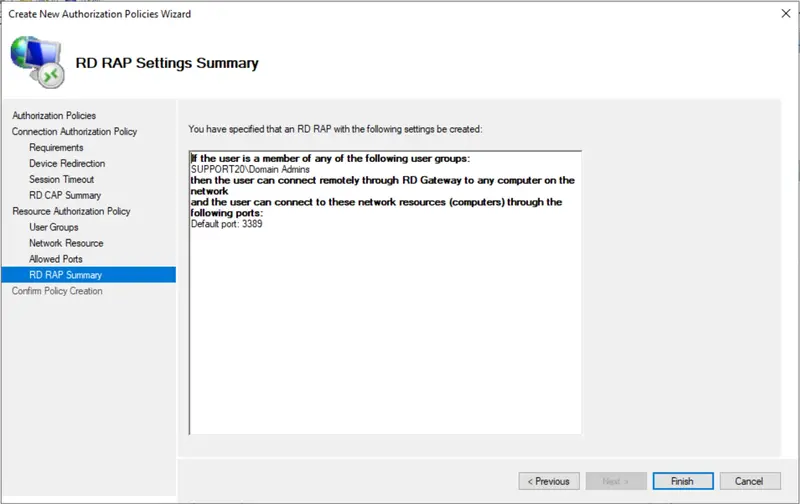
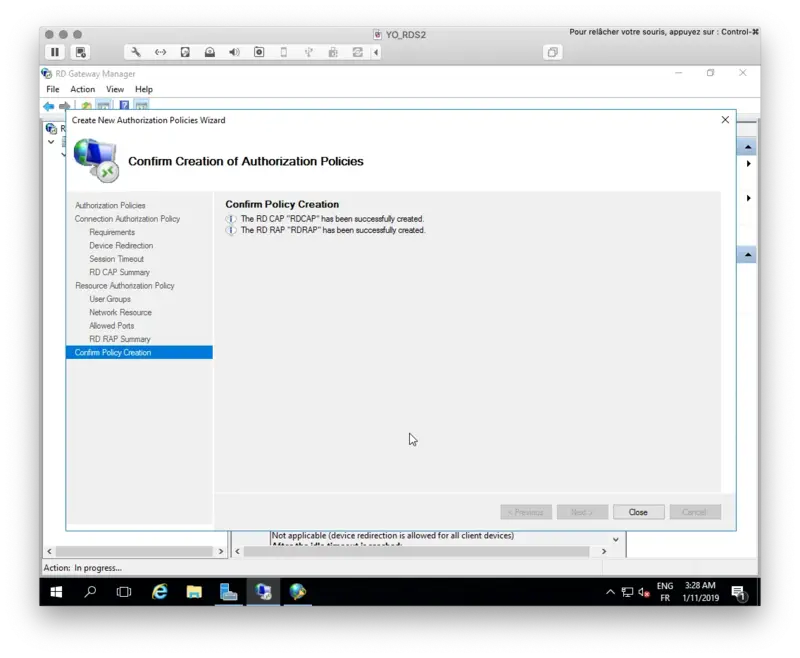
The configuration wizard is now finished.
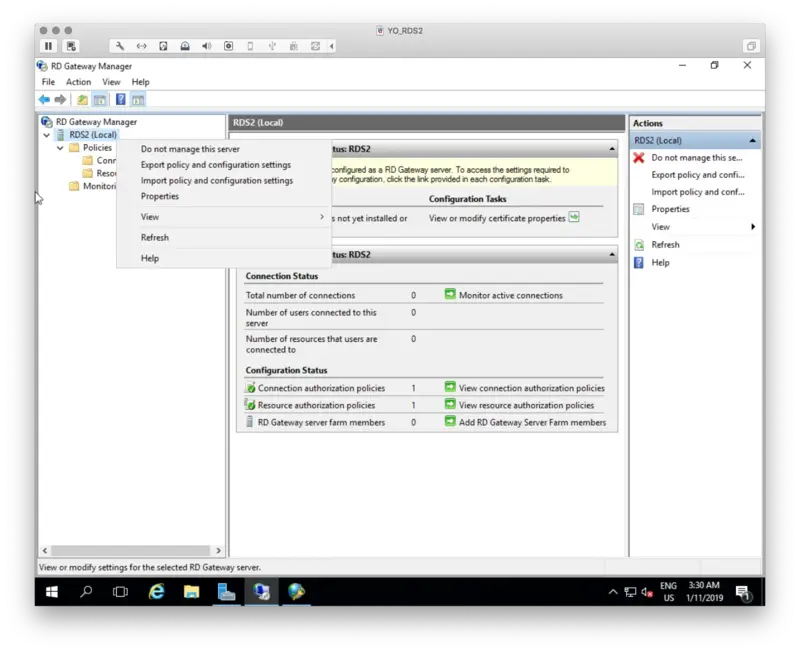
Now click right on your server name under RD Gateway Manager console and select Properties.
Under the SSL Certificate tab, select your Certificate signed by your CA or select a self-signed certificate. On my side, I select a certificate issued by my internal CA.
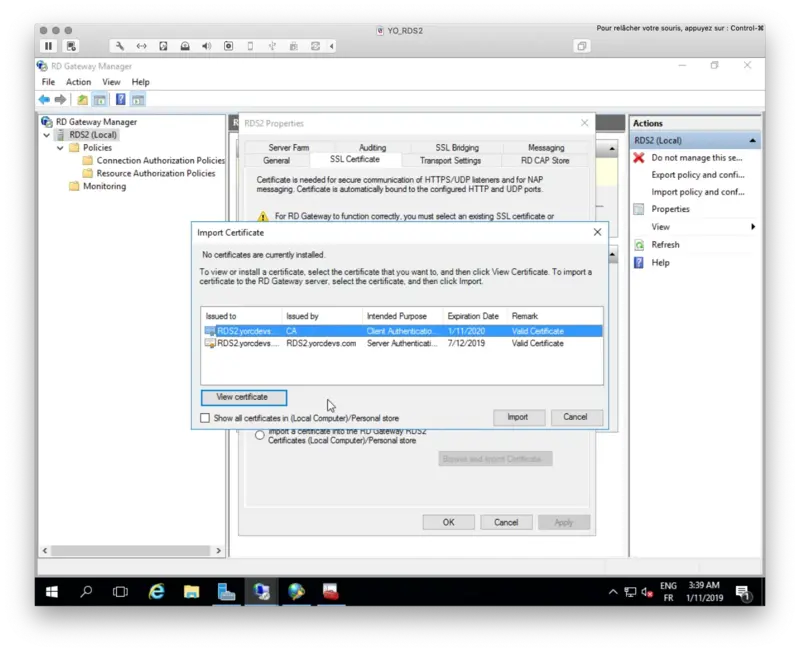
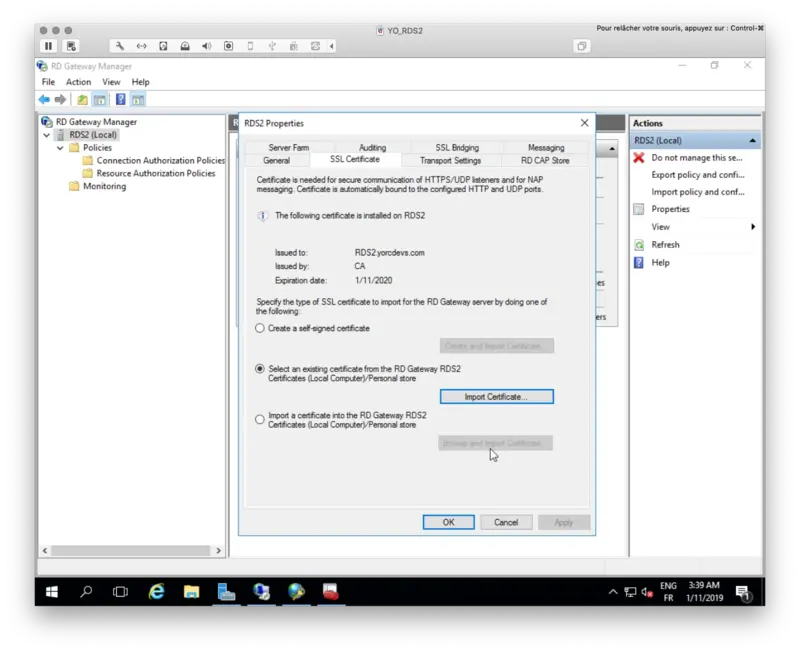
My certificate will now be used to trust the Gateway.
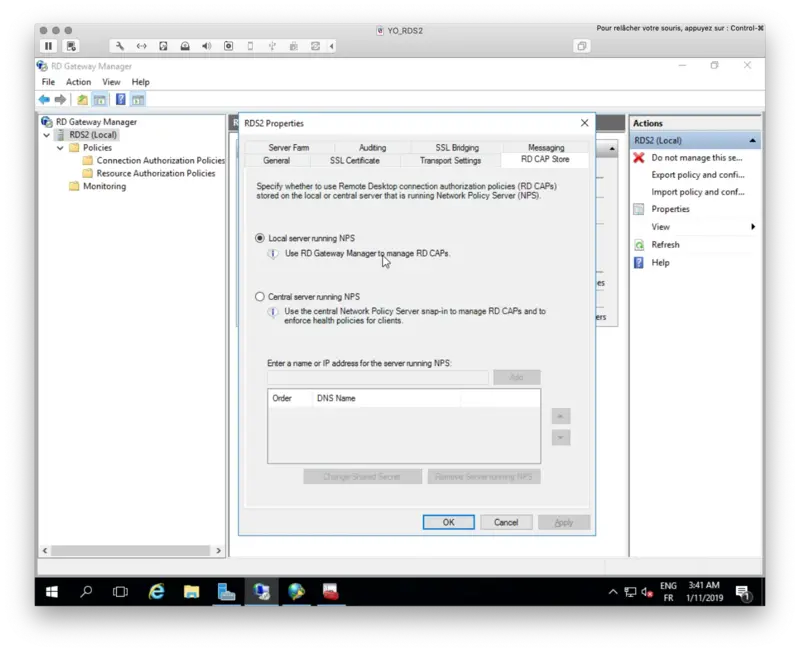
Now, go to RD CAP Store and choose the location of your NPS server. On my side, NPS is installed on the same server.
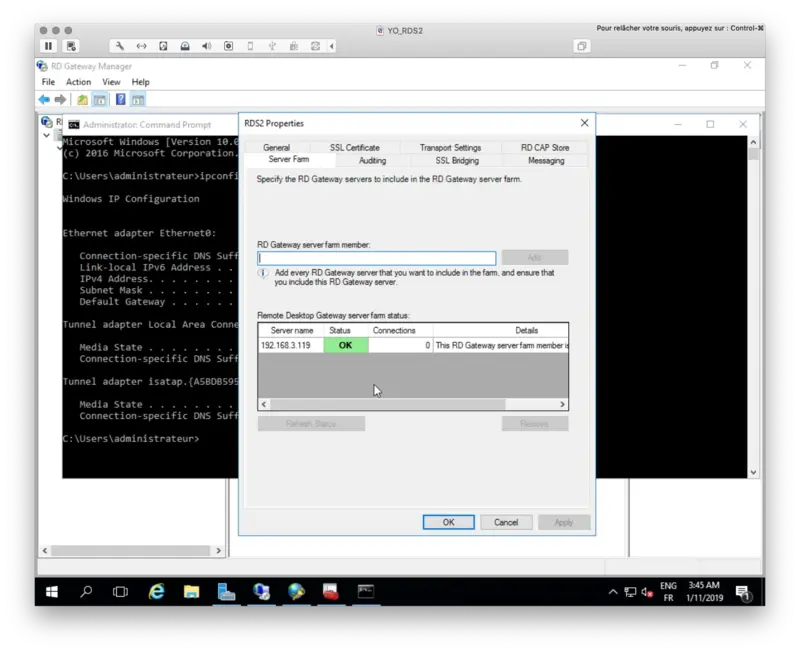
Under the Server Farm tab, add your current RD Gateway server(s).
The configuration of RD Gateway is now finished!
4.3 NPS Configuration
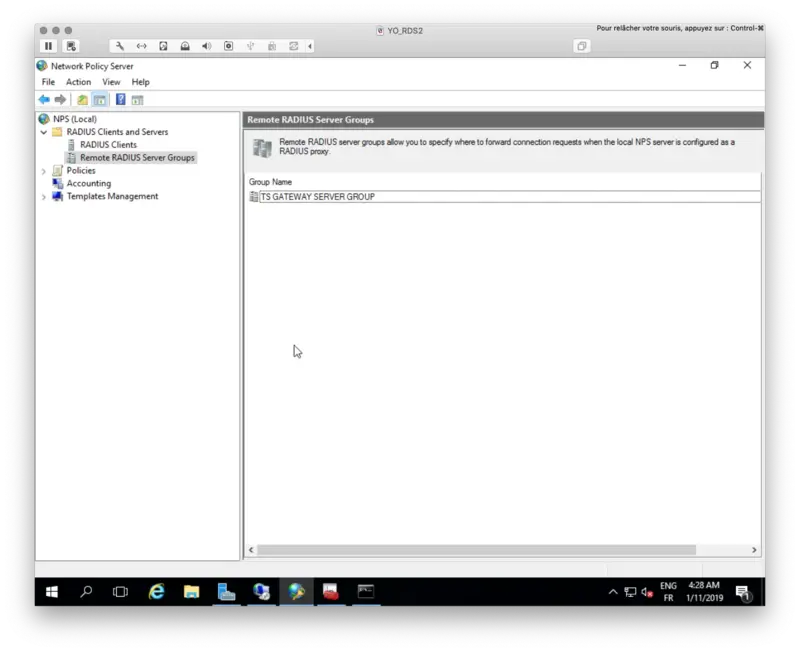
4.3.1 Remote RADIUS Server Groups
We will now configure the NPS component. NPS manages which user is able to log in on which resource, the authentication method…
First, we will configure a Remote RADIUS Server Group and edit the default group TS GATEWAY SERVER GROUP.
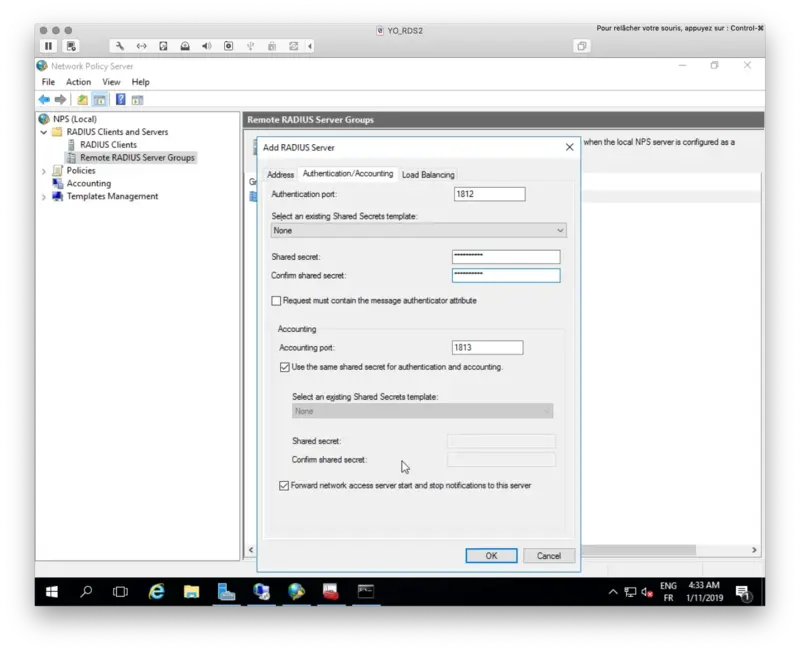
Right click > Properties on the TS Gateway Server Group. Under the General tab, click Add button to add a RADIUS Server. 192.168.3.54 is my Radius Bridge server installed on my OpenOTP/WebADM server.
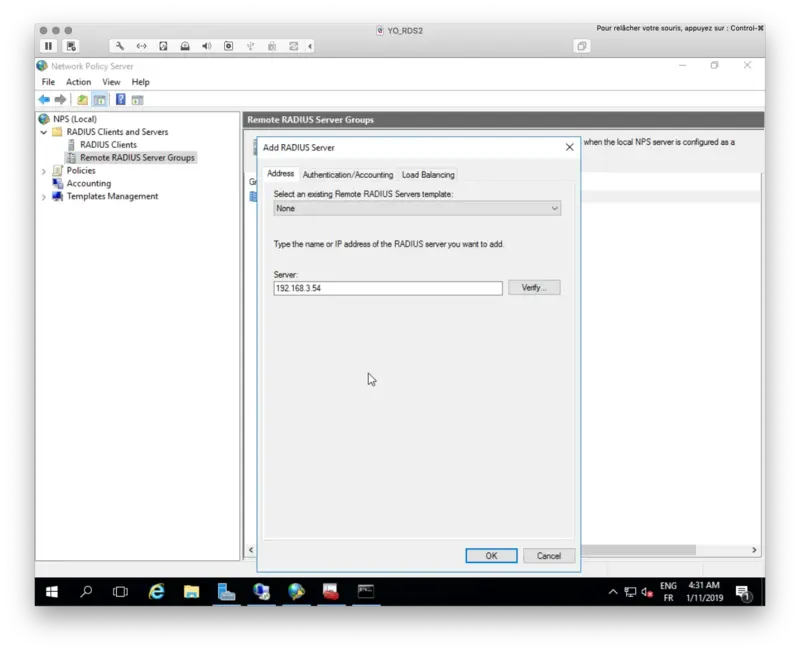
On the Authentication/Accounting tab, configure your Radius secret.
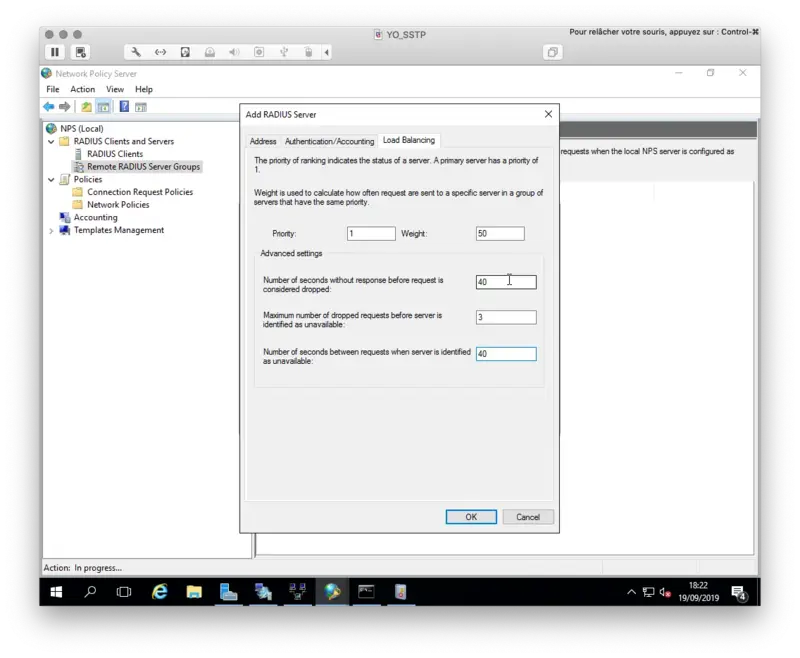
Under the Load Balancing tab, configure your timeout value and the priority if you configure more than 1 server.
Once the configuration is done, click Save and Ok.
At this step, you can also configure the Radius Client and his secret on Radius Bridge Server to allow NPS to communicate with Radius Bridge.
vi /opt/radiusd/conf/clients.conf
At the end of this file you should have your NPS Server configured like below:
client NPS {
        ipaddr = 192.168.3.119
        secret = testing123
}
Your Radius Server is now configured at the NPS level.
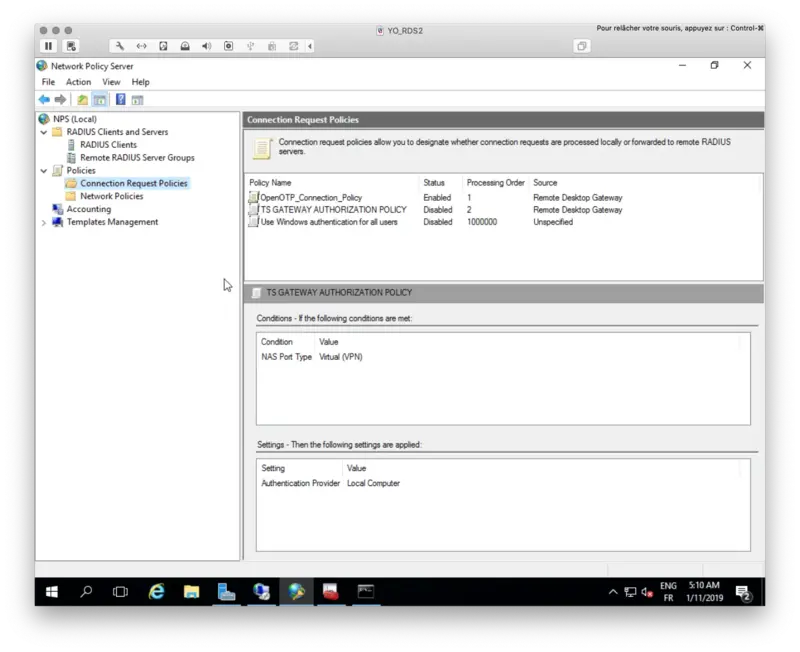
4.3.2 Connection Request Policies
We will now create a new Connection Request Policy.
Name your policy and select Remote Desktop Gateway as Type of network access server.
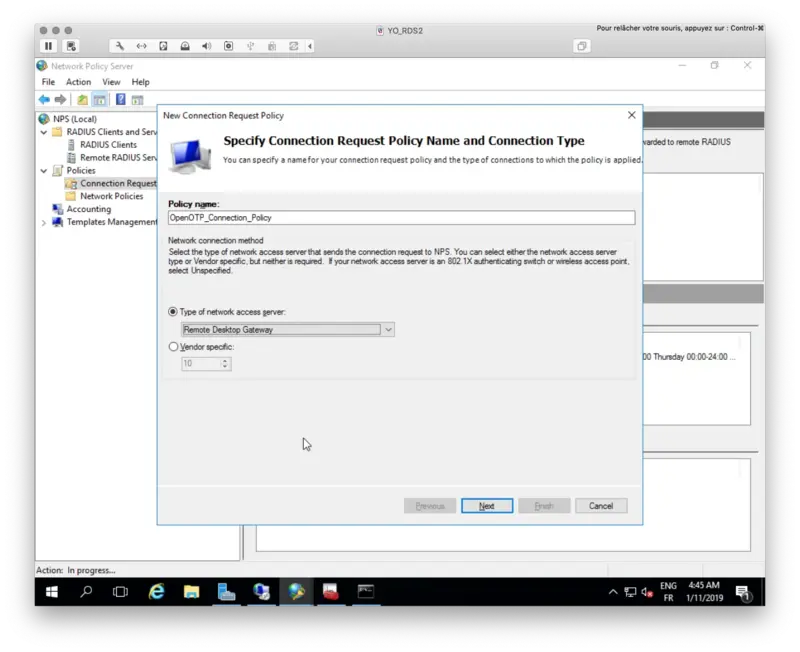
Click Next.
You have now to specify conditions of this policy.
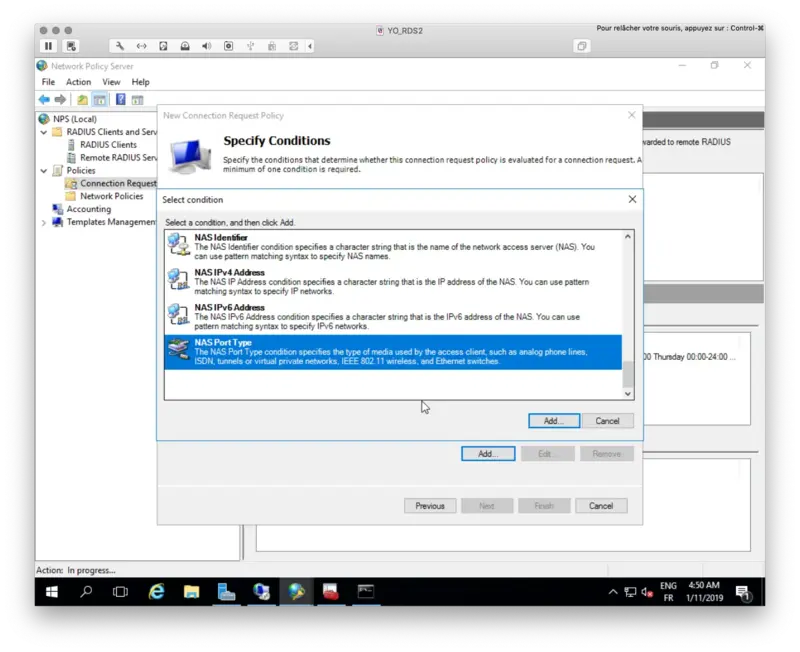
Select NAS port Type and then Virtual (VPN) as value.
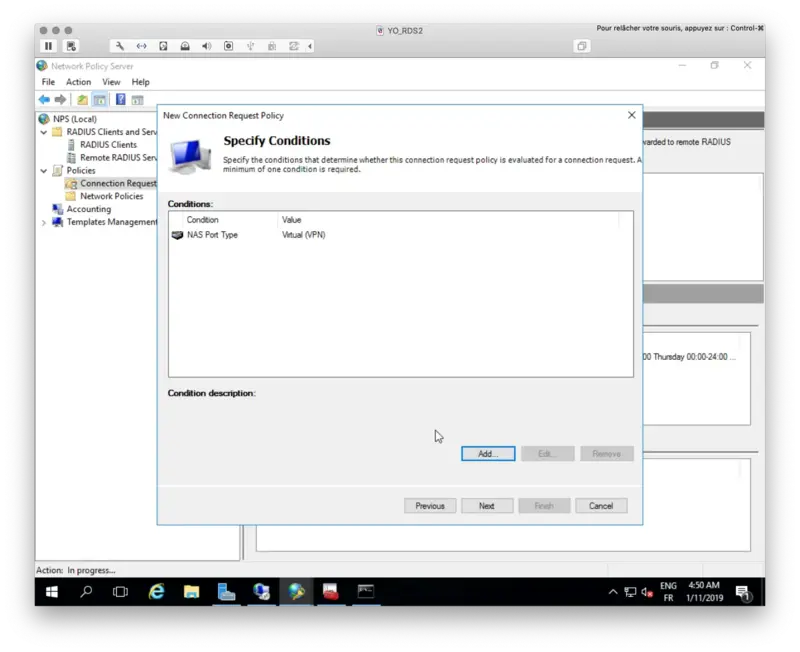
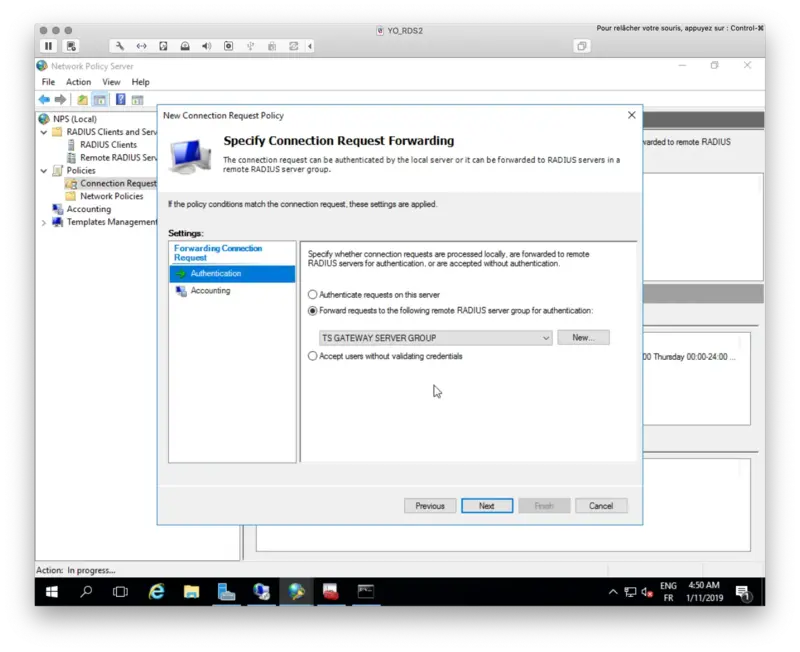
Click Next and on the next page, select your Radius Server group previously configured.
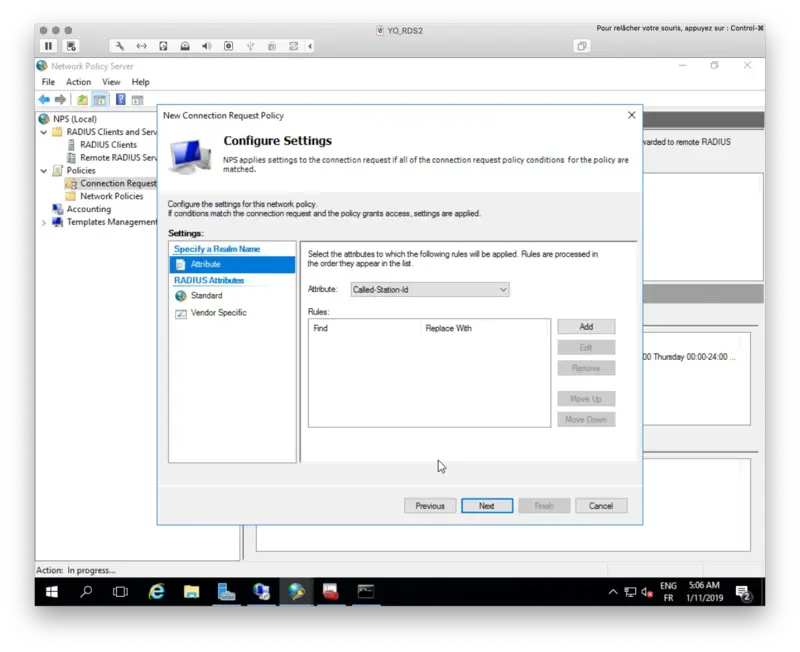
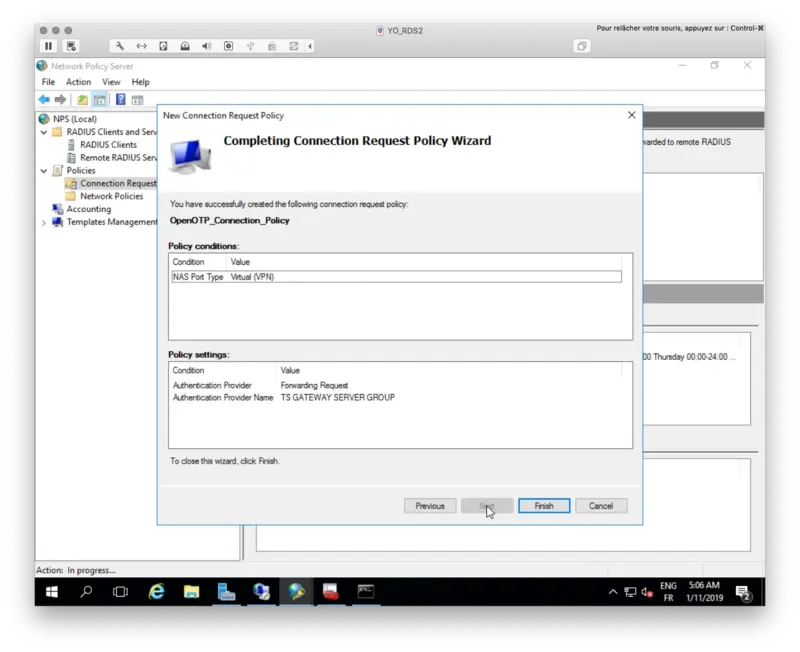
Click on Finish button.
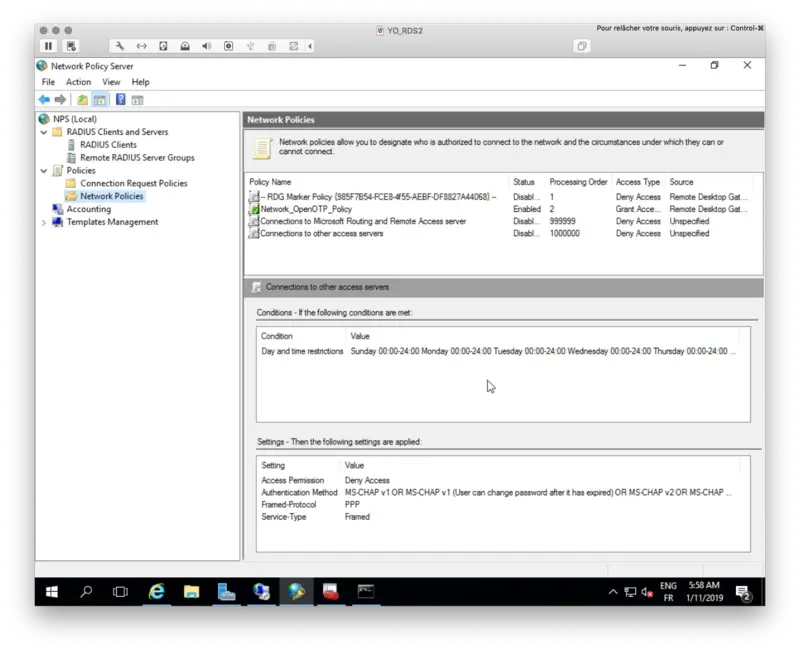
My connection request policy is now created and activated.
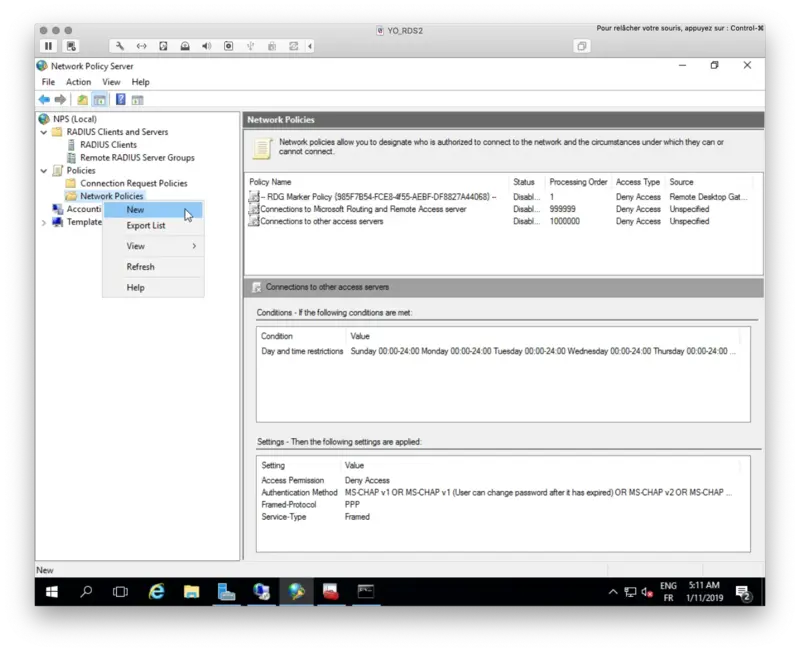
4.3.3 Network Policies
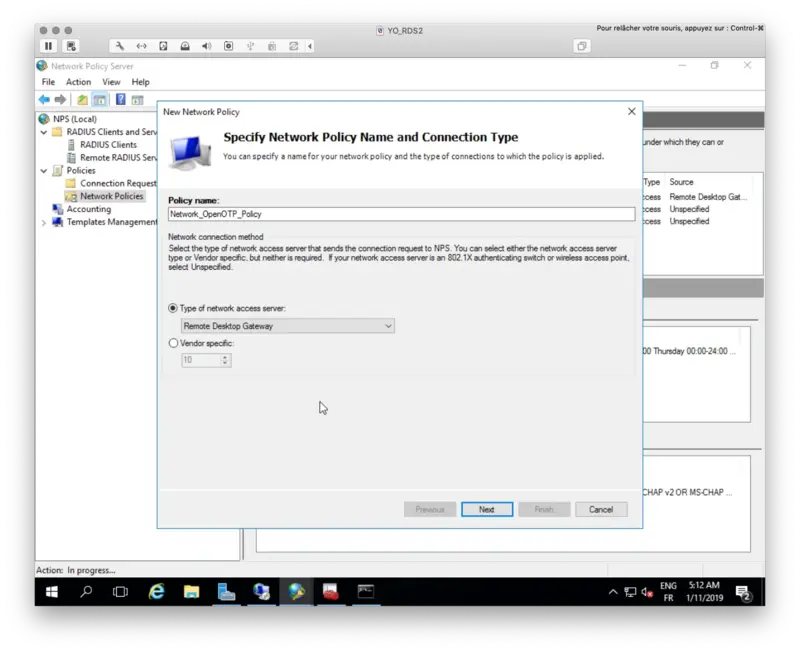
We will now configure a Network Policy through the NPS console. Right click on Network Policies > New.
Name your Network Policy, select Remote Desktop Gateway as Type of network access server and then click Next.
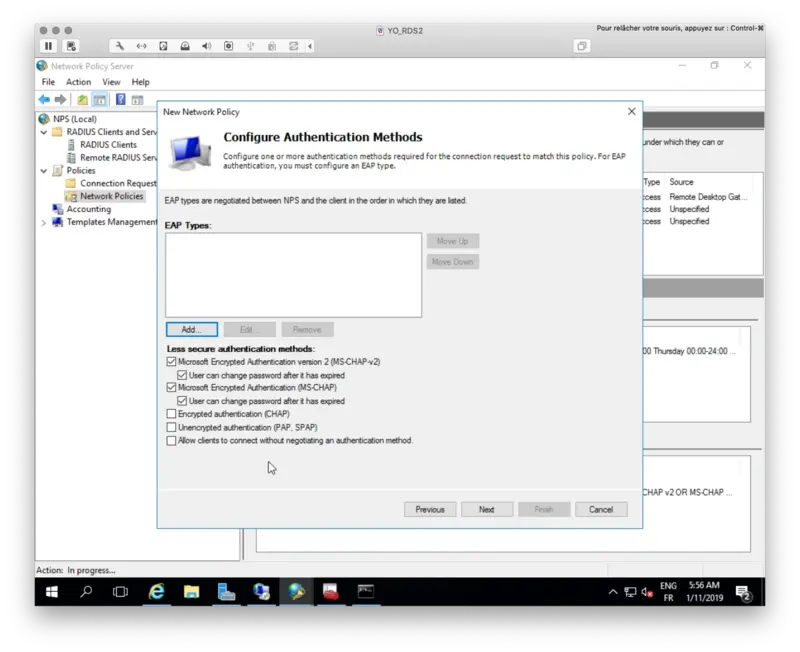
On the following screen, you have to specify conditions.
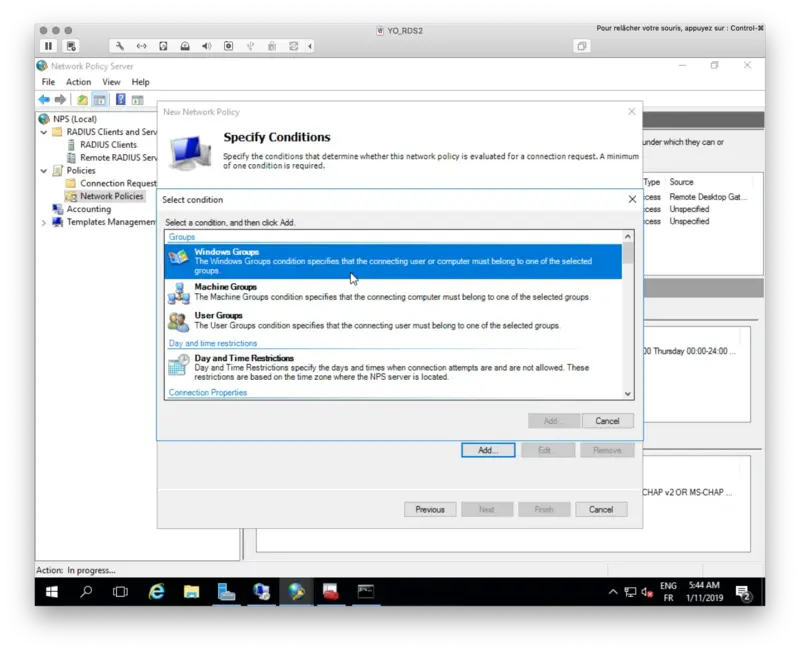
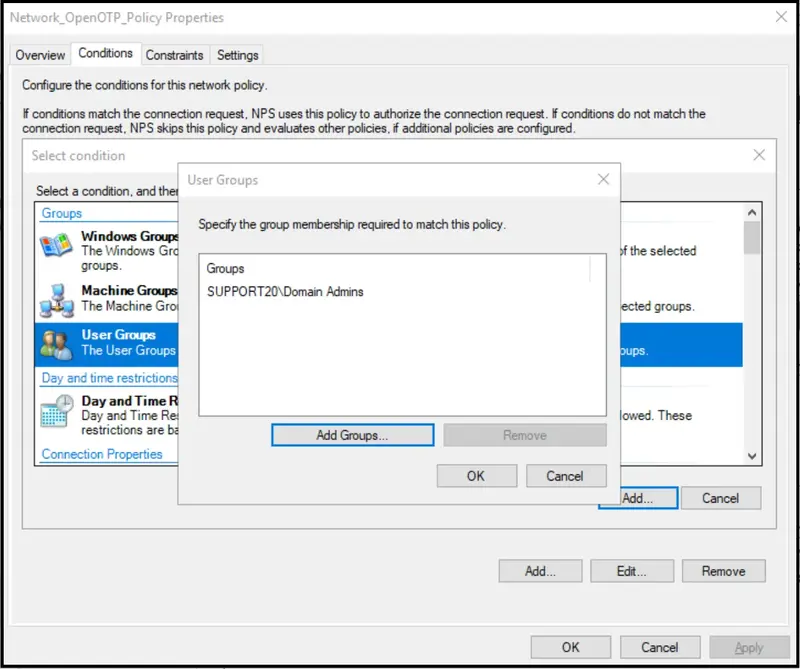
You should have 3 following conditions configured in your Network Policy. For the Calling Station ID condition, put UserAuthType:(PW|CA) value.
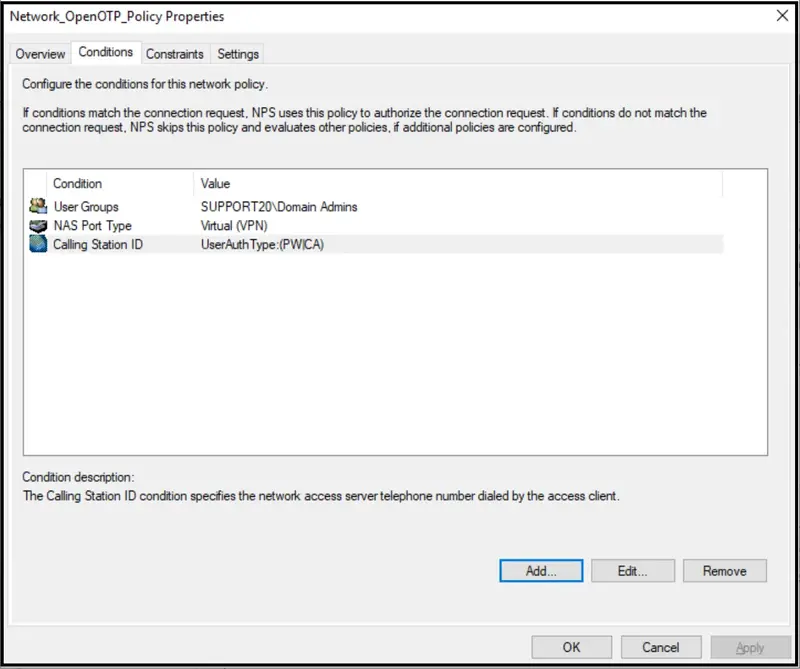
Once you have the 3 previous conditions configured, click Next.
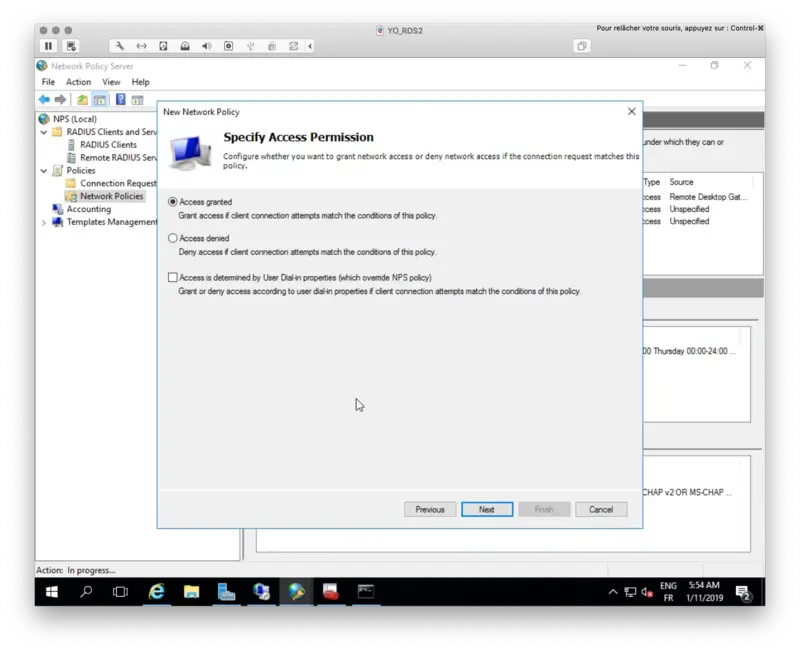
I configured this policy to allow the access so here I select Access Granted:
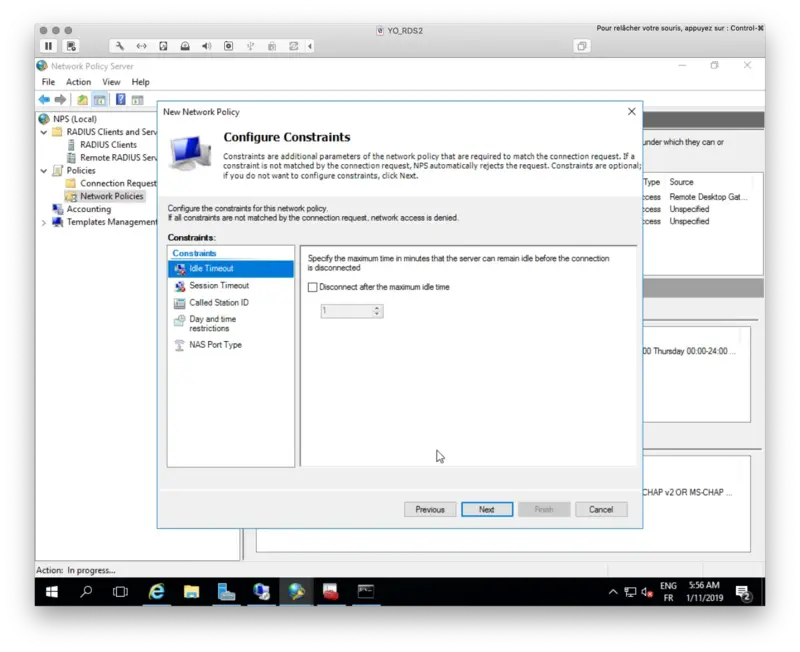
I keep these settings by default.
I keep these settings by default.
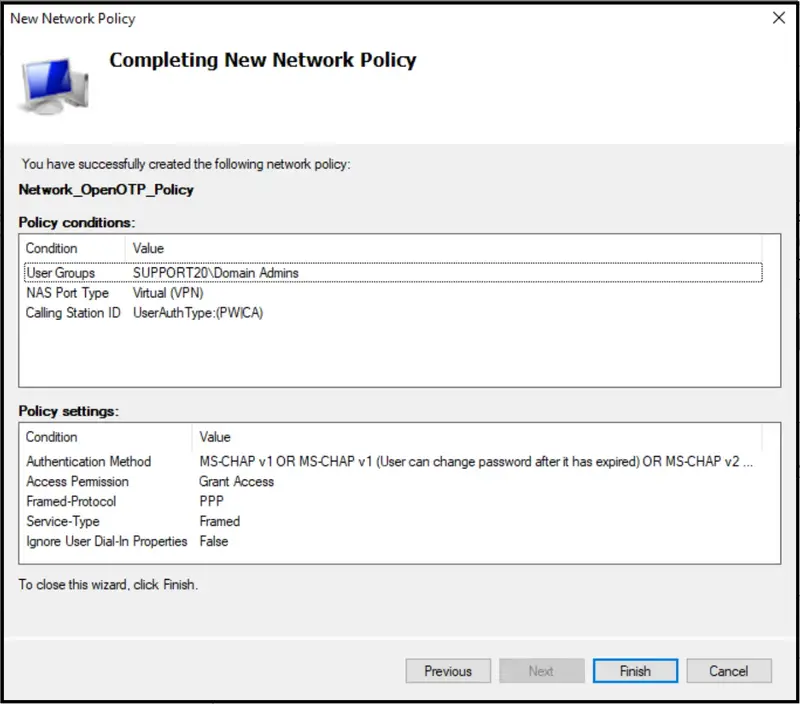
The NPS configuration is done. I should be able now to log in on a Session Host through my RD Gateway and NPS over RADIUS protocol.
4.4. Login Test with MFA Push Login
I start the default RDP client tool from Microsoft. In the advanced configuration, I configure my RD Gateway server address.
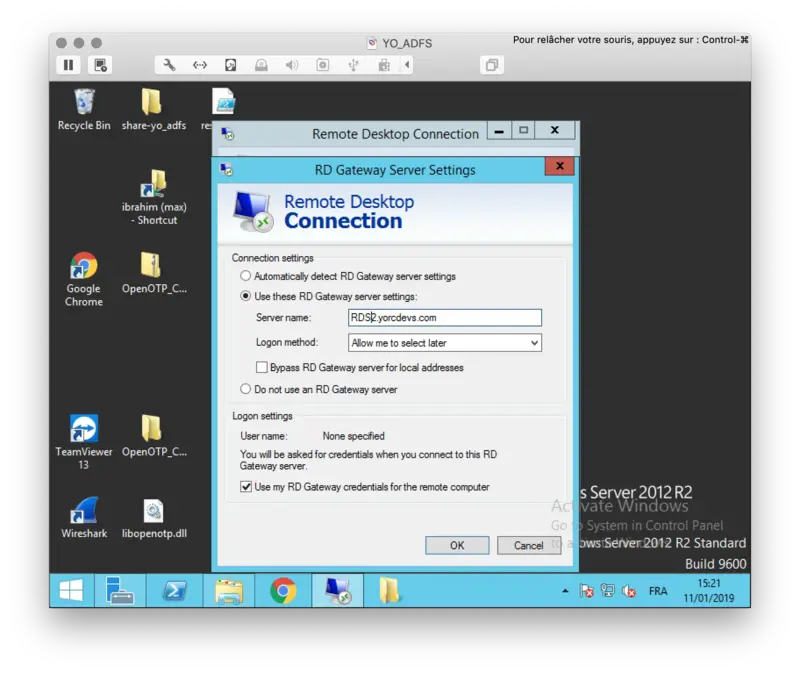
I will now try to log in remotely on my AD server, so I configured my AD server address:

In the meantime, I’ve started my Radius Bridge component in debug mode with the following command to see in live the radius request sent by NPS:
/opt/radiusd/bin/radiusd debug
Listening on auth address * port 1812 bound to server default
Listening on auth proto tcp address * port 1812 bound to server default
Listening on auth address * port 1645 bound to server default
Listening on acct address * port 1813 bound to server default
Listening on acct address * port 1646 bound to server default
Listening on status address * port 18120 bound to server default
Listening on command file /opt/radiusd/temp/radiusd.sock
Ready to process requests
I perform the login now through my RDP client. I’m prompted to enter my Credentials:

I press OK after providing my credentials, and then I see the RADIUS request coming on my Radius Bridge debug console:
(0) Received Access-Request Id 24 from 192.168.3.119:60706 to 192.168.3.54:1812 length 143
(0)   Service-Type = Voice
(0)   User-Name = "NETBIOSYORCDEVS\\administrateur"
(0)   Called-Station-Id = "UserAuthType:PW"
(0)   MS-Machine-Name = "YO_SQL2.yorcdevs.com"
(0)   MS-Network-Access-Server-Type = Terminal-Server-Gateway
(0)   NAS-Port-Type = Virtual
(0)   Proxy-State = 0xfe80000000000000c9e592a48d7b3d5c0000001b
(0) # Executing section authorize from file /opt/radiusd/lib/radiusd.ini
(0)   authorize {
(0) eap: No EAP-Message, not doing EAP
(0)     [eap] = noop
(0) pap: WARNING: No "known good" password found for the user.  Not setting Auth-Type
(0) pap: WARNING: Authentication will fail unless a "known good" password is available
(0)     [pap] = noop
(0)     [openotp] = ok
(0)   } # authorize = ok
(0) Found Auth-Type = OTP
(0) # Executing group from file /opt/radiusd/lib/radiusd.ini
(0)   Auth-Type OTP {
rlm_openotp: Found NPS Terminal-Server-Gateway request (password not requested)
rlm_openotp: Sending openotpNormalLogin request
rlm_openotp: OpenOTP authentication succeeded
rlm_openotp: Reply message: Authentication success
rlm_openotp: Sending Access-Accept
(0)     [openotp] = ok
(0)   } # Auth-Type OTP = ok
(0) Login OK: [NETBIOSYORCDEVS] (from client any port 0)
(0) Sent Access-Accept Id 24 from 192.168.3.54:1812 to 192.168.3.119:60706 length 0
(0)   Reply-Message := "Authentication success"
(0)   Proxy-State = 0xfe80000000000000c9e592a48d7b3d5c0000001b
(0) Finished request
Waking up in 9.9 seconds.
(0) Cleaning up request packet ID 24 with timestamp +9
Ready to process requests
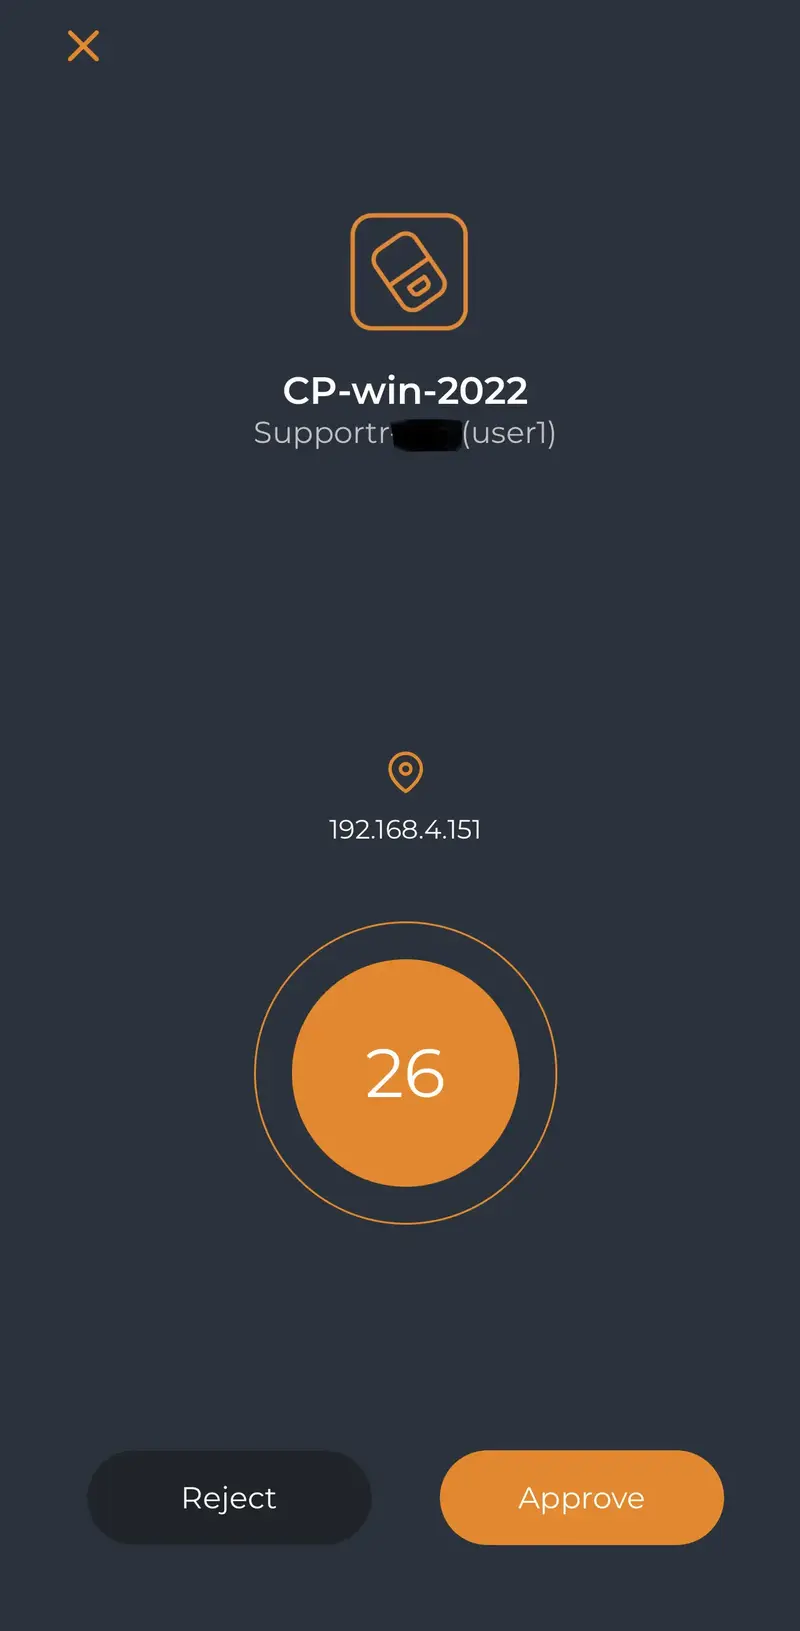
I now received the push login request on my phone:
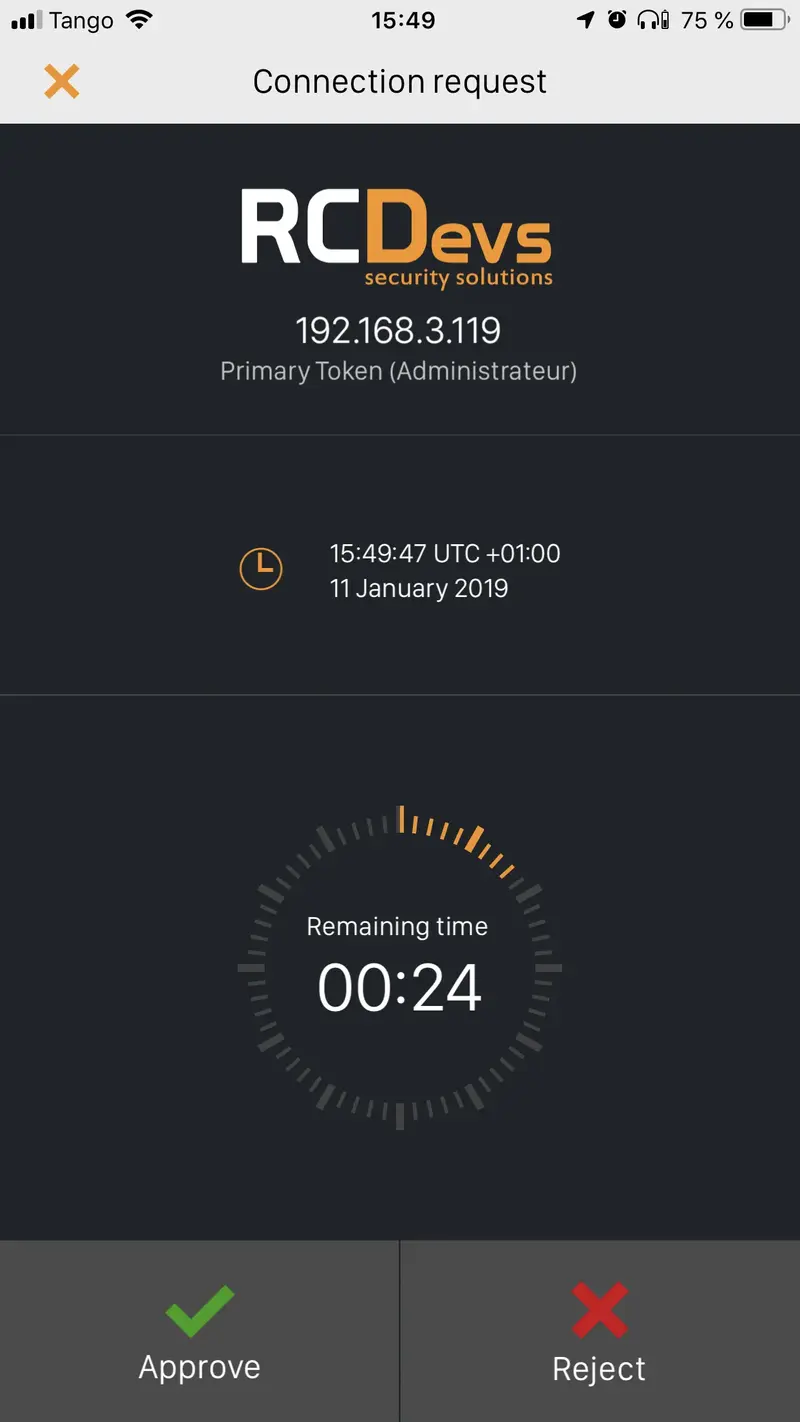
I approve the login request, and I am logged on my remote server:
5. Another scenario
Another scenario is also possible which consist on protect each session hosts with the OpenOTP Credential Provider for Windows login. The 2FA login will be performed by each session hosts instead of a centralized component.