This document provides instructions for installing the OpenOTP Credential Provider for MacOS.
Ensure that WebADM/OpenOTP infrastructure is properly installed and configured before proceeding with the OpenOTP Credential Provider for MacOS installation. Please, refer to WebADM Installation and WebADM Administration guides to do it.
The OpenOTP Credential Provider for MacOS is a component that integrates the RCDevs OpenOTP authentication into the MacOS login process and can be downloaded from RCDevs Website
2. Preliminary Information and prerequisites
Administrative/elevated permissions are necessary on any MacOS to correctly set up and/or change the OpenOTP Credential Provider’s configuration.
To correctly set up the provider, please gather the following minimum information that you will need to know and/or provide during the installation process:
The URI(s) of the OpenOTP web-service(s) (mandatory)
These URIs are mandatory; the client needs to know where the OpenOTP SOAP API can be reached. At least one URI is necessary and port 8443 and 443 must be reachable. If you precise the port 8443 to fetch the URLs through the configuration generator, then only the port 8443 is needed. Else the port 443 will be used to automatically fetch the servers URLs.
A client ID (recommended)
It is an identifier sent to OpenOTP backend(s) to match a specific client policy during an authentication request. This is recommended and is a best practice with RCDevs solutions.
The WebADM certificate authority (CA) file. It will be automatically downloaded if you use the configuration generator. If you only use the command line tool (cputil), then you need to manually retrieve the CA certificate on your WebADM. This is optional but recommanded for security reasons.
The OpenOTP Credential Provider for MacOS is supported from version 12. The Credential Provider bundle has been built for both Intel and ARM processors, and the same package is compatible with both architectures.
There are 2 ways to deploy the MacOS CP:
The first option is to use the configuration generator (CPInstaller) to generate the configuration files with the wanted settings. Once the configuration is generated, you can deploy it using the cputil tool with the install argument.
The secondary option is to use only the cputil tool to generate and deploy the configuration. Both methods are describe below. If you want to deploy the OpenOTP-CP on multiple MacOS machines and the configuration remains the same on all of them, then you can generate the configuration once, then deploy it on each machine using the cputil tool with the install argument.
The LDAP password is never sent to OpenOTP for validation, even if the MacOS is domain joined. The LDAP password validation remains within the MacOS perimeter. That is why the option -LDAP is sent to OpenOTP during every authentication request in case the default policy applied would require the LDAP password.
User accounts can be local accounts or LDAP accounts if MacOS is integrated with an LDAP backend.
Account(s) must exist in WebADM (in LDAP servers configured with WebADM) and must meet the authentication requirements to be successfully authenticated. If the local username does not match any LDAP account based on the username value sent to OpenOTP, an alias on the corresponding LDAP account can be created.
Offline login with MFA is supported with the OpenOTP Token mobile application and FIDO2 keys. Enabling offline logins requires a first successfull online login to be fully enabled. This is because the offline metadata are returned per machine and per user after an online login. The fact that the offline login is enabled or not is based on the cp.offlinedata.plist file availability once the configuration is deployed. When that file is generated during the setup, only the structure will be there and the file will be populated after online logins.
Once the OpenOTP-CP for MacOS is configured, the OpenOTP login is by default enforced for every users. You can whitelist some accounts if you want to bypass OpenOTP authentication for these users. The OpenOTP-CP is by default involved ONLY to open a session. When you unlock a session, the plugin is not involved. You also have the possibiliy to block access (blacklist) users account.
192.168.4.20 is the IP address of one node part of my WebADM cluster used as example for that documentation.
3. CPInstaller
3.1 Configuration generation through the CPInstaller
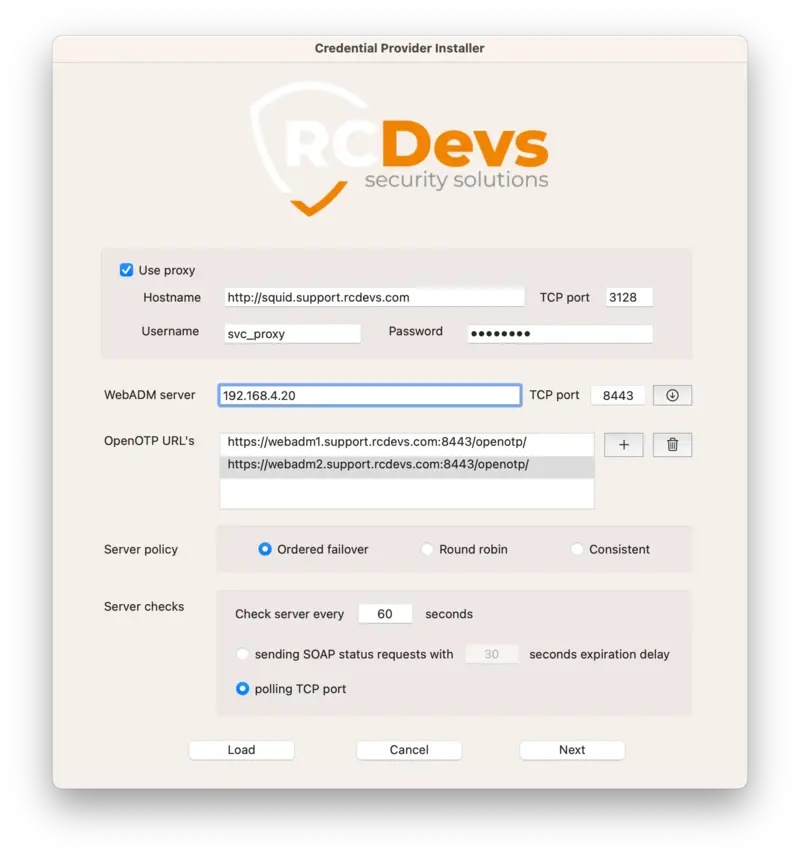
First, you have to download OpenOTP Credential Provider for MacOS available on RCDevs Website. Extract files from the archive on your Mac and run the pkg file. The installer will start and you arrive in the configuration generator. Found below the description of all settings prompted available on that first page:
Use proxy: You can set up a proxy server to pass the connections through it. You have to define it with its hostname, the port used and if required the credentials to be authenticated on the proxy server. (Optional)
WebADM server and TCP port: Fill this setting with one of your WebADM server URL (WebADM IP address or DNS name) and the second one with the TCP port used (both 443 and 8443 works here, it is used to automatically retrieve the OpenOTP URLs and CA certificate). Then, click on the Download button on the right and it will add the OpenOTP URL(s) in the OpenOTP URLslist just below.
OpenOTP URLs: List of the servers added that the CP will contact. It’s possible to directly add a WebADM server URL from the + button and remove from one with the trash button. (Mandatory)
Server policy: If you have more than one WebADM server, this is the way the Credential Provider will contact them
Ordered failover: the first server declared is always preferred;
Round robin: the server is chosen randomly for each request;
Consistent: the first server selection depends on the used ID;
Server checks: This section concerns the actions done by the CP to check the availability of the OpenOTP service.
Define the interval time in seconds of the checks realized toward the server.
Sending SOAP status request to OpenOTP to retrieve the status of the OpenOTP service. The URL https://webadm_server_address:8443/status.php is used with that mode. 10 seconds is the timeout of the SOAP status requests before considering the request timedout. Once timedout, server is considered not available. A new check will be performed according to the Check server every xxx value, here 60 seconds.
Polling of the OpenOTP service port every 60 seconds.
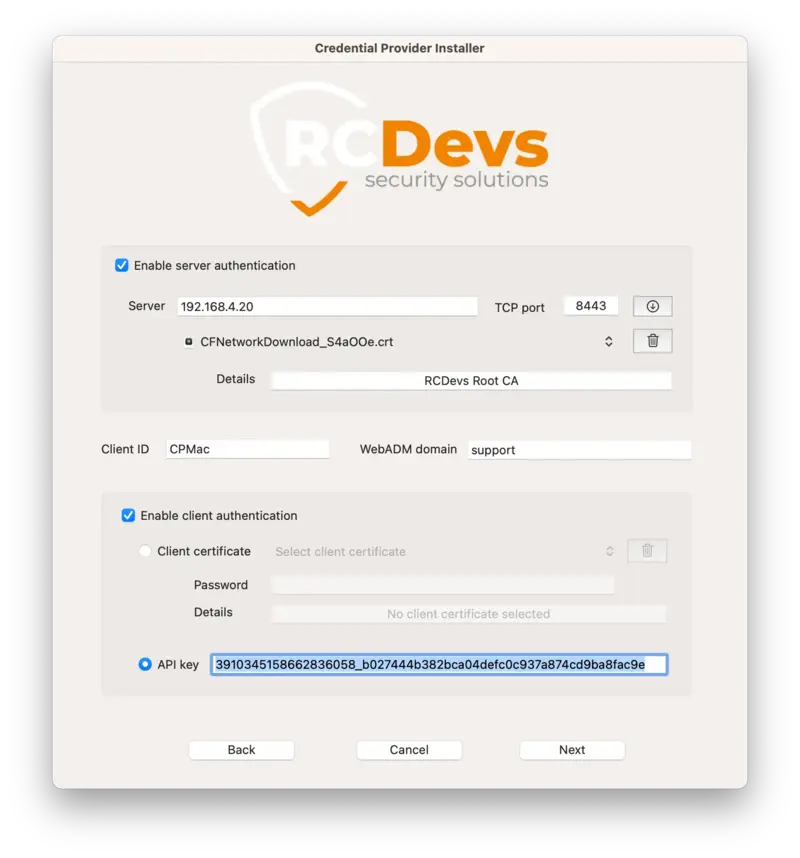
Click Next and you are on the second configuration page which contains the following settings:
Enable server authentication: This can contain the CA file of your WebADM servers. It can be download by typing the server URL and the TCP port before using the arrow button. (Recommended for better security)
Client ID: It is an identifier sent to OpenOTP backend(s) to match a specific client policy during an authentication request. This is recommended and is a best practice with RCDevs solutions.
WebADM Domain: It is possible to precise the WebADM domain name that needs to be used during authentication process. That value can be empty on the client side and configured at the client policy level.
Enable client authentication: OpenOTP can be configured to require a client certificate or an API key in order to allow its clients to consume its SOAP API. Refer to WebADM Administrator Guide to issue a client certificate or an API Key. Note that if the client certificate or the API key expires, the client (MacOS CP) will not be authorized to consume the OpenOTP SOAP service. The client certificate will always have an expiration, while the API key may not necessarily have one. (Recommended for better security).
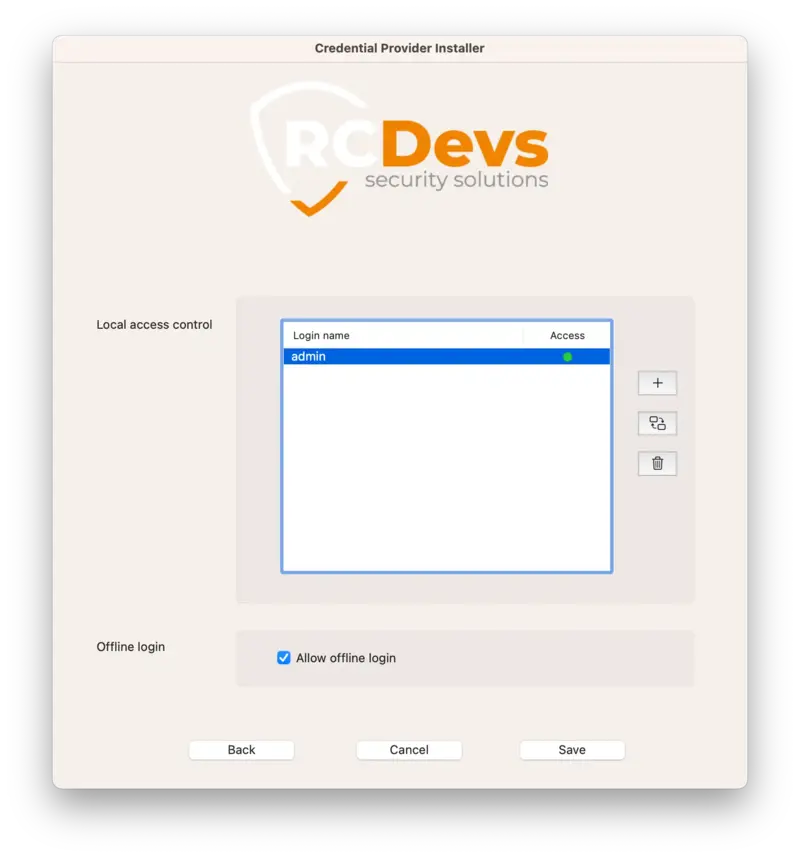
Click Next and you are on the third and last configuration page:
Local access control: In this part, you can manage access of users. You can either whitelist or blacklist them. It is possible to add users with the + button and remove users with the trash button. Authentication of whitelisted users will not involve OpenOTP. Blacklisted users will not be allowed to login at all on that device. If empty, OpenOTP login is enforced for every users.
OpenOTP offline login: Enable this option if you want to use the offline mode of this Credential Provider. This will permit you to authenticate to your machine even if OpenOTP service is not reachable. Offline login with MFA is supported with the OpenOTP Token (mobile application) and FIDO2 keys. Enabling the offline logins always requires a first successfull online login to be activated. Offline login validity is valid up to 1 year and is configured on OpenOTP server side.
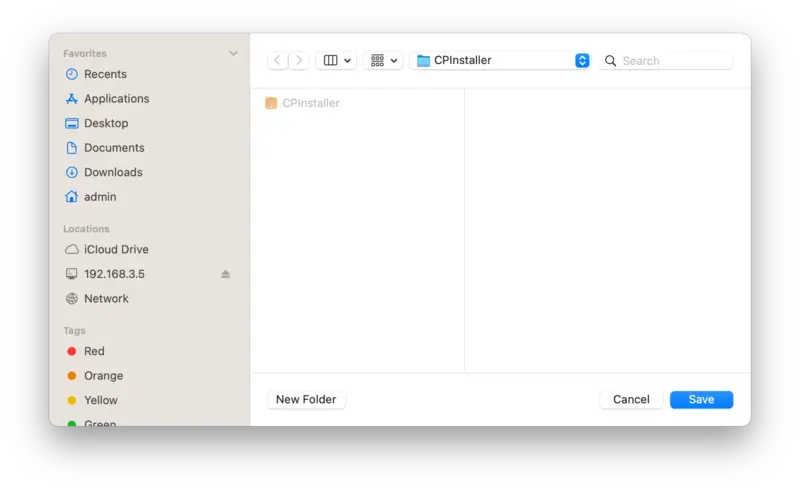
Click save button and choose the location of where configuration files will be save and click again save:
You can now press Ok on the previous window to close the CPInstaller and the next step is to deploy the configuration with cputil tool.
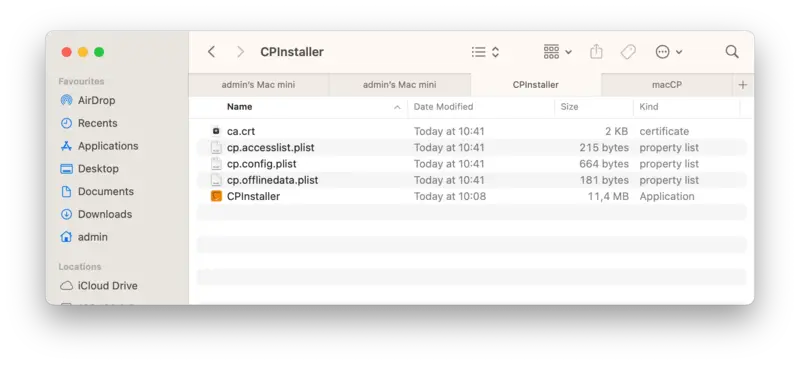
In that example, I saved the generated configuration files in a folder where the CPInstaller bundle is located.
4. CPutil script
4.1 Deploy the configuration generated by the CPInstaller
To deploy the configuration previously generated in /Users/admin/Desktop/CPInstaller/ folder, we have to use the cputil command.
Open a terminal with root or sudo permissions and navigate under CPInstaller.app bundle:
Found below, the details and usecase of each parameters:
configure: Allow you to generate a new configuration or to reconfigure the CP. If you use that command, the settings previously configured will be erased. If you just want to modify one parameter, you have to provide all other configuration parameters.
install: Allow you to install the CP and copy the files to the correct locations.
access: That parameter allow you to enable/disable offline login mode and set/unset users from whitelist/blacklist.
uninstall: This parameter can be used to remove the CP and its configuration.
As our configuration has been generated by the CPInstaller, we have to use the command like below with the --indir parameter pointing to the folder containing the generated configuration:
After execution of that command, the files are deployed in the following location:
/Library/Application Support/RCDevs/
To check that everything has been correctly copied, navigate in the previous folder and list the content to be sure that everything which has been generated by the CPInstaller has been copied:
root@admins-Mac-mini Resources # cd /Library/Application\ Support/RCDevs/root@admins-Mac-mini RCDevs # ls -al -rw------- 1 admin staff 1991 Dec 5 10:41 ca.crt
-rw-r--r-- 1 admin staff 215 Dec 5 10:41 cp.accesslist.plist
-rw-r--r-- 1 admin staff 664 Dec 5 10:41 cp.config.plist
-rw-r--r-- 1 admin staff 181 Dec 5 10:41 cp.offlinedata.plist
After successful installation, the authorization database (authorizationdb) should be updated. You can check it with the following command:
<?xml version="1.0" encoding="UTF-8"?><!DOCTYPE plist PUBLIC "-//Apple//DTD PLIST 1.0//EN" "http://www.apple.com/DTDs/PropertyList-1.0.dtd"><plistversion="1.0"><dict><key>class</key><string>evaluate-mechanisms</string><key>comment</key><string>Login mechanism based rule. Not for general use, yet.</string><key>created</key><real>707673332.60597301</real><key>mechanisms</key><array><string>builtin:policy-banner</string><string>loginwindow:login</string><string>builtin:login-begin</string><string>builtin:reset-password,privileged</string><string>loginwindow:FDESupport,privileged</string><string>builtin:forward-login,privileged</string><string>builtin:auto-login,privileged</string><string>builtin:authenticate,privileged</string><string>PKINITMechanism:auth,privileged</string><string>CP:CPStart,privileged</string><string>CP:CPConfiguration,privileged</string><string>CP:CPAccess,privileged</string><string>CP:CPOffline,privileged</string><string>CP:CPAuthentication,privileged</string><string>CP:CPSave,privileged</string><string>CP:CPDone,privileged</string><string>builtin:login-success</string><string>loginwindow:success</string><string>HomeDirMechanism:login,privileged</string><string>HomeDirMechanism:status</string><string>MCXMechanism:login</string><string>CryptoTokenKit:login</string><string>loginwindow:done</string></array><key>modified</key><real>723467844.683411</real><key>shared</key><true/><key>tries</key><integer>10000</integer><key>version</key><integer>10</integer></dict></plist>
What has been added in that database is the following content:
Before you close your session to test your configuration we recommand you to retrieve the IP address of your MacOS device, enable the SSH server on it to be able to login through SSH in case you are stuck in the login process. You will be able to drop the 7 previous lines in the authorization db in order to get your access back.
4.2 Generate the configuration files with cputil script
To generate the configuration files through the cputil script, you must first use the configure argument.
With the exception of the url setting, all parameters share identical names as those specified in the previous example.
The CA and client certificates (if any) must be downloaded and available at the provided path before executing the configure command.
The certificate files will be automatically copied to the correct location during the installation.
It is important to note that when enabling client authentication, you should configure either an API key or a client certificate, but not both simultaneously.
The folder where the configuration is going to be exported will be created by the cputil tool. If the folder already exist, you will have an error.
4.3 Install the configuration files with cputil script
Once the configuration is generated, run the script with the install argument and provide the path of your configuration with the --indir parameter:
You can modify few settings via the access argument the following:
–offline enable the offline login mode. If the parameter is not provided during the execution, then offline mode is by default enabled.
–online disable the offline login mode.
–whitelist allow you to whitelist user(s). List of usernames can be provided in the form user1 user2 user3…
–blacklist allow you to blacklist user(s). List of usernames can be provided in the form user1 user2 user3… (A user blacklisted takes precedence over a whitelisted user).
–unlist allow you to remove user(s) from the whitelist/blacklist.
–show allow you to show whitelisted and blacklisted accounts.
If you want to edit/change one of the previous listed configuration, you need to use that command as the below examples:
The previous command whitelist the admin account and blacklist the user1 account.
./cputil access --show
admin=W user1=B
This command list whitelisted and blacklisted accounts.
./cputil access --unlist <user>
These commands remove admin and user1 from the whitelist/blacklist.
./cputil access --unlist admin
./cputil access --unlist user1
You can also do both simultaneously:
./cputil access --unlist admin user1
4.5 CP configuration modification
The configuration can be modified afterward by using the configure argument. Modifying the configuration involves reconfiguration of all settings. If you want to change only one setting, then you need to pass in the command all settings previously configured.
You can incorporate your own logo in the OpenOTP Credential Provider login screen.
For this, you need to copy your logo in the following location:
/Library/Application Support/RCDevs/
The logo must be in PNG format. The size does not matter, it will be resized to the correct one.
The logo must be named cp.logo.png.
5. Client policy
Please, refer to RCDevs client policy documentation in order to configure your client policy. The Client ID value which has been configured during the setup is needed for the client policy configuration.
6. Online Authentications
Now the CP is installed and configured then we will perform logins. For the login examples in that documentation, I use the Admin account. I had to remove it from the whitelist configuration in order to use OpenOTP authentication for that account.
6.1 Push Login
In this scenario, WebADM and OpenOTP are configured to work in Push Login Mode. Please have a look here to know how to configure a push login infrastructure.
I’m now on the login screen of my Mac, I have to enter my username and password:
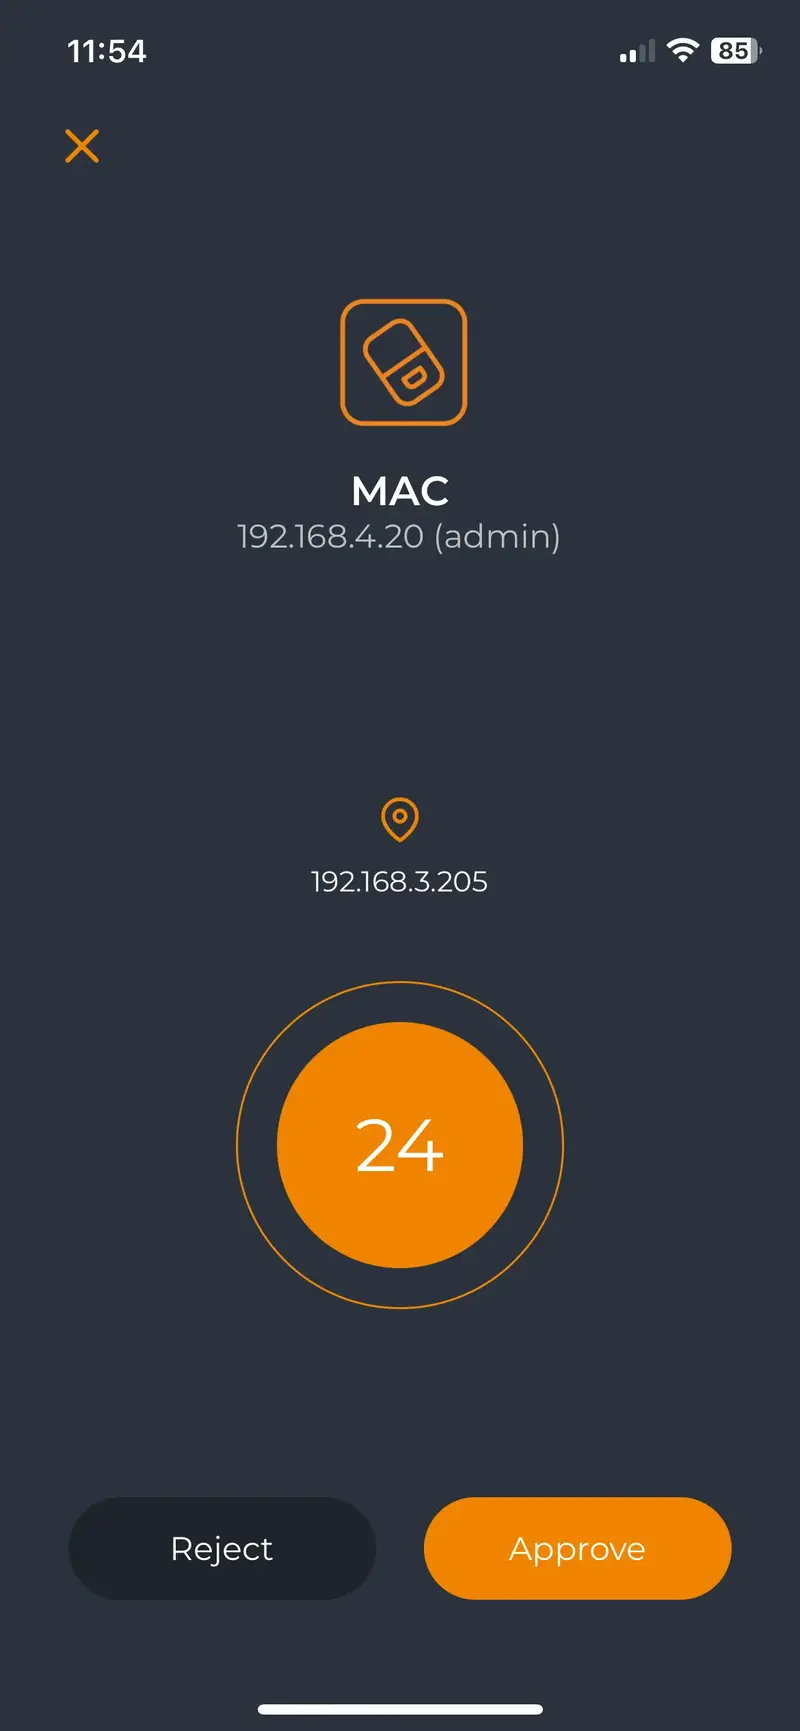
I press enter and a push login request is sent to my mobile phone.
I press the Approve button to validate the login.
I am now authenticated, and my session is opening.
6.2 Logins with OTP and FIDO2 Challenges
6.2.1 OTP Challenge
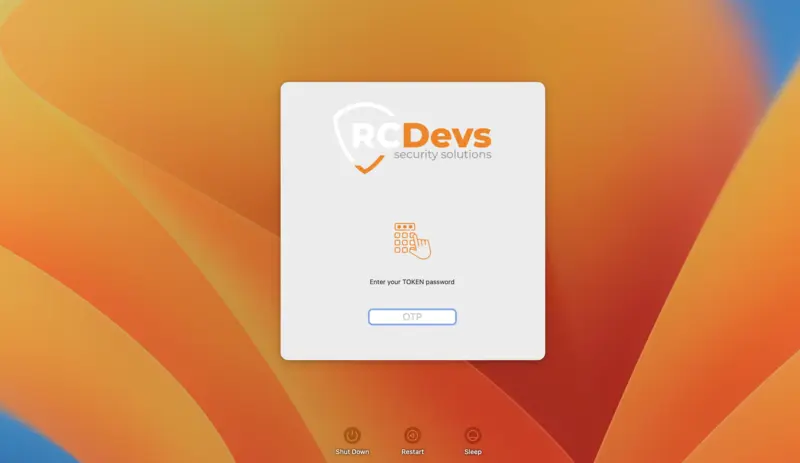
I will now perform a login in Challenge mode. I’m on the login screen of my Mac and I have to enter my username and password.
I press enter, then the provided credetials are validated before entering in the OpenOTP login process. If the first validation is ok, then the OpenOTP login process start and a request is sent to OpenOTP server. OpenOTP send me a challenge request to enter my OTP code:
I type in my OTP code and I log in to on my Mac.
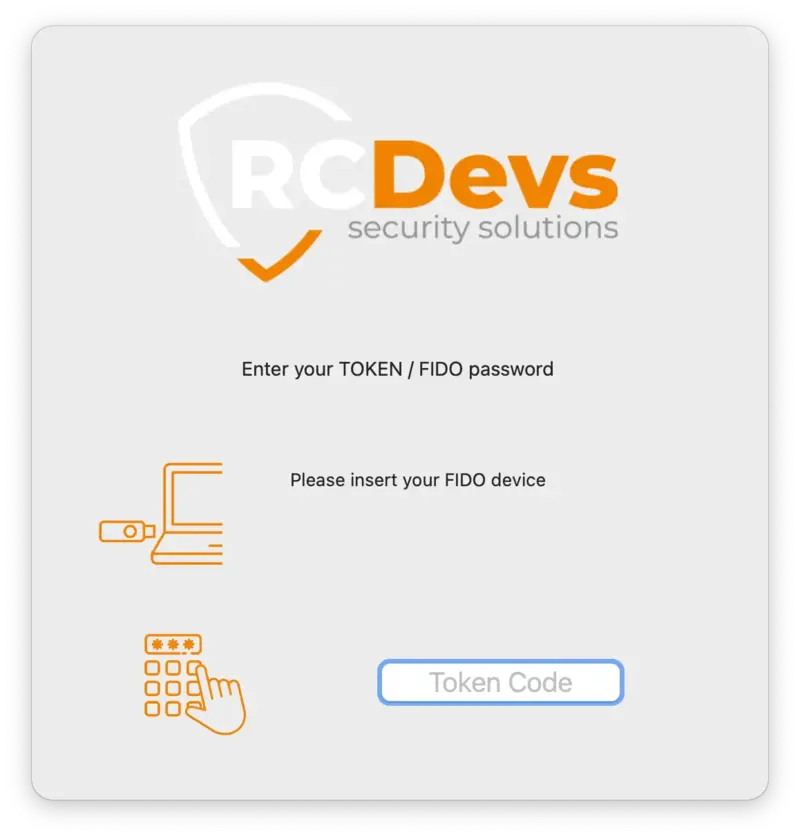
6.2.2 FIDO Challenge
In case your are using a FIDO2 key, The FIDO authentication will be prompted as below:
Plug your FIDO2 key, if there is a PIN or a Biometric method which is protection the key, you will be invited to provide it. In that example, my key is protected with a PIN:
Once the PIN password or the biometric method available on your key has been validated by the key, according to the user presence and user verification settings configured in your policy, you will be invited to touch your key like in the screenshot below.
Press your FIDO2 key to be authenticated.
6.2.3 FIDO and OTP Challenge simultaneously
If your policy is configured to support OTP and FIDO (LoginMode=MFA in OpenOTP) technologies simultaneously, both challenges will be presented on the challenge screen. Upon receiving the challenges on the client side, if the FIDO key is already plugged in, the Credential Provider will automatically utilize the FIDO device. If the FIDO key is not plugged in at this moment, you have the option to plug it in to complete the authentication process with FIDO or use your OTP token by providing the OTP.
7. Offline Authentication
An offline mode is available in the OpenOTP Credential Provider for MacOS, and we enabled this option during the configuration.
When your MacOS is offline, you can log in with either an OTP or a FIDO2 key.
The OpenOTP Credential Provider for macOS is unable to contact the OpenOTP server, so it will automatically switch to the offline mode. The offline mode will prompt you with a QRCode if you are using the OpenOTP Token or a FIDO2 challenge if you are using FIDO2 keys.
If both methods are allowed in your policy and registered on your account, then you will have the choice to choose which one you want to use for your offline login like in the screenshot below:
Offline Prerequisites
Regardless the method you use for offline logins, an online login is required to enable offline login mode!
You must perform an online login with each devices you want to enable for offline logins.
With OpenOTP Token application, ONLY Token registered on the first slot is usable in offline mode.
7.1 With OpenOTP Token application
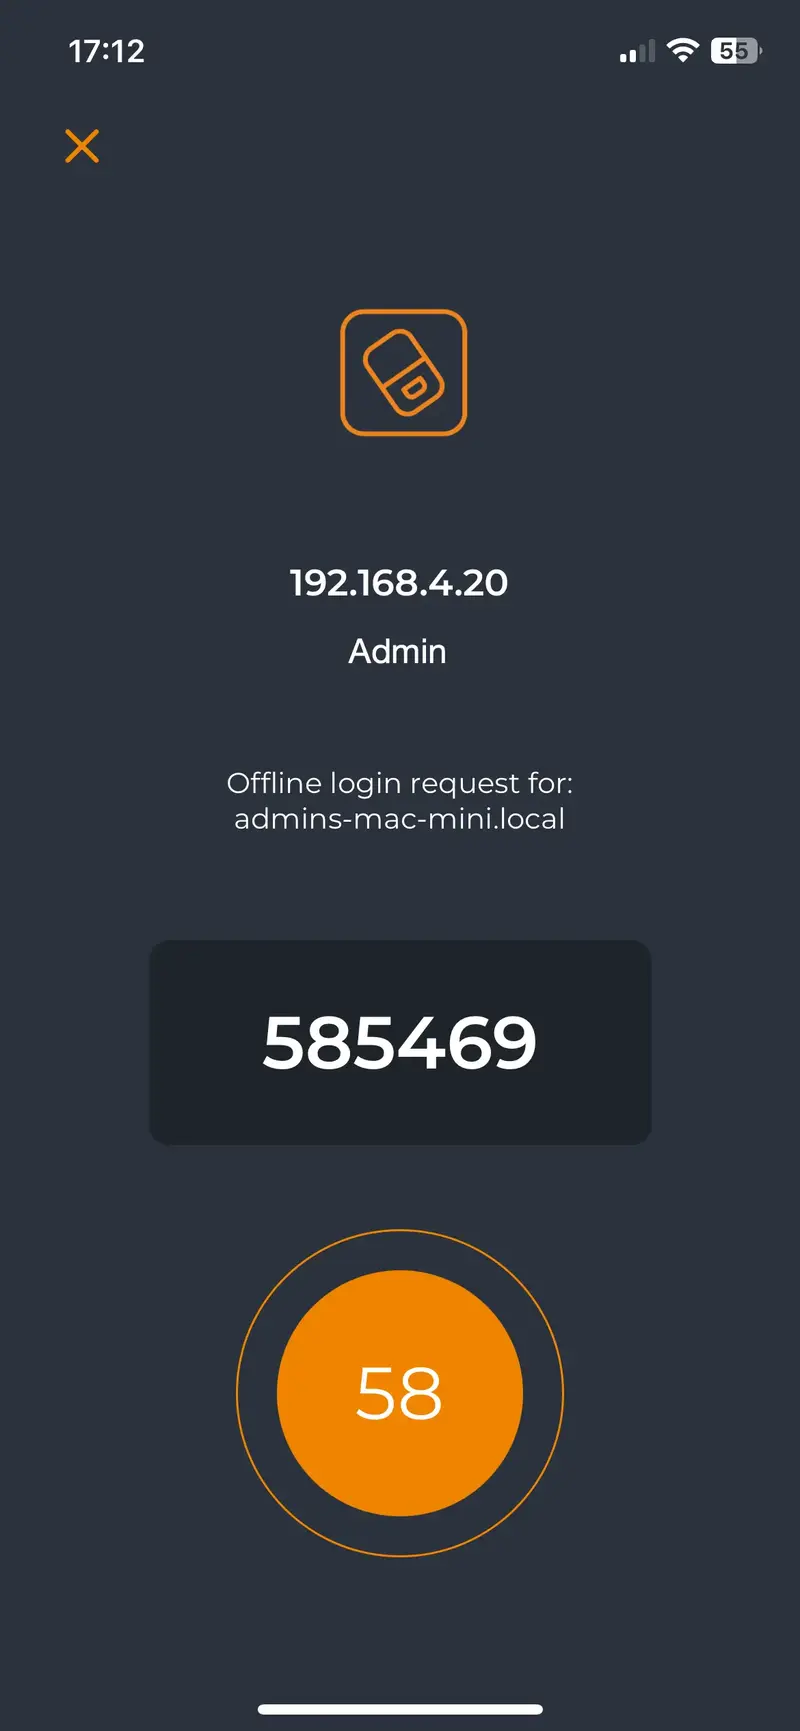
Once you provided username and password, the OpenOTP Credential Provider for MacOS tries to contact the server which is not reachable. Then, it falls back to the offline mode, and a screen like the one below is prompted:
You have to scan this QRCode with the OpenOTP Token application. Open your OpenOTP Token application, press on the camera button and scan the QRCode.
After scanning the QRCode, a window with an OTP is displayed on your smartphone like below:
Enter your OTP and you are logged on.
7.2 With FIDO2 Key
Plug your FIDO2 device:
Then you are prompted to unlock the key according to the FIDO user verification configured on the server. This will be done according to the method available on your FIDO key (biometrics or PIN)
Once the user verification is done, press your key.
You are authenticated.
8. Troubleshooting
8.1 Retrieve MacOS logs for troubleshooting
The following commands can be used in order to troubleshoot your CP installation or login issues from the client side:
The plugin is now removed and after a reboot of your MacOS in normal mode, you should be able to log in on your Mac without OpenOTP Credential Provider.
8.3 Single-User Mode
Note
If you are not able to access your Mac through SSH then start your Mac in single-user mode. Check the key combinaison on Apple support website and then start a shell.
Mount the file system in read/write mode and navigate to /tmp folder:
...
*** Single-user boot ***
Root device is mounted read-only
...
root@admins-Mac-mini# mount -uw /
root@admins-Mac-mini# cd /Volumes/Macintosh\ HD/tmp
###Macintosh HD is the name of the Hard Drive on my Mac.root@admins-Mac-mini# sudo security authorizationdb read system.login.console > system.login.console.openotp_removed
YES (0)root@admins-Mac-mini# nano system.login.console.openotp_removed
The plugin is now removed and after a reboot of your MacOS in normal mode, you should be able to log in on your Mac without OpenOTP Credential Provider.