How To Install and Configure PAM OpenOTP Plugin to Enable Multifactor Authentication on Linux Machines
Simple login flow
Push Login flow
1. Background
On Unix-like systems, processes such as the OpenSSH daemon need to authenticate the user and learn a few things about him or her (user ID, home directory, …). Authentication is done through a mechanism called Pluggable Authentication Modules, and retrieving information about users (or even groups, hostnames, …) is done through another mechanism, called the Name Service Switch.
In this tutorial, we will allow users accounts stored as posixAccount objects in an LDAP server to be considered valid in a system, in addition to the locally-defined ones, by configuring NSS. We will then configure PAM to delegate authentication to OpenOTP accounts stored on the LDAP server.
When authenticating a user through PAM, a process will read /etc/pam.d/, where is the name of the service that the process implements. Each line in that file mentions a module to load, how to use it, and what decision to make based on the result. We will install the pam_openotp plugin and add a line mandating its use to contact your OpenOTP server.
Processes that need to find out, say, what users or groups exist, use a set of functions implemented by the C standard library. These functions will read the file /etc/nsswitch.conf and, according to the information it contains, load modules in the form of libraries and gets the needed information through these modules in a certain order. We will install the NSS -based spankey module to collect user account information on our LDAP server. If pam_ldap module returns the account information you don’t need to install spankey, this particular case is not explained in this documentation.
pam_ldap.so, nss_ldap.so and nscd are not maintained by RCDevs.
There is 2 kind of integration with PAM. In both integrations, accounts which need to authenticate with PAM OpenOTP needs to be available on WebADM server.
Use local accounts on the OS (not preferred because it involves users duplication between the client systems and WebADM server and each user will need to be created on all machine he need to access). In this howto, we will not demonstrate that setup.
Remote/LDAP accounts using Spankey client/server. In that integration Spankey is free and is just used for NSS requests and to retrieve LDAP users and groups from Spankey server on the Linux machine. Any LDAP accounts can natively become a Linux account just by adding Posix Objectclass to the user account and fill the mandatory attributes. This is explained later in that documentation.
2. Prerequisites
Firstly, you must have a configured OpenOTP and SpanKey server available through WebADM.
Then you have to install spankey_client, pam_openotp and & nscd packages on your server on which you want 2 Factors Authentication. All packages are available on RCDevs Repository. The best way is to configure RCDevs Repository to install every package with our repository.
On a RedHat, CentOS or Fedora system, you can use our repository, which simplifies updates. Add the repository:
You are now able to install RCDevs packages on your system:
apt-get install pam-openotp nscd spankey-client
After downloading and installing the previous packages, we can start the configuration of these different products.
3. WebADM Accounts Configuration
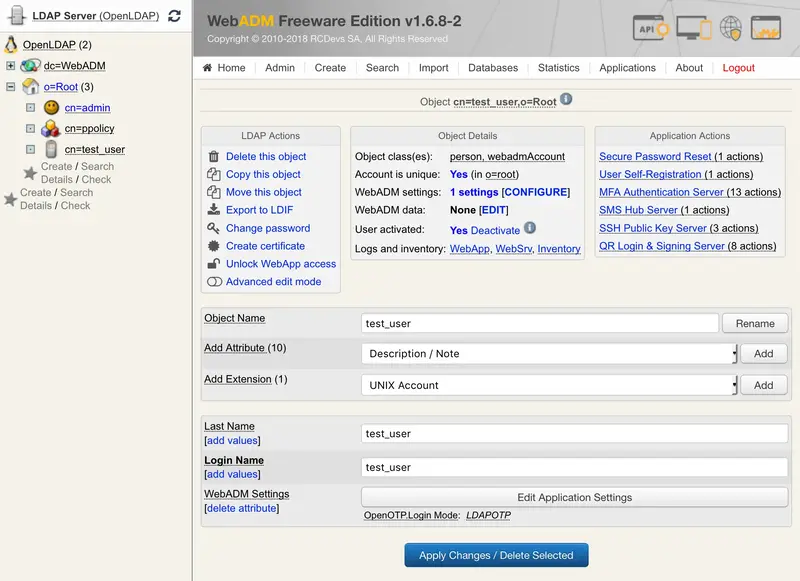
To use your LDAP account on UNIX servers, you have to extend your account to UNIX through WebADM GUI. To extend your account to UNIX, click on your account on the left tree, you can find on the user details, the option Add Extension, select UNIX Account and click on Add button.
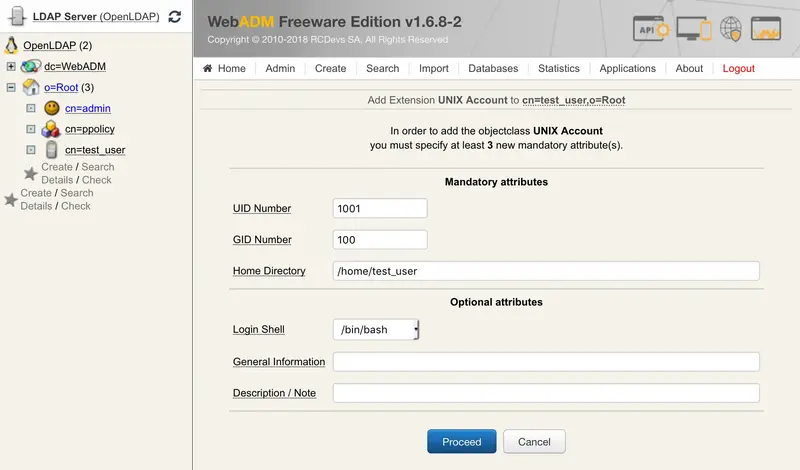
You will see the following screen after clicking Add:
Note
At this step, be careful to not use a UID already assigned to an existing user. We advise starting from uid=1000…
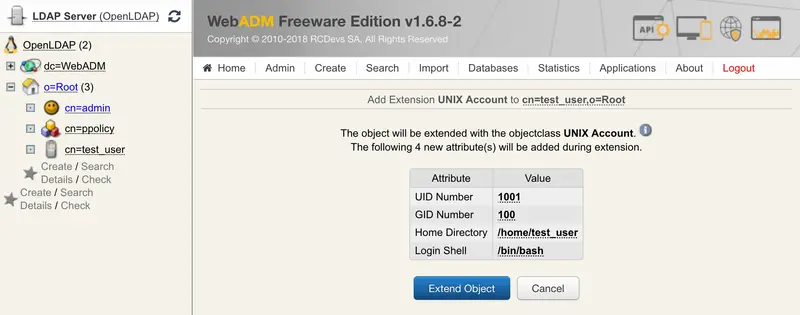
Click on Proceed and Extend Object to finish the UNIX extension for your account.
If you want to use Hardware Token for this account, don’t forget to change OTP method and Token Type to LDAPOTP/TOKEN else you will have an error message like Account Require Missing Data when you will try to log in.
4.WebADM Group Configuration
It’s possible to create a Sudoers group in WebADM and add user’s to this group. User’s added to the group will have root rights.
Note
This procedure has been tested on Ubuntu22.04
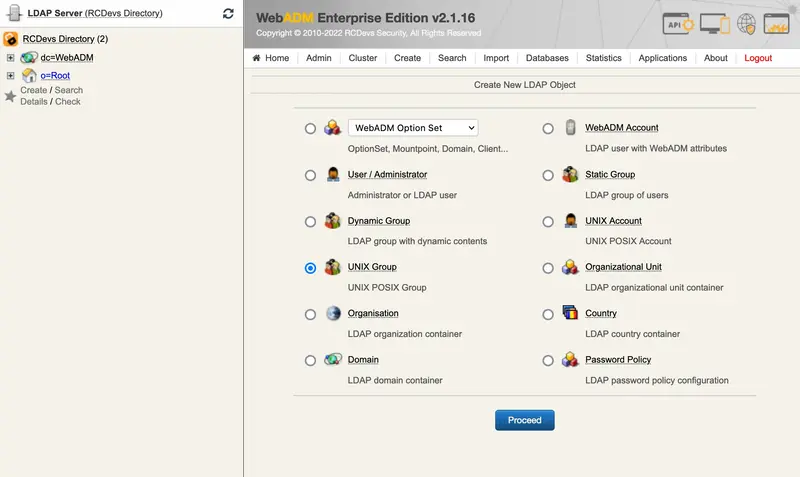
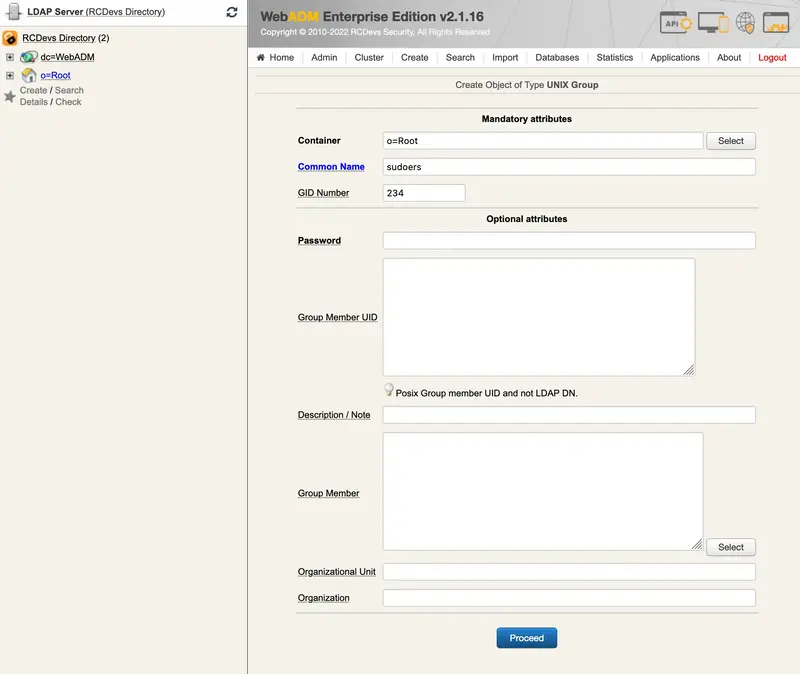
Click on create, select UNIX Group, and click on Proceed button.
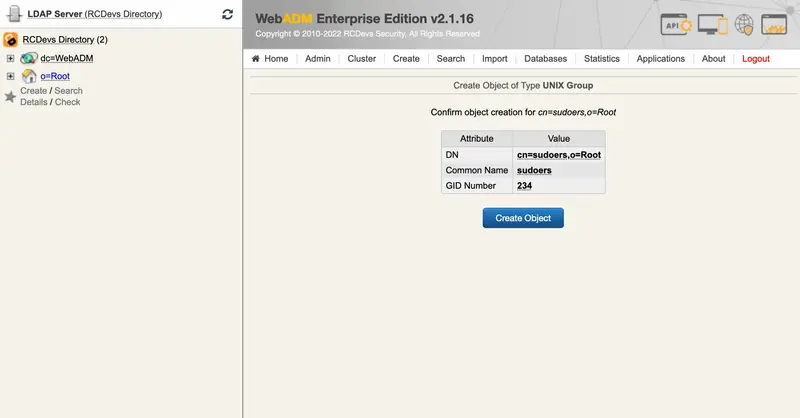
Give a name to the Group, and click on Proceed button.
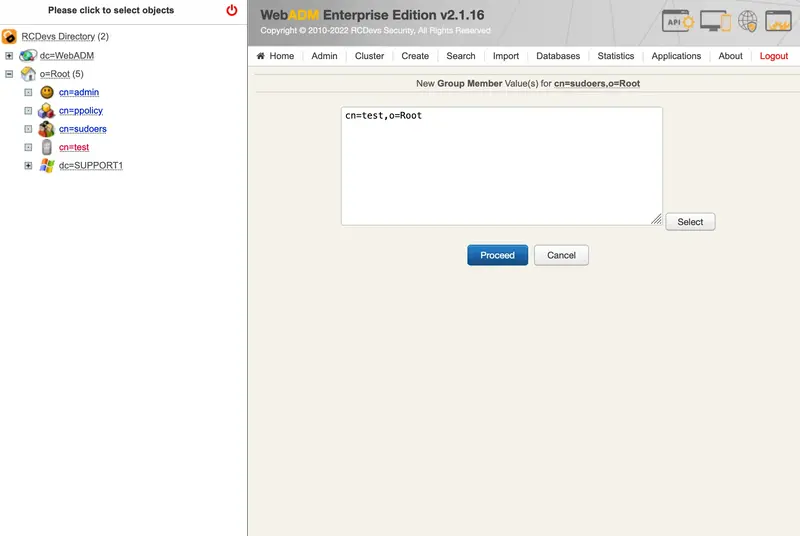
Now you can add the User to the Group by clicking on Add members
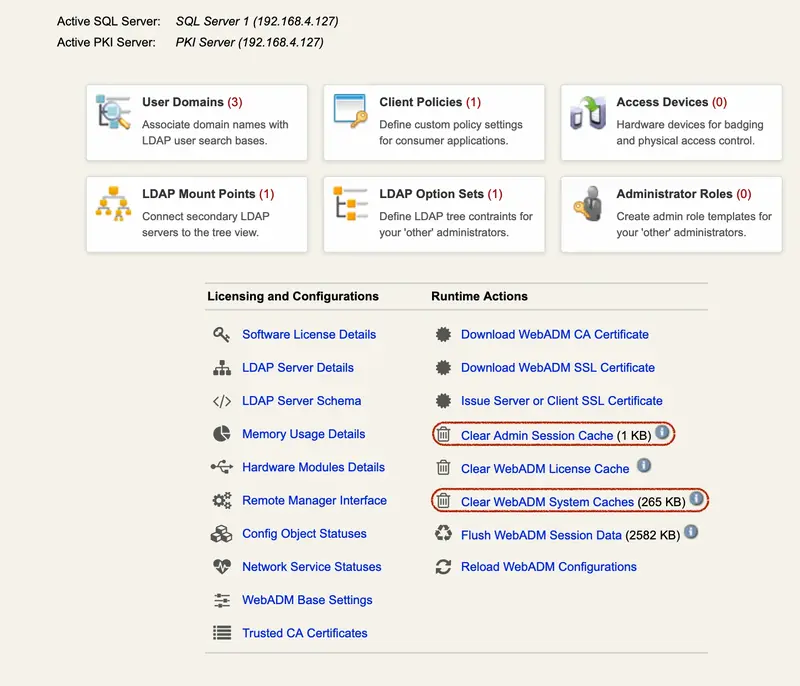
After clicking on Proceed, clear the cache of WebADM :
Now we are going to add our Group to sudoers file :
root@Ubuntu-machine:~# visudo
## This file MUST be edited with the 'visudo' command as root.## Please consider adding local content in /etc/sudoers.d/ instead of# directly modifying this file.## See the man page for details on how to write a sudoers file.#Defaults env_reset
Defaults mail_badpass
Defaults secure_path="/usr/local/sbin:/usr/local/bin:/usr/sbin:/usr/bin:/sbin:/bin:/snap/bin"Defaults use_pty
# This preserves proxy settings from user environments of root# equivalent users (group sudo)#Defaults:%sudo env_keep += "http_proxy https_proxy ftp_proxy all_proxy no_proxy"# This allows running arbitrary commands, but so does ALL, and it means# different sudoers have their choice of editor respected.#Defaults:%sudo env_keep += "EDITOR"# Completely harmless preservation of a user preference.#Defaults:%sudo env_keep += "GREP_COLOR"# While you shouldn't normally run git as root, you need to with etckeeper#Defaults:%sudo env_keep += "GIT_AUTHOR_* GIT_COMMITTER_*"# Per-user preferences; root won't have sensible values for them.#Defaults:%sudo env_keep += "EMAIL DEBEMAIL DEBFULLNAME"# "sudo scp" or "sudo rsync" should be able to use your SSH agent.#Defaults:%sudo env_keep += "SSH_AGENT_PID SSH_AUTH_SOCK"# Ditto for GPG agent#Defaults:%sudo env_keep += "GPG_AGENT_INFO"# Host alias specification# User alias specification# Cmnd alias specification# User privilege specificationroot ALL=(ALL:ALL) ALL
# Members of the admin group may gain root privileges%admin ALL=(ALL) ALL
# Allow members of group sudo to execute any command%sudo ALL=(ALL:ALL) ALL
%sudoers ALL=(ALL:ALL) ALL
# See sudoers(5) for more information on "@include" directives:@includedir /etc/sudoers.d
root@Ubuntu-machine:~# getent group | grep sudoers
sudoers:x:234:test

root@Ubuntu-machine:~# getent passwd | grep test
test:x:5009:100::/home/test:/bin/bash
Switch to test user :
root@Ubuntu-machine:~# sudo -iu test
test@Ubuntu-machine:/root$ whoami
test
test@Ubuntu-machine:/root$ sudo -i
[sudo] password for test: password
Enter your TOKEN password: 388229root@Ubuntu-machine:~# whoami
root
Note
To use sudo -i with MFA, you must edit the file /etc/pam.d/sudo-i
5. SELinux Configuration (Client Machine)
If you encountered some problems caused by SELinux so, then it’s recommended to set SELinux to permissive mode.
Note NSCD
You have to restart nscd service if you disable SELinux configuration after having configured SpanKey Client. SELinux policies are loaded until restart each service where SELinux is configured.
For RedHat/CentOS 6:
bash-4.1# vi /etc/selinux/config
# This file controls the state of SELinux on the system.
# SELINUX= can take one of these three values:
#     enforcing - SELinux security policy is enforced.
#     permissive - SELinux prints warnings instead of enforcing.
#     disabled - No SELinux policy is loaded.
SELINUX=permissive
# SELINUXTYPE= can take one of these two values:
#     targeted - Targeted processes are protected,
#     mls - Multi Level Security protection.
SELINUXTYPE=targeted
For RedHat/CentOS 7:
bash-4.1# vi /etc/sysconfig/selinux
# This file controls the state of SELinux on the system.# SELINUX= can take one of these three values:# enforcing - SELinux security policy is enforced.# permissive - SELinux prints warnings instead of enforcing.# disabled - No SELinux policy is loaded.SELINUX=permissive
# SELINUXTYPE= can take one of these two values:# targeted - Targeted processes are protected,# minimum - Modification of targeted policy. Only selected processes are protected. # mls - Multi Level Security protection.SELINUXTYPE=targeted
For Debian:
By default, SELinux is not installed and configured on Debian distributions. Look the following link to have more information about SELinux on Debian.
6. SpanKey Client Setup (Client Machine)
When the spankey_client package is installed, a configuration script is available to configure it. To execute this script, you just have to run /opt/spankey/bin/setup in a shell prompt. The configuration of spankey client starting…
root@ubuntu18client:/home/ubuntu18-client# /opt/spankey/bin/setup
Enter one of your running WebADM server IP or hostname: 192.168.3.131
Detected hostname is 'ubuntu18client'. Would you like to use it as client id (y/n)? [N]Do you want to enable SpanKey Client for OpenSSH server (y/n)? [N]Do you want to enable SpanKey Client NSS plugin (y/n)? [Y]Do you want to register SpanKey Client logrotate script (y/n)? [Y]Do you want SpanKey Client to be automatically started at boot (y/n)? [Y]Primary OpenOTP service URL is: 'https://192.168.3.131:8443/spankey/'Secondary OpenOTP service URL is: 'NONE'.
Use 'ubuntu18client' as client id: No
Enable SpanKey Client for OpenSSH server: No
Enable SpanKey Client NSS plugin: Yes
Register SpanKey Client logrotate script: Yes
SpanKey Client must be automatically started at boot: Yes
Do you confirm (y/n)?: y
Applying SpanKey Client setting from default configuration files... Ok
Retrieving WebADM CA certificate from host '192.168.3.131'... Ok
The setup needs now to request a signed 'SpanKey' client certificate.
This request should show up as pending in your WebADM interface and an administrator must accept it.
Waiting for approbation... Ok
At this step, you have to log in on the WebADM Admin GUI to approve the SSL Certificate Request in pending…
Updating file '/etc/nsswitch.conf'... Ok
Updating file '/etc/pam.d/common-account'...  Ok
Registering SpanKey Client service... Ok
Adding logrotate script... Ok

SpanKey Client has successfully been setup.

IMPORTANT: Do not forget to perform the following action before you exit this session:
 - Start SpanKey (/opt/spankey/bin/spankey start)
 - Restart 'nscd'
That’s it for SpanKey client, we just use it for the NSS part so configuration is easy.
Note Debian 6
For Debian 6, you have to configure your WebADM/SpanKey Server(s) without SSL because it’s not supported by the old version of Debian. To do it, you can edit /etc/spankey/spankey.conf file. To work with SSL, you must download the source file of pam_openotp and compile it directly on the client machine.
Note: In the above example, we selected «No» to enable SpanKey for OpenSSH server because in our case we’ll use SpanKey only for the NSS part. SpanKey for OpenSSH is a separate product, used in a normal way as an SSH Key Management Service requiring an enterprise license (beyond 5 managed servers). To find more information on SpanKey, please visit RCDevs | SpanKey website.
7. PAM OpenOTP Setup (Client Machine)
The configuration of the OpenOTP client is very easy. You just have to run the following command in a shell and provide the asked information:
root@ubuntu18client:/home/ubuntu18-client# /usr/bin/openotp_setup
This is the configuration tool for RCDevs PAM module.
It will configure WebADM Server URL(s), SSH helper and NSS.

Enter WebADM server IP or hostname [localhost]: 192.168.3.131
Found one server URL: https://192.168.3.131:8443/openotp/
Retrieving WebADM CA certificate... Ok
Do you want PAM module to auto-create home directories ([y]/n)?:
y
Do you want to keep local password authentication as a fallback to OpenOTP? ([y]/n)?:
y
Do you want to activate PAM OpenOTP for ssh ([y]/n)?:
y
Do you want to activate PAM OpenOTP for graphical login with  lightdm ([y]/n)?:
y

Auto-create home directories: Yes
Keep local password authentication as a fallback: Yes
Activate PAM OpenOTP for ssh: Yes

Do you confirm ([y]/n)?: y

Updating /etc/openotp/openotp.conf... Ok
Updating /etc/ssh/sshd_config... Ok
Updating /etc/pam.d/sshd... OK
Synchronizing state of ssh.service with SysV service script with /lib/systemd/systemd-sysv-install.
Executing: /lib/systemd/systemd-sysv-install enable ssh
Synchronizing state of nscd.service with SysV service script with /lib/systemd/systemd-sysv-install.
Executing: /lib/systemd/systemd-sysv-install enable nscd

PAM OpenOTP has been succesfully configured.
Setup for PAM OpenOTP is now finished. During the setup, we can automatically configure PAM OpenOTP for OpenSSH, but we will show in the next section, the required configuration for OpenSSH.
Note Debian 6
See Note in Chapter 4. SpanKey Client.
8. OpenSSH Server Configuration (Client Machine)
These settings are already configured with the PAM_OpenOTP setup.
For SSHd, you can keep the default configuration on each UNIX distribution. You just have to edit this file /etc/ssh/sshd_config and adjust the following settings:
ChallengeResponseAuthentication yes
UsePAM yes
Note
Since OpenSSH 1:8.7, the references to ChallengeResponseAuthentication are removed in favor of KbdInteractiveAuthentication. For this end, you need to enable the line in /etc/ssh/sshd_config :
The prefix number in the name of the configuration file matter as it give the priority of OpenSSH loaded settings. On a RHEL9, by default I have a file named 50-redhat.conf in that folder. In order to give priority to my SSHD configuration file, I need to use a number lower than 50 to apply my configuration. Else, my settings may be overridden by the 50-redhat.conf and will not be taken into account.
Restart OpenSSH server to apply the new configuration.
To configure UNIX services with OpenOTP authentication, you have to edit the files refering to the service you want to enable 2FA available in /etc/pam.d/<service>.
After the PAM OpenOTP setup script, an openotp-auth PAM file is created which looks like below on every Linux distributions:
The fallback to Local accounts is kept with the line calling pam_unix.so library.
When the authentication failed at the local level, it continues and enter in pam_openotp.so which involves OpenOTP server.
The modification of PAM configuration file for a service is only related to the inclusion of the openotp-auth configuration file in the pam configuration file of the service.
Optionnaly, you can edit the openotp-auth file if you want to call the first OpenOTP authentication stack before the UNIX stack by switching the 2 lines like below:
Found below, few configuration examples for different services.
9.1.1 SSH
Note
These files should be already configured with the PAM_OpenOTP setup because we answered yes to configure OpenSSH server during PAM_OpenOPT setup.
bash-4.1# vi /etc/pam.d/sshd
#%PAM-1.0auth substack openotp-auth
auth include postlogin
account required pam_sepermit.so
account required pam_nologin.so
account include password-auth
password include password-auth
# pam_selinux.so close should be the first session rulesession required pam_selinux.so close
session required pam_loginuid.so
# pam_selinux.so open should only be followed by sessions to be executed in the user contextsession required pam_selinux.so open env_params
session required pam_namespace.so
session optional pam_keyinit.so force revoke
session optional pam_motd.so
session include password-auth
session include postlogin
Configuration is done for OpenSSH. You are now able to log in to your OpenSSH server with your LDAP credentials and OTP password.
Test:
[yoann@iMac ~]$ ssh Administrator@192.168.3.69
Password: xxxxxxx
Enter your TOKEN password: 043792-bash-4.1$ whoami
Administrator
-bash-4.1$
9.1.2 XRDP
Found below, the configuration for XRDP.
bash-4.1# vi /etc/pam.d/xrdp-sesman
#%PAM-1.0# Generic Fedora config#auth include password-authauth include openotp-auth
account include password-auth
password include password-auth
session include password-auth
# Gnome specific Fedora config#auth include gdm-password#account include gdm-password#password include gdm-password#session include gdm-password
Restart the server in order to have XRDP integration working after the PAM configuration. Restart the XRDP services may not be enough when editing PAM configuration of XRDP service.
9.1.3 CONSOLE
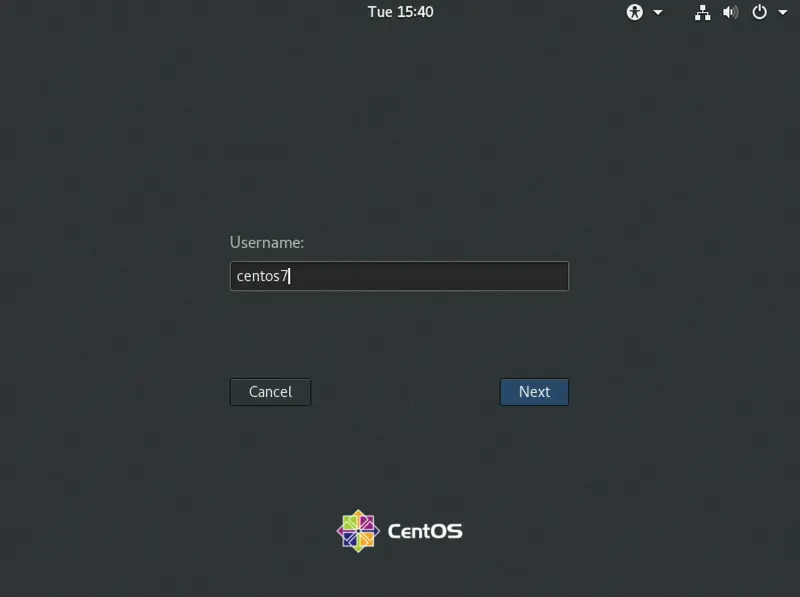
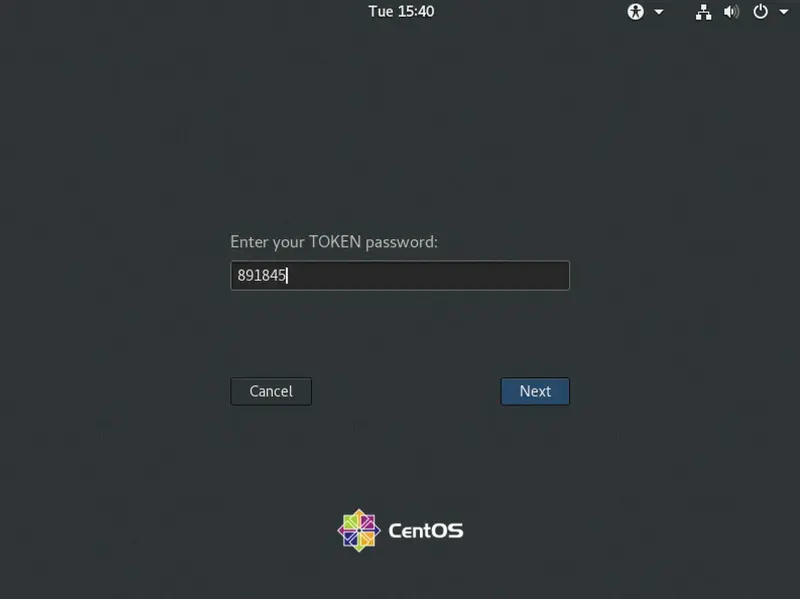
To configure the console login with OpenOTP you have to configure the file /etc/pam.d/login.
bash-4.1# vi /etc/pam.d/login
#%PAM-1.0auth include openotp-auth
auth substack system-auth
auth include postlogin
account required pam_nologin.so
account include system-auth
password include system-auth
# pam_selinux.so close should be the first session rulesession required pam_selinux.so close
session required pam_loginuid.so
# pam_selinux.so open should only be followed by sessions to be executed in the user contextsession required pam_selinux.so open
session required pam_namespace.so
session optional pam_keyinit.so force revoke
session include system-auth
session include postlogin
-session optional pam_ck_connector.so
9.1.4 GDM
Note
These files should be already configured with the PAM_OpenOTP setup because we answered yes to configure GDM during PAM_OpenOTP setup.
bash-4.1# vi /etc/pam.d/gdm-password
auth     [success=done ignore=ignore default=bad] pam_selinux_permit.so
auth        substack      openotp-auth
auth        optional      pam_gnome_keyring.so
auth        include       postlogin

account     required      pam_nologin.so
account     include       password-auth

password    substack       password-auth
-password   optional       pam_gnome_keyring.so use_authtok

session     required      pam_selinux.so close
session     required      pam_loginuid.so
session     optional      pam_console.so
session     required      pam_selinux.so open
session     optional      pam_keyinit.so force revoke
session     required      pam_namespace.so
session     include       password-auth
session     optional      pam_gnome_keyring.so auto_start
session     include       postlogin
9.1.5 SUDO
In this part, we will configure sudo to use OpenOTP. Switching user using sudo requires the necessary authorizations. These authorizations can be set by the root user and edited in /etc/sudoers. See UNIX documentation to edit it.
Here, we will edit /etc/pam.d/sudo to have a One-Time Password when users execute a sudo command.
Note
This integration is not to give SUDO privileges as Spankey server is able to do under the Spankey licensing. This integration is to prompt the end-user for MFA when asking SUDO privileges.
bash-4.1# vi /etc/pam.d/sudo
#%PAM-1.0#auth include system-authauth include openotp-auth
account include system-auth
password include system-auth
session include system-auth
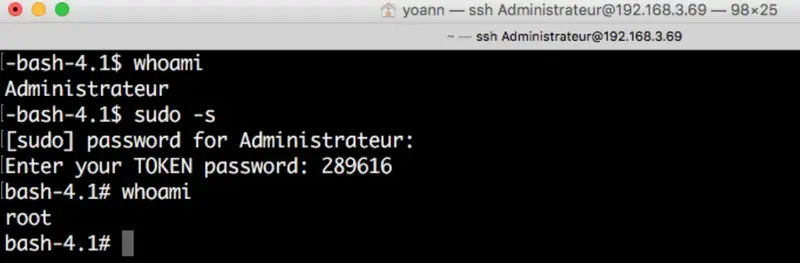
So, as said before, user Administrateur must have permissions to execute sudo command. I will then be prompted to provide my OTP to entering the SUDO mode.
Test:
9.2 Debian / Ubuntu
9.2.1 SSH
To configure UNIX services with OpenOTP authentication, you have to edit the different file available in /etc/pam.d/<service>.
The following example works for SSH. We disabled @include common-auth and added @include openotp-auth:
bash-4.1# vi /etc/pam.d/sshd
# PAM configuration for the Secure Shell service# OpenOTP authentication.@include openotp-auth
# Disallow non-root logins when /etc/nologin exists.account required pam_nologin.so
# Uncomment and edit /etc/security/access.conf if you need to set complex# access limits that are hard to express in sshd_config.# account required pam_access.so# Standard Un*x authorization.@include common-account
# SELinux needs to be the first session rule. This ensures that any# lingering context has been cleared. Without this it is possible that a# module could execute code in the wrong domain.session [success=ok ignore=ignore module_unknown=ignore default=bad] pam_selinux.so close
# Set the loginuid process attribute.session required pam_loginuid.so
# Create a new session keyring.session optional pam_keyinit.so force revoke
# Standard Un*x session setup and teardown.@include common-session
# Print the message of the day upon successful login.# This includes a dynamically generated part from /run/motd.dynamic# and a static (admin-editable) part from /etc/motd.session optional pam_motd.so motd=/run/motd.dynamic
session optional pam_motd.so noupdate
# Print the status of the user's mailbox upon successful login.session optional pam_mail.so standard noenv # [1]# Set up user limits from /etc/security/limits.conf.session required pam_limits.so
# Read environment variables from /etc/environment and# /etc/security/pam_env.conf.session required pam_env.so # [1]# In Debian 4.0 (etch), locale-related environment variables were moved to# /etc/default/locale, so read that as well.session required pam_env.so user_readenv=1 envfile=/etc/default/locale
# SELinux needs to intervene at login time to ensure that the process starts# in the proper default security context. Only sessions which are intended# to run in the user's context should be run after this.session [success=ok ignore=ignore module_unknown=ignore default=bad] pam_selinux.so open
# Standard Un*x password updating.@include common-password
Restart the server in order to have XRDP integration working after the PAM configuration. Restart the XRDP services may not be enough when editing PAM configuration of XRDP service.
9.2.3 CONSOLE
# The PAM configuration file for the Shadow `login' service## Enforce a minimal delay in case of failure (in microseconds).# (Replaces the `FAIL_DELAY' setting from login.defs)# Note that other modules may require another minimal delay. (for example,# to disable any delay, you should add the nodelay option to pam_unix)auth optional pam_faildelay.so delay=3000000# Outputs an issue file prior to each login prompt (Replaces the# ISSUE_FILE option from login.defs). Uncomment for use# auth required pam_issue.so issue=/etc/issue# Disallows other than root logins when /etc/nologin exists# (Replaces the `NOLOGINS_FILE' option from login.defs)auth requisite pam_nologin.so
# SELinux needs to be the first session rule. This ensures that any# lingering context has been cleared. Without this it is possible# that a module could execute code in the wrong domain.# When the module is present, "required" would be sufficient (When SELinux# is disabled, this returns success.)session [success=ok ignore=ignore module_unknown=ignore default=bad] pam_selinux.so close
# Sets the loginuid process attributesession required pam_loginuid.so
# Prints the message of the day upon successful login.# (Replaces the `MOTD_FILE' option in login.defs)# This includes a dynamically generated part from /run/motd.dynamic# and a static (admin-editable) part from /etc/motd.session optional pam_motd.so motd=/run/motd.dynamic
session optional pam_motd.so noupdate
# SELinux needs to intervene at login time to ensure that the process# starts in the proper default security context. Only sessions which are# intended to run in the user's context should be run after this.# pam_selinux.so changes the SELinux context of the used TTY and configures# SELinux in order to transition to the user context with the next execve()# call.session [success=ok ignore=ignore module_unknown=ignore default=bad] pam_selinux.so open
# When the module is present, "required" would be sufficient (When SELinux# is disabled, this returns success.)# This module parses environment configuration file(s)# and also allows you to use an extended config# file /etc/security/pam_env.conf.## parsing /etc/environment needs "readenv=1"session required pam_env.so readenv=1# locale variables are also kept into /etc/default/locale in etch# reading this file *in addition to /etc/environment* does not hurtsession required pam_env.so readenv=1 envfile=/etc/default/locale
# Standard Un*x authentication.#@include common-auth@include openotp-auth
# This allows certain extra groups to be granted to a user# based on things like time of day, tty, service, and user.# Please edit /etc/security/group.conf to fit your needs# (Replaces the `CONSOLE_GROUPS' option in login.defs)auth optional pam_group.so
# Uncomment and edit /etc/security/time.conf if you need to set# time restraint on logins.# (Replaces the `PORTTIME_CHECKS_ENAB' option from login.defs# as well as /etc/porttime)# account requisite pam_time.so# Uncomment and edit /etc/security/access.conf if you need to# set access limits.# (Replaces /etc/login.access file)# account required pam_access.so# Sets up user limits according to /etc/security/limits.conf# (Replaces the use of /etc/limits in old login)session required pam_limits.so
# Prints the last login info upon successful login# (Replaces the `LASTLOG_ENAB' option from login.defs)session optional pam_lastlog.so
# Prints the status of the user's mailbox upon successful login# (Replaces the `MAIL_CHECK_ENAB' option from login.defs).## This also defines the MAIL environment variable# However, userdel also needs MAIL_DIR and MAIL_FILE variables# in /etc/login.defs to make sure that removing a user# also removes the user's mail spool file.# See comments in /etc/login.defssession optional pam_mail.so standard
# Create a new session keyring.session optional pam_keyinit.so force revoke
# Standard Un*x account and session@include common-account
@include common-session
@include common-password
9.2.4 GDM
For GDM, the only file that you have to edit is: /etc/pam.d/gdm-password. This file should be like below:
#%PAM-1.0auth requisite pam_nologin.so
auth required pam_succeed_if.so user != root quiet_success
@include openotp-auth
auth optional pam_gnome_keyring.so
@include common-account
# SELinux needs to be the first session rule. This ensures that any# lingering context has been cleared. Without this it is possible# that a module could execute code in the wrong domain.session [success=ok ignore=ignore module_unknown=ignore default=bad] pam_selinux.so close
session required pam_loginuid.so
# SELinux needs to intervene at login time to ensure that the process# starts in the proper default security context. Only sessions which are# intended to run in the user's context should be run after this.session [success=ok ignore=ignore module_unknown=ignore default=bad] pam_selinux.so open
session optional pam_keyinit.so force revoke
session required pam_limits.so
session required pam_env.so readenv=1session required pam_env.so readenv=1 envfile=/etc/default/locale
@include common-session
session optional pam_gnome_keyring.so auto_start
@include common-password
This is the default file, we only change @include common-auth by @include openotp-auth on line 4.
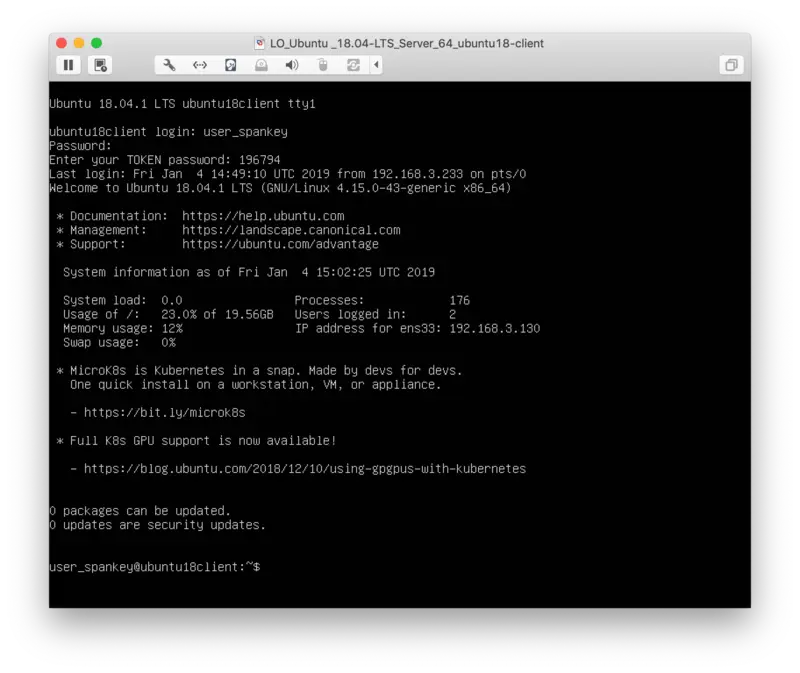
Configuration is done, you are now able to log in on the Gnome desktop with an OTP:
9.2.5 Lightdm
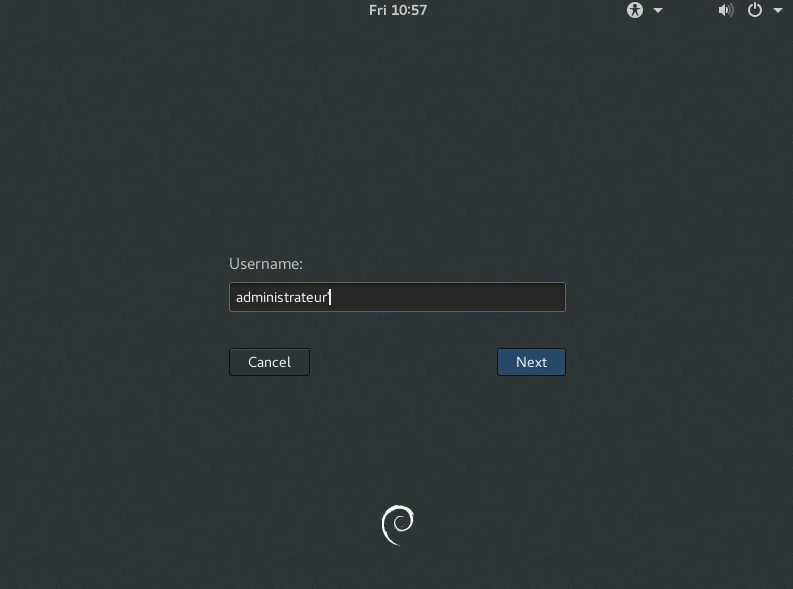
When the default graphical interface is lightdm and to authorize the user to enter his own username, you have to edit the following file:
vi /usr/share/lightdm/lightdm.conf.d/50-ubuntu.conf
And add the following line:
greeter-show-manual-login=true
You can now reboot your machine, and you will be able on the next login to enter your username manually.
After the openotp_setup script, if you choose yes to enabled PAM OpenOTP for Lightdm, then the line including OpenOTP authentication should be already configured.
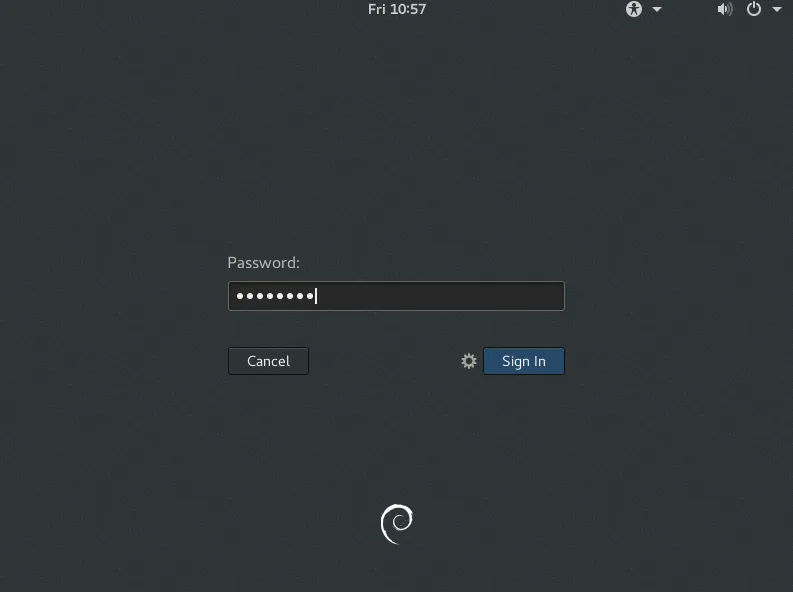
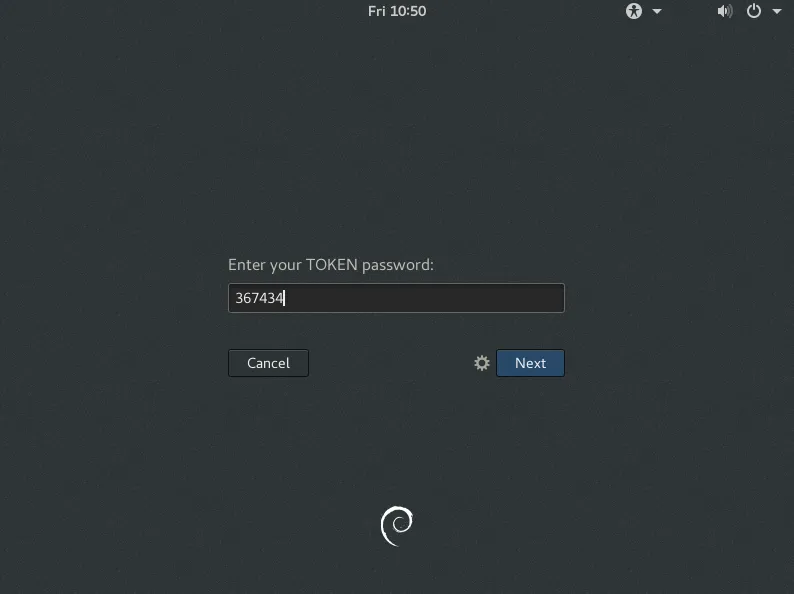
Edit the file /etc/pam.d/lightdm and you should have something like below:
This is the default file, we only have to change @include common-auth by @include openotp-auth.
Configuration is done, you are now able to log in to your desktop with an OTP.
9.2.6 SUDO
In this part, we will configure sudo to use OpenOTP.
user_spankey@ubuntu18client:~$ whoami
user_spankey
user_spankey@ubuntu18client:~$ sudo su
[sudo] password for user_spankey:
Enter your TOKEN password: 745487root@ubuntu18client:/home/user_spankey# whoami
root
Switching the user to use sudo requires the necessary authorizations. These authorizations can be set by the root user by editing the /etc/sudoers file. See UNIX documentation to edit it.
Note
This integration is not to give SUDO privileges as Spankey server is able to do under the Spankey licensing. This integration is to prompt the end-user for MFA when asking SUDO privileges.
First, we’ll add the user (user_spankey) to /etc/sudoers with the following command:
root@ubuntu18client:/home/ubuntu18-client# addgroup user_spankey sudo
Adding user `user_spankey' to group `sudo' ...
Adding user user_spankey to group sudo
Done.
Here, we will edit /etc/pam.d/sudo to prompt a One-Time Password when users execute a sudo command.
root@ubuntu18client:/home/ubuntu18-client# vi /etc/pam.d/sudo
A policy can be configured per service(xrdp, ssh, consol…). Client policy overrides every other policy already configured on a group or on a user account.
11. Troubleshooting
There are many files that you can check to troubleshoot the Linux client and WebADM/OpenOTP/SpanKey servers.
11.1 WebADM/OpenOTP/SpanKey Servers
WebADM/OpenOTP has a transaction log that records all requests/responses in the following file:
bash-4.1# cat /opt/webadm/logs/webadm.log
Typical logs of an authentication success using SSH and PAM_OpenOTP:
[2017-02-03 15:54:30][192.168.3.134][OpenOTP:3MJAB3KR] New openotpSimpleLogin SOAP request
[2017-02-03 15:54:30][192.168.3.134][OpenOTP:3MJAB3KR] > Username: Administrateur
[2017-02-03 15:54:30][192.168.3.134][OpenOTP:3MJAB3KR] > Password: xxxxxxxx
[2017-02-03 15:54:30][192.168.3.134][OpenOTP:3MJAB3KR] > Client ID: SSH
[2017-02-03 15:54:30][192.168.3.134][OpenOTP:3MJAB3KR] > Source IP: 10.0.3.22
[2017-02-03 15:54:30][192.168.3.134][OpenOTP:3MJAB3KR] > Options: -U2F
[2017-02-03 15:54:30][192.168.3.134][OpenOTP:3MJAB3KR] Enforcing client policy: SSH
[2017-02-03 15:54:30][192.168.3.134][OpenOTP:3MJAB3KR] Registered openotpSimpleLogin request
[2017-02-03 15:54:30][192.168.3.134][OpenOTP:3MJAB3KR] Resolved LDAP user: CN=Administrateur,CN=Users,DC=yorcdevs,DC=com
[2017-02-03 15:54:30][192.168.3.134][OpenOTP:3MJAB3KR] Resolved LDAP groups: propri\xc3\xa9taires cr\xc3\xa9ateurs de la strat\xc3\xa9gie de groupe,admins du domaine,administrateurs de l\xe2\x80\x99entreprise,administrateurs du sch\xc3\xa9ma,administrateurs,utilisateurs du bureau \xc3\xa0 distance,groupe de r\xc3\xa9plication dont le mot de passe rodc est refus\xc3\xa9
[2017-02-03 15:54:30][192.168.3.134][OpenOTP:3MJAB3KR] Started transaction lock for user
[2017-02-03 15:54:30][192.168.3.134][OpenOTP:3MJAB3KR] Found user language: EN
[2017-02-03 15:54:30][192.168.3.134][OpenOTP:3MJAB3KR] Found 3 user certificate
[2017-02-03 15:54:30][192.168.3.134][OpenOTP:3MJAB3KR] Found 37 user settings: LoginMode=LDAPMFA,OTPType=TOKEN,OTPLength=6,ChallengeMode=Yes,ChallengeTimeout=90,ChallengeLock=No,PushLogin=No,EnableLogin=Yes,AppKeyLength=20,HOTPLookAheadWindow=25,TOTPTimeStep=30,TOTPTimeOffsetWindow=120,MOTPTimeOffsetWindow=120,OCRASuite=OCRA-1:HOTP-SHA1-6:QN06-T1M,SMSType=Normal,SMSMode=Ondemand,MailMode=Ondemand,LastOTPTime=300,ListChallengeMode=ShowID
[2017-02-03 15:54:30][192.168.3.134][OpenOTP:3MJAB3KR] Found 12 user data: LoginCount,RejectCount,LastOTP,ListInit,ListState,TokenType,TokenKey,TokenState,TokenID,Device1Name,Device1Data,Device1State
[2017-02-03 15:54:30][192.168.3.134][OpenOTP:3MJAB3KR] Found 1 registered OTP token (TOTP)[2017-02-03 15:54:30][192.168.3.134][OpenOTP:3MJAB3KR] Requested login factors: LDAP & OTP
[2017-02-03 15:54:30][192.168.3.134][OpenOTP:3MJAB3KR] LDAP password Ok
[2017-02-03 15:54:30][192.168.3.134][OpenOTP:3MJAB3KR] Challenge required
[2017-02-03 15:54:30][192.168.3.134][OpenOTP:3MJAB3KR] Started OTP challenge session of ID PaS3WXe2HDJFz0st valid for90 seconds
[2017-02-03 15:54:30][192.168.3.134][OpenOTP:3MJAB3KR] Sent challenge response
[2017-02-03 15:54:30][192.168.3.134][OpenOTP:3MJAB3KR] New openotpChallenge SOAP request
[2017-02-03 15:54:30][192.168.3.134][OpenOTP:3MJAB3KR] > Username: Administrateur
[2017-02-03 15:54:30][192.168.3.134][OpenOTP:3MJAB3KR] > Session: PaS3WXe2HDJFz0st
[2017-02-03 15:54:30][192.168.3.134][OpenOTP:3MJAB3KR] > OTP Password: xxxxxx
[2017-02-03 15:54:30][192.168.3.134][OpenOTP:3MJAB3KR] Enforcing client policy: SSH
[2017-02-03 15:54:30][192.168.3.134][OpenOTP:3MJAB3KR] Registered openotpChallenge request
[2017-02-03 15:54:30][192.168.3.134][OpenOTP:3MJAB3KR] Found challenge session started 2017-02-03 15:54:30
[2017-02-03 15:54:30][192.168.3.134][OpenOTP:3MJAB3KR] Started transaction lock for user
[2017-02-03 15:54:30][192.168.3.134][OpenOTP:3MJAB3KR] TOTP password Ok (token #1)[2017-02-03 15:54:30][192.168.3.134][OpenOTP:3MJAB3KR] Updated user data
[2017-02-03 15:54:30][192.168.3.134][OpenOTP:3MJAB3KR] Sent success response
Typical logs of an authentication failure caused by WebADM configuration. Challenge Mode Supported should be configured to Yes either in OpenOTP Application settings or in the sudo Client Policy settings.
[2017-02-03 13:26:41][192.168.3.60][OpenOTP:7UERIOQE] New openotpSimpleLogin SOAP request
[2017-02-03 13:26:41][192.168.3.60][OpenOTP:7UERIOQE] > Username: Administrateur
[2017-02-03 13:26:41][192.168.3.60][OpenOTP:7UERIOQE] > Password: xxxxxxxx
[2017-02-03 13:26:41][192.168.3.60][OpenOTP:7UERIOQE] > Client ID: sudo
[2017-02-03 13:26:41][192.168.3.60][OpenOTP:7UERIOQE] > Source IP: 10.0.3.21
[2017-02-03 13:26:41][192.168.3.60][OpenOTP:7UERIOQE] Options: -U2F
[2017-02-03 13:26:41][192.168.3.60][OpenOTP:7UERIOQE] Enforcing client policy: sudo
[2017-02-03 13:26:41][192.168.3.60][OpenOTP:7UERIOQE] Registered openotpSimpleLogin request
[2017-02-03 13:26:41][192.168.3.60][OpenOTP:7UERIOQE] Resolved LDAP user: CN=Administrateur,CN=Users,DC=yorcdevs,DC=com
[2017-02-03 13:26:41][192.168.3.60][OpenOTP:7UERIOQE] Resolved LDAP groups: propri\xc3\xa9taires cr\xc3\xa9ateurs de la strat\xc3\xa9gie de groupe,admins du domaine,administrateurs de l\xe2\x80\x99entreprise,administrateurs du sch\xc3\xa9ma,administrateurs,utilisateurs du bureau \xc3\xa0 distance,groupe de r\xc3\xa9plication dont le mot de passe rodc est refus\xc3\xa9
[2017-02-03 13:26:41][192.168.3.60][OpenOTP:7UERIOQE] Started transaction lock for user
[2017-02-03 13:26:44][192.168.3.60][OpenOTP:7UERIOQE] Found user language: EN
[2017-02-03 13:26:44][192.168.3.60][OpenOTP:7UERIOQE] Found 3 user certificate
[2017-02-03 13:26:44][192.168.3.60][OpenOTP:7UERIOQE] Found 37 user settings: LoginMode=LDAPMFA,OTPType=TOKEN,OTPLength=6,ChallengeMode=Yes,ChallengeTimeout=90,ChallengeLock=No,PushLogin=No,EnableLogin=Yes,AppKeyLength=20,HOTPLookAheadWindow=25,TOTPTimeStep=30,TOTPTimeOffsetWindow=120,MOTPTimeOffsetWindow=120,OCRASuite=OCRA-1:HOTP-SHA1-6:QN06-T1M,SMSType=Normal,SMSMode=Ondemand,MailMode=Ondemand,LastOTPTime=300,ListChallengeMode=ShowID
[2017-02-03 13:26:44][192.168.3.60][OpenOTP:7UERIOQE] Found 12 user data: LoginCount,RejectCount,LastOTP,ListInit,ListState,TokenType,TokenKey,TokenState,TokenID,Device1Name,Device1Data,Device1State
[2017-02-03 13:26:44][192.168.3.60][OpenOTP:7UERIOQE] Challenge mode disabled (assuming concatened passwords)[2017-02-03 13:26:44][192.168.3.60][OpenOTP:7UERIOQE] Found 1 registered OTP token (TOTP)[2017-02-03 13:26:44][192.168.3.60][OpenOTP:7UERIOQE] Requested login factors: LDAP & OTP
[2017-02-03 13:26:44][192.168.3.60][OpenOTP:7UERIOQE] LDAP password Ok
[2017-02-03 13:26:44][192.168.3.60][OpenOTP:7UERIOQE] Updated user data
[2017-02-03 13:26:44][192.168.3.60][OpenOTP:7UERIOQE] Sent failure response
11.2 SpanKey Client
To know if SpanKey client works properly, you can run the following command on your client:
bash-4.1# getent passwd
This command must return Local and LDAP account (Extended to UNIX in WebADM).
If this command doesn’t return your LDAP Accounts, please check the firewall configuration and SpanKey’s configuration URLs in /etc/spankey/spankey.conf. You can also try to restart the nscd service and check the SELinux configuration.
On Unix client, you can see the logs of the getent command in /var/log/messages:
Feb 3 15:33:40 debian8 spankey[2043]: RCDevs SpanKey NSS Plugin version 1.0.2-3 loaded
If this log doesn’t appear when you call the getent command, SpanKey is not installed correctly. Try to reinstall it.
In WebADM logs, you can see the logs for the getent command too, getent call SpanKey module:
[2017-02-03 16:48:15][192.168.3.134][SpanKey:VOK85UQY] New spankeyNSSList SOAP request
[2017-02-03 16:48:15][192.168.3.134][SpanKey:VOK85UQY] > Database: user
[2017-02-03 16:48:15][192.168.3.134][SpanKey:VOK85UQY] > Client ID: SSH
[2017-02-03 16:48:15][192.168.3.134][SpanKey:VOK85UQY] Enforcing client policy: SSH
[2017-02-03 16:48:15][192.168.3.134][SpanKey:VOK85UQY] Registered spankeyNSSList request
[2017-02-03 16:48:15][192.168.3.134][SpanKey:VOK85UQY] Found 2 posix users
[2017-02-03 16:48:15][192.168.3.134][SpanKey:VOK85UQY] Sent success response
11.3 CentOS & Debian
Typical logs of an authentication success:
For CentOS:
bash-4.1# cat /var/log/secure
Feb 3 16:24:30 centos7 openotp[2132]: PAM Module for OpenOTP version 1.0.12 starting
Feb 3 16:24:30 centos7 openotp[2132]: Server URLs: https://192.168.3.55:8443/openotp/
Feb 3 16:24:30 centos7 openotp[2132]: Server Policy: Ordered
Feb 3 16:24:30 centos7 openotp[2132]: Domain name: [None]Feb 3 16:24:30 centos7 openotp[2132]: Client id: SSH
Feb 3 16:24:30 centos7 openotp[2132]: Challenge suffix: :
Feb 3 16:24:30 centos7 openotp[2132]: User settings: [None]Feb 3 16:24:30 centos7 openotp[2132]: Cert file: [None]Feb 3 16:24:30 centos7 openotp[2132]: Cert password: [None]Feb 3 16:24:30 centos7 openotp[2132]: CA file: [None]Feb 3 16:24:30 centos7 openotp[2132]: SOAP timeout: [Default]Feb 3 16:24:30 centos7 openotp[2132]: Create homedirs: No
Feb 3 16:24:30 centos7 openotp[2132]: Password mode: [Default]Feb 3 16:24:30 centos7 openotp[2132]: Password separator: [None]Feb 3 16:24:30 centos7 openotp[2132]: OTP length: [Default]Feb 3 16:24:30 centos7 openotp[2132]: Got user name Administrateur
Feb 3 16:24:30 centos7 openotp[2132]: Got host name 10.0.3.28
Feb 3 16:24:30 centos7 openotp[2132]: Got anyPassword ******** for user Administrateur
Feb 3 16:24:30 centos7 openotp[2132]: Sending OpenOTP SimpleLogin request for user Administrateur
Feb 3 16:24:31 centos7 openotp[2132]: Authentication challenge for user Administrateur
Feb 3 16:24:53 centos7 openotp[2132]: Got OTP password ****** for user Administrateur
Feb 3 16:24:53 centos7 openotp[2132]: Sending OpenOTP Challenge request for user Administrateur
Feb 3 16:24:56 centos7 openotp[2132]: Authentication succeeded for user Administrateur
For Debian:
bash-4.1# cat /var/log/auth.log
Feb 3 15:54:30 debian8 openotp[2048]: PAM Module for OpenOTP version 1.0.12 starting
Feb 3 15:54:30 debian8 openotp[2048]: Server URLs: https://192.168.3.55:8443/openotp/
Feb 3 15:54:30 debian8 openotp[2048]: Server Policy: Ordered
Feb 3 15:54:30 debian8 openotp[2048]: Domain name: [None]Feb 3 15:54:30 debian8 openotp[2048]: Client id: SSH
Feb 3 15:54:30 debian8 openotp[2048]: Challenge suffix: :
Feb 3 15:54:30 debian8 openotp[2048]: User settings: [None]Feb 3 15:54:30 debian8 openotp[2048]: Cert file: [None]Feb 3 15:54:30 debian8 openotp[2048]: Cert password: [None]Feb 3 15:54:30 debian8 openotp[2048]: CA file: [None]Feb 3 15:54:30 debian8 openotp[2048]: SOAP timeout: [Default]Feb 3 15:54:30 debian8 openotp[2048]: Create homedirs: No
Feb 3 15:54:30 debian8 openotp[2048]: Password mode: [Default]Feb 3 15:54:30 debian8 openotp[2048]: Password separator: [None]Feb 3 15:54:30 debian8 openotp[2048]: OTP length: [Default]Feb 3 15:54:30 debian8 openotp[2048]: Got user name Administrateur
Feb 3 15:54:30 debian8 openotp[2048]: Got host name 10.0.3.22
Feb 3 15:54:30 debian8 openotp[2048]: Got anyPassword ******** for user Administrateur
Feb 3 15:54:30 debian8 openotp[2048]: Sending OpenOTP SimpleLogin request for user Administrateur
Feb 3 15:54:31 debian8 openotp[2048]: Authentication challenge for user Administrateur
Feb 3 15:54:53 debian8 openotp[2048]: Got OTP password ****** for user Administrateur
Feb 3 15:54:53 debian8 openotp[2048]: Sending OpenOTP Challenge request for user Administrateur
Feb 3 15:54:56 debian8 openotp[2048]: Authentication succeeded for user Administrateur
11.4 Name Service Cache Daemon (NSCD)
In Linux, user and group information is often cached by NSCD (Name Service Cache Daemon), this can result in failed PAM-OpenOTP login right after the installation or after creating a new user since the user is not available in the cache yet.
To resolve this issue, you can wait for the cache to be refreshed on its own, or start and stop the nscd process and to flush the NSCD cache on your server.
The exact command and configuration depend on the Linux distribution in question. These commands are a sample for CentOS 7.
To stop and start NSCD:
systemctl stop nscd
systemctl start nscd
To clear NSCD cache files, invalidate the passwd and group cache:
To enable the debug logs of PAM OpenOTP plugin, you have to edit the OpenOTP PAM configuration file and add debug value on the openotp.so library line.
Then in /var/log/message you will have the following output when performing an authentication :
Dec  9 11:40:56 webadm2 openotp[70367]: Got user name yoann
Dec  9 11:40:56 webadm2 openotp[70367]: Got host name 192.168.3.205
Dec  9 11:40:56 webadm2 openotp[70367]: Got anyPassword ******** for user yoann
Dec  9 11:40:56 webadm2 openotp[70367]: Sending OpenOTP SimpleLogin request for user yoann
Dec  9 11:40:57 webadm2 openotp[70367]: Authentication challenge for user yoann
Dec  9 11:40:57 webadm2 openotp[70367]: Could not get user password for user yoann