1. Overview
OpenOTP MFA plugin for Nextcloud enables multi-factor authentication on Admin and User portals of Nextcloud.
Users’ credentials can be validated:
- Locally by Nextcloud (Nextcloud local accounts),
- Through an LDAP service (LDAP accounts)
Once the first step of the authentication is successfully validated, the authentication workflow continues through the OpenOTP Plugin for Nextcloud and OpenOTP server(s). The plugin will submit an authentication request to OpenOTP server(s) with the provided credentials during the first step (username). In both scenarios (local and LDAP accounts), for the authentication to work with OpenOTP, the provided username must match a valid WebADM licensed account and the user must have a registered Token type allowed for that client.
In order to use that plugin, you MUST HAVE OpenOTP Security Suite running in your infrastructure (on-premise or in the cloud). Please refer to the installation documentation for instructions on this. If you have a tenant running on RCDevs cloud, you must provide a client certificate or an API key issued from your tenant during the Nextcloud plugin configuration. You must have a valid license for OpenOTP and you need to download the OpenOTP Authentication Plugin for Nextcloud from RCDevs website or from the Nextcloud store.
2. Installation
2.1 NextCloud Store
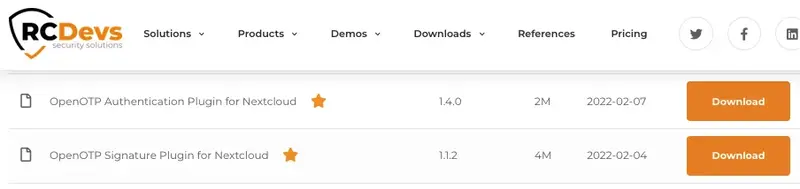
Download the OpenOTP Authentication Plugin for Nextcloud from the NextCloud Store.
2.2 Manually
Download the OpenOTP Authentication Plugin for Nextcloud from the RCDevs Integration Plugin download page.
Compatible Nextcloud 14.x to 22.X (Tested on 22.1.1) Version 1.1.0
- If your PHP installation does not have the soap extension, install the php-soap package for your Linux distribution. With RedHat, do it with
yum install php-soap. - Upload twofactor_rcdevsopenotp directory under the
appsdirectory of your ownCloud. - The RCDevsOpenOTP Application folder should have read write permission for the web server user (under debian/ubuntu :
chown -R www-data:www-data twofactor_rcdevsopenotp) - Navigate to the
Appspage in Admin. Click onOpenOTP Two Factor Authenticationin the application list. Then click theEnablebutton.

3. Configuration
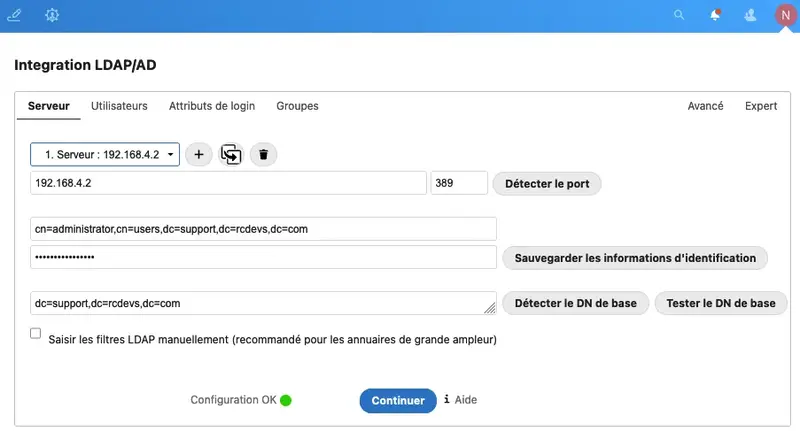
3.1 LDAP Backend configuration (optional)
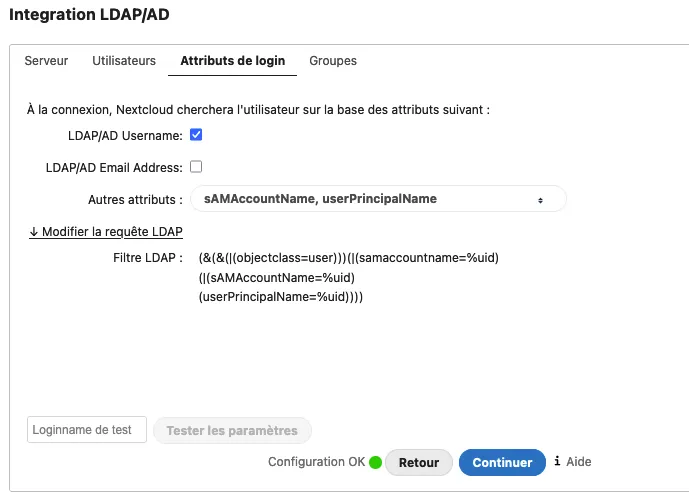
It’s possible to use LDAP/AD Integration (user_ldap) application with RCDevs OpenOTP (twofactor_rcdevsopenotp) application. Be sure to configure the LDAP plugin to create your local user with the uid/samaccountname. Otherwise, a randomly generated string is used for username when accounts are auto-created during the import process. To do this, click on the Expert tab, and fill in “Override UUID detection” with the correct login name based on your LDAP directory (uid/samaccountname…)
Next, you can adapt the search query to get the right users from the LDAP.
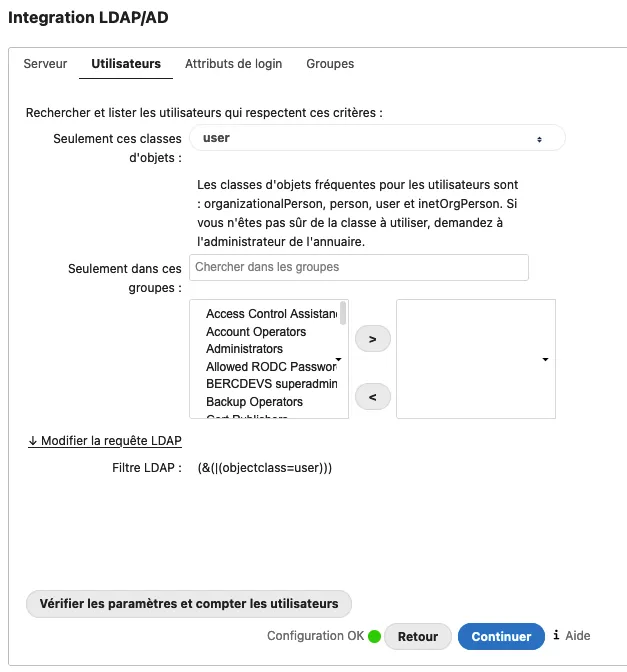
Finally, configure the login attribute used to get the right username of users.
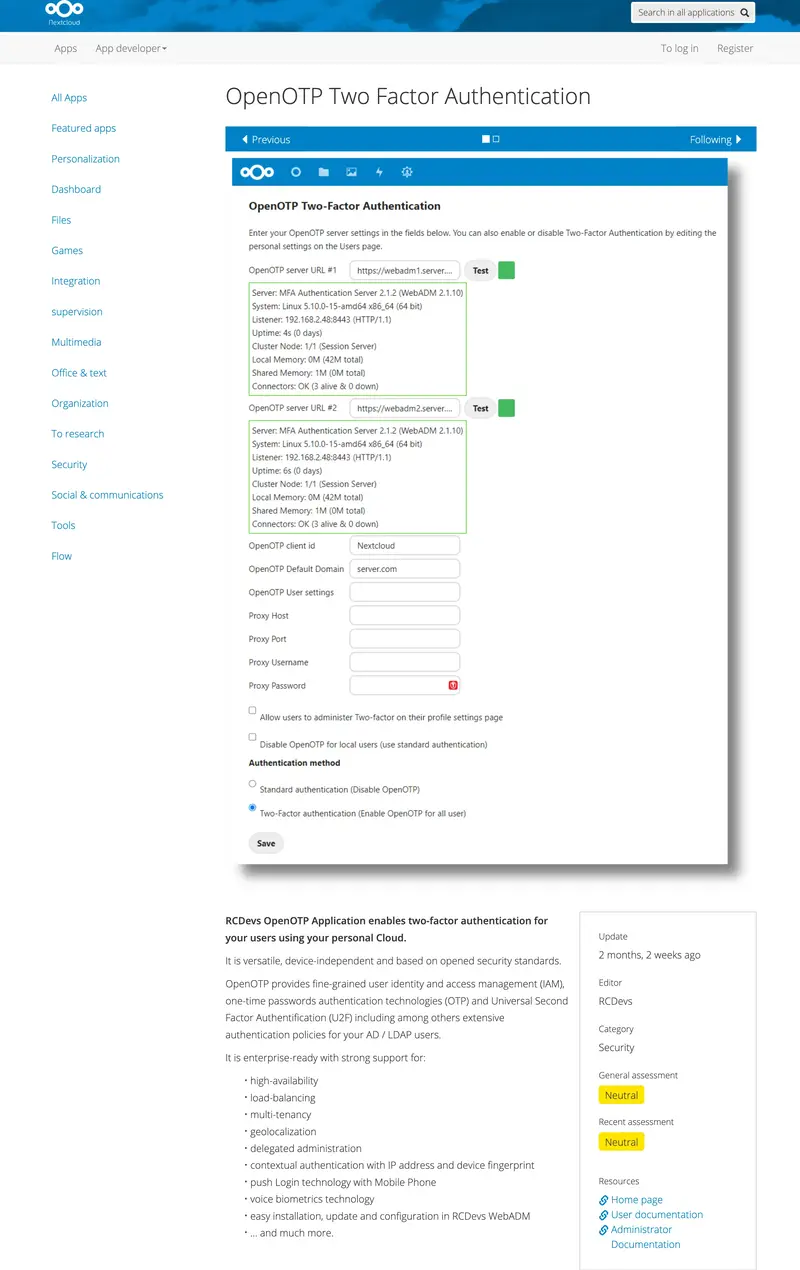
3.2 OpenOTP Plugin configuration
- Navigate to the
Adminpage / Additional settings, or go directly to the configuration via the Admin button in the header.

- Set at least the
OpenOTP server URL #1and theOpenOTP client id, clickSave.
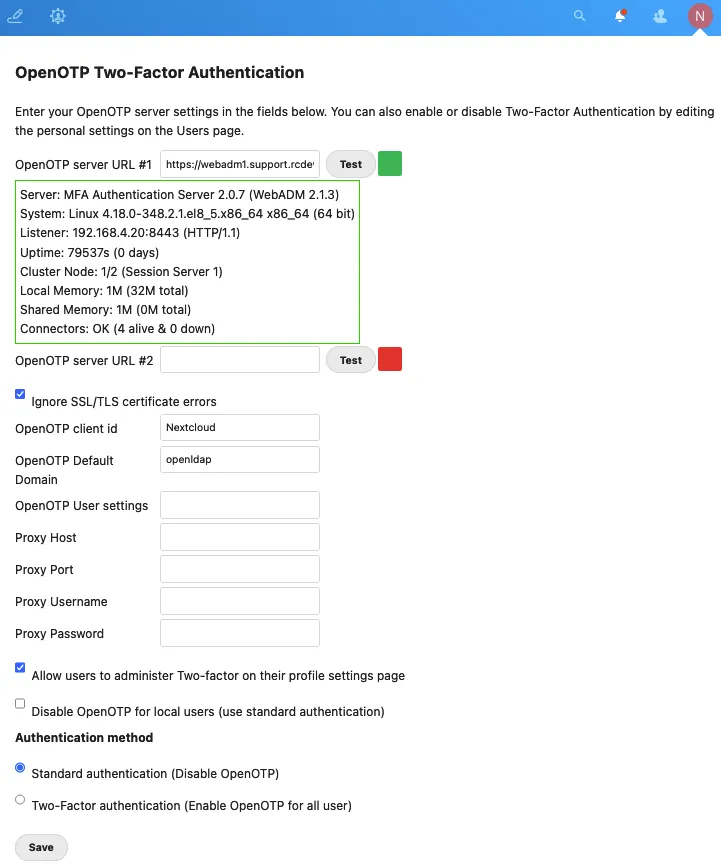
- Allow users to administer Two-factor on their profile settings page or not. When activated, the user goes to the Personal section to enable or not Two-Factor on his account.
Warning
Keep an admin user working without OTP in case of a problem. If not you can:
- Use occ command line to disable/enable two-factor authentication for a user:
sudo -u www-data ./occ twofactorauth:enable username
- Switch authentication method to Standard (Nextcloud password):
UPDATE *PREFIX*appconfig SET configvalue = 0 WHERE appid = 'twofactor_rcdevsopenotp' AND configkey = 'rcdevsopenotp_authentication_method'
- Disable openOTP authentication for one (admin?) user:
"DELETE FROM *PREFIX*appconfig WHERE userid = '%yourusername%' AND appid = 'twofactor_rcdevsopenotp' AND configkey = 'enable_openotp'
Replace PREFIX by Nextcloud table prefix ‘oc_’ by default.
4. Client Policy
A client policy can be configured for Nextcloud authentication on WebADM side. You can refer to the following documentation for more information about the client policies.
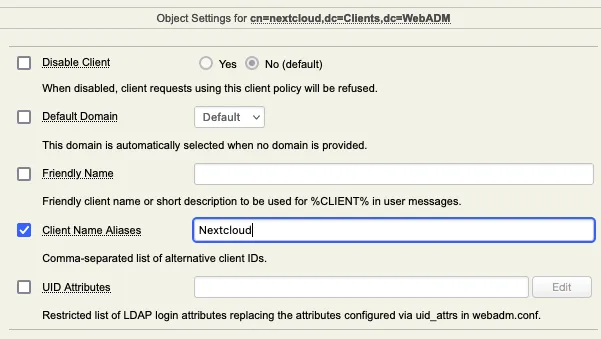
First, create a client policy object from WebADM GUI > Admin > Client Policies > Add Client.
You can name it Nextcloud as it is the value that we configured as Client ID during the plugin configuration. If you name it differently than the name we configured in the Client ID setting, you need to add the value configured in Client ID as Client Name Aliases on the next page:
You can then configure the settings you want according to what you want to enforce for that client.
All authentication types are supported (OTP, Push, FIDO, Voice biometric, PIN+OTP…)