User Self-Registration
1. Overview
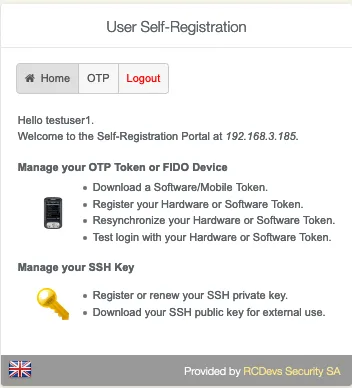
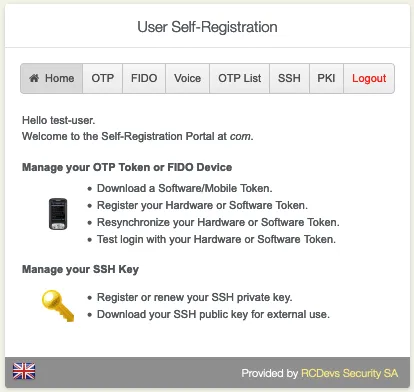
User Self-Registration (SelfReg) application is a web application provided by RCDevs installed on the WebADM server. This application allows users to manage their OTP Token and U2F key enrollment. Users are also able to manage their OTP list and SSH key for SpanKey.
The SelfReg application is similar to the User Self-Service Desk, the only difference between both applications is that the User Self-Registration can be accessed only with a WebADM Administrator request. To allow the user, the Administrator will send a Self-Registration request to the user and this user will receive a one time link to access the application. Once logged on the application, the access link is revoked and the user cannot re-access the application using the access link any more.
Note
To be able to use SelfReg, any LDAP user must be a WebADM account. That means usable LDAP accounts are those containing the webadmAccount LDAP object class. You can enable the WebADM features on any LDAP user/group by extending it with the webadmAccount object class (from object extension list).
The installation of SelfReg is straightforward and only consists of either running the self-installer, or install the corresponding package through RCDevs repository. It is also included in the webadm_all_in_one package.
After installation, this is required to register and configure the application in WebADM. You do not have to modify any files in the SelfReg install directory! The web application configurations are managed and stored in LDAP by WebADM.
2. Installation
The User Self-Registration application can be installed using our package repositories or through a self-installer.
2.1 Install with Redhat Repository
On a RedHat, CentOS or Fedora system, you can use our repository, which simplifies updates. Add the repository:
yum install https://repos.rcdevs.com/redhat/base/rcdevs_release-1.1.1-1.noarch.rpm
Clean yum cache and install the User Self-Registration (SelfReg):
yum clean all
yum install selfreg
The User Self-Registration application is now installed.
2.2 Install with Debian Repository
On a Debian or Ubuntu system, you can use our repository, which simplifies updates. Add the repository:
wget https://repos.rcdevs.com/debian/base/rcdevs-release_1.1.1-1_all.deb
apt-get install ./rcdevs-release_1.1.1-1_all.deb
Clean cache and install the User Self-Registration (SelfReg):
apt-get update
apt-get install selfreg
The User Self-Registration application is now installed.
2.3 Install Using the Self-Installer
The installation of the User Self-Registration application is very simple and is performed in less than 5 minutes. Just download the User Self-Registration self-installer package from the RCDevs website and put the installer file on your server. You can use WinSCP to copy the file to your server. To install the User Self-Registration, log into the server with SSH and run the following commands:
gunzip selfreg-1.1.x.sh.gz
bash selfreg-1.1.x.sh
3. Webapp Integration
You can embed a Web app on your website in an HTML iFrame or Object.
#Example

<object data="https://<webadm_addr>/webapps/selfreg?inline=1" />
4. Graphical Configuration
Once the application is installed, you have to enable it through the WebADM GUI.
To activate it, log in on the WebADM GUI with your super_admin account, click on Applications tab, in Categories box, on the left, click on Self-Service. You should see the User Self-Registration application here.

Click on the REGISTER button to enable the Application and you can now CONFIGURE it.
Under the configuration menu, many settings can be configured as you can see on the screenshots below.
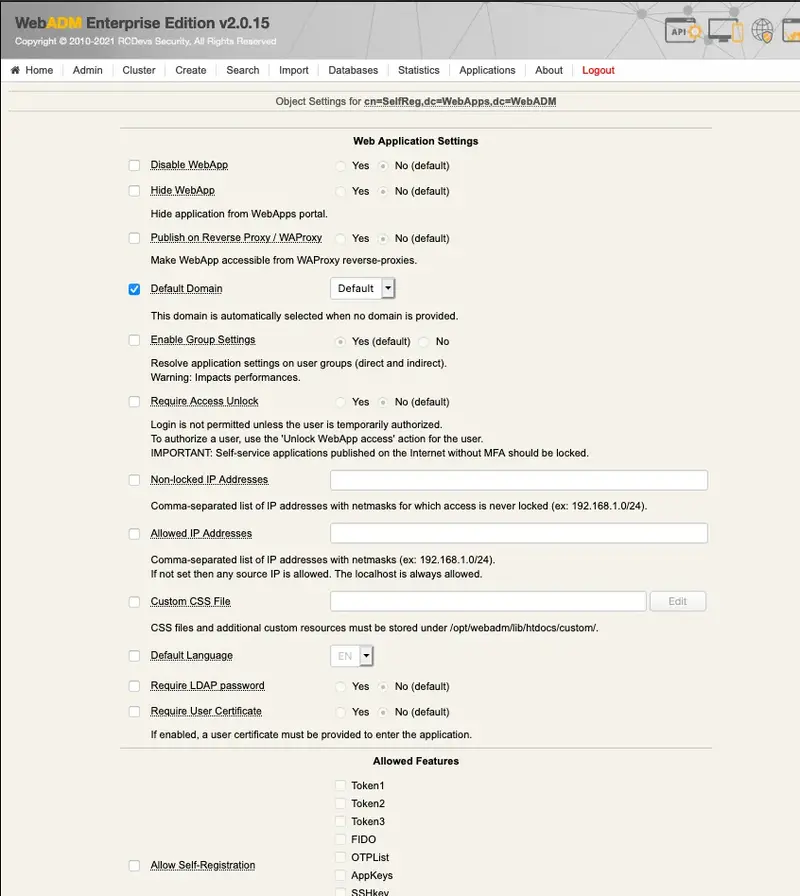
The settings below allow the admin to manage how many tokens can be managed by the user, which features will be allowed on the App, which kind of token the user can enroll, etc.
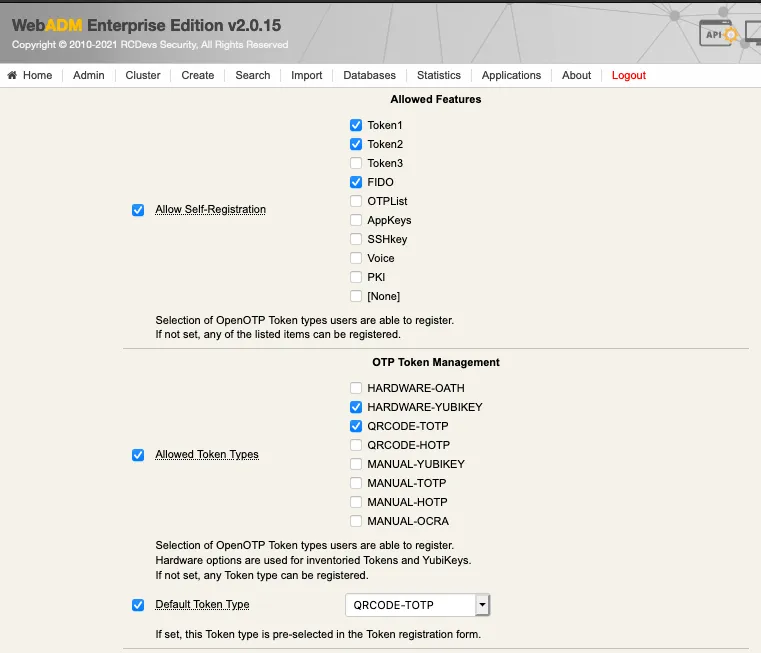
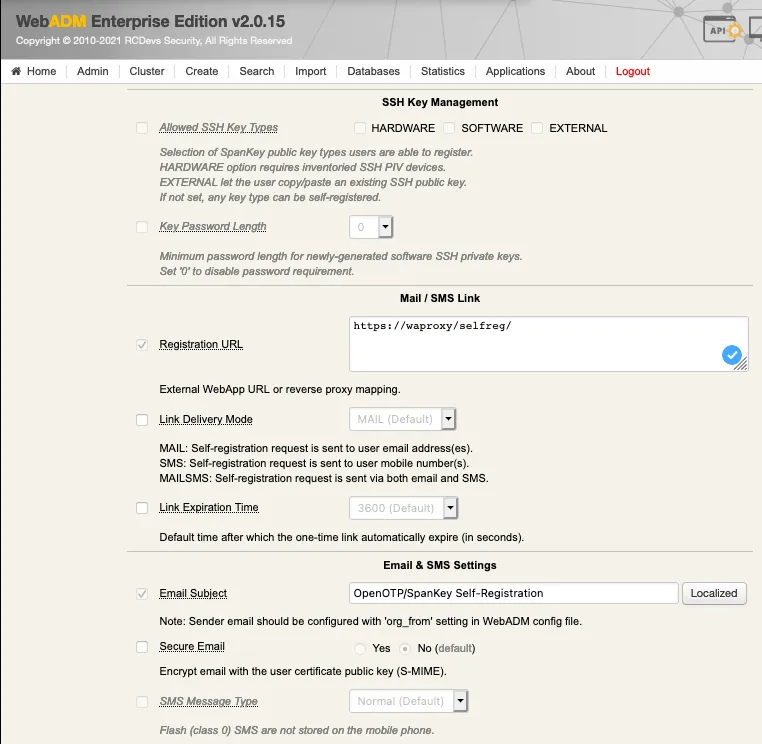
The SSH key management/renewal can be done through the User Self-Registration application too.
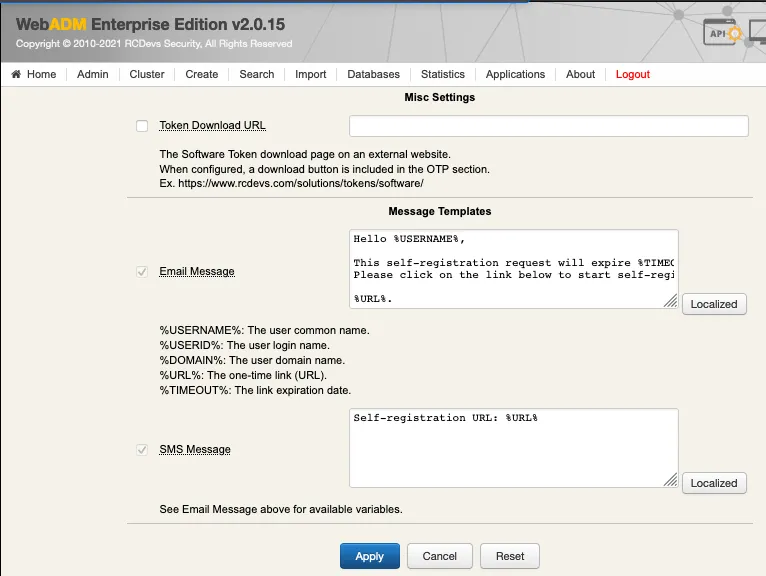
Below the SSH Key management settings, another part called Mail/SMS Link allows you to configure the Registration URL, the delivery mode (Mail/SMS) and the link expiration time. This URL should be adjusted when you are running the Application through the WAProxy. Otherwise, the users will access the application through the WebADM server directly.
URL example when a user accesses the app through the WebADM server:
https://webadm_ip/webapps/selfreg/
URL example when a user accesses the app through the WAProxy:
https://waproxy_ip/selfreg/
Other settings can be adjusted like you want to…
Click on Apply and the configuration is done.
5. Send a Self-Registration Request to a User
To send a self-registration request to a user, you have 2 ways:
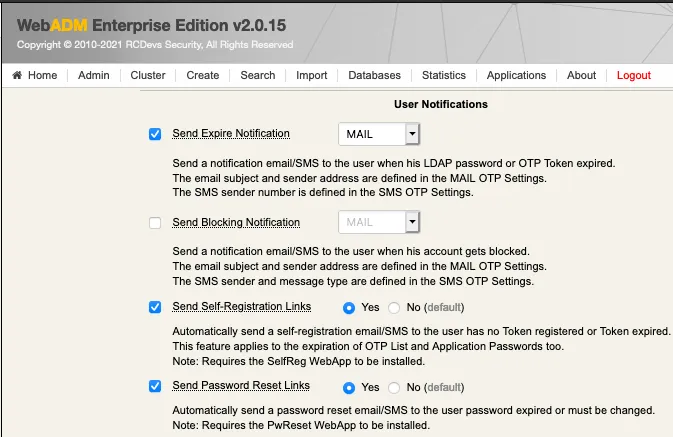
- Auto send a link when the Token user is expired,
This setting is available since the OpenOTP v1.3.12-1. When the user will login and his token is expired, the authentication will fail and a self-reg link will be sent to the user.
- Manually send a link.
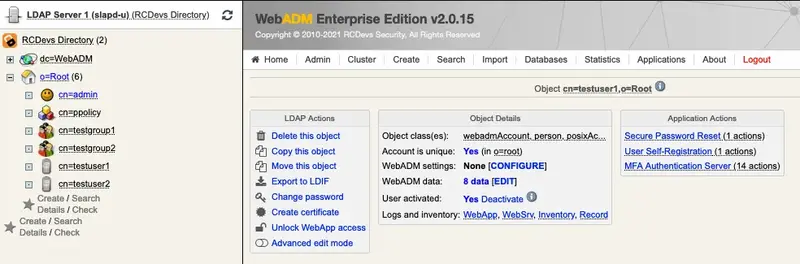
To manually send a self-reg link, go to the WebADM Admin GUI, click on the related user on the left tree. In Application Actions box, click on User Self-Registration.
You can select the method you want to use to send the request (SMS/Mail) and you can also write a message to the user:
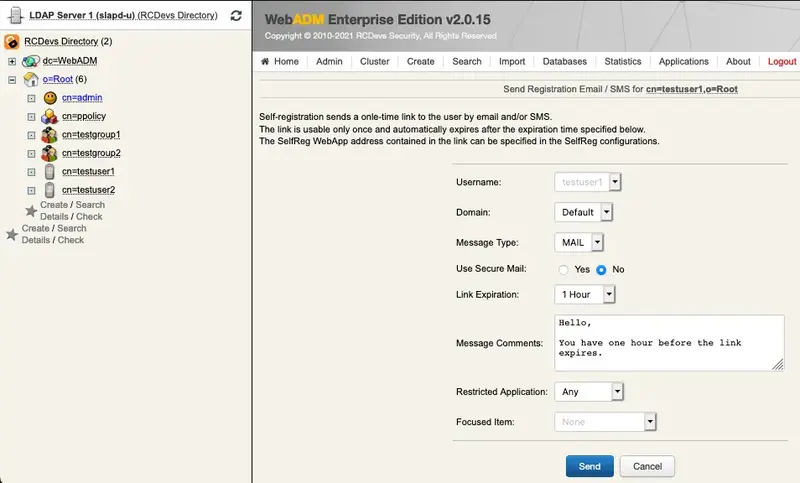
Click on Send button and the selfreg request is sent to the user.
The user will receive something like this:
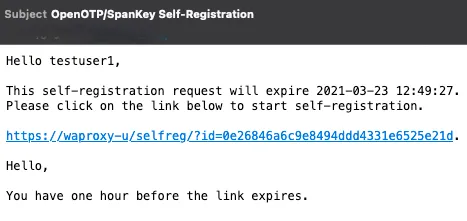
He has to click on the link and will be redirected to the Application.
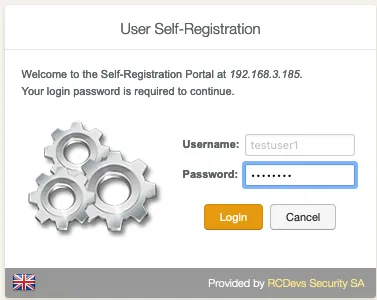
Log in with his credentials and the user is logged on the application. Now the user can manage what the admin has allowed him to manage.

6. Proxy_user rights for User Self-Registration application
The proxy_user will operate for the end user for every action performed through SelfReg application. This means that the proxy_user account must have the required rights at the AD level to do these actions.
Note
Note that CN=Users,DC=test,DC=local used below is the user search base configured under the WebADM Admin GUI > Admin tab > Local Domains > YOUR_DOMAIN > CONFIGURE > User Search Base setting.
6.1 Rights for domain user accounts
For domain users, you have to configure the following rights for the proxy_user:
Token registration rights for a not extended schema
dsacls "CN=Users,DC=test,DC=local" /I:T /G 'TEST\proxy_user:WPRP;bootfile'
dsacls "CN=Users,DC=test,DC=local" /I:T /G 'TEST\proxy_user:WPRP;bootparameter'
dsacls "CN=Users,DC=test,DC=local" /I:T /G 'TEST\proxy_user:WPRP;userCertificate'
Token registration rights for an extended schema
dsacls "CN=Users,DC=test,DC=local" /I:T /G 'TEST\proxy_user:WPRP;webadmsetting'
dsacls "CN=Users,DC=test,DC=local" /I:T /G 'TEST\proxy_user:WPRP;webadmdata'
dsacls "CN=Users,DC=test,DC=local" /I:T /G 'TEST\proxy_user:WPRP;userCertificate'
6.2 Rights for domain administrator accounts
For domain admin users, you have to configure the rights on the AdminSDHolder object else, rights will be overridden after an hour.
Token registration rights for a not extended schema
dsaclsc"CN=AdminSDHolder,CN=System,DC=test,DC=local" /I:T /G 'TEST\proxy_user:WPRP;bootfile'
dsacls "CN=AdminSDHolder,CN=System,DC=test,DC=local" /I:T /G 'TEST\proxy_user:WPRP;bootparameter'
dsacls "CN=AdminSDHolder,CN=System,DC=test,DC=local" /I:T /G 'TEST\proxy_user:WPRP;userCertificate'
Token registration rights for an extended schema
dsacls "CN=AdminSDHolder,CN=System,DC=test,DC=local" /I:T /G 'TEST\proxy_user:WPRP;webadmsetting'
dsacls "CN=AdminSDHolder,CN=System,DC=test,DC=local" /I:T /G 'TEST\proxy_user:WPRP;webadmdata'
dsacls "CN=AdminSDHolder,CN=System,DC=test,DC=local" /I:T /G 'TEST\proxy_user:WPRP;userCertificate'
7. Token Enrollment
The Self-Registration application is accessible via the following address:
https://YOUR_WEBADM/webapps/selfreg/index.php
and through the WAProxy it is:
https://YOUR_WAPROXY/selfreg/index.php
7.1 Software Token
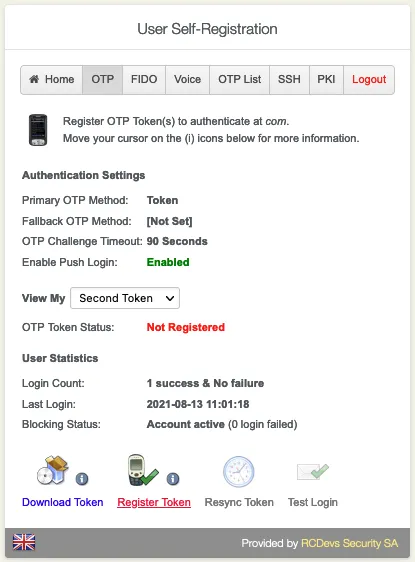
Go to the OTP tab. Enroll and manage the Primary Token, Second Token, etc.
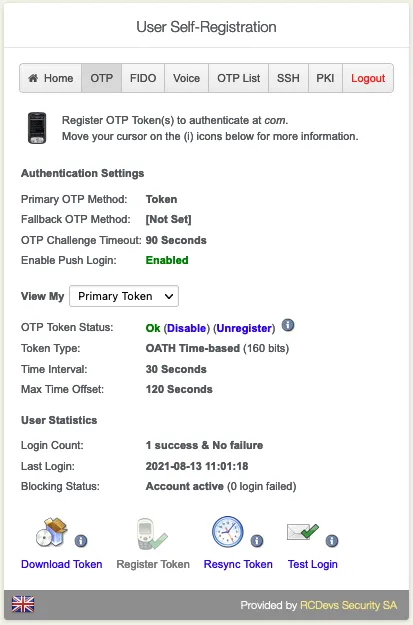
Click on View My Primary/Second Token etc. Click on Register Token.
Choose between Hardware, YubiKey, QRCode-based or Manual Registration of the Token.
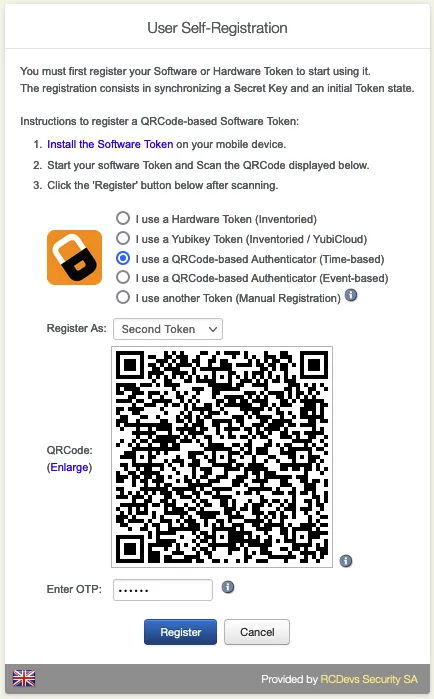
Enter the OTP from the OpenOTP Smartphone App. (Only without the Push Login.)
Click on Test Login to verify if the Software Token has successfully enrolled.

Enter the OTP from the OpenOTP Smartphone App. (Only without the Push Login.)

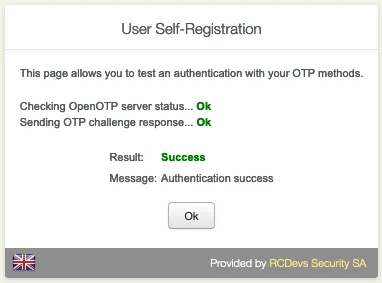
Click on Resync Token if the Software Token is out of sync. Always use an NTP Server on the WebADM Servers and the Endpoints.
7.2 Hardware Token
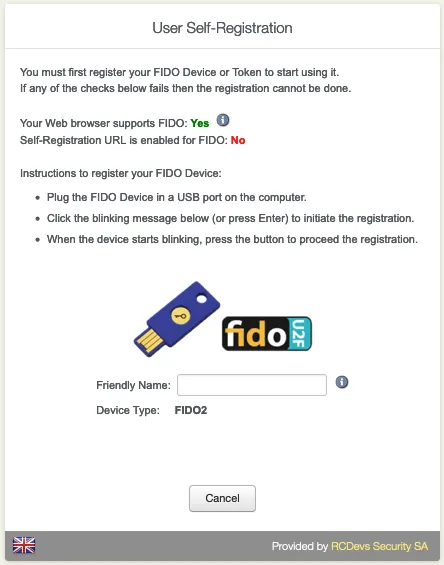
Go to the FIDO tab.
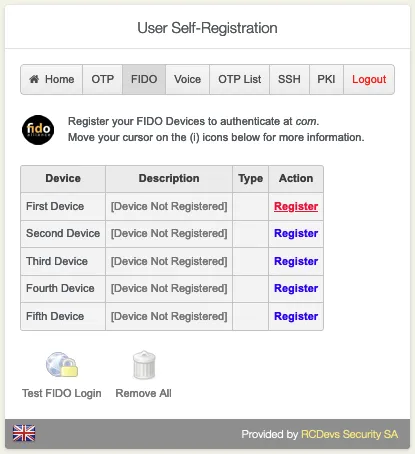
Click on Register to add the FIDO Device.
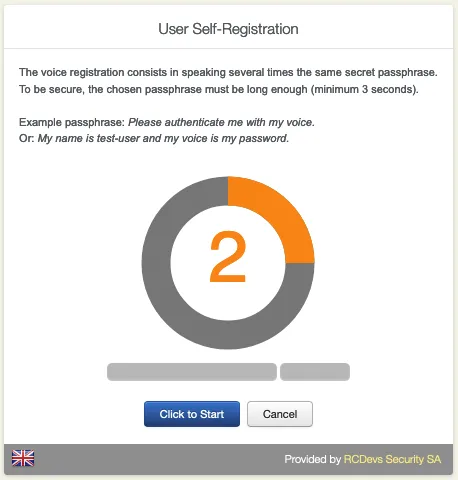
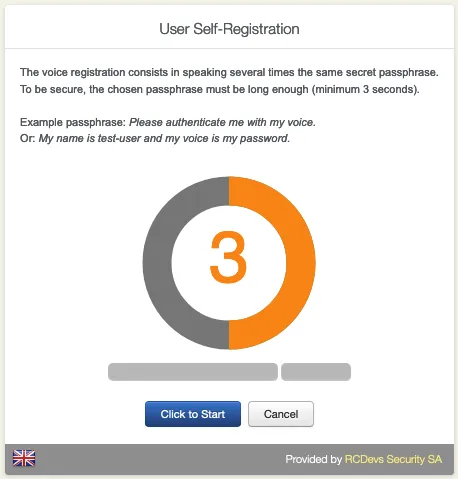
7.3 Voice Registration
Go to the Voice tab. The Voice Registration consists in speaking several times the same secret passphrase.
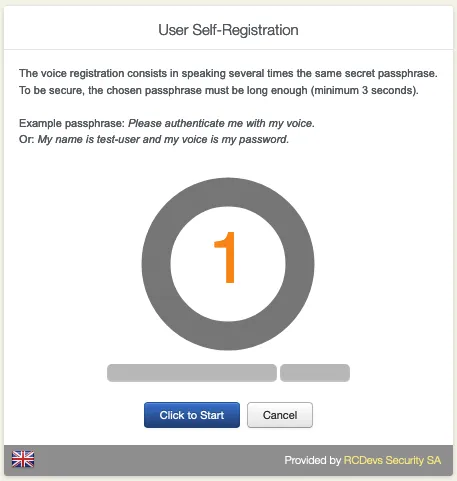
Repeat the same Passphrase.
Again, repeat the same Passphrase.
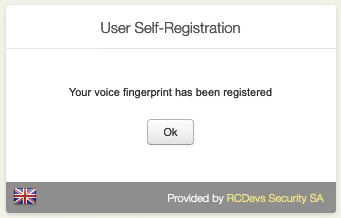
The Voice Fingerprint is successfully enrolled.
7.4 OTP List
Go to the OTP List tab. A printed OTP Password List can be used, for example, as a fallback to your current enrolled OTP Token.
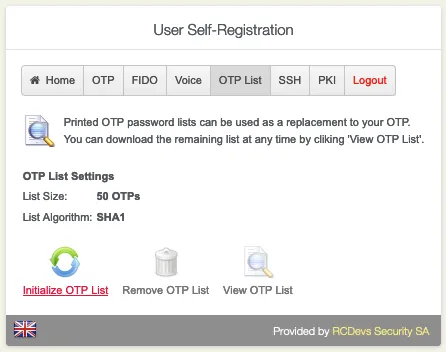
Click on Initialize OTP List.
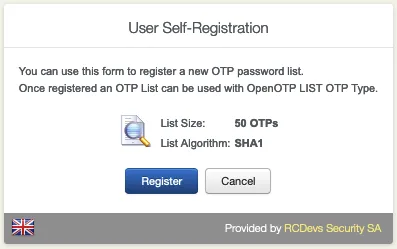
Click on Register.

Click on Ok to see the OTP List.
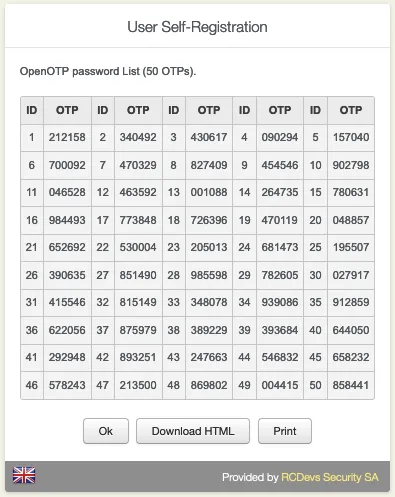
Choose between Download HTML or Print the OTP List.
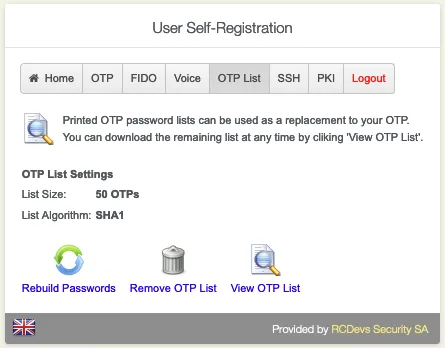
Finally, have the option to Rebuild Passwords, Remove OTP List or View OTP List.
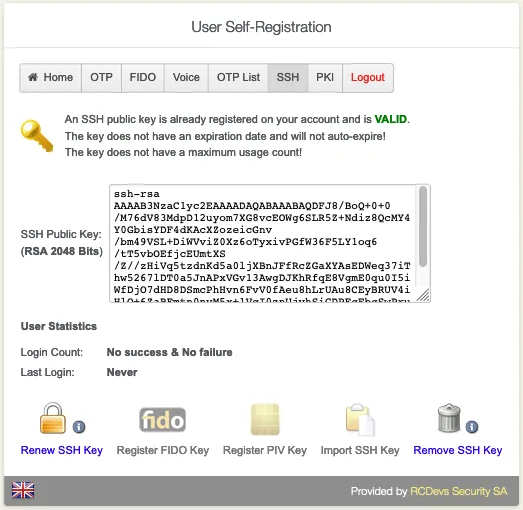
7.5 SSH Key
Go to the SSH tab. Choose if you would like to Generate SSH Key, Register FIDO Key, Register PIV Key, Import SSH KEY or Remove SSH KEY.
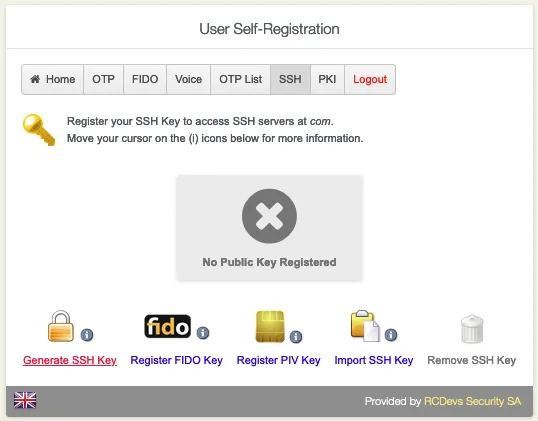
Click on Generate SSH Key to add the FIDO Device.
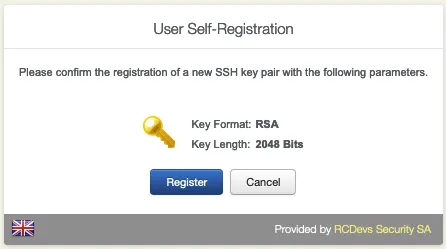
Click on Register.
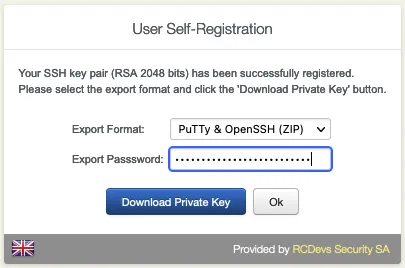
Set a strong Password and download the Private Key.
In the User Statistics, there is the Login Count and Last Login.
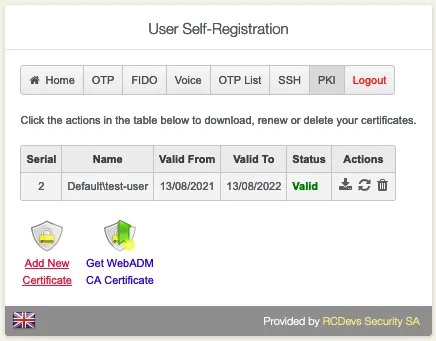
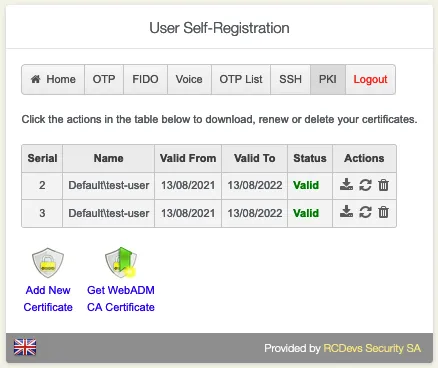
7.6 User Certificate
Go to the PKI tab. Choose if you would like to Add New Certificate or Get WebADM CA Certificate.
Click on Add New Certificate.
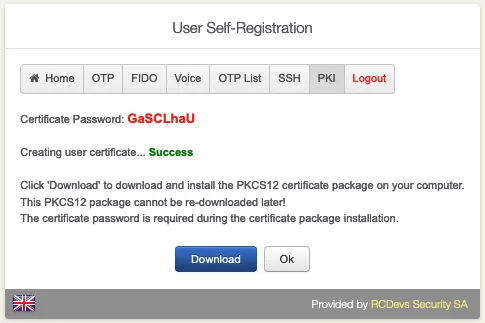
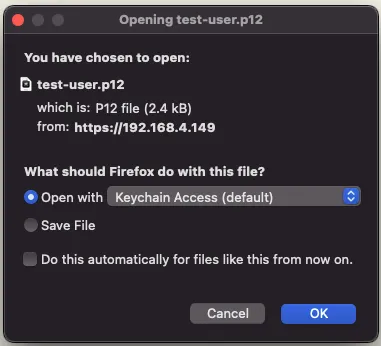
Download the New Certificate.
Overview of all the users’ certificates. Download, Renew or Delete a certificate.
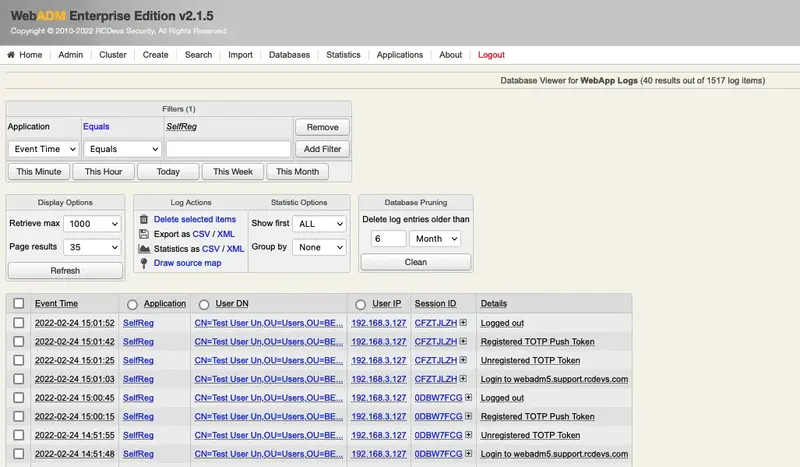
8 Logs
SelfReg application logs are accessible in the Databases menu in WebADM:
- You can see full logs in
WebADM Server Log Files(lines containing[SelfReg:pattern);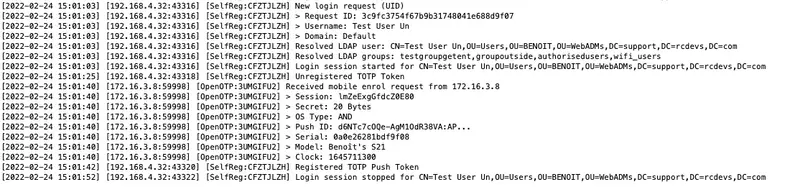
- You can see a list of SelfReg activities in
WebApp Logs: