Electronic Signature from Windows
1. Overview
This documentation describes the installation and usage of the OpenOTP Signature plugin for Windows OS. To install and use that signature plugin, you need to have WebADM & OpenOTP server(s) deployed, OpenOTP Token mobile application, Push mecanisisms implemented, a push token registered on the user account through OpenOTP mobile application, a license which allow you the usage of signature feature of OpenOTP and signature credits.
The prerequisites for the Windows machines are :
- Have .NET 6.0 Desktop Runtime installed,
- Up-to-date Windows OS (minimal compatible version >= Windows 10 version 2004, from mid 2020).
That plugin has been developed in order to provide an easy way to electronically sign a document/file for collaborators of your organization from their Windows machine just by right-clicking on the document.
The plugin offer the 4 kinds of signatures supported by OpenOTP. Please refer to OpenOTP Signature documentation to get more details about different types of signature.
The signatory is always the person which initiate the signature workflow. You can not submit a document for signature to someone else through this integration. RCDevs provides other integrations for this purpose (Postfix mail server plugin).
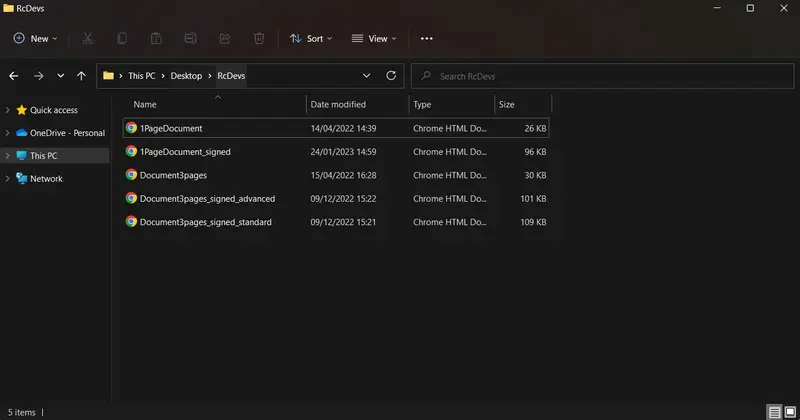
Once the signature workflow has been completed, the signed document is automatically fetch from OpenOTP servers to the Windows machine. Both original and signed files are kept/saved at the same location. The extension “signed” is added to the signed files name.
OpenOTP API URL must be reachable directly or through a reverse proxy (WAProxy) in order to perform a signature. If OpenOTP backend is not reachable by the Windows machine, it is not possible to sign.
2. Installation and configuration
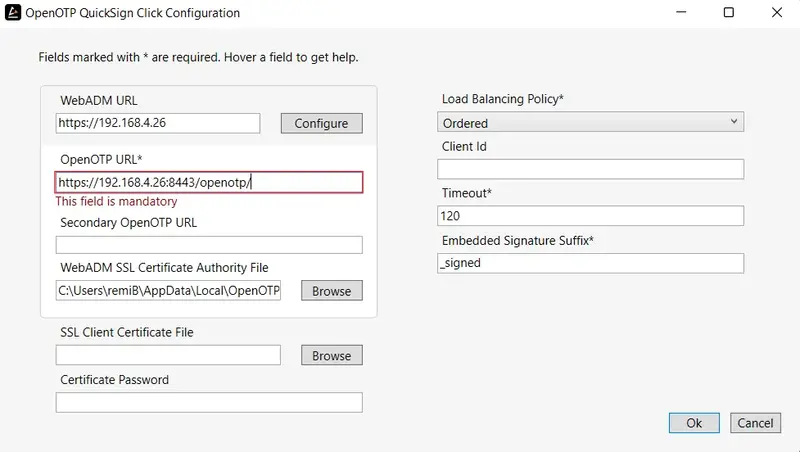
First of all, after installing the product, you will be brought to the configuration page where you can put your WebADM URL and then click on Configure. It will automatically fill the below parameters. After that, you can still add other parameters such as the SSL Client Certificate File alongside its password if you have one.
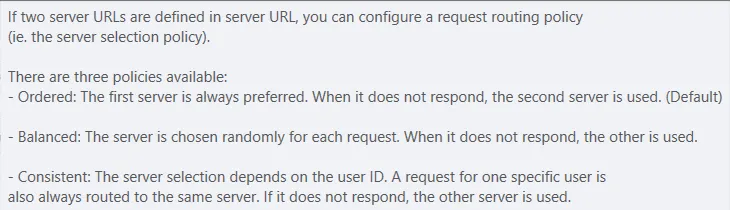
On the right of the window, you can also change other settings : the Load Balancing Policy which have 3 different configurations that can be seen below.
There is the possibility to change the client ID too, the timeout of the signature request and the Embedded Signature Suffix added at the end of the new document signed.
3. Usage
Once the signature plugin for Windows is installed and configured properly, you can right-click on a document and submit it to OpenOTP for signature.
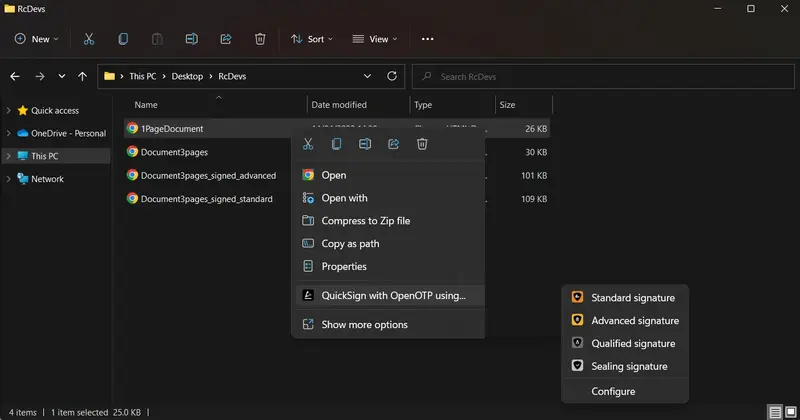
The document is sent to OpenOTP backend. OpenOTP is going to prepare the transaction and send it on the user’s mobile.

The user receives the signature request with the attached document. He can sign it and finalize the signature. After it’s done, the signed document will appear below the original one with its new suffix.